Lacerate "Budget-Slicer" Gladiator Starter build
Budget-friendly build that uses the new Lacerate Gem with greatly increased damage from Bleeding effectsLacerate "Budget-Slicer"
Bleed Gladiator build
Updated for Patch 3.25
The Best Crafty Guides by Odealo
| Guide notes |
| July 29, 2024 -Reworked the Passive Tree to include changes in Patch 3.25, greatly increasing the Damage and durability of the Gladiator Ascendency. |
| Build overview | |||
| Tags: [MELEE] [PHYSICAL] [BLEED] [LIFE] [STARTER] | |||
|
Budget: Defenses: |
|
Boss DPS: AoE: |
|
Gladiator is a typical sword & board type of character that offers very solid defenses regardless of your equipment. Thanks to Passive skills that increase your Block Chance, Gladiator is a perfect character to level up in new Leagues. The Bleed Builds didn't benefit from the Ancestral Totems before, so the impact of the recent Melee Buffs was twice as effective compared to regular Hit Builds.
With the new Gladiator Notables, you can easily reach a 65% chance to Block Spells and Attack. With the conditional Lucky Block Chance, it rises to roughly 90%. You should combine it with a Shield that recovers your Life any time you Block, making you insanely durable during regular Mapping. To mitigate the Damage that goes through the Block you will use Endurance Charges, Armour, and Fortify. You can also invest into Spell Suppression Chance, but doing so requires a lot of resources which affects your DPS.
The Bleed deals 70% of the initial base Attack Damage over the 5 seconds, for a total of 350% Damage. If your Enemy is Moving, or you Aggravate the inflicted Bleed, it will deal 3 times more, for a total of 1050% initial Damage. To Aggravate the Bleed you can simply allocate the Gladiator Ascendency Notable, repeatably Hit Bleeding Enemy with fast Attacks, or use the Tempest Rising Boots. By default you can inflict only 1 Bleed at a time, so slow but powerful Attacks are preferred. The Lacerate of Haemorrhage offers the best DPS, but other choices such as Bladestorm or Earthquake are also viable and require only tiny adjustments to the Setup.
You can check our other Path of Exile builds right here
1. Gameplay
Lacerate Gladiator is a typical Melee character. It utilizes a one-handed Axe and Shield to slice through enemies. Lacerate attacks twice with your main-hand weapon creating two waves. Enemies right in front of you can be hit by both waves simultaneously. The Lacerate Attack also deals more damage against bleeding targets. This build uses the Resolute Technique Passive, which saves you a lot of effort (and money) to reach enough Accuracy Rating on your gear to efficiently kill your enemies. While it is an insane damage buff up to mid-tier Maps, it limits your maximum possible DPS by making you unable to Critically Strike.
|
|
|
|

2. Build's PROS & CONS
| PROS |
|
| CONS |
|
3. Leveling tips
Leveling with Gladiator is a very easy task. You should have enough defenses just from following the recommended Passive Skill Trees and upgrading your gear with self-found stuff once in a while. Your main priority should be increasing your DPS output by upgrading the weapon (aim for one-handed Axes with the highest base Physical DPS) and getting equipment with flat Added Physical Damage to Attacks, and increases to Attack Speed. Below you will find several useful unique items that will greatly boost you during the leveling phase.
Suggested leveling Gem setups:
| Lacerate setup | |
 |
Lacerate - primary Attack used in this build. It is recommended to upgrade it at the same time you level up your character. Use the Lacerate of Haemorrhage as soon as you can afford one. |
 |
Melee Physical Damage Support - primary Support Gem for any Melee/Physical build |
 |
Chance to Bleed Support - improves your Damage with Bleeding and provides necessary Chance to inflict Bleed in the early game. |
 |
Maim Support - Maims enemies, which increases the Physical Damage they take and slows them down |
| Shield Charge setup | |
 |
Shield Charge - your primary mobility skill |
 |
Faster Attacks Support - increases your movement speed with Shield Charge |
| Utility gems | |
 |
Vulnerability - the recommended Curse for this build |
 |
Pride - increases the Physical Damage taken by Enemies. Combine it with the Eternal Blessing to make it free. |
Bandits:
We recommend killing all the bandits for two additional Passive Points. You can help Alira for an easier early gearing process.
Leveling Skill Trees:
38 Points Skill Tree
Rush all the Bleed Passives and Mastery that Aggravates older Bleeds. The Spirit of War will help with your Mana sustain until you can take the Blood Magic Keystone.
68 Points Skill Tree
Go for the Resolute Technique, the Axe Clusters, Block Chance, and Maximum Life. After the Cruel Labirytnh unspec the unnecessary Bleeding Notables such as Bleeding Duration or Aggravation.
Recommended leveling items:
 Blackheart - one of the best leveling Rings for melee classes Blackheart - one of the best leveling Rings for melee classes |
|
| Adds 1 to 4 Physical Damage to Attacks Adds (10-15) to (20-25) Chaos Damage to Attacks Regenerate (10-15) Life per second 10% chance to Cause Monsters to Flee |
|
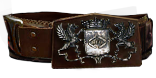 Meginord's Girdle - an extremely powerful Belt, which equipped on level 8 will serve you for many many levels. You can easily keep it until you reach low-level Maps Meginord's Girdle - an extremely powerful Belt, which equipped on level 8 will serve you for many many levels. You can easily keep it until you reach low-level Maps |
|
| +(25-35) to Strength +25 to Strength Adds 10 to 20 Physical Damage to Attacks 10% increased maximum Life +(10-20)% to Cold Resistance 25% increased Flask Life Recovery rate |
|
 Crest of Perandus - the best low-level Shield which grants very high bonus Life Crest of Perandus - the best low-level Shield which grants very high bonus Life |
|
| 3% increased Movement Speed +(60-80) to maximum Life Regenerate (5-7.5) Life per second +30% to Lightning Resistance 0.6% of Physical Attack Damage Leeched as Life +5% Chance to Block |
|
|
|
|
| Socketed Gems are supported by Level 2 Chance to Flee Adds (10-15) to (25-30) Physical Damage +(10-15) to maximum Life Gain (5-7) Life per Enemy Killed 10% increased Movement Speed |
|
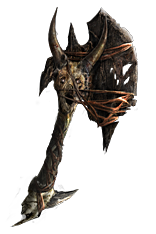
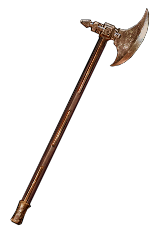
 Screaming Eagle - one of the first unique Axes that can be used. It also increases your Movement Speed which is a perfect attribute for leveling faster
 Goldrim - the best leveling Helmet in the game. It grants very high All Elemental Resistances bonuses, which makes it very useful until the early mapping phase Goldrim - the best leveling Helmet in the game. It grants very high All Elemental Resistances bonuses, which makes it very useful until the early mapping phase |
|
| +(30-50) to Evasion Rating 10% increased Rarity of Items found +(30-40)% to all Elemental Resistances Reflects 4 Physical Damage to Melee Attackers Level Requirement reduced by 100 (Hidden) |
|
4. Final Skill Tree, Ascendancy Points, and Pantheon
Final Skill Tree:
106 Points Final Skill Tree
119 Points Path of Building (PoB) link
Ascendancy points:
Preferably in the order:
- Gratuitous Violence
- Jagged Technique
- Determined Survivor
- More than Skill
Pantheon:
Major God: Soul of the Brine King: You cannot be Stunned if you've been Stunned or Blocked a Stunning Hit in the past 2 seconds; 100% chance to Avoid being Frozen
Minor God: Soul of Shakari 5% reduced chaos damage taken 25% reduced chaos damage over time taken while in a caustic cloud
5. Final Gems links
| [DPS] Lacerate setup | |
 |
Lacerate of Haemorrhage - your primary DPS skill. It's a swift Melee/AoE attack. The Haemorrhage variant has lower damage and less AoE, but has higher Attack Speed and deals more Damage with Bleeding. |
|
Melee Physical Damage Support - increases Melee Physical Damage of supported skills. |
|
Chance to Bleed Support - you have a higher chance of causing Bleeding, and deal More Bleed Damage. You can also use the Cruelty Support if you can reliably activate high effectiveness against Bosses. |
 |
Swift Affliction Support - your Bleeds deal Damage faster but lasts a shorter amount of time. |
 |
Brutality Support - use it to deal more Physical Damage and limit yourself only to this one type of Damage. |
 |
Volatility Support - introduces a higher variance of your Damage, only the highest active Bleed instance deals Damage. |
| [UTILITY] Curse | |
|
Vulnerability - the recommended Curse for this build. It increases the Physical Damage taken by Enemies and grants a chance to Aggravate Bleeds. |
| [MOBILITY] Mobility setup | |
 |
Shield Charge - recommended Movement skill used in this build. You can also use Leap Slam which is slower but allows you to jump over cliffs and other obstacles. |
 |
Faster Attacks Support - you can Charge much faster. |
 |
Momentum Support - slightly improves your Attack Speed. Use it only if you have enough Sockets to spare, it is not very impactful. |
 |
Lifetap Support - allows you to pay no attention to Mana when moving, as you spend Life on the linked Skills instead. |
 |
Frostblink - an instant Blink that teleports you a short distance, it can be used to dodge incoming Attacks while Attacking. You can use a low-level Frostblink to avoid Attribute Requirements. |
| [MOBILITY] Offensive Mobility setup | |
 |
Leap Slam - you can inflict decent Bleeds with your Movement Skills, and Explosions will do the rest. It won't kill Rare Enemies on its own, but it greatly improves your Clear Speed. You can use the Leap Slam of Groundbreaking for extra AoE, but it has very limited jump distance. |
|
Faster Attacks Support - it is still a Movement Skill, so you want to make it faster. |
|
Lifetap Support - you don't need to optimise the Damage here, Lifetap is good enough considering the Utility it provides. |
|
Brutality Support - best Damage Support that doesn't have any drawbacks. |
 |
Essence of Delirium - using this Essence on Gloves provides 30% more Damage over Time for Socketed Gems. |
| [UTILITY] Auras setup | |
|
Pride - It's the default Aura for Melee Physical Builds, the enemies nearby take more Physical Damage. |
 |
Determination - Adds and increases Armour to take less Physical Hit Damage. |
 |
Enlighten Support - The most efficient way to fit in all the Auras, they Reserve less Mana. |
 |
Flesh and Stone - alternatively you can use this Aura to take less Damage from nearby Enemies. The Blood Stance doesn't affect Bleed Damage. |
 |
Herald of Purity - if you have Mana to spare use this Herald to improve your Physical Damage with Bleeds. |
| [UTILITY] Various Gems | |
 |
War Banner - places a Banner that greatly improves your Physical Damage. It requires Valor stacks to be effective, which you gain by fighting Enemies. You can use More Duration or Efficacy Supports to prolong its effect. |
 |
Blood Rage - grants increased Attack Speed, Frenzy Charge generation, and Life Leech. |
 |
Enduring Cry - Quickly Regenerates some of your Life. Use it to generate Endurance Charges against Bosses or quickly recover a large amount of Life. |
| [UTILITY] Molten Shell setup | |
 |
Cast when Damage Taken Support - auto-casts all the supported spells whenever you take a certain amount of damage. |
 |
Molten Shell - A protective barrier that absorbs incoming damage for some time, or until it can take no more. |
|
|
5. Gear Setup
Below you will find all the recommended items for this build. The Build doesn't need any particular Unique Items, but of course some of them provide more Damage scaling potential than regular Rare Items, although you don't need them for functionality. The Tempest Rising allows you to pick a different Ascendency Notable, but it is not detrimental to have at the start. The Attack Speed doesn't affect your DPS, but it is very important for comfortable Clear Speed. On your Gear you should mostly seek maximum Life, Armour, and cap Resistance and Attribute Requirements. Most of your Damage will be sourced directly from the Weapon. You should also seek added Physical Damage on your Jewelery, Damage over Time Multiplier, faster Bleeds, or generic increases to Physical or Bleed Damage. If you decide to go for Spell Suppression Chance you will need that modifier on every Rare Armour piece you get, otherwise it might not be worth the investment.
Our recommended items will:
- Cap your resistances
- Give you enough DPS/Life to start mapping successfully
|
Stat priorities on items:
|
 (Helmet) Rare Helmet - on Helmet, you should seek maximum Life, Mana Reservation Efficiency, and Resistances. You can use a Hybrid Armour and Evasion Base to get immunity to Bleeding and Poison if you keep their values balanced. (Helmet) Rare Helmet - on Helmet, you should seek maximum Life, Mana Reservation Efficiency, and Resistances. You can use a Hybrid Armour and Evasion Base to get immunity to Bleeding and Poison if you keep their values balanced. |
|
| Min. requirements: +50% to Elemental Resistances +100 to maximum Life Optional affixes: Intelligence Resistance Mana Reservation Efficiency Spell Suppression Chance Armour |
|
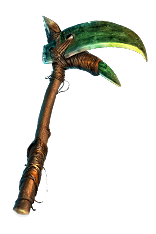
 (Weapon) Jack, the Axe - A decent pick for the weapon slot. Grants increased Life regeneration, Bleed Chance, and much more Bleed Damage. (Weapon) Jack, the Axe - A decent pick for the weapon slot. Grants increased Life regeneration, Bleed Chance, and much more Bleed Damage. |
|
| Grants Level 20 Thirst for Blood Skill (130-150)% increased Physical Damage Adds (11-14) to (18-23) Physical Damage 25% chance to cause Bleeding on Hit +(25-35)% to Damage over Time Multiplier for Bleeding from Hits with this Weapon |
|
 (Weapon) Rare Axe - the highest top range of the Physical Damage is the most important here, the Reaver Axe is the best Base for strict DPS. However, it is quite slow, so you might pick a weaker but faster option. (Weapon) Rare Axe - the highest top range of the Physical Damage is the most important here, the Reaver Axe is the best Base for strict DPS. However, it is quite slow, so you might pick a weaker but faster option. |
|
| Min. requirements: 350 Physical DPS Optional affixes: Increased Damage with Bleeding Attack Speed Physical Damage over Time Multiplier |
|
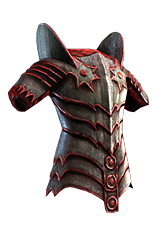 (Body Armour) Rare Body Armour - with the recent changes your Body Armour is the most important source of Physical Damage Reduction. Use the Exarch Influence to generate Endurance Charges for even more Damage Reduction. (Body Armour) Rare Body Armour - with the recent changes your Body Armour is the most important source of Physical Damage Reduction. Use the Exarch Influence to generate Endurance Charges for even more Damage Reduction. |
|
| Min. requirements: 1500 Armour Gain an Endurance Charge every 15 seconds (Exarch Implicit) +50% Elemental Resistances Optional affixes: Mana Reservation Efficiency Spell Suppression Chance % additional Physical Damage Reduction % Chance to Block Attack Damage Armour |
|
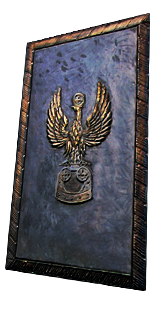 (Shield) Rare Shield - with the Gladiator Ascendency you set the Base Block Chance to 50%, overwriting the Shield modifiers completely. You should prioritize the shaper's modifier that Recovers a portion of your Life on Block. Other than that, look for defensive modifiers such as maximum Life, Armour, Resistance, Spell Suppression, or Attack Speed. (Shield) Rare Shield - with the Gladiator Ascendency you set the Base Block Chance to 50%, overwriting the Shield modifiers completely. You should prioritize the shaper's modifier that Recovers a portion of your Life on Block. Other than that, look for defensive modifiers such as maximum Life, Armour, Resistance, Spell Suppression, or Attack Speed. |
|
| Min. requirements: +80 to maximum Life Recover 5% of Life when you Block +50% Elemental Resistances Optional affixes: Chance to Block Spells Chaos Resistance Attack Speed Armour Spell Suppression Chance |
|
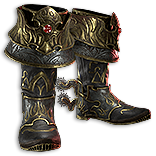
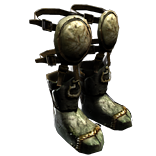 (Boots) Rare Boots - just aim for high defensive stats on a preferably Strength base for extra Armour Rating. You can include Avoidances or Life Regeneration too. (Boots) Rare Boots - just aim for high defensive stats on a preferably Strength base for extra Armour Rating. You can include Avoidances or Life Regeneration too. |
|
| Min. requirements: +70 to maximum Life 25% Movement Speed +60% to Elemental Resistances Optional affixes: Attributes Armour Rating Spell Suppression Chance |
|
 (Boots) The Tempest Rising - the best offensive Boots, they make your Bleed deal Damage much faster and remove the need for Bleed Aggravation, allowing you to pick a different Ascendency Notable instead. (Boots) The Tempest Rising - the best offensive Boots, they make your Bleed deal Damage much faster and remove the need for Bleed Aggravation, allowing you to pick a different Ascendency Notable instead. |
|
| (80-120)% increased Armour 30% increased Movement Speed (5-25)% increased Duration of Ailments on Enemies Damaging Ailments deal damage (5-25)% faster You and Enemies in your Presence count as moving while affected by Elemental Ailments |
|
 (Belt) Ryslatha's Coil - only the highest instance of Bleed deals the Damage, so raising your maximum Potential is a very efficient way to improve your DPS. (Belt) Ryslatha's Coil - only the highest instance of Bleed deals the Damage, so raising your maximum Potential is a very efficient way to improve your DPS. |
|
| (20-30)% increased Stun Duration on Enemies +(20-40) to Strength (30-40)% more Maximum Physical Attack Damage (40-30)% less Minimum Physical Attack Damage Adds 1 to (15-20) Physical Damage to Attacks +(80-100) to maximum Life Gain 50 Life when you Stun an Enemy |
|
 (Belt) Rare Belt - use a Rare Belt to get tons of maximum Life and Resistance. It can also greatly boost your Flask uptime. (Belt) Rare Belt - use a Rare Belt to get tons of maximum Life and Resistance. It can also greatly boost your Flask uptime. |
|
| Min. requirements: +70 to maximum Life +60% to Elemental Resistances Optional affixes: Attributes Armour % increased Flask Charges gained % increased Flask Effect Duration |
|
 (Belt) Abyss Jewel - if you have an Abyss Socket to spare fil it with a Jewel that improves your maximum Life, improves the Physical Damage, and covers lacking Resistances or Attributes. (Belt) Abyss Jewel - if you have an Abyss Socket to spare fil it with a Jewel that improves your maximum Life, improves the Physical Damage, and covers lacking Resistances or Attributes. |
|
| Min. requirements: +30 to maximum Life Optional affixes: Attributes Resistance Added Physical Damage with Axe Attacks |
|
 (Amulet) Rare Amulet - here you can find a lot of Attributes, maximum Life, and Resistances. It should also boost your Damage over Time Multiplier or add Physical Damage to Attacks. (Amulet) Rare Amulet - here you can find a lot of Attributes, maximum Life, and Resistances. It should also boost your Damage over Time Multiplier or add Physical Damage to Attacks. |
|
| Min. requirements: +60 to maximum Life Optional affixes: Adds Physical Damage to Attacks Damage over Time Multiplier Physical Attack Damage Leeched as Mana Attributes Resistance |
|
| Recommended Anointments: Hatchet Master |
|
 (Ring) Rare Rings - The regular Life, Resistances, and some utility mods like Attributes or reduced Mana Cost of Skills should be sufficient. To improve your Damage seek added Physical Damage, DoT Multiplier from the Essence of Delirium, or craft Minimum Frenzy Charges. (Ring) Rare Rings - The regular Life, Resistances, and some utility mods like Attributes or reduced Mana Cost of Skills should be sufficient. To improve your Damage seek added Physical Damage, DoT Multiplier from the Essence of Delirium, or craft Minimum Frenzy Charges. |
|
| Min. requirements: 60 maximum Life +60% Total Elemental Resistances Non-Channelling Skills have -7 to Total Mana Cost (crafted) Optional affixes: Attributes Adds Physical Damage to Attacks Physical Attack Damage Leeched as Life Damage over Time Multiplier |
|
 (Ring) Venopuncture - a very potent Ring that grants a lot of Damage and slows down all your Enemies by 10%. It enables The Tempest Rising Boots, but it is also worth using without them. Try to get a better Implicit via Corruption. (Ring) Venopuncture - a very potent Ring that grants a lot of Damage and slows down all your Enemies by 10%. It enables The Tempest Rising Boots, but it is also worth using without them. Try to get a better Implicit via Corruption. |
|
| +(20-30) to Strength Attacks have 25% chance to cause Bleeding (40-60)% increased Damage with Bleeding You are Chilled while you are Bleeding Non-Chilled Enemies you inflict Bleeding on are Chilled Bleeding Enemies you Kill with Hits Shatter |
|
 (Gloves) Rare Gloves - you can get plenty of Damage over Time Multiplier just from the Eldritch Implicit. Other than that look for maximum Life, Resistances, or Attributes. You can also include Attack Speed or Spell Suppression. (Gloves) Rare Gloves - you can get plenty of Damage over Time Multiplier just from the Eldritch Implicit. Other than that look for maximum Life, Resistances, or Attributes. You can also include Attack Speed or Spell Suppression. |
|
| Min. requirements: 70 maximum Life +60% Total Elemental Resistances Optional affixes: Dexterity Armour Added Physical Damage to Attacks Attack Speed Spell Suppression Chance |
|
 (Jewels) Rare Jewels - These should provide extra Maximum Life and bonus Damage over Time for Bleeding. "Damaging Ailments deal damage faster" may be the best one if your Attack Speed is high enough. (Jewels) Rare Jewels - These should provide extra Maximum Life and bonus Damage over Time for Bleeding. "Damaging Ailments deal damage faster" may be the best one if your Attack Speed is high enough. |
|
| Recommended affixes: increased maximum Life Optional affixes: Damage over Time Multiplier increased DoT/Bleeding Damage Attributes Resistances Damaging Ailments deal damage faster |
|
 (Jewels) Watcher's Eye - this jewel can further bolster the effect of your offensive and defensive Auras of your choosing. You can also include a low-level Vitality or Clarity to get Utility bonuses such as Leech or lowered Mana Cost of Skills. (Jewels) Watcher's Eye - this jewel can further bolster the effect of your offensive and defensive Auras of your choosing. You can also include a low-level Vitality or Clarity to get Utility bonuses such as Leech or lowered Mana Cost of Skills. |
|
| (4-6)% increased maximum Energy Shield (4-6)% increased maximum Life (4-6)% increased maximum Mana <Two or Three random aura modifiers> (40-60)% increased Physical Damage while using Pride You take (60-40)% reduced Extra Damage from Critical Strikes while affected by Determination (5-8)% additional Physical Damage Reduction while affected by Determination |
|
 (Jewels) Large Cluster Jewels - look for a Physical Cluster that also boosts your Resistance and Armour. The third, furthest Notable will be skipped, but it has to be present on the Jewel itself. (Jewels) Large Cluster Jewels - look for a Physical Cluster that also boosts your Resistance and Armour. The third, furthest Notable will be skipped, but it has to be present on the Jewel itself. |
|
| Recommended affixes: 1 Added Passive Skill is Battle-Hardened 1 Added Passive Skill is Furious Assault 1 Added Passive Skill is Master the Fundamentals |
|
 (Jewels) Medium Cluster Jewels - You can use a generic or specific Physical Damage over Time Multiplier. There are a lot of useful modifiers to use, try to focus on those that also boost your defense. (Jewels) Medium Cluster Jewels - You can use a generic or specific Physical Damage over Time Multiplier. There are a lot of useful modifiers to use, try to focus on those that also boost your defense. |
|
| Recommended affixes: 1 Added Passive Skill is Flow of Life 1 Added Passive Skill is Wasting Affliction 1 Added Passive Skill is Circling Oblivion 1 Added Passive Skill is Brewed for Potency 1 Added Passive Skill is Student of Decay |
|
 (Flask) Blood Sap Tincture - the Bleed Tincture is insanely powerful, it grants you a lot of Damage for a short time. It will quickly burn through your Mana, but you can activate it again after a few seconds. It can't be used with the Blood Magic Keystone. (Flask) Blood Sap Tincture - the Bleed Tincture is insanely powerful, it grants you a lot of Damage for a short time. It will quickly burn through your Mana, but you can activate it again after a few seconds. It can't be used with the Blood Magic Keystone. |
|
| (80-90)% Increased Damage with Bleeding Recommended modifiers: 20% increased effect +30% to Physical Damage over Time Multiplier |
|
Other suggested Flasks:
|
|
    |
|
|
If you have any other build requests please leave that in the comments below. We will appreciate any feedback or comments that can help us improve our guides for you!
Pictures used in this article are the intellectual property of Grinding Gear Games.
