
Soulrend of the Spiral Assassin
A very powerful setup for Assassin using the Poet's Pen and The Squire to fire multiple Soulrends in every directionSoulrend of the Spiral
Assassin build
Updated for Patch 3.23
The Best Crafty Guides by Odealo
| Guide notes |
| January 20, 2024 -Build created |
| Build overview | |||
| Tags: [CRIT] [CHAOS] [LIFE] [TRIGGER] | |||
|
Budget: Defenses: |
|
Boss DPS: AoE: |
|
The new transfigured Soulrend of the Spiral is quite surprising. By default, it works like regular Soulrend, except it shoots 5 Projectiles in a circle around you instead of just 1. However, as it turns out every time it fires a Projectile it counts as a separate instance, allowing you to Hit the same target a few times with a single cast. It requires you to stand very close to the enemy and scales very well with sources of additional Projectiles. The Returning Projectiles obtained via Support Gem or the Nimis Ring add another layer of insanity. It is still a bit random, but you can expect 5-10 Hits per single use of this Skill. It also retains the excellent Clear Speed of the regular Soulrend, as your Projectiles will easily cover the entire screen.
This Soulrend unfortunately has a very slow Cast Time, so it is best to use Triggers. In this Setup, we use the Poet's Pen and the Squire Shield to trigger Soulrend every time you perform any Wand Attack. The Attack of choice is the Frenzy, combined with Cast on Crit setup to automate Curses. The Poet's Pen has a longer Cooldown than Cast on Crit setups, but you don't need to worry about Accuracy, Crit Chance for Attacks, or even aiming.
This Setup faces 2 major problems. The first is the insanely high Mana Cost of the Soulrend. Our recommended solution is to use the Eldritch Battery Keystone which causes you to use Energy Shield instead of Mana. You will also need a decent amount of ES on your Gear, the Discipline Aura, and most importantly, a Wacther's Eye Jewel with the "energy Shield on Hit" modifier. A little bit of instant Energy Shield will also help.
The other problem is your survivability, as getting this close to Enemies can be deadly. To deal with that, we use Lightning Coil to reduce Physical Damage, a high amount of Evasion, Bloodnotch Jewel and Defiance of Destiny Amulet for excellent Recovery, and Spell Suppression. You can also use the Forbidden Flesh&Flame combo to Blind and Reduce Damage of nearby enemies or be permanently Elusive, which makes you immune to Crits and improves your Movement Speed.
You can also check our other Path of Exile builds right over here Odealo's Crafty Guides - Full List
1. Gameplay
Thanks to the Poet's Pen you will automatically use Soulrend of the Spiral when you perform any Attack. The Frenzy is a very good choice here, as it generates your Frenzy Charges and easily reaches the desired Attack Speed to match your Cooldowns. Most of your Curses are automatic, but you should Cast the Despair manually to enable the Balance of Terror requirement and inflict Wither on your Enemies.
|
|
|
|

2. Build's PROS & CONS
| PROS |
|
| CONS |
|
3. Leveling tips
At first, you should rely on the DoT portion of Chaos Spells and transition to Hit Damage when your Critical Strike Chance is sufficient enough to be worthwhile. There are not many sources of Chaos Damage for Hits on the Passive Tree, most of it will come from your Cluster Jewels. On the other hand, Chaos DoT bonuses are abundant. You can refer to the leveling setup in our Soulrend DoT Trickster Build Guide, as most leveling Items and Gem setups stay the same.
Bandits:
You should kill all the Bandits to get two more Passive Skill Points, but you can help Alira for easier Early-game and refund it later.
Leveling Skill Trees:
41 Points Skill Tree
Take nearby Chaos Damage bonuses, some maximum Life and Mana, and Spell Suppression.
68 Points Skill Tree
Flask Notables will greatly improve your Quicksilvers. Head towards the Life, Chaos, and Mana Reservation Notables.
4. Final Skill Tree, Ascendancy Points, and Pantheon
Final Skill Tree:
90 Points Final Skill Tree (doesn't include Unique or Cluster Jewels)
120 Points Path of Building(PoB) link
Ascendancy points:
Preferably in the order:
- Opportunistic
- Unstable Infusion
- Ambush and Assassinate
- Deadly Infusion
Pantheon:
Major God: Soul of Arakaali 10% reduced Damage taken from Damage Over Time; +40% Chaos Resistance against Damage Over Time
Minor God: Soul of Shakari 50% less Duration of Poisons on You; 5% reduced Chaos Damage taken
5. Final Gems links
| [DPS] Soulrend of the Spiral setup Socket in the Poet's Pen and the Squire |
|
 |
Soulrend of the Spiral - fires 5 Projectiles in a circle around you, dealing high Chaos Damage on Hit and applying a DoT. It can Hit the same target many times. |
 |
Void Manipulation Support - improves your Chaos Damage. The Awakened version increases your active Gem Level by 1. |
 |
Greater Multiple Projectiles Support - increases the amount of Projectiles, making them more likely to overlap and enhancing the AoE coverage. |
 |
Added Chaos Damage Support - adds plenty of Chaos Damage to your Hits, the Awakened version at level 5 will increase the Soulrend Gem Level by 1. You can also use the Returning Projectiles Support if you don't have the Nimis Ring. |
 |
Increased Critical Damage Support - adds a ton of Critical Strike Multiplier. |
 |
Empower Support - further improves Gem levels of your Soulrend. You can also use the Increased Critical Strikes Support if your Crit Chance is still low. |
| [UTILITY] Frenzy setup | |
 |
Frenzy - a Wand Attack that generates Frenzy Charges on Hit. It gains more Attack Speed for every Frenzy Charge you have. You should aim for 4.30 Attacks per Second to match your Poet's Pen Cooldown. |
|
Greater Multiple Projectiles Support - more Projectiles make it easier to Hit your Enemies without aiming, and slightly improve your sustain with the on-hit mechanics. |
| Cast on Critical Strike Support - you will have decently enough Critical Strike Chance to automatically trigger your Curses when needed. | |
 |
Faster Attacks Support - improves your Attack Speed. |
 |
Enfeeble - lowers the Damage and Accuracy of your Enemies. You can also use the Temporal Chains to slow them down instead. |
 |
Punishment - significantly improves your Damage against Enemies under 50% of their maximum Life. |
| [UTILITY] Auras setup | |
 |
Purity of Elements - this Aura increases your Elemental Resistances and makes you immune to all Elemental Ailments. |
 |
Grace - another defensive Aura that grants you a lot of Evasion Rating and improves it further. |
 |
Discipline - it is necessary Aura to sustain your Spells. It improves your maximum Energy Shield and makes it faster to recharge. It also enables a very important modifier on the Watcher's Eye. |
 |
Precision - improves your Accuracy Rating and Critical Strike Chance. It is not that impactful, so you can leave it at a low Gem Level so it Reserves a small amount of Mana. |
| [UTILITY] Divine Blessing setup | |
 |
Zealotry - an offensive Aura that improves your Spell Damage and Critical Strike Chance with Spells. |
 |
Divine Blessing Support - changes your permanent Aura into a temporary Buff which you can cast using your Energy Shield with the Eldritch Battery Keystone allocated. |
 |
Inspiration Support - lowers the Cost of the Divine Blessing, which can be quite high. |
| [UTILITY] Mark setup | |
 |
Sniper's Mark - greatly increases your Damage with Projectiles. You could also use the Assassin's Mark if your Crit Chance is still low. |
 |
Mark on Hit Support - you will automatically Mark your Enemies when you Hit them with any Attack. |
| [UTILITY] Various Utility Skills | |
 |
Frostblink - an instant Blink Skill that leaves a Chilling Ground in both locations. |
 |
Despair - a very important Curse, it lowers the Chaos Resistance of affected foes. Casting it manually will enable the Balance of Terror Jewel for the Withering debuff. |
 |
Steelskin - creates a shield that absorbs part of the incoming Damage and disables Bleeding. It is ineffective on low Gem levels, so if you lack Strength you should use the Immortal Call instead. |
|
|
5. Gear Setup
The Build uses many Unique Items, making it quite easy to assemble. On your Rare Items, you should mostly look for defensive bonuses: maximum Life, Energy Shield for your Eldritch Battery, Spell Suppression, and Resistance. You will need at least a 9% or 27% Cooldown Recovery Rate to get more triggers per second on your Poet Pen. You will also need to match your Attack Speed to make proper use of them. Your main Damage Spell should be socketed in the Poet's Pen, so the Squire is mandatory to properly boost it with more Support Gems.
|
Stat priorities on items:
|
 (Helmet) Rare Helmet - here you should get a lot of maximum Life, Energy Shield, and Resistance. Use the Eldritch Implicits and Crafted Prefix to gain Physical Damage mitigation in the form of Damage Taken conversion. You can also use a Trigger modifier to activate your Curses instead of the CoC setup. (Helmet) Rare Helmet - here you should get a lot of maximum Life, Energy Shield, and Resistance. Use the Eldritch Implicits and Crafted Prefix to gain Physical Damage mitigation in the form of Damage Taken conversion. You can also use a Trigger modifier to activate your Curses instead of the CoC setup. |
|
| Min. requirements: +70 to maximum Life 150 Energy Shield 70% Total Elemental Resistances Optional affixes: #% increased Mana Reservation Efficiency of Skills #% of Physical Damage from Hits taken as Fire Damage Trigger Socketed Spells when you Focus |
|
 (Weapon) Poet's Pen - it will automatically Trigger socketed Spells when you perform any Attack. You can Corrupt it to gain even more Attack Speed. It changes the base Attack Speed, which makes it easier to scale. (Weapon) Poet's Pen - it will automatically Trigger socketed Spells when you perform any Attack. You can Corrupt it to gain even more Attack Speed. It changes the base Attack Speed, which makes it easier to scale. |
|
| (11-15)% increased Spell Damage +1 to Level of Socketed Skill Gems per 25 Player Levels Trigger a Socketed Spell when you Attack with this Weapon, with a 0.25 second Cooldown Adds 3 to 5 Physical Damage to Attacks with this Weapon per 3 Player Levels (8-12)% increased Attack Speed |
|
 (Weapon) The Squire - thanks to this Shield you can make your Poet's Pen Setup a proper 6-link. It doesn't provide any significant defensive value, but the extra Damage is definitely worth it. (Weapon) The Squire - thanks to this Shield you can make your Poet's Pen Setup a proper 6-link. It doesn't provide any significant defensive value, but the extra Damage is definitely worth it. |
|
| Has 3 Sockets All Sockets are White +(5-8)% to Quality of Socketed Support Gems Socketed Support Gems can also Support Skills from your Main Hand (100-150)% increased Armour and Evasion +(3-5)% Chance to Block |
|
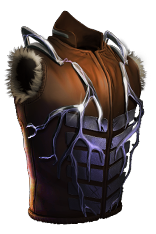 (Body Armour) Lightning Coil - currently it is the best defensive Armour in the game for the majority of Builds. You can use a Corrupted version that reduces the Damage you take from Enemy Critical Strikes. (Body Armour) Lightning Coil - currently it is the best defensive Armour in the game for the majority of Builds. You can use a Corrupted version that reduces the Damage you take from Enemy Critical Strikes. |
|
| Adds 1 to (20-30) Lightning Damage to Attacks (90-120)% increased Armour and Evasion +(60-80) to maximum Life -60% to Lightning Resistance 50% of Physical Damage from Hits taken as Lightning Damage |
|
 (Body Armour) Rare Body Armour - you can also use a Rare Armour with tons of Energy Shield, additional Critical Strike Chance for Spells, or a chance to explode Enemies when you kill them. (Body Armour) Rare Body Armour - you can also use a Rare Armour with tons of Energy Shield, additional Critical Strike Chance for Spells, or a chance to explode Enemies when you kill them. |
|
| Min. requirements: 400 Energy Shield 12% of Physical Damage from Hits taken as Elemental Damage 40% Total Elemental Resistances Optional affixes: +#% to Spell Critical Strike Chance Spell Suppression Chaos Resistance |
|
 (Boots) Rare Boots - on your Boots you should look mostly for maximum Life and Movement Speed, paired with necessary Resistance or Attributes. You will want to stand on top of Enemies anyway, so you can greatly benefit from the Eldritch Implicit that drops a Birttled Ground for an extra 2% Critical Strike Chance. You can also opt for more Cooldown Recovery Rate, but it might be hard to achieve it without significant investments. (Boots) Rare Boots - on your Boots you should look mostly for maximum Life and Movement Speed, paired with necessary Resistance or Attributes. You will want to stand on top of Enemies anyway, so you can greatly benefit from the Eldritch Implicit that drops a Birttled Ground for an extra 2% Critical Strike Chance. You can also opt for more Cooldown Recovery Rate, but it might be hard to achieve it without significant investments. |
|
| Min. requirements: 30% Movement Speed +60 to maximum Life 40% Total Elemental Resistances Optional affixes: % increased Cooldown Recovery Rate Drops Brittle Ground while moving, lasting 2 seconds % chance to Suppress Spell Damage % chance to gain Onslaught for 4 seconds on Kill Life Regeneration % chance to Avoid Elemental Ailments |
|
 (Gloves) Rare Gloves - your Gloves should provide you with a lot of maximum Life, Energy Shield, and Resistance. They can also provide a little bit of Damage, but it is not that impactful. The Eldritch Implicits are quite important, as they grant you a chance to Unnerve Enemies and Life Leech. (Gloves) Rare Gloves - your Gloves should provide you with a lot of maximum Life, Energy Shield, and Resistance. They can also provide a little bit of Damage, but it is not that impactful. The Eldritch Implicits are quite important, as they grant you a chance to Unnerve Enemies and Life Leech. |
|
| Min. requirements: 70 maximum Life 40% Total Elemental Resistances 0.2% of Chaos Damage Leeched as Life (Eater) 15% chance to Unnerve Enemies for 4 seconds on Hit (Exarch) Optional affixes: % increased Attack Speed % chance to Suppress Spell Damage % increased Damage during any Flask Effect % increased Energy Shield Recharge Rate |
|
 (Belt) Rare Belt - use a Stygian Vise to get an additional Abyss Socket. Aim for high maximum Life, Strength, any Flask modifier, and an empty Suffix to craft the Cooldown Recovery Rate via Crafting Bench. You can also aim for the influenced base with that modifier as it can reach higher values, but it will be quite expensive. (Belt) Rare Belt - use a Stygian Vise to get an additional Abyss Socket. Aim for high maximum Life, Strength, any Flask modifier, and an empty Suffix to craft the Cooldown Recovery Rate via Crafting Bench. You can also aim for the influenced base with that modifier as it can reach higher values, but it will be quite expensive. |
|
| Min. requirements: 60 maximum Life +40 to Strength 40% Total Elemental Resistances 12% increased Cooldown Recovery Rate Optional affixes: Chaos Resistance maximum Life % Flasks applied to you have #% increased Effect Increased Flask Charges Gained/Used |
|
 (Jewel) Rare Abyss Jewel - the extra Abyss Jeel acquired by your Belt can be used to improve your maximum Life, cover lacking Resistance or Attributes, and improve your Critical Strike Multiplier. (Jewel) Rare Abyss Jewel - the extra Abyss Jeel acquired by your Belt can be used to improve your maximum Life, cover lacking Resistance or Attributes, and improve your Critical Strike Multiplier. |
|
| Min. requirements: 30 maximum Life Optional affixes: Attributes Resistances Attack Speed Cooldown Recovery Rate Critical Strike Multiplier |
|
 (Amulet) Defiance of Destiny - a very powerful defensive Amulet that renders you almost immune to non-lethal Damage. You can boost the Life Recovered amount with Fertile Catalysts, or Corrupt it to get a more useful Implicit than the default Mana Regen. (Amulet) Defiance of Destiny - a very powerful defensive Amulet that renders you almost immune to non-lethal Damage. You can boost the Life Recovered amount with Fertile Catalysts, or Corrupt it to get a more useful Implicit than the default Mana Regen. |
|
| +(60-80) to maximum Life +(10-40)% to Fire Resistance +(10-40)% to Cold Resistance +(10-40)% to Lightning Resistance Gain (25-35)% of Missing Unreserved Life before being Hit by an Enemy |
|
 (Amulet) Replica Dragonfang's Flight - an offensive alternative for your Amulet. It grants you a ton of Damage via additional Gem Levels. The Reservation Efficiency bonus is not enough to fit another Aura anyway. (Amulet) Replica Dragonfang's Flight - an offensive alternative for your Amulet. It grants you a ton of Damage via additional Gem Levels. The Reservation Efficiency bonus is not enough to fit another Aura anyway. |
|
| +(10-16) to all Attributes +3 to Level of all Soulrend Gems +(5-10)% to all Elemental Resistances (5-10)% increased Reservation Efficiency of Skills Items and Gems have (10-5)% reduced Attribute Requirements |
|
 (Ring) Rare Ring - at first you can use a Rare Ring with bonuses to your maximum Life, Resistance, Attribute, and Critical Strike Damage. You can also use it to apply a level 1 Curse on Hit. Don't spend too much on it, you will want to use Unique Rings later anyway. (Ring) Rare Ring - at first you can use a Rare Ring with bonuses to your maximum Life, Resistance, Attribute, and Critical Strike Damage. You can also use it to apply a level 1 Curse on Hit. Don't spend too much on it, you will want to use Unique Rings later anyway. |
|
| Min. requirements: 50 to Maximum Life 60% Total Elemental Resistances Optional affixes: Non-Channelling Skills have -(7-6) to Total Mana Cost Attributes Critical Strike Multiplier |
|
 (Ring) Anathema - raises your Curse limit up to 5, which is more than enough for any Build. You can automate them with various triggering or on-hit setups. Try to get a useful Corruption here, as the base Energy Shield is quite lacking. (Ring) Anathema - raises your Curse limit up to 5, which is more than enough for any Build. You can automate them with various triggering or on-hit setups. Try to get a useful Corruption here, as the base Energy Shield is quite lacking. |
|
| +(30-40) to Intelligence (10-15)% increased Cast Speed (10-20)% chance to gain a Power Charge when you Cast a Curse Spell Your Curse Limit is equal to your maximum Power Charges |
|
 (Ring) Nimis - an unquestionable BiS Ring for this Build. It doubles your Damage by Returning the Projectiles, and the randomized direction makes it more likely to Hit Enemies standing directly in front of you. (Ring) Nimis - an unquestionable BiS Ring for this Build. It doubles your Damage by Returning the Projectiles, and the randomized direction makes it more likely to Hit Enemies standing directly in front of you. |
|
| +(20-30)% to Lightning Resistance +(30-50) to Dexterity (25-35)% increased Projectile Damage Projectiles Return to you Projectiles are fired in random directions |
|
 (Jewel) Large Cluster Jewel - your biggest source of increased Chaos Damage modifiers. You can use a combination of 3 Notables that grant a 30% increased Damage, or include the Unspeakable Gifts Notable for additional explosions. It should have a maximum of 8 additional Passive Skills. (Jewel) Large Cluster Jewel - your biggest source of increased Chaos Damage modifiers. You can use a combination of 3 Notables that grant a 30% increased Damage, or include the Unspeakable Gifts Notable for additional explosions. It should have a maximum of 8 additional Passive Skills. |
|
| Recommended affixes: 1 Added Passive Skill is Unholy Grace 1 Added Passive Skill is Unwaveringly Evil 1 Added Passive Skill is Wicked Pall 1 Added Passive Skill is Unspeakable Gifts |
|
 (Jewel) Medium Cluster Jewel - those Jewels are very important for this Build. They grant you an absurd amount of Damage against Enemies standing close, improve the Projectile Speed which is vital for smooth Clear Speed, and reduce the time you have to wait for Returning Projectiles. (Jewel) Medium Cluster Jewel - those Jewels are very important for this Build. They grant you an absurd amount of Damage against Enemies standing close, improve the Projectile Speed which is vital for smooth Clear Speed, and reduce the time you have to wait for Returning Projectiles. |
|
| Recommended affixes: 1 Added Passive Skill is Eye to Eye 1 Added Passive Skill is Streamlined |
|
 (Jewel) Watcher's Eye - the Discipline-related modifier that grants you ES on Hit solved the sustain issues almost completely. You can also use other useful modifiers, but it can be quite expansive in combination with the ES modifier. (Jewel) Watcher's Eye - the Discipline-related modifier that grants you ES on Hit solved the sustain issues almost completely. You can also use other useful modifiers, but it can be quite expansive in combination with the ES modifier. |
|
| (4-6)% increased maximum Energy Shield (4-6)% increased maximum Life (4-6)% increased maximum Mana <Two or Three random aura modifiers> Recommended modifiers: +(12-15)% chance to Suppress Spell Damage while affected by Grace Gain (20-30) Energy Shield per Enemy Hit while affected by Discipline Gain a Flask Charge when you deal a Critical Strike while affected by Precision |
|
 (Jewel) Brutal Restraint - converts nearby Keystone into a Traitor, which generates Flask Charges if you have empty Flask slots. It also adds useful bonuses to your other Passives. It is useful, but not mandatory. You can also use the Lethal Pride for better Damage, but worse Flask Sustain. (Jewel) Brutal Restraint - converts nearby Keystone into a Traitor, which generates Flask Charges if you have empty Flask slots. It also adds useful bonuses to your other Passives. It is useful, but not mandatory. You can also use the Lethal Pride for better Damage, but worse Flask Sustain. |
|
| Denoted service of (500-8000) dekhara in the akhara of Balbala Passives in radius are Conquered by the Maraketh Historic |
|
 (Jewel) The Balance of Terror - casting your Despair Curse will cause you to inflict Withered on all your Hits. If you have other sources of Wither you can adjust your Curse setups to get a different bonus. (Jewel) The Balance of Terror - casting your Despair Curse will cause you to inflict Withered on all your Hits. If you have other sources of Wither you can adjust your Curse setups to get a different bonus. |
|
| +(10-15)% to all Elemental Resistances <2 random curse modifiers> Recommended modifiers: Inflict Withered for 2 seconds on Hit if you've cast Despair in the past 10 seconds Take no Extra Damage from Critical Strikes if you've cast Enfeeble in the past 10 seconds +(30-40)% to Critical Strike Multiplier if you've cast Enfeeble in the past 10 seconds (20-25)% increased Cooldown Recovery Rate if you've cast Temporal Chains in the past 10 seconds |
|
 (Jewel) Bloodnotch - it will instantly restore up to 60% of the non-lethal Damage you take from any Hit. With the ES Mastery, you will be Stunned by any Hit. (Jewel) Bloodnotch - it will instantly restore up to 60% of the non-lethal Damage you take from any Hit. With the ES Mastery, you will be Stunned by any Hit. |
|
| (40-60)% of Damage taken from Stunning Hits is Recovered as Life | |
 (Jewel) Immutable Force - with this Jewel, you will hardly see any effect of the Stuns on you. They will still interrupt your actions such as Channeling, but it doesn't affect this setup that much. (Jewel) Immutable Force - with this Jewel, you will hardly see any effect of the Stuns on you. They will still interrupt your actions such as Channeling, but it doesn't affect this setup that much. |
|
| (500-1000)% increased Stun and Block Recovery | |
  (Jewel) Forbidden Flesh&Flame - this combination of Jewels allows you to borrow an Ascendency Node from all Shadow's Ascendencies. There are a lot of good options to choose from, such as the Born in the Shadow, Polymath, Like Clockwork, or Mistwalker. (Jewel) Forbidden Flesh&Flame - this combination of Jewels allows you to borrow an Ascendency Node from all Shadow's Ascendencies. There are a lot of good options to choose from, such as the Born in the Shadow, Polymath, Like Clockwork, or Mistwalker. |
|
| Allocates <Random Ascendancy Notable> if you have the matching modifiers on Forbidden Flesh Allocates <Random Ascendancy Notable> if you have the matching modifiers on Forbidden Flame |
|
|
The Traitor Keystone allows you to easily sustain your Flasks, but you can opt for a regular 5 Flask setup instead. Our recommended setup consists of:
|
|
    |
|
|
If you have any other build requests please leave that in the comments below. We are always open to suggestions and constructive feedback.
Pictures used in this article are the intellectual property of Grinding Gear Games.
