 Buy/Sell
 Log in


Soulrend of Reaping Assassin
A simple yet powerful Setup for Assassin that triggers an avalanche of poisonous Soulrends by using Lancing Steel of Spraying via CoC!Soulrend of Reaping
Assassin build
Updated for Patch 3.29
The Best Crafty Guides by Odealo
| Guide notes | |||
| August 22, 2026 -Build created |
|||
| Build overview | |||
| Tags: [RANGED] [CHAOS] [TRIGGER] [LIFE] | |||
|
Budget: Defenses: |
|
Boss DPS: AoE: |
|


Soulrend of Reaping is a Transfigured variant that focuses on Hit Damage by removing the built-in DoT component. It has one of the highest base DPS among Spells, and an insanely high Critical Strike Chance of 10%. In the recent 3.29 Patch, it also received additional Projectiles, which removes the need for Multiple Projectile Gem, netting 30-50% more Damage for most Setups. Moreover, those properties make it very alluring for the Critical Poison approach, circling back to the DoT style.
Poisons inflicted by Critical Hits have an initial 50% DoT Multiplier bonus, and you can easily pick the Adder's Touch and Dire Torment for another 25% bonus each. Later on, you can opt for the Perfect Agony Keystone to gain lots of Damage over Time from Critical Strike Multiplier instead, but that route is unnecessary here. They also deal 20% More Damage thanks to Assassin's Ascendancy, and allow you to opt for the Cast on Crit archetype for a more comfortable playstyle. You can use Cyclone to trigger your Spells on the move, or Lancing Steel of Spraying to easily ensure a very high trigger rate. It makes the Mana sustain quite problematic, so you will need the Eldritch Battery Keystone, especially once you start raising the Gem Levels over the baseline 20.
The Knife in the Back Notable doubles your Crit Chance against Enemies with more than 50% of their maximum Life, but this bonus changes to Critical Strike Multiplier and Culling Strike for the remaining part, which is much less desirable and leads to inconsistent DPS. The ramp-up nature of Poisons allows you to stack many Poisons during the first phase, which is usually enough to take down most Bosses once you lose the consistency of your Critical Hits. You can also embrace the Insanity Buff of the Doppelgänger Guise Armour to gain up to 60% More Critical Strike Chance to finish the job, but it is rarely necessary.
You can also find our other Path of Exile builds right over here Odealo's Crafty Guides - Full List
1. Gameplay
Use Lancing Steel or Cyclone to trigger your Soulrend of Reaping. The Despair Curse is useful against Bosses. Your Mobility comes from Shield Charge and Frostblink. Your remaining Utility Spells should be used automatically.
|
Full gameplay video: |
|
|


2. Build's PROS & CONS
| PROS |
|
| CONS |
|
3. Leveling tips
Leveling with Poisons is possible, but usually slower than other alternatives due to its ramp-up nature and lack of early scaling. We recommend following our Blight of Contagion Trickster Build instead, which is very powerful during the campaign and shares many features on the Passive Tree, making it very easy to transition to your final Setup.
Bandits:
We recommend killing all the Bandits for the additional Passive Point, but helping Alira is also a good option.
4. Final Skill Tree, Ascendancy Points, and Pantheon
Final Skill Tree:
115 Points Final Skill Tree (doesn't include Unique or Cluster Jewels)
121 Points Path of Building (PoB) link
Ascendancy points:
Preferably in that order:
- Toxic Delivery
- Knife in the Back
- Opportunistic
- Mistwalker
Pantheon:
Major God: Soul of Arakaali: 10% reduced Damage taken from Damage Over Time, +40% Chaos Resistance against Damage Over Time
Minor God: Soul of Ralakesh: 25% reduced Physical Damage over Time taken while moving, Moving while Bleeding doesn't cause you to take extra Damage
5. Final Gem Links
| [DPS] Soulrend of Reaping setup | |
 |
Soulrend of Reaping - has higher base DMG and Crit Chance, but does not inflict its unique DoT. In this Setup, we focus on the Poisons it inflicts instead. |
 |
Lancing Steel of Spraying/Cyclone - an Attack with a very high frequency of Hits. |
 |
Cast on Critical Strike Support - triggers linked Spell when you land a Critical Hit with an Attack. |
 |
Void Manipulation/Critical Affliction Support - they both provide a similar amount of Damage; the best option depends on your current setup. |
 |
Unbound Ailment Support |
 |
Deadly Ailments Support |
| [UTILITY] Aura setup | |
 |
Purity of Elements - makes you immune to Elemental Ailments and improves your Elemental Resistances. |
 |
Herald of Agony - grants a solid amount of Poison Chance and improves your Damage with this Ailment. |
 |
Malevolence - an offensive Aura that greatly improves your Damage with Poisons. |
 |
Vitality - use a low-level Vitality to enable Watcher's Eye modifiers. |
 |
Enlighten Support |
| [UTILITY] Curse setup | |
 |
Despair - an important offensive Curse that lowers enemy Chaos Resistance. You will have to cast it manually. |
 |
Assassin's Mark - improves your Crit Chance and generates Power Charges. |
 |
Mark on Hit Support |
| [UTILITY] Automation setup | |
 |
Steelskin - absorbs incoming Damage and disables Bleeding effects on you. |
 |
Automation - automatically triggers linked Instant Skills once they are ready to use. |
 |
More Duration Support |
| [MOBILITY] Mobility setup | |
 |
Shield Charge - your main Skill for mobility; it scales greatly with your Movement and Attack Speed. |
 |
Faster Attacks Support |
 |
Momentum Support |
 |
Frostblink - your supplementary Movement Skill; it teleports you instantlyly ut it is limited by a short Cooldown. |
| [UTILITY] CwDT setup | |
 |
Summon Chaos Golem - improves your DoT Multiplier and grants Chaos Resistance. |
 |
Enfeeble - your final Curse; it lowers damage dealt by Enemies. |
 |
Frost Shield - a defensive bubble that absorbs incoming Damage. It drains your Energy Shield to activate. |
 |
Cast when Damage Taken Support |
|
|
5. Gear Setup
Asenath's Gentle Touch and Betrayal's Sting are excellent Uniques for almost every Poison build out there. The Dragonfang Amulet is great for all Spells, but Ungil's Harmony makes it trivial to cap your Critical Strike Chance. The Anathema Ring allows you to use multiple Curses, while Doppelgänger Guise provides tons of survivability.
Scaling the Damage of your Poison is rather limited on Rare Gear. Your Weapon should focus on enabling the CoC playstyle instead, while the Shield provides mostly defense. You will also need 14% Cooldown Recovery Rate for optimal trigger rate. Keep in mind that increases to Spell Damage do not affect Poisons; you can only rely on increasing Chaos Damage or Damage over Time Multiplier. Your Defense is based on maximum Life and Evasion. This Soulrend has a very high Mana Cost, which you will pay with Energy Shield instead, recovered via Recharge. If you are struggling with sustain, you will need more ES, increases to Recharge Rate, or improved Mana Cost Efficiency. Usually it is only problematic against Bosses.
|
Stat priorities on items:
|
 (Helmet) Rare Helmet - it is your main source of Energy Shield thanks to the Mastery that increases ES from Helmet by 100%. You will still need the usual Life and Resistances. (Helmet) Rare Helmet - it is your main source of Energy Shield thanks to the Mastery that increases ES from Helmet by 100%. You will still need the usual Life and Resistances. |
|
| Min. requirements: +200 to Energy Shield +90 maximum Life +80% Total Elemental and Chaos Resistances Optional affixes: +#% chance to Suppress Spell Damage % increased Energy Shield Recharge Rate % increased Mana Cost Efficiency (Exarch) % of Physical Damage from Hits taken as Fire Damage (Eater) |
|
 (Body Armour) Doppelgänger Guise - the best Armour you can use to get tons of Physical Damage Reduction. You can succumb to Insanity to cap Crit Chance against Enemies on Low Life. (Body Armour) Doppelgänger Guise - the best Armour you can use to get tons of Physical Damage Reduction. You can succumb to Insanity to cap Crit Chance against Enemies on Low Life. |
|
| Grants Level 20 Unhinge Skill (40-60)% more Critical Strike Chance while Insane Enemies Killed by your Hits are destroyed while Insane (40-30)% less Physical and Chaos Damage Taken while Sane Regenerate 10% Life over one second when Hit while Sane |
|
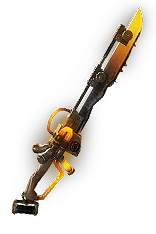 (Weapon) Rare Spiritblade - you will need high Crit Chance and Attack Speed; the Spiritblade is the best base among Swords for that purpose. Capping Accuracy would be very resource-intensive; it is more efficient to craft "Hits Cannot be Evaded" instead. At a higher budget, you can add a second Crafted mod to improve your Chaos Damage. (Weapon) Rare Spiritblade - you will need high Crit Chance and Attack Speed; the Spiritblade is the best base among Swords for that purpose. Capping Accuracy would be very resource-intensive; it is more efficient to craft "Hits Cannot be Evaded" instead. At a higher budget, you can add a second Crafted mod to improve your Chaos Damage. |
|
| Min. requirements: Hits can't be Evaded (Crafted) 8% Critical Strike Chance 1.6+ Attack Speed Optional affixes: % increased Chaos Damage % increased Damage over Time % to Chaos Damage over Time Multiplier |
|
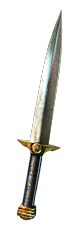 (Weapon) Rare Dagger - Cyclone has no Weapon type requirements, so you can use a Dagger for higher Crit Chance, which adds consistency against Low-life enemies. Getting perfect Attack Speed breakpoints is only important if you can sustain the ES Costs in prolonged fights. (Weapon) Rare Dagger - Cyclone has no Weapon type requirements, so you can use a Dagger for higher Crit Chance, which adds consistency against Low-life enemies. Getting perfect Attack Speed breakpoints is only important if you can sustain the ES Costs in prolonged fights. |
|
| Min. requirements: Hits can't be Evaded (Crafted) 10% Critical Strike Chance 1.6+ Attack Speed Optional affixes: % increased Chaos Damage % increased Damage over Time % to Chaos Damage over Time Multiplier |
|
 (Shield) Rare Shield - your Shield should provide a decent Chance to Block Attacks, a high amount of Energy Shield for better sustain, and raise the Gem Levels of your Chaos Spells. It can also increase the Crit Chance of your Spells or supplement basic Resistance. (Shield) Rare Shield - your Shield should provide a decent Chance to Block Attacks, a high amount of Energy Shield for better sustain, and raise the Gem Levels of your Chaos Spells. It can also increase the Crit Chance of your Spells or supplement basic Resistance. |
|
| Min. requirements: +1 to Level of all Chaos Spell Skill Gems 30% Chance to Block Attacks +100 Energy Shield +40% Elemental and Chaos Resistance Optional affixes: % increased Spell Critical Strike Chance Maximum Life |
|
 (Boots) Rare Boots - your Boots should provide lots of Movement Speed and Action Speed modifiers, but they can also grant a bit of Cooldown Recovery. Once you cap your Resistances, consider adding Spell Suppression and ES Recharge Rate. (Boots) Rare Boots - your Boots should provide lots of Movement Speed and Action Speed modifiers, but they can also grant a bit of Cooldown Recovery. Once you cap your Resistances, consider adding Spell Suppression and ES Recharge Rate. |
|
| Min. requirements: +100 to maximum Life +50 to Energy Shield +40% Elemental and Chaos Resistance 30% Increased Movement Speed 4% increased Cooldown Recovery Rate (Crafted) Optional affixes: % increased Energy Shield Recharge Rate % chance to Suppress Spell Damage % increased Action Speed (Exarch) |
|
 (Belt) Rare Belt - the remaining Cooldown Recovery Rate should be sourced from the Belt. It is also a good source of Strength and maximum Life. Always use Stygian Vise for an extra Abyssal Jewel socket. (Belt) Rare Belt - the remaining Cooldown Recovery Rate should be sourced from the Belt. It is also a good source of Strength and maximum Life. Always use Stygian Vise for an extra Abyssal Jewel socket. |
|
| Min. requirements: +100 maximum Life +40% to Total Elemental and Chaos Resistances 12% increased Cooldown Recovery Rate (Crafted) Optional affixes: Strength increased Maximum Life |
|
 (Amulet) Ungil's Harmony - This Amulet provides an insane amount of Crit Chance, which you can boost even further with Catalysts. It is enough to cap your Crit Chance by itself. The lack of extra Crit Damage does not affect your Poisons. (Amulet) Ungil's Harmony - This Amulet provides an insane amount of Crit Chance, which you can boost even further with Catalysts. It is enough to cap your Crit Chance by itself. The lack of extra Crit Damage does not affect your Poisons. |
|
| +(16-24) to Dexterity and Intelligence (250-350)% increased Global Critical Strike Chance Your Critical Strikes do not deal extra Damage +(30-50) to maximum Life +(30-50) to maximum Mana 40% increased Stun and Block Recovery |
|
| Recommended Anointments: Adder's Touch |
|
 (Amulet) Replica Dragonfang's Flight - once you have enough Crit Chance from other sources, you can use this Amulet to raise the Skill Gem Levels of Soulrend. Keep in mind it will be harder to sustain your Triggers, but they will deal significantly more Damage. (Amulet) Replica Dragonfang's Flight - once you have enough Crit Chance from other sources, you can use this Amulet to raise the Skill Gem Levels of Soulrend. Keep in mind it will be harder to sustain your Triggers, but they will deal significantly more Damage. |
|
| +(10-16) to all Attributes +3 to Level of all <Random Skill> Gems +(5-10)% to all Elemental Resistances (5-10)% increased Reservation Efficiency of Skills Items and Gems have (10-5)% reduced Attribute Requirements |
|
 (Ring) Anathema - it is a very easy way to fit 3 additional Curses into your Build. Try to get a Corrupted Implicit that improves your Chaos or Elemental Resistances. (Ring) Anathema - it is a very easy way to fit 3 additional Curses into your Build. Try to get a Corrupted Implicit that improves your Chaos or Elemental Resistances. |
|
| (7-10)% increased Cast Speed +(30-40) to Intelligence (10-15)% increased Cast Speed (10-20)% chance to gain a Power Charge when you Cast a Curse Spell Your Curse Limit is equal to your maximum Power Charges |
|
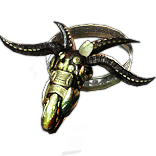
 (Ring) Betrayal's Sting - an insanely effective Ring for Poison Builds, and it can also be boosted by Catalysts, reaching almost 50% Chance to inflict additional Poison with each Hit. (Ring) Betrayal's Sting - an insanely effective Ring for Poison Builds, and it can also be boosted by Catalysts, reaching almost 50% Chance to inflict additional Poison with each Hit. |
|
| Adds (3-4) to (10-14) Physical Damage to Attacks +(20-35) to Dexterity -(30-20)% to all Elemental Resistances +(20-30)% to Chaos Resistance 5% increased Movement Speed (25-40)% chance to inflict an additional Poison on the same Target when you inflict Poison |
|
 (Gloves) Asenath's Gentle Touch - a very convenient way of inflicting the Temporal Chains Curse and causing Physical Explosions that can also inflict Poison. Thanks to the Gift of Asenath Card, you can easily get a pair with additional Frenzy Charge and extra Crit Chance for your Attacks. (Gloves) Asenath's Gentle Touch - a very convenient way of inflicting the Temporal Chains Curse and causing Physical Explosions that can also inflict Poison. Thanks to the Gift of Asenath Card, you can easily get a pair with additional Frenzy Charge and extra Crit Chance for your Attacks. |
|
| +(20-30) to Intelligence +(60-80) to maximum Life +(60-80) to maximum Mana Curse Enemies with Temporal Chains on Hit Non-Aura Curses you inflict are not removed from Dying Enemies Enemies near corpses affected by your Curses are Blinded Enemies Killed near corpses affected by your Curses explode, dealing 3% of their Life as Physical Damage |
|
 (Jewel) Watcher's Eye - there is only one useful modifier to improve your Damage, and it is not very impressive. The extra defense or utility is much more impactful. You could include Discipline Aura to make sustain much easier to solve, but it's hard to get enough Reservation Efficiency. (Jewel) Watcher's Eye - there is only one useful modifier to improve your Damage, and it is not very impressive. The extra defense or utility is much more impactful. You could include Discipline Aura to make sustain much easier to solve, but it's hard to get enough Reservation Efficiency. |
|
| (4-6)% increased maximum Energy Shield (4-6)% increased maximum Life (4-6)% increased maximum Mana <Two or Three random aura modifiers> Recommended modifiers: +(18-22)% to Damage over Time Multiplier while affected by Malevolence +(30-50)% to Chaos Resistance while affected by Purity of Elements Gain a Flask Charge when you deal a Critical Strike while affected by Precision (10-15)% increased Attack Speed while affected by Precision Gain (20-30) Life per Enemy Hit while affected by Vitality Gain (20-30) Energy Shield per Enemy Hit while affected by Discipline |
|
 (Jewel) The Light of Meaning - this Jewel socketed near Supreme Ego Keystone increases your Chaos Damage by 132%, which is a lot. (Jewel) The Light of Meaning - this Jewel socketed near Supreme Ego Keystone increases your Chaos Damage by 132%, which is a lot. |
|
| Passive Skills in Radius also grant 6% increased Chaos Damage | |
 (Jewel) Brutal Restraint - you don't need any specific Keystone here; just aim for useful bonus modifiers on nearby Notables. The most impactful is gaining Onslaught on Kill, but you can also get plenty of Poison Damage, maximum Life, or Speed and Crit. (Jewel) Brutal Restraint - you don't need any specific Keystone here; just aim for useful bonus modifiers on nearby Notables. The most impactful is gaining Onslaught on Kill, but you can also get plenty of Poison Damage, maximum Life, or Speed and Crit. |
|
| Denoted service of (500-8000) dekhara in the akhara of <Asenath • Balbala • Nasima> Passives in radius are Conquered by the Maraketh Historic |
|
  (Jewel) Forbidden Flesh Flame - the Perfect Crime or Clockwork Notables could grant you a massive amount of Damage, but sustaining the Mana Costs would be even harder. Instead, we recommend borrowing the Born in the Shadows Notable for better survivability. (Jewel) Forbidden Flesh Flame - the Perfect Crime or Clockwork Notables could grant you a massive amount of Damage, but sustaining the Mana Costs would be even harder. Instead, we recommend borrowing the Born in the Shadows Notable for better survivability. |
|
| Allocates <random Ascendancy Notable> if you have the matching modifier on Forbidden Flesh | |
 (Jewel) Foulborn Witchbane - the Foulborn variant of this Jewel provides yet another source of explosion. You will automatically Curse every enemy with your Hits anyway. (Jewel) Foulborn Witchbane - the Foulborn variant of this Jewel provides yet another source of explosion. You will automatically Curse every enemy with your Hits anyway. |
|
| +(5-15) to Intelligence Cursed Enemies you or your Minions Kill have a (10-15)% chance to Explode, dealing a quarter of their maximum Life as Chaos Damage |
|
 (Jewel) Rare Abyssal Jewels - due to the very high Added Damage Effectiveness of the Soulrend, it is very efficient to use Jewels that add flat Chaos or Physical Damage to your Spells. (Jewel) Rare Abyssal Jewels - due to the very high Added Damage Effectiveness of the Soulrend, it is very efficient to use Jewels that add flat Chaos or Physical Damage to your Spells. |
|
| Recommended affixes: Increased maximum Life Add Chaos or Physical Damage to Spells Add Chaos or Physical Damage to Spells while holding a Shield Attributes Resistance |
|
 (Jewel) Large Cluster Jewel - you will need the Overwhelming Malice Notable to get automatic Wither Debuff application. Unholy Grace is the second-best Notable as it also grants you Attack Speed, but you can choose to get Unspeakable Gifts for extra explosions instead. (Jewel) Large Cluster Jewel - you will need the Overwhelming Malice Notable to get automatic Wither Debuff application. Unholy Grace is the second-best Notable as it also grants you Attack Speed, but you can choose to get Unspeakable Gifts for extra explosions instead. |
|
| Recommended affixes: 1 Added Passive Skill is Touch of Cruelty 1 Added Passive Skill is Unholy Grace 1 Added Passive Skill is Overwhelming Malice 1 Added Passive Skill is Wicked Pall 1 Added Passive Skill is Unspeakable Gifts |
|
 (Jewel) Medium Cluster Jewel - Circling Oblivion and Flow of Life is the best combo for Damage and survivability, but you can pick Haemorrhage if you lack Crit Chance, or Septic Spells if you need more Poison Chance. (Jewel) Medium Cluster Jewel - Circling Oblivion and Flow of Life is the best combo for Damage and survivability, but you can pick Haemorrhage if you lack Crit Chance, or Septic Spells if you need more Poison Chance. |
|
| Recommended affixes: 1 Added Passive Skill is Circling Oblivion 1 Added Passive Skill is Flow of Life 1 Added Passive Skill is Haemorrhage 1 Added Passive Skill is Septic Spells |
|
 (Flask) Coralito's Signature - this Flask is very rarely used, but it suits this setup perfectly, as it improves your Critical Poisons. It is also a Diamond Flask, so it improves your Crit Chance. (Flask) Coralito's Signature - this Flask is very rarely used, but it suits this setup perfectly, as it improves your Critical Poisons. It is also a Diamond Flask, so it improves your Crit Chance. |
|
| 25% chance to Poison on Hit during Effect Your Critical Strikes do not deal extra Damage during Effect +(20-30)% to Damage over Time Multiplier for Poison from Critical Strikes during Effect Take 250 Chaos Damage per Second during Effect |
|
|
Other suggested Flasks:
|
|
    |
|
|
If you have any other build requests, please leave that in the comments below.
Pictures used in this article are the intellectual property of Grinding Gear Games.
