Reave Slayer Duelist Build
Pure-physical Reave setup for the Slayer class that utilizes Sword & Board playstyle for extra defensive utilityPure Physical Reave
Slayer Build
Updated for Patch 3.22
The Best Crafty Guides by Odealo
| Guide notes |
| August 31, 2022 -Updated for Patch 3.19 |
| Build overview | |||
| Tags: [MELEE] [PHYSICAL] [IMPALE] [LIFE] | |||
|
Budget: Defenses: |
|
Boss DPS: AoE: |
|
Reave is a powerful AoE Attack that has a short initial range, that grows with each consecutive Hit. When deciding to play a version suited for Physical Damage, it's recommended to pick Slayer Ascendancy. Slayer specializes in rapid Life Leeching, Boss Killing, and high Melee Physical Damage. To further boost our damage we utilize impale and rage. Impale is a stackable Debuff that deals Bonus Damage as you repeatedly hit an enemy, and. Rage increases your Attack Damage, Attack Speed, and Movement Speed. It also allows you to use Berserk for insane burst DPS. Combined with Pride Aura it makes your DPS grow over time as you keep attacking opponents, which is perfect for killing bosses.
In the current patch reave got a significant buff to its damage scaling. In this build, we use huge amounts of flat Physical Damage, which goes very well with Reave’s damage effectiveness. Thanks to the Slayer Ascendancy you will also instantly kill any enemy under 20% Life and deal more damage to bosses. Your Endurance Charges, Purity of Elements, and Fortify form an additional layer protecting you from Damage. Still, your best survivability tactic is your Life Leech - as a Slayer with Brutal Fervour you can Leech very fast, and the effect of Leeching is not removed on Full Life. You also take no Reflected Physical Damage and reduced Damage while Leeching. The Reave Attack deals exclusively Physical Damage, which is then increased by multiple other Active Skills and Passive Auras. Reave Skill Gem has also a Vaal variant of it which grants you additional maximum stages for even more area of effect until this effect fades out.
You can also check our other Path of Exile builds right over here Odealo's Crafty Guides - Full List
1. Gameplay
The gameplay consists mostly of using Leap Slam to move around and attacking groups of enemies with Reave. During Boss fights use your Vaal Raeve, place both Ancestral Totems to boost your Damage and activate Berserk. This high damage spike should kill most of the bosses in seconds. Use Mana-reserving Skills such as Pride, Precision, Purity of Elements, Blood and Sand, Herald of Purity, and War Banner. Blood Rage Buff is supposed to stay active at all times. You can cast Assassin Mark manually but it's better if you can automate it with Mark on Hit support.
|
This video was recorded on a level 94 Slayer using a mediocre Physical DPS Paradoxica, Abyssus Helmet, and Aul's Uprising for Pride. We didn't have Forbidden Flesh and Flame with Master of Metal, which would be the easiest and most impactful DPS boost at this point |
|
|

2. Build's PROS & CONS
| PROS |
|
| CONS |
|
3. Leveling tips
You can start with Reave right from the start, but it is not very good without high attack speed and other investments. You can use literally any other Melee Attack such as Cleave or Perforate to level up. Just be sure that the Attack doesn't convert your Physical Damage to any other Elemental type of Damage after you acquire Brutality Support Gem. Keep your Elemental Resistances High to not die, and regularly check if you qualify to equip better level-restricted items. We recommend following our Duelist Leveling Guide with Melee/Impale here.
Suggested leveling Gem setups:
| Perforate setup | |
 |
Perforate - strong early game Attack, good for single target and AoE depending on your Stance Skill |
 |
Maim Support - you deal more Physical Damage and Maim enemies reducing their Movement Speed |
 |
Melee Physical Damage Support - Melee Physical Damage is increased but your Attack Speed is reduced |
 |
Damage on Full Life Support - as a Slayer with Brutal Fervour your Life should be Full most of the times |
| Auras setup | |
 |
Pride - enemies near you receive more Physical Damage, this effect is increased after four seconds |
 |
Blood and Sand - alternate between Stances to gain more Damage or AoE, also additionally affect Perforate Skill |
 |
Precision - Increased Accuracy Rating and Critical Strike Chance |
| Ancestral Warchief setup | |
 |
Ancestral Warchief - summons Totem that attacks nearby enemies and gives you a massive bonus to your Damage |
|
Maim Support - linking it to your totem allows you to drop it from the main skill setup in favour of a more efficient Support gem |
|
Melee Physical Damage Support - increases Physical Damage dealt by your totem |
|
Damage on Full Life Support - totems are always summoned with Full Life and are rarely targeted by enemies |
| Curse and Leap Slam setup | |
 |
Leap Slam - a Travel Skill that you can use to jump over cliffs and rocks and move faster |
 |
Faster Attacks Support - makes your Leap Slam faster resulting in higher mobility |
 |
Vulnerability - causes enemies to take more Physical Damage, and be more susceptible to Bleeding |
Bandits:
Kill all three bandits and be rewarded with two additional Skill Points
Leveling Skill Trees:
29 Points Passive Tree
Take Master of the Arena, Art of the Gladiator, Defiance, Rampart with Fortify Mastery, Golem Blood, Cloth and Chain, and Merciless Skewering
69 Points Passive Tree
Allocate more Blade of Cunning, Dismembering, Bastion Breaker, Bloodless, Blade Master&Razor Edge, and go for Born to Fight
Recommended leveling items:
 Le Heup of All - grants you more Damage with Attacks, Attributes, and Elemental Resistances, all of which are important Le Heup of All - grants you more Damage with Attacks, Attributes, and Elemental Resistances, all of which are important |
|
| Adds 1 to 4 Physical Damage to Attacks +(10-30) to all Attributes (10-30)% increased Damage (10-30)% increased Rarity of Items found +(10-30)% to all Elemental Resistances |
|
 Rigwald's Crest - grants some Elemental Resistances but most importantly, it summons Spectral Wolfs on kill. Each Wolf grants you flat Physical Damage, up to 45 at the maximum amount of summoned Wolves. Rigwald's Crest - grants some Elemental Resistances but most importantly, it summons Spectral Wolfs on kill. Each Wolf grants you flat Physical Damage, up to 45 at the maximum amount of summoned Wolves. |
|
| +(12-16)% to Fire and Cold Resistances Trigger Level 10 Summon Spectral Wolf on Kill (20-30)% increased Mana Regeneration Rate |
|
 Thief's Torment - grants amazing Life and Mana sustain and lots of Elemental Resistances, but disables your other Ring slot Thief's Torment - grants amazing Life and Mana sustain and lots of Elemental Resistances, but disables your other Ring slot |
|
| +(8-10)% to all Elemental Resistances (10-16)% increased Quantity of Items found Can't use other Rings +(25-40)% to all Elemental Resistances +(40-60) Life gained for each Enemy hit by your Attacks +30 Mana gained for each Enemy hit by your Attacks 50% reduced Effect of Curses on you |
|
 Goldrim - provides you with a lot of Elemental Resistances and can be used since level 1 Goldrim - provides you with a lot of Elemental Resistances and can be used since level 1 |
|
| +(30-50) to Evasion Rating 10% increased Rarity of Items found +(30-40)% to all Elemental Resistances Reflects 4 Physical Damage to Melee Attackers Level Requirement reduced by 100 (Hidden) |
 Tabula Rasa - has six, white, linked sockets so you are not limited by socket colours Tabula Rasa - has six, white, linked sockets so you are not limited by socket colours |
|
| Item has no level requirement and Energy Shield (Hidden) Item has 6 White Sockets and is fully linked (Hidden) |
|
 Wanderlust - an amazing pair of boots that can be worn since level 1. They give a decent Movement Speed bonus and immunity to Freeze Wanderlust - an amazing pair of boots that can be worn since level 1. They give a decent Movement Speed bonus and immunity to Freeze |
|
| +5 to Dexterity +(10-20) to maximum Energy Shield (20-40)% increased Mana Regeneration Rate 20% increased Movement Speed Cannot be Frozen |
|
 Meginord's Girdle - an early game Belt that adds Strength and Physical Damage to your Attacks Meginord's Girdle - an early game Belt that adds Strength and Physical Damage to your Attacks |
|
| +(25-35) to Strength +25 to Strength Adds 5 to 15 Physical Damage to Attacks 10% increased maximum Life +(10-20)% to Cold Resistance 25% increased Flask Life Recovery rate |
|
 Redbeak - Redbeak is one of the best early-game Swords for Physical Melee builds Redbeak - Redbeak is one of the best early-game Swords for Physical Melee builds |
|
| 40% increased Global Accuracy Rating 100% increased Damage when on Low Life 50% increased Physical Damage Adds 2 to 6 Physical Damage 10% increased Attack Speed +(20-30) to maximum Life +2 Life gained for each Enemy hit by Attacks |
|
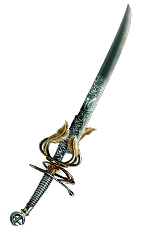
 Scaeva - a very strong mid-game Sword you can equip around act 8, and you can comfortably start mapping with this weapon Scaeva - a very strong mid-game Sword you can equip around act 8, and you can comfortably start mapping with this weapon |
|
| 40% increased Global Accuracy Rating Adds (75-92) to (125-154) Physical Damage (15-25)% increased Critical Strike Chance 0.3% of Physical Attack Damage Leeched as Life per Red Socket +10% to Global Critical Strike Multiplier per Green Socket 0.3% of Physical Attack Damage Leeched as Mana per Blue Socket 8% increased Global Defences per White Socket (60-80)% increased Global Critical Strike Chance when in Main Hand +8% Chance to Block Attack Damage when in Off Hand |
|
 Oni-Goroshi - hard to acquire on your first character, but if you have some currency to spend, this Sword will serve you for the whole leveling process Oni-Goroshi - hard to acquire on your first character, but if you have some currency to spend, this Sword will serve you for the whole leveling process |
|
| 40% increased Global Accuracy RatingUses both hand slots (70-90)% increased Critical Strike Chance Adds 2 to 3 Physical Damage to Attacks per Level Gain Her Embrace for 3 seconds when you Ignite an Enemy While in Her Embrace, take 0.5% of your total Maximum Life and Energy Shield as Fire Damage per second per Level |
|
 Carnage Heart - you can Leech more Damage at a higher rate, and your Damage is increased Carnage Heart - you can Leech more Damage at a higher rate, and your Damage is increased |
|
| +(10-16) to all Attributes +(20-40) to all Attributes +(10-20)% to all Elemental Resistances (1.2-2)% of Physical Attack Damage Leeched as Life 50% increased total Recovery per second from Life Leech (30-40)% increased Damage while Leeching Extra gore |
|
 Maligaro's Virtuosity - they give some Critical Strike Chance and set your Critical Strike Multiplier to be always on 300% Maligaro's Virtuosity - they give some Critical Strike Chance and set your Critical Strike Multiplier to be always on 300% |
|
| +(20-30) to Dexterity 5% increased Attack Speed 50% increased Global Critical Strike Chance (60-80)% increased Evasion Rating Your Critical Strike Multiplier is 300% |
|
4. Final Skill Tree, Ascendancy Points, and Pantheon
Final Skill Tree:
119 Points Final Passive Tree (doesn't include Cluster Jewels)
119 Points Path of Building (PoB) link
Ascendancy points:
Preferably in that order:
- Brutal Fervour
- Bane of Legends
- Headsman
- Impact
Pantheon:
Major God: Soul of Solaris: 6% additional Physical Damage Reduction while there is only one nearby Enemy; 20% chance to take 50% less Area Damage from Hits
Minor God: Soul of Shakari: You cannot be Poisoned while there are at least 3 Poisons on you; 50% less Duration of Poisons on You
5. Final Gems links
| [DPS] Reave setup | |
 |
Vaal Reave - Melee Attack that grows in size after the first four Hits, at maximum stages it can cover most of your screen and is wide-angled. You can use the Phantasmal version for even more AoE. |
 |
Brutality Support - deal more Physical Damage, but no Elemental Damage |
 |
Impale Support - your Attacks have a higher chance to Impale, and the Impale effect is increased |
 |
Rage Support - you have added Physical Damage per Rage, and your hits generate Rage, which is later spent on Berserk |
 |
Multistrike Support - Attack a few more times with increased Attack Speed but reduced Damage |
|
Melee Physical Damage Support - your Attack Speed is reduced, but Melee Physical Damage increased |
| [UTILITY] Offensive Auras to choose from | |
|
Precision - you have a higher Accuracy Rating and Critical Strike Chance |
|
Blood and Sand - you can switch between having more AoE and less Area Damage, or more Area Damage and less AoE |
 |
War Banner - this Banner causes enemies to take increased Physical Damage and improves our Accuracy Rating |
 |
Herald of Purity - At level 20 this Gem grants 12% more Physical Damage which is a lot. It also creates Minions which may divert some of the attention from you. |
|
Pride - nearby enemies take more Physical Damage, and this effect increases over 4 seconds. Can be cast for free with Aul's Uprising. It's the most important Aura and it has to be included. |
| [UTILITY] Optional Defensive Auras to choose from | |
 |
Purity of Elements - Makes your character immune to all Elemental Ailments and grants you Elemental Resistances. |
 |
Determination - a defensive-oriented Aura that adds a big amount of flat Armour Rating and adds a More Armour multiplier on top of that. |
 |
Tempest Shield - another defensive Aura that you can use to increase your Spell Block Chance and be immune to Shock |
| [UTILITY] Ancestral Totems setup | |
 |
Ancestral Protector - a Totem that grants more Attack Speed, you can use the Phantasmal version for increased Buff effect |
|
Ancestral Warchief - a Totem that grants you more Melee Attack Damage. Vaal version gives even more Damage |
 |
Multiple Totems Support - you can now summon both Totems at the same time |
|
Maim Support - Totems will Maim on Hit reducing the Movement Speed of your foes and increasing all Physical Damage Taken |
| [UTILITY] Blood Rage setup | |
 |
Blood Rage - increases your Attack Speed, generates Frenzy Charges on Kill, and grants you more Life Leech |
| [MOBILITY] Leap Slam setup | |
|
Leap Slam - you can jump over obstacles, and move faster by using this Attack |
|
Faster Attacks Support - faster Leap Slam means faster movement |
 |
Lifetap support - spend Life instead of Mana allowing you to spam this ability freely |
| [UTILITY] Berserk | |
 |
Berserk - If you accumulate some Rage use this Skill to get more Attack Speed, Attack Damage, Movement Speed, and reduced Damage Taken for a short time |
| [UTILITY] Steelskin | |
 |
Steelskin - A Guard Spell of your choice that reduces the damage you take for a short duration. You can replace it with Molten Shell if you have a lot of Armour. |
| [UTILITY] Assassin Mark | |
 |
Assassin's Mark - a mark that gives a lot of Critical Strike Chance and Multiplier, on top of that it allows you to generate Power Charges. |
 |
Mark on Hit Support - automatically applies linked Mark to every Rare and Unique Enemy you attack |
|
|
6. Gear Setup
A weapon you're supposed to use is a one-handed Sword, preferably a good Paradoxica or a Rare Foil. It is important to have a source of Impale Chance somewhere in your gear, preferably on your Weapon. A shield can provide you with Block Chance, but most importantly you can find an Affix that increases Mana Reservation Efficiency for socketed Gems. The build can be played with no expensive Unique Items, however, Aul's Uprising Unique Amulet allows you to cast one of your most expensive Auras for free so it's definitely worth buying. Getting enough Dexterity and Intelligence might be a hassle, but not a big one, one or two mods should be enough to cover your need for these Attributes. Look for Maximum Life, Resistance, Armour, and Block Chance to increase your Defences; Flat Physical Damage to Attacks, Attack Speed, and Critical Strike mods for offenses.
Our recommended items will:
- Cap your resistances at 75%
- Provide you with enough DPS and Life to start mapping
|
Stat priorities on items:
|
 (Helmet) Rare Helmet - Rare Helmet is the optimal choice if you value your survivability over raw damage, it can grant you Life and Resistances (Helmet) Rare Helmet - Rare Helmet is the optimal choice if you value your survivability over raw damage, it can grant you Life and Resistances |
|
| Min. requirements: +50% to Elemental Resistances +60 to maximum Life Nearby Enemies take 9% increased Physical Damage Optional affixes: Global Critical Strike Multiplier Accuracy Rating Intelligence Armour |
|
 (Helmet) Abyssus - Abyssus is a risky choice, it increases your damage by a lot, but you also take more Physical Damage yourself (Helmet) Abyssus - Abyssus is a risky choice, it increases your damage by a lot, but you also take more Physical Damage yourself |
|
| +(20-25) to all Attributes Adds 40 to 60 Physical Damage to Attacks +(100-125)% to Melee Critical Strike Multiplier (100-120)% increased Armour (40-50)% increased Physical Damage taken |
|
| Helmet enchantments: Ancestral Protector grants increased Attack Speed Reave enchantment mods |
|
 (Weapon) Rare one-handed Sword - a Rare one-handed Sword that could potentially outmatch perfect Paradoxica is almost impossible to get, but you can use the rare sword as a replacement before you get one with desired modifiers. (Weapon) Rare one-handed Sword - a Rare one-handed Sword that could potentially outmatch perfect Paradoxica is almost impossible to get, but you can use the rare sword as a replacement before you get one with desired modifiers. |
|
| Min. requirements: around 400 Physical DPS Optional affixes: Accuracy Rating Hits with this Weapon Overwhelm #% Physical Damage Reduction |
|
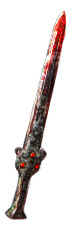
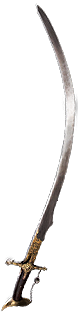 (Weapon) Paradoxica - at a bare minimum you need a Chance to Impale modifier that comes with increased Physical Damage. Other than that, a regular Attack Speed modifier makes a perfect combination, but conditional Attack Speed is good enough until you can afford a better one (Weapon) Paradoxica - at a bare minimum you need a Chance to Impale modifier that comes with increased Physical Damage. Other than that, a regular Attack Speed modifier makes a perfect combination, but conditional Attack Speed is good enough until you can afford a better one |
|
| +25% to Global Critical Strike Multiplier Attacks with this Weapon deal Double Damage Veiled Prefix: Increased Physical Damage And Impale Veiled Suffix: Attack Speed with Dexterity and Intelligence Attack Speed and Trigger Level 1 Blood Rage On Kill Chance Attack Speed If Rare or Unique Enemy Nearby |
|
 (Weapon) Rare Shield - The reservation efficiency mod is a great solution to your Mana problem. Besides that, look for more Life, Block Chance, and Elemental Resistances (Weapon) Rare Shield - The reservation efficiency mod is a great solution to your Mana problem. Besides that, look for more Life, Block Chance, and Elemental Resistances |
|
| Min. requirements: Socketed Gems have 30% increased Reservation Efficiency +80 to maximum Life +12% increased Attack Speed Optional affixes: Elemental Resistances Chance to Block Armour increased Global Physical Damage |
|
 (Body Armour) Rare Body Armour - a Body Armour with a lot of Maximum Life, Elemental Resistances, and additional Critical Strike chance is very good. You can look for additional Curses or reduced Mana Cost of skills later on (Body Armour) Rare Body Armour - a Body Armour with a lot of Maximum Life, Elemental Resistances, and additional Critical Strike chance is very good. You can look for additional Curses or reduced Mana Cost of skills later on |
|
| Min. requirements: +100 to maximum Life Attacks have +1.5% to Critical Strike Chance +70% to Elemental Resistances Optional affixes: You can apply an additional Curse Socketed Attacks have -15 to Total Mana Cost Enemies you Kill have a chance to Explode, dealing a tenth of their Maximum Life as Physical Damage |
|
 (Boots) Rare Boots - Try to get the default defensive affixes, and later on look for the Tailwind, Onslaught, or Elusive mods (Boots) Rare Boots - Try to get the default defensive affixes, and later on look for the Tailwind, Onslaught, or Elusive mods |
|
| Min. requirements: +60 to maximum Life +60% to Elemental Resistances Optional affixes: You have Tailwind if you have dealt a Critical Strike Recently chance to gain Onslaught for 4 seconds on Kill chance to gain Elusive on Critical Strike |
|
 (Gloves) Rare Gloves - other than Life and Elemental Resistances they can provide a lot of useful Damage modifiers. For an Eldritch mod, look for Rage on Hit. (Gloves) Rare Gloves - other than Life and Elemental Resistances they can provide a lot of useful Damage modifiers. For an Eldritch mod, look for Rage on Hit. |
|
| Min. requirements: +50 to maximum Life +70% to Elemental Resistances Optional affixes: increased Attack Speed increased Melee Damage Accuracy Rating add Physical Damage to Attacks increased Damage while Leeching (crafted) |
|
 (Belt) Ryslatha's Coil - this Unique Belt grants you the best offensive stats and a lot of Maximum Life, get one as soon as you're able to equip it (Belt) Ryslatha's Coil - this Unique Belt grants you the best offensive stats and a lot of Maximum Life, get one as soon as you're able to equip it |
|
| (20-30)% increased Stun Duration on Enemies +(20-40) to Strength (30-40)% more Maximum Physical Attack Damage (40-30)% less Minimum Physical Attack Damage Adds 1 to (15-20) Physical Damage to Attacks +(80-100) to maximum Life Gain 50 Life when you Stun an Enemy |
|
 (Belt) Rare Belt - It's not as good as Ryslatha's Coil, use it if you're in dire need of Elemental Resistances or Maximum Life (Belt) Rare Belt - It's not as good as Ryslatha's Coil, use it if you're in dire need of Elemental Resistances or Maximum Life |
|
| Min. requirements: +100 to Maximum Life +80% to Elemental Resistances Optional affixes: increased Maximum Life Armour increased damage |
|
 (Amulet) Aul's Uprising - there are two versions of this Amulet you can get - one is Strength-related and it gets you free Pride, and one correlates to Intelligence so that you can cast Purity of Elements off charge. Intelligence one gets you increased Crit. Chance and ES. The Strength variant is for increased Armour and reduced Stun and Block Recovery for enemies. (Amulet) Aul's Uprising - there are two versions of this Amulet you can get - one is Strength-related and it gets you free Pride, and one correlates to Intelligence so that you can cast Purity of Elements off charge. Intelligence one gets you increased Crit. Chance and ES. The Strength variant is for increased Armour and reduced Stun and Block Recovery for enemies. |
|
| +(10-16) to all Attributes +(20-30) to Strength / Intelligence (15-20)% increased Armour / Maximum Energy Shield +(50-70) to maximum Life Nearby Enemies have 10% reduced Stun and Block Recovery / Hits against Nearby Enemies have 50% increased Critical Strike Chance <Random Strength / Intelligence aura> Reserves no Mana |
|
 (Amulet) Rare Amulet - Added Physical Damage to Attacks and Critical Strike Multipliers are the most valuable offensive Affixes, but you can also aim for the missing Attributes, Resistances, Accuracy, or Mana Leech. Thanks to the Lake of Kalandra's doubled modifiers this can be a strong contender for Aul's Uprising. (Amulet) Rare Amulet - Added Physical Damage to Attacks and Critical Strike Multipliers are the most valuable offensive Affixes, but you can also aim for the missing Attributes, Resistances, Accuracy, or Mana Leech. Thanks to the Lake of Kalandra's doubled modifiers this can be a strong contender for Aul's Uprising. |
|
| Min. requirements: +70% to Elemental Resistances +50 to Maximum Life Adds 10 to 20 Physical Damage to Attacks Optional affixes: Global Critical Strike Multiplier Physical Attack Damage Leeched as Mana Attributes Accuracy Rating increased Mana Reservation Efficiency for Auras you're using |
|
| Recommended Anointments: Panopticon Fatal Blade Tenacity |
|
 (Ring) Rare Ring - look for one with high Life, Elemental Resistance, and added Physical Damage with Attacks. 20% Quality Steel Ring with Essence of Contempt yields the best results (Ring) Rare Ring - look for one with high Life, Elemental Resistance, and added Physical Damage with Attacks. 20% Quality Steel Ring with Essence of Contempt yields the best results |
|
| Min. requirements: +80% to Elemental Resistances +60 to Maximum Life Optional affixes: Adds Physical Damage to Attacks Dexterity and Intelligence |
|
 (Jewel) Rare Jewels - increase your Maximum Life and Critical Strike Multipliers for Attacks, also you can get missing Attributes or Resistances (Jewel) Rare Jewels - increase your Maximum Life and Critical Strike Multipliers for Attacks, also you can get missing Attributes or Resistances |
|
|
Recommended affixes: |
|
  (Jewel)Forbidden Flesh&Flame - allows you to pick up Master of Metal from Champion Ascendency. Very powerful but not mandatory (Jewel)Forbidden Flesh&Flame - allows you to pick up Master of Metal from Champion Ascendency. Very powerful but not mandatory |
|
| Allocates <<Random Ascendancy Notable>> if you have the matching modifiers on Forbidden Flesh/Flame | |
 (Jewel) Brutal Restraint - There's a great place for this Jewel, it's near Stamina Notable. It gives you more Dexterity, and allocated Notables in range grant you various bonuses such as Crit. Chance, Accuracy, Maximum Life, Onslaught on Kill, or increased Attack Damage. (Jewel) Brutal Restraint - There's a great place for this Jewel, it's near Stamina Notable. It gives you more Dexterity, and allocated Notables in range grant you various bonuses such as Crit. Chance, Accuracy, Maximum Life, Onslaught on Kill, or increased Attack Damage. |
|
| Denoted service of (500-8000) dekhara in the akhara of Nasima Passives in radius are Conquered by the Maraketh Historic |
|
 (Jewel) Watcher's Eye - you want one of these Jewels for most of the builds that use any Aura. In this case, Pride and Precision mods are the most valuable for you, the one with Impale lasting for 2 additional Hits being the best possible (Jewel) Watcher's Eye - you want one of these Jewels for most of the builds that use any Aura. In this case, Pride and Precision mods are the most valuable for you, the one with Impale lasting for 2 additional Hits being the best possible |
|
| (4-6)% increased maximum Energy Shield (4-6)% increased maximum Life (4-6)% increased maximum Mana <Two or Three random aura modifiers> |
|
 (Jewel) Large Cluster Jewels - can be used to get mana leech if you don't have it elsewhere yet. Feed the Fury provides the best damage bonus as you will be constantly under the life leech effect. (Jewel) Large Cluster Jewels - can be used to get mana leech if you don't have it elsewhere yet. Feed the Fury provides the best damage bonus as you will be constantly under the life leech effect. |
|
| Recommended affixes: 1 Added Passive Skill is Drive the Destruction 1 Added Passive Skill is Fuel the Fight (if you need Mana Leech) 1 Added Passive Skill is Feed the Fury 1 Added Passive Skill is Smite the Weak 1 Added Passive Skill is Martial Prowess |
|
 (Jewel) Medium Cluster Jewels - best to use them for improving your Critical Strike Chance, and get some increased Area of Effect (Jewel) Medium Cluster Jewels - best to use them for improving your Critical Strike Chance, and get some increased Area of Effect |
|
| Recommended affixes: Basics of Pain Magnifier Quick Getaway |
|
 (Flask) Lion's Roar - gives More Damage and Knockback on every hit, it's a nice mix of Offence and Defense power in one Flask (Flask) Lion's Roar - gives More Damage and Knockback on every hit, it's a nice mix of Offence and Defense power in one Flask |
|
| +1500 to Armour Adds Knockback to Melee Attacks during Flask effect Knocks Back Enemies in an Area when you use a Flask 75% chance to cause Enemies to Flee on use (7-10)% more Melee Physical Damage during effect |
|
 (Flask) Bottled Faith - you have increased Critical Strike Chance and Damage while on Consecrated Ground, making it one of the best Damage Flasks in the game (Flask) Bottled Faith - you have increased Critical Strike Chance and Damage while on Consecrated Ground, making it one of the best Damage Flasks in the game |
|
| 40% increased Damage Creates Consecrated Ground on Use (30-15)% reduced Duration Consecrated Ground created by this Flask has Tripled Radius Consecrated Ground created during Effect applies (7-10)% increased Damage taken to Enemies (100-150)% increased Critical Strike Chance against Enemies on Consecrated Ground during Flask effect |
|
|
Suggested Flasks:
|
|
   |
|
|
If you have any other build requests please leave that in the comments below. We are always open to suggestions and constructive feedback.
Pictures used in this article are the intellectual property of Grinding Gear Games.
