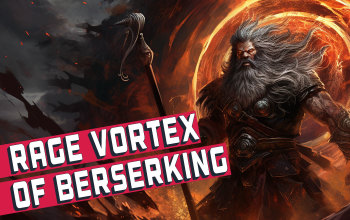
Rage Vortex of Berserking Berserker Build
A very fast setup for the new transfigured Rage Vortex of Berserker that lets you blitz through the maps at astounding speed.Rage Vortex of Berserking
Berserker Build
Updated for Patch 3.23
The Best Crafty Guides by Odealo
| Guide notes |
| December 15, 2023 -Build created |
| Build overview | |||
| Tags: [PHYSICAL] [MELEE] [LIFE] [CRIT] | |||
|
Budget: Defenses: |
|
Boss DPS: AoE: |
|
The new Rage Vortex of Berserking fundamentally changes the way this Skill works. When used, it will attach a spinning Rage Vortex to your Character, dealing Attack Damage to all nearby Enemies, and drain your Rage at an accelerating rate. It is quite similar to the famous Blade Vortex Spell, but you don't need to recast it as often. This variant of the Rage Vortex has some very interesting and powerful interactions with other Skills. The Exerted Attack Buff from your Warcry or Ambush will apply to the whole duration of your Rage Vortex. The Ambush is a particularly strong Skill, and it is the pillar of this Build. It is a quick dash, that adds up to 35% base Critical Strike Chance to your next Attack, or even more if you include the Enhance Support. It will very easily cap your Critical Strike Chance, so you can use Items such as Marylene's Fallacy to significantly improve your Damage. Unfortunately, it also limits you to only use One-handed Weapons. The regular global Buffs like Ancestral Totems or Phase Run will apply dynamically as you cast them.
To make this playstyle comfortable you will have to find a way to consistently and reliably regenerate Rage to fuel your Vortex. Thankfully, there are plenty of variants you can incorporate into your Build. The most popular method is to use the Redblade Banner and the Berserker Ascendency to gain maximum Rage every time you use a Warcry while being below 25 Rage. The General Cry has the lowest Cooldown of only 4 seconds, which you can easily lower to less than 2 seconds. You can make it Instant, or invest in Warcry Speed and use other Warcries too.
You can also use the Chainbreaker Keystone provided by the Lethal Pride Jewel. To make it work you will need to use additional Clarity Aura, and aim for Mana Regeneration Rate modifiers on your Gear. You will also have to limit your Utility Skills, as they all will cost Rage to use. The passive Rage regeneration will greatly prolong the duration of your Blade Vortex, making it much more comfortable.
You can also use the combination of Shackles of the Wretched and Chains of Emancipation. This Belt grants you Maximum Rage when you lose the Temporal Chains Curse on yourself. By linking any Skill with Hextouch and 2 Curses while having a limit of only 1 Curse, you will instantly gain and lose the Temporal Chains, and as a result, you will gain maximum Rage. The second Curse you applied to yourself will also be removed by this Belt, as having more than 25 Rage makes you Immune to Curses. It is the most proactive style, but lets you use any Weapon or Ascendency you want.
You will have a lot of Armour Rating and Life Recovery from your Life Leech and using Warcries, but as a Berserk, you inherently take 10% more Damage. The lack of Spell Suppression can also be noticeable against Uber Bosses.
You can also check our other Path of Exile builds right over here Odealo's Crafty Guides - Full List
1. Gameplay
Before you use your Rage Vortex you should use the Ambush, which will apply for the entire Duration of the Vortex. You don't want to use too many Skills after that, as the Chainbreaker Keystone adds Rage Cost to all your Skills. It is still worth it to use Ancestral Totems or Curse when fighting powerful Enemies. Use Warcry to refill all your Rage if you have less than 25 of that Resource.
|
|
|
|

2. Build's PROS & CONS
| PROS |
|
| CONS |
|
3. Leveling tips
The Rage generation during leveling is too ineffective to use this setup at first. The Redblade Banner Shield can be equipped at level 35, at which point you should have your first Ascendency. The new Cleave of Rage is also a great option. You should check out our Leveling Guide for Melee Marauders to see more tips.
Suggested leveling Gem setups:
| Cleave setup | |
 |
Cleave - a Melee swing that deals Damage with both of your Weapons. You can use the new Cleave of Rage to generate Rage. |
 |
Chance to Bleed Support - grants plenty of added Physical Damage and causes your Attacks to inflict Bleeding. |
 |
Maim Support - improves your Physical Damage and slows Enemies. |
 |
Melee Physical Damage Support - improves your Physical Damage with Melee Skills further. |
 |
Multistrike Support - you will Attack 3 times in quick succession, each Hit dealing more Damage. |
 |
Brutality Support - disables your Elemental or Chaos Damage but improves your Physical Damage. |
| Utility Gems | |
 |
Leap Slam - a swift jump that deals a bit of damage and Stuns enemies caught within its radius. Used mostly for mobility. |
 |
Vitality - grants you a bit of Life Regeneration. |
 |
Herald of Purity - improves your Physical Damage and summons helpful Minions. |
 |
Vulnerability - causes your Enemies to take increased Damage from Physical Attacks. |
Bandits:
Kill all Bandits to be rewarded with 2 Passive Tree Skill Points.
Leveling Skill Trees:
43 Points Skill Tree
It is meaningless to scale Critical Strikes without the Ambush, so you should pick nearby useful Notables to improve your leveling experience and refund them later.
Take Strong Arm, Art of the Gladiator, Hatchet Master, and all nearby useful notables.
68 Points Skill Tree
Take Steadfest, Bloodless, Cleaving, Slaughter, Barbarism, and Juggernaut.
Recommended leveling items:
 Le Heup of All - use this Ring to boost your Damage and Resistance. Le Heup of All - use this Ring to boost your Damage and Resistance. |
|
| (10-30)% increased Damage +(10-30) to all Attributes (10-30)% increased Rarity of Items found +(10-30)% to all Elemental Resistances |
|
 Goldrim - the best defensive Helm you can use during the campaign. Goldrim - the best defensive Helm you can use during the campaign. |
|
| +(30-50) to Evasion Rating 10% increased Rarity of Items found +(30-40)% to all Elemental Resistances Reflects 4 Physical Damage to Melee Attackers Level Requirement reduced by 100 (Hidden) |
|
 Tabula Rasa - with this Armour you can freely experiment with your setups, as it grants 6-link with White Sockets. Tabula Rasa - with this Armour you can freely experiment with your setups, as it grants 6-link with White Sockets. |
|
| Item has no level requirement and Energy Shield (Hidden) Item has 6 White Sockets and is fully linked (Hidden) |
|
 Wanderlust - those Boots grant you immunity to Freeze, and some Movement Speed and Dexterity. Wanderlust - those Boots grant you immunity to Freeze, and some Movement Speed and Dexterity. |
|
| +5 to Dexterity +(10-20) to maximum Energy Shield (20-40)% increased Mana Regeneration Rate 20% increased Movement Speed Cannot be Frozen |
|
4. Final Skill Tree, Ascendancy Points, and Pantheon
Final Skill Tree:
109 Points Final Skill Tree (doesn't include Unique or Cluster Jewels)
119 Points Path of Building(PoB) link
Ascendancy points:
Preferably in the order:
- War Bringer
- Crave the Slaughter
- Rite of Ruin
- Aspect of Carnage
Pantheon:
Major God: Soul of Arakaali 10% reduced Damage taken from Damage Over Time; +40% Chaos Resistance against Damage Over Time
Minor God: Soul of Shakari 50% less Duration of Poisons on You; 5% reduced Chaos Damage taken
5. Final Gems links
| [DPS] Lightning Trap setup | |
 |
Rage Vortex of Berserking - rapidly spins your Weapon around you, dealing Attack Damage to nearby Enemies, and draining your Rage at accelerating rate until its fully deplated. |
|
Brutality Support - improves your Physical Damage, which is the only type dealt by this Build. |
|
Melee Physical Damage Support - improves your Damage further, but slightly reduces the Attack Speed. |
 |
Impale Support - improves your Chance and Effectiveness of Impales, which boosts your Physical Damage. |
 |
Pulverise Support - greatly increases your Area Damage and Radius but reduces your Attack Speed. |
 |
Rage Support - slightly helps with Rage generation and grats plenty of Damage. |
| [UTILITY] Auras setup | |
 |
Determination - helps reduce the incoming Physical Damage by adding a lot of Armour Rating. |
 |
Blood and Sand - change your Stance and grant you AoE Damage or Radius depending on the Stance you are in. |
|
Herald of Purity - improves your Physical Damage and summons helpful Minions. |
 |
Precision - improves your Accuracy Rating and Critical Strike Chance. |
 |
War Banner - makes Enemies more vulnerable to Physical Damage and improves your Accuracy Ratings. You can also use the Dread Banner if you lack the chance to Impale. |
| [UTILITY] Arrogance setup | |
 |
Clarity - grants you a bit of Mana Regeneration, which you can convert into Rage Regeneration with the Chainbreaker Keystone. |
 |
Arrogance Support - greatly improves the Aura Effect of linked Skills, but makes them Reserve Life instead of Mana. |
| [UTILITY] Ambush setup | |
 |
Ambush - a swift dash to a nearby Enemy that exerts your first Attack, greatly improving its Base Critical Strike Chance and Multiplier. You should always use this Skill before casting the Rage Vortex. |
 |
Enhance Support - bonus Quality is very useful for this Skill, as it nearly doubles the Base Critical Strike Chance it provides. |
| [UTILITY] Ancestral Totem setup | |
 |
Ancestral Protector - summons a Totem that Attacks nearby Enemies and greatly improves your Attack Speed. |
 |
Ancestral Warchief - another very important Totem, this one further improves your Melee Damage. You can use the Vaal Version to gain an even stronger buff. |
 |
Multiple Totems Support - increases the maximum Totem limit of Supported Totems, so you can use both Totems at once. |
| [UTILITY] Various Utility Skills | |
|
Leap Slam - use this Movement Skill to cross terrain gaps or engage Enemies. Don't spam it if you have the Chainbreaker Keystone allocated. |
|
Vulnerability - a powerful Curse that increases the Physical Damage Enemies Take from all sources. |
 |
Phase Run - consumes your Frenzy Charges to quickly move around and increase your Melee Damage. It will improve the Damage of your existing Rage Vortex. |
 |
General's Cry - a Warcry with the lowest Cooldown. Use it while on low Rage to regain maximum Rage. |
 |
Blood Rage - a Buff that consumes your Life as a Physical Damage over time effect, but grants you Attack Speed, Life Leech, and generates Frenzy Charges on Kill. |
|
|
5. Gear Setup
The Redblade Banner Shield is necessary to quickly regain all your Rage on demand. You will also need a Lethal Pride Jewel to obtain the Chainbreaker Keystone, which makes sustaining your Rage Vortex much more enjoyable. The Ambush Skill grants you so much Critical Strike Chance, that you can use Marylene's Fallacy and still cap your Critical Strike Chance, and benefit from the insane amounts of Critical Strike Multiplier this Amulet grants. The Rare Gear you aim for is rather usual, but you will need a decent amount of Mana Regeneration Rate on your Rings to improve the Rage generation. It should provide you with maximum Life, Resistance, Critical Strike Multiplier, or bonuses to your Attacks. You will also need plenty of Attributes on your Gear to fulfill Gem requirements.
|
Stat priorities on items:
|
 (Helmet) Rare Helmet - here you can focus fully on defensive aspects, such as maximum Life, Resistance, or Life Regeneration. You can also get plenty of Accuracy Rating or Attributes. (Helmet) Rare Helmet - here you can focus fully on defensive aspects, such as maximum Life, Resistance, or Life Regeneration. You can also get plenty of Accuracy Rating or Attributes. |
|
| Min. requirements: 70 maximum Life 70% Total Elemental Resistances Optional affixes: % of Physical Damage from Hits taken as Fire Damage #% increased Mana Reservation Efficiency of Skills Accuracy Rating Life Regeneration Attributes |
|
 (Weapon) Rare Weapon - try to get the Psychotic Axe for the maximum Rage bonus, but the regular Axes are also good. Simply look for the highest Physical DPS you can find. If you Craft the Hit can't be Evaded modifier you could skip all the investments into Accuracy Rating. (Weapon) Rare Weapon - try to get the Psychotic Axe for the maximum Rage bonus, but the regular Axes are also good. Simply look for the highest Physical DPS you can find. If you Craft the Hit can't be Evaded modifier you could skip all the investments into Accuracy Rating. |
|
| Min. requirements: 350+ Physical DPS Optional affixes: Chance to deal Double Damage Global Critical Strike Multiplier % chance to Impale Enemies on Hit with Attacks Hits can't be Evaded |
|
 (Weapon) Redblade Banner - grants the maximum Power for all your Warcry Effects, and reduces their Cooldown. You will be able to regain all your Rage with one Warcry if you use it below 25 Rage. (Weapon) Redblade Banner - grants the maximum Power for all your Warcry Effects, and reduces their Cooldown. You will be able to regain all your Rage with one Warcry if you use it below 25 Rage. |
|
| (80-100)% increased Armour +(50-60) to maximum Life 20% increased Taunt Duration +5% Chance to Block 50% increased Warcry Cooldown Recovery Rate Warcries have infinite Power |
|
 (Jewel) Lethal Pride - converts nearby Keystones into special ones. You should get one that grants the Chainbreaker Keystone, which converts every 25 of your Mana Regeneration into 1 Rage, but adds a flat 3 Rage Cost to all your Skills. With this, you don't have to remember about constant Warcrying, or recasting the Rage Vortex so often. (Jewel) Lethal Pride - converts nearby Keystones into special ones. You should get one that grants the Chainbreaker Keystone, which converts every 25 of your Mana Regeneration into 1 Rage, but adds a flat 3 Rage Cost to all your Skills. With this, you don't have to remember about constant Warcrying, or recasting the Rage Vortex so often. |
|
| Commanded leadership over (10000-18000) warriors under Akoya Passives in radius are Conquered by the Karui Historic |
|
 (Body Armour) Loreweave - the best Armour for this Build, it grants you a bit of everything, in every aspect of the Build. Try to get one with the highest maximum Resistances, other modifiers aren't as impactful. (Body Armour) Loreweave - the best Armour for this Build, it grants you a bit of everything, in every aspect of the Build. Try to get one with the highest maximum Resistances, other modifiers aren't as impactful. |
|
| +(8-24) to all Attributes Adds (4-10) to (14-36) Physical Damage to Attacks (20-60)% increased Global Critical Strike Chance +(15-50) to maximum Energy Shield +(20-60) to maximum Life +(20-50) to maximum Mana (6-30)% increased Rarity of Items found (15-50)% increased Elemental Damage Your Maximum Resistances are (76-78)% |
|
 (Boots) Rare Boots - here you should look for defensive bonuses like maximum Life and Resistance. It should also provide a decent amount of Movement Speed. (Boots) Rare Boots - here you should look for defensive bonuses like maximum Life and Resistance. It should also provide a decent amount of Movement Speed. |
|
| Min. requirements: 25% Movement Speed +60 to maximum Life 60% Total Elemental Resistances Optional affixes: chance to gain Onslaught on Kill Chaos Resistance Life Regeneration % chance to Avoid Elemental Ailments |
|
 (Gloves) Rare Gloves - on your Gloves, you should aim for high Attack Speed and Damage bonuses, but don't forget about the usual maximum Life and Resistance. The Rage Regeneration from the Eldritch Implicit can be useful too. (Gloves) Rare Gloves - on your Gloves, you should aim for high Attack Speed and Damage bonuses, but don't forget about the usual maximum Life and Resistance. The Rage Regeneration from the Eldritch Implicit can be useful too. |
|
| Min. requirements: 70 maximum Life 70% Total Elemental Resistances Optional affixes: % increased Damage during any Flask Effect % increased Damage while Leeching % increased Attack Speed Gain 1 Rage on Hit with Attacks |
|
 (Belt) The Magnate - you will have no problems reaching 400 Strenght with this Build, so you should use this Belt to greatly increase your Damage and Flask sustain. You should buy one with a useful Corrupted Implicit, such as Elemental Resistances or Crit Multiplier. (Belt) The Magnate - you will have no problems reaching 400 Strenght with this Build, so you should use this Belt to greatly increase your Damage and Flask sustain. You should buy one with a useful Corrupted Implicit, such as Elemental Resistances or Crit Multiplier. |
|
| +(40-50) to Strength +(20-25)% to all Elemental Resistances 50% increased Flask Charges gained 10% chance to deal Double Damage while you have at least 200 Strength 5% chance to deal Triple Damage while you have at least 400 Strength |
|
 (Amulet) Marylene's Fallacy - this Amulet significantly decreases your Critical Stike Chance, but grants insane amounts of Crit Multiplier, and adds the Culling effect. Thanks to the Ambush, you will be nearly Crit capped anyway. (Amulet) Marylene's Fallacy - this Amulet significantly decreases your Critical Stike Chance, but grants insane amounts of Crit Multiplier, and adds the Culling effect. Thanks to the Ambush, you will be nearly Crit capped anyway. |
|
| +(20-30) to Intelligence +(80-120) to Accuracy Rating +(210-240)% to Global Critical Strike Multiplier +(80-100) to Evasion Rating (10-15)% increased Light Radius 40% less Critical Strike Chance Critical Strikes have Culling Strike |
|
 (Ring) Rare Ring - look for additional Physical Damage to your Attacks Critical Strike Multiplier, minimum Frenzy Charges, maximum Life, and Resistance. They should also increase your Mana Regeneration Rate if you use the Chainbreaker Keystone. (Ring) Rare Ring - look for additional Physical Damage to your Attacks Critical Strike Multiplier, minimum Frenzy Charges, maximum Life, and Resistance. They should also increase your Mana Regeneration Rate if you use the Chainbreaker Keystone. |
|
| Min. requirements: 60 to Maximum Life 60% Total Elemental Resistances 55% increased Mana Regeneration Rate Optional affixes: Adds # to # Physical Damage to Attacks Attributes Critical Strike Multiplier |
|
 (Jewel) Rare Jewels - try to get lacking Resistances or Attributes if you can't get them on your regular Gear pieces. Other than that, look for maximum Life, Critical Strike Multiplier, and Attack Speed. (Jewel) Rare Jewels - try to get lacking Resistances or Attributes if you can't get them on your regular Gear pieces. Other than that, look for maximum Life, Critical Strike Multiplier, and Attack Speed. |
|
| Recommended affixes: % to Melee Critical Strike Multiplier % increased Attack Speed with Axes increased Maximum Life Elemental Resistances Attributes |
|
 (Jewel) Watcher's Eye - this jewel can have very powerful bonuses for your Attacks while you are affected by Precision. It can be quite expensive if you search for more synergistic modifiers at once. (Jewel) Watcher's Eye - this jewel can have very powerful bonuses for your Attacks while you are affected by Precision. It can be quite expensive if you search for more synergistic modifiers at once. |
|
| (4-6)% increased maximum Energy Shield (4-6)% increased maximum Life (4-6)% increased maximum Mana <Two or Three random aura modifiers> Recommended modifiers: (40-60)% increased Attack Damage while affected by Precision (10-15)% increased Attack Speed while affected by Precision +(20-30)% to Critical Strike Multiplier while affected by Precision |
|
 (Cluster Jewel) Large Cluster Jewel - it is a great way to get a source of Life and Mana Leech. You will also gain 2 regular Jewel Sockets and some bonuses to Damage. The Run Through Notable is very strong if you still don't have a 100% chance to Impale on Hit. (Cluster Jewel) Large Cluster Jewel - it is a great way to get a source of Life and Mana Leech. You will also gain 2 regular Jewel Sockets and some bonuses to Damage. The Run Through Notable is very strong if you still don't have a 100% chance to Impale on Hit. |
|
| 1 Added Passive Skill is Feed the Fury 1 Added Passive Skill is Martial Prowess 1 Added Passive Skill is Run Through |
|
 (Flask) Bottled Faith - it is the best offensive Flask for this Build. The extra Critical Strike Chance is not useful, but extra Damage against Enemies on Consecrated Ground is very useful to have. (Flask) Bottled Faith - it is the best offensive Flask for this Build. The extra Critical Strike Chance is not useful, but extra Damage against Enemies on Consecrated Ground is very useful to have. |
|
| (30-15)% reduced Duration Consecrated Ground created by this Flask has Tripled Radius Consecrated Ground created during Effect applies (7-10)% increased Damage taken to Enemies (100-150)% increased Critical Strike Chance against Enemies on Consecrated Ground during Effect |
|
|
Other suggested Flasks:
|
|
    |
|
|
If you have any other build requests please leave that in the comments below. We are always open to suggestions and constructive feedback.
Pictures used in this article are the intellectual property of Grinding Gear Games.
