
Poisonous Spark of the Nova Pathfinder Build
Poisonous Spark build for a Pathfinder that makes use of Grasping Vines to apply Poison with all types of damagePoisonous Spark of the Nova
Pathfinder Build
Updated for Patch 3.25
The Best Crafty Guides by Odealo
| Guide notes |
| September 15, 2024 -Build created |
| Build Overview | |||
| Tags: [CASTER] [ELEMENTAL] [POISON] [LIFE] | |||
|
Budget: Defenses: |
|
Boss DPS: AoE: |
|
Usually, Poison is inflicted by dealing Physical or Chaos Damage. This build uses a Lightning Spell Damage instead. One of the very few limited ways to Poison with any type of damage is to wear the Inextricable Fate Boots, which until the 3.25 patch almost no one did, because you first have to apply at least 3 Grasping Vines on an enemy, and there were no way to do it quickly and reliably. 3.25 introduced Vinespike Cordial anoint-only notable that causes you to apply one Grasping Vine on Hit during any Life Flask Effect. Life Flask stops working as you reach Maximum Life, so to have it up whenever you want, you have to allocate Pathfinder's Master Surgeon. It's not a big issue since Pathfinder specializes in Poison with their Master Toxicist and Nature's Reprisal, so you would probably want to choose this class anyway. These passives provide you with a lot of damage and Poison Proliferation for a comfortable mapping and bossing experience.
You want to have your Life Flask active permanently, which requires a good source of Flask Charges. Here, we have implemented Alchemist Genius, The Tides of Time, and Nature's Adrenaline to never run out of Life Flask Charges. Use a Divine Life Flask - it recovers less Life per second than an Eternal Life Flask, but it lasts longer, so you won't have to use it that often and it's easier to sustain the Charge drain. You'll also invest in Life Recovery from Flasks, since as it has to be always active you may as well use it as your primary source of Life Recovery. Combine it with instant Life on Hit and Defiance of Destiny. It's very hard to find a build with better life recovery mechanics; we certainly cannot think of one. The Recovery from Flask can be applied to Energy Shield and combined with Eldritch Battery to never run out of "Mana" thanks to the Replica Sorrow of the Divine Flask.
Given a choice of any Spell in the game that you can now Poison witch, Spark of the Nova seems like the best option, but only after investing heavily in Skill Effect Duration, Extra Pierce, and Projectile Speed. These Sparks will move extremely fast and erratic, quickly filling your entire screen with Projectiles.
The build is very durable, not only because of its top-of-the-line Recovery, but also high Maximum Hit it can take. Your Elemental Resistances are quite high, and the Endurance Charges combined with Doppelgänger Guise and Tukohama will reduce Physical Damage Taken by a lot. Your Life Pool is above average. Spell Suppression Chance is easily capped at 100%. You're unaffected by Curses and take no extra damage from Critical Strikes. Be sure to reach high Chaos Resistance to cover all your weak points.
You can also check our other Path of Exile builds right over here Odealo's Crafty Guides - Full List
1. Gameplay
You must keep an eye on your Life Flask to be sure it's always on. After some time one can get used to it and burn the exact timing into the muscle memory. To deal damage use Spark of the Nova. To boost your damage, deploy the Arcanist Brand, which will Trigger three Spells - Despair, Flame Wall, and Sigil of Power. All your other Skills are automated since maintaining Life Flask requires a bit of attention. These are Frost Shield, Immortal Call, and Void Sphere - all linked up with CwDT. Temporal Chains Curse is applied on Hit. Withering Step is linked with Automation. Your passive skills are Haste, Malevolence, Skitterbots, Flesh and Stone, and level-1 Vitality.
|
|
|
|

2. Build's PROS & CONS
| PROS |
|
| CONS |
|
3. Leveling tips
You can't start with Elemental Damage since the Boots require character level 70, which is when you start mapping. Instead, we recommend some other type of Poison build for a Pathfinder. Poisonous Concoction has a proven record of being one of the best starter and leveling builds for this ascendancy. Swap to this build around level 90 and after gathering the required items and jewels.
Bandits:
you should kill all three Bandits for two additional Skill Points
4. Final Skill Tree, Ascendancy Points, and Pantheon
Final Skill Tree:
91 Points Final Skill Tree (doesn't include Unique or Cluster Jewels)
123 Points Path of Building (PoB) link
Ascendancy points:
Preferably in that order:
- Nature's Reprisal
- Master Toxicist
- Nature's Adrenaline
- Master Surgeon
Pantheon:
Major God: Soul of Lunaris: 1% additional Physical Damage Reduction for each nearby Enemy, up to 8%; 1% increased Movement Speed for each nearby Enemy, up to 8%
Minor God: Soul of Tukohama: 3% additional Physical Damage Reduction per second you've been stationary, up to a maximum of 9%
5. Final Gems links
| [DPS] Spark of the Nova setup | |
 |
Spark of the Nova - A slightly stronger version of Spark with a longer Cast Time. The most important difference is that it fires Projectiles around the character, not in front of it. |
 |
Spell Echo Support - The Skill repeats an additional time with a much better Cast Speed, but lower damage. |
 |
Unbound Ailments Support - More Poison Damage and Increased Poison Duration. |
 |
Elemental Focus Support - More Elemental Damage, but you will no longer be able to Shock with the Spark. |
 |
Deadly Ailments Support - Less Hit Damage, but much more Poison Damage. |
 |
Cruelty Support - Cruelty grants more Damage over Time. |
| [UTILITY] Mana Reservation setup | |
 |
Malevolence - Increased Skill Effect Duration and more Damage over Time. Both qualities are important. |
 |
Haste - Increased Movement, Cast, and Attack Speed to boost your DPS and mobility. |
 |
Summon Skitterbots - These will Chill and Shock since you can't do it with Spark. It slows enemies down and increases your DPS output. |
 |
Flesh and Stone - Stay in Sand Stance. You will receive less damage from nearby enemies. |
 |
Enlighten Support - Linked Spells Reserve less Mana. You can Reserve exactly all of it thanks to Eldritch Battery. |
| [UTILITY] CwDT setup | |
 |
Void Sphere - Hinders an enemy, massively reducing its Movement Speed. |
 |
Frost Shield - Drains your ES to form a dome, inside of which you take less damage, especially from enemies outside of it. |
 |
Immortal Call - Reduces incoming Elemental and Physical Damage for a brief moment. |
 |
Cast when Damage Taken Support - Linked Spells are Triggered automatically as you receive enough damage. |
| [UTILITY] Arcanist Brand setup | |
 |
Arcanist Brand - Linked Spells are activated in sequence via the Brand. It saves you buttons to press. |
 |
Despair - Reduces Chaos Resistance. |
 |
Flame Wall - Projectiles passing through the wall have added Fire Damage, which can Poison. |
 |
Sigil of Power - We won't spend any Mana to gain more Stages, but ES instead, although it's still a boost to Lightning Damage, which can Poison. |
| [UTILITY] Vitality setup | |
 |
Vitality - Used not to Regenerate Life, but to unlock a "Life on Hit" mod on a Watcher's Eye. Keep it at level 1. |
 |
Arrogance Support - Vitality Reserves Life instead of Mana. With a proper Reservation Mastery, your Maximum Elemental Resisances are increased by 1%. |
| [UTILITY] Withering Step Spells | |
 |
Withering Step - Applies Withered, grants Phasing, and Elusive buffs. It's not your only source of Withred, but it's 8 out of 15 stacks applied instantly. |
 |
Automation - Withering Step is Triggered automatically. |
| [UTILITY] Dash | |
 |
Dash - Used to Dash around and move faster. You can replace it with other Dash-like Skills if this one doesn't suit you. |
|
|
6. Gear Setup
Gearing up is straightforward because you use many Unique gear pieces, and fixing your Resistances and Attributes is surprisingly easy. You will also need a very specific Rare Helmet and Quiver. Even all your Jewels are of Unique Rarity so there's very little legroom for adjustments. Only your Rings and Cluster Jewels are less defined. In there, you will need to patch up your missing Resistances and Attributes. With Rational Doctrine you have to be very precise with Attributes or else it won't work at its fullest potency, if at all. If you have any excess Dexterity, use green Tattoos for increased Projectile Speed.
Our recommended items will:
- Cap your resistances at 75%
- Provide you with enough DPS and Life to start mapping
|
Stat priorities on items:
|
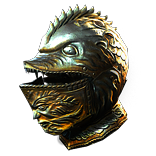 (Helmet) Rare Helmet - On a Helmet you will need Essence-crafted Reservation Efficiency, extra Pierce unlocked by Unveiling, Maximum Life, and a bit of Spell Suppression Chance. For the Eldritch mods, get even more Reservation Efficiency and increased Cast Speed. To fit more Projectile Speed Tattoos, you can go for Dexterity here since it's a base with Evasion. (Helmet) Rare Helmet - On a Helmet you will need Essence-crafted Reservation Efficiency, extra Pierce unlocked by Unveiling, Maximum Life, and a bit of Spell Suppression Chance. For the Eldritch mods, get even more Reservation Efficiency and increased Cast Speed. To fit more Projectile Speed Tattoos, you can go for Dexterity here since it's a base with Evasion. |
|
| Min. requirements: 90 maximum Life Projectiles Pierce an additional Target (crafted Prefix) Mana Reservation Efficiency (Essence Suffix) Spell Suppression Chance Optional affixes: Attributes Elemental Resistances Increased Mana Reservation Efficiency |
|
 (Weapon) Widowhail - There are not that many good mods on a Bow, it's preferred to increase the modifiers of your Quiver instead. You will need one with at least a 200% roll. (Weapon) Widowhail - There are not that many good mods on a Bow, it's preferred to increase the modifiers of your Quiver instead. You will need one with at least a 200% roll. |
|
| (150-250)% increased bonuses gained from Equipped Quiver | |
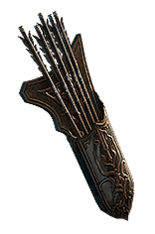 (Off-Hand) Rare Feathered Arrow Quiver - Two extra Pierces can be crafted using an Essence. Projectile speed is very important, you can get it as a Suffix and as Implicit on a Feathered Arrow Quivers. After that, look for Maximum Life, added Elemental Damage, and Resistances. (Off-Hand) Rare Feathered Arrow Quiver - Two extra Pierces can be crafted using an Essence. Projectile speed is very important, you can get it as a Suffix and as Implicit on a Feathered Arrow Quivers. After that, look for Maximum Life, added Elemental Damage, and Resistances. |
|
| Min. requirements: Projectiles Pierce 2 additional Targets (Essence Prefix) 70% increased Projectile Speed (in total) Maximum Life Optional affixes: Resistances Added Elemental Damage (crafted) |
|
 (Body Armour) Doppelgänger Guise - It's the most efficient way to mitigate Physical Hit Damage, which would otherwise be a major issue in this build. Stay Sane. (Body Armour) Doppelgänger Guise - It's the most efficient way to mitigate Physical Hit Damage, which would otherwise be a major issue in this build. Stay Sane. |
|
| Grants Level 20 Unhinge Skill (40-60)% more Critical Strike Chance while Insane Enemies Killed by your Hits are destroyed while Insane (40-30)% less Physical and Chaos Damage Taken while Sane Regenerate 10% Life over one second when Hit while Sane |
|
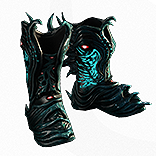 (Boots) Inextricable Fate - A core element of the build. With Vinespike Cordial and Life Flask & Master Surgeon, you will apply Grasping Vines on Hit with Spark. These Boots will let you Poison with any type of damage as long as the enemy is affected by 3 Vines. Inextricable Fate are also great Boots on their own. (Boots) Inextricable Fate - A core element of the build. With Vinespike Cordial and Life Flask & Master Surgeon, you will apply Grasping Vines on Hit with Spark. These Boots will let you Poison with any type of damage as long as the enemy is affected by 3 Vines. Inextricable Fate are also great Boots on their own. |
|
| +(13-17)% to Chaos Resistance +(80-100) to maximum Life 30% increased Movement Speed You gain 3 Grasping Vines when you take a Critical Strike Nearby stationary Enemies gain a Grasping Vine every 0.5 seconds All Damage inflicts Poison against Enemies affected by at least 3 Grasping Vines You take (50-30)% reduced Extra Damage from Critical Strikes by Poisoned Enemies |
|
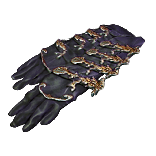 (Gloves) Asenath's Gentle Touch - Applies Temporal Chains on Hit and explodes enemies on kill. It's a great improvement to clear speed which saves you buttons to press. (Gloves) Asenath's Gentle Touch - Applies Temporal Chains on Hit and explodes enemies on kill. It's a great improvement to clear speed which saves you buttons to press. |
|
| +(20-30) to Intelligence +(60-80) to maximum Life +(60-80) to maximum Mana Curse Enemies with Temporal Chains on Hit Non-Aura Curses you inflict are not removed from Dying Enemies Enemies near corpses affected by your Curses are Blinded Enemies Killed near corpses affected by your Curses explode, dealing 3% of their Life as Physical Damage |
|
 (Belt) The Tides of Time - Provides you with Life Flask Charges and Increases Life Recovered from Flasks. The Mana Flask aspects are not important. (Belt) The Tides of Time - Provides you with Life Flask Charges and Increases Life Recovered from Flasks. The Mana Flask aspects are not important. |
|
| +(260-320) to Armour and Evasion Rating 100% increased Life Recovery from Flasks 100% increased Mana Recovery from Flasks Flasks applied to you have 25% increased Effect Life Flasks gain (0-3) Charges every 3 seconds Mana Flasks gain (0-3) Charges every 3 seconds Utility Flasks gain (0-3) Charges every 3 seconds |
|
 (Amulet) Defiance of Destiny - One of the best Amulets defensive-wise. You have good passive Recovery from a Life Flask, but the proactive recovery before you get Hit will save you if that's not enough, which can happen in dire cases. (Amulet) Defiance of Destiny - One of the best Amulets defensive-wise. You have good passive Recovery from a Life Flask, but the proactive recovery before you get Hit will save you if that's not enough, which can happen in dire cases. |
|
| (20-30)% increased Mana Regeneration Rate +(60-80) to maximum Life +(10-40)% to Fire Resistance +(10-40)% to Cold Resistance +(10-40)% to Lightning Resistance Gain (10-20)% of Missing Unreserved Life before being Hit by an Enemy |
|
| Recommended Anointments: Vinespike Cordial |
|
 (Ring) Rare Rings - Rings are a source of Attributes, Maximum Life, and Cast Speed. Resistance may not even be needed. Craft a Prefix that adds Elemental Damage given the opportunity. (Ring) Rare Rings - Rings are a source of Attributes, Maximum Life, and Cast Speed. Resistance may not even be needed. Craft a Prefix that adds Elemental Damage given the opportunity. |
|
| Min. requirements: 90 maximum Life Strength and Intelligence Optional affixes: adds Elemental Damage (crafted) Cast Speed Resistances |
|
 (Jewel) Large Cluster Jewel - 12-passives Large Cluster Jewel with increased Intelligence and increased effect of Small Passives is your best option. These Small passives should also grant you some Maximum Life, Strength, Intelligence, or some type of Resistnace. (Jewel) Large Cluster Jewel - 12-passives Large Cluster Jewel with increased Intelligence and increased effect of Small Passives is your best option. These Small passives should also grant you some Maximum Life, Strength, Intelligence, or some type of Resistnace. |
|
| Recommended affixes: Added Passive Skills have 35% increased Effect Added Passive Skills also grant Maximum Life Added Passive Skills also grant Resisances Added Passive Skills also grant Strength or Intelligence |
|
 (Jewel) Medium Cluster Jewel - Flask Duration Medium Cluster Jewel with Spiked Concoction for Alchemist's Genius, and Brewed for Potency is mandatory. (Jewel) Medium Cluster Jewel - Flask Duration Medium Cluster Jewel with Spiked Concoction for Alchemist's Genius, and Brewed for Potency is mandatory. |
|
| Recommended affixes: 1 Added Passive Skill is Spiked Concoction 1 Added Passive Skill is Brewed for Potency |
|
 (Jewel) Small Cluster Jewel - Enduring Composure will generate Endurance Charges after getting Hit, but if you lack Mana, which you shouldn't, find a Jewel that increases your Mana Reservation Efficiency, or Efficiency of Malevolence/Haste only. (Jewel) Small Cluster Jewel - Enduring Composure will generate Endurance Charges after getting Hit, but if you lack Mana, which you shouldn't, find a Jewel that increases your Mana Reservation Efficiency, or Efficiency of Malevolence/Haste only. |
|
| Recommended affixes: 1 Added Passive Skill is Enduring Composure something or Reservation Efficiency |
|
 (Jewel) Militant Faith - Socket it near Shaper notable. You're only looking for specific Devotion modifiers, not a Keystone. These are Elemental Resistances per Devotion and Elemental Damage per Devotion. You will pair it up with Unnatural Instinct. (Jewel) Militant Faith - Socket it near Shaper notable. You're only looking for specific Devotion modifiers, not a Keystone. These are Elemental Resistances per Devotion and Elemental Damage per Devotion. You will pair it up with Unnatural Instinct. |
|
| Carved to glorify (2000-10000) new faithful converted by High Templar (Avarius-Dominus-Maxarius) Passives in radius are Conquered by the Templars Historic <two random mods of devotion> |
|
 (Jewel) Rational Doctrine - Balance your Strength and Intelligence, making them higher than Dexterity. You will now be permanently affected by Consecrated Ground, and your enemies by Profane Ground, which boosts your damage and survivability. (Jewel) Rational Doctrine - Balance your Strength and Intelligence, making them higher than Dexterity. You will now be permanently affected by Consecrated Ground, and your enemies by Profane Ground, which boosts your damage and survivability. |
|
| <Three random synthesis implicit modifiers> You have Consecrated Ground around you while stationary if Strength is your highest Attribute 25% chance to create Profane Ground on Critical Strike if Intelligence is your highest Attribute Effects of Consecrated Ground you create Linger for 4 seconds Effects of Profane Ground you create Linger for 4 seconds |
|
 (Jewel) Thread of Hope - You will need two of these, One, with a Massive Ring, socketed near Eternal Youth Keystone, will let you allocate 5 good notables. The other one, with a Large Ring, sandwiched between Infused and Frenetic notables, will allow you to allocate another 5 useful notables. Check PoB to see which ones to pick. (Jewel) Thread of Hope - You will need two of these, One, with a Massive Ring, socketed near Eternal Youth Keystone, will let you allocate 5 good notables. The other one, with a Large Ring, sandwiched between Infused and Frenetic notables, will allow you to allocate another 5 useful notables. Check PoB to see which ones to pick. |
|
| Radius: Variable Only affects Passives in (Small-Very Large) Ring Passives in Radius can be Allocated without being connected to your tree -(20-10)% to all Elemental Resistances |
|
 (Jewel) The Light of Meaning - Socket it near Supreme Ego to increase your chaos Damage substantially. (Jewel) The Light of Meaning - Socket it near Supreme Ego to increase your chaos Damage substantially. |
|
| Passive Skills in Radius also grant 6% increased Chaos Damage | |
 (Jewel) Impossible Escape - Find a version with Chaos Inoculation, and remotely allocate all the notables in its radius. (Jewel) Impossible Escape - Find a version with Chaos Inoculation, and remotely allocate all the notables in its radius. |
|
| Passive in Radius of <Keystone> can be Allocated without being connected to your tree | |
 (Jewel) Unnatural Instinct - Socket it near Harrier notable; it will grant you more Devotion due to its overlapping radius with Militant Faith. (Jewel) Unnatural Instinct - Socket it near Harrier notable; it will grant you more Devotion due to its overlapping radius with Militant Faith. |
|
| Allocated Small Passive Skills in Radius grant nothing Grants all bonuses of Unallocated Small Passive Skills in Radius |
|
 (Jewel) Watcher's Eye - You're looking for a Vitality mod for Life on Hit, since you Hit very often. Vitality also has a great mod that increases Life Recovered from Flasks. Your other Auras are Malevolence and Haste. (Jewel) Watcher's Eye - You're looking for a Vitality mod for Life on Hit, since you Hit very often. Vitality also has a great mod that increases Life Recovered from Flasks. Your other Auras are Malevolence and Haste. |
|
| (4-6)% increased maximum Energy Shield (4-6)% increased maximum Life (4-6)% increased maximum Mana <Two or Three random aura modifiers> |
|
 (Flask) Replica Sorrow of the Divine - Eldritch Battery makes your Mana obsolete, and you're now using ES instead of it. This Flask also rapidly Recovers your ES alongside Life so you'll never run out of this resource. (Flask) Replica Sorrow of the Divine - Eldritch Battery makes your Mana obsolete, and you're now using ES instead of it. This Flask also rapidly Recovers your ES alongside Life so you'll never run out of this resource. |
|
| 40% increased Damage Creates Consecrated Ground on Use (25-50)% increased Duration Eldritch Battery during Effect Life Recovery from Flasks also applies to Energy Shield during Effect |
|
 (Flask) Progenesis - With your exceptionally good Life Recovery, your survivability is bottlenecked only by Hits that would one-shot you. Equip this Flask to Receive less immediate damage from Hits, making it more gradual. (Flask) Progenesis - With your exceptionally good Life Recovery, your survivability is bottlenecked only by Hits that would one-shot you. Equip this Flask to Receive less immediate damage from Hits, making it more gradual. |
|
| +35% to Chaos Resistance (20-10)% reduced Charges per use (-35-35)% increased Duration When Hit during effect, 25% of Life loss from Damage taken occurs over 4 seconds instead |
|
|
Other suggested Flasks:
|
|
   |
|
|
If you have any other build requests please leave them in the comments below. We are always open to suggestions and constructive feedback.
Pictures used in this article are the intellectual property of Grinding Gear Games.
