Poison Spellslinger Daughter of Oshabi Build
A rare Spellslinger build for the Daughter of Oshabi from the Legacy of Phrecia event.Detonate Dead of Chain Reaction Spellslinger
Daughter of Oshabi Build
Updated for Patch 3.25
The Best Crafty Guides by Odealo
| Guide notes | |||
| March 1, 2025 -Build created |
|||
| Build overview | |||
| Tags: [RANGED] [ELEMENTAL] [POISON] [LIFE] | |||
|
Budget: Defenses: |
|
Boss DPS: AoE: |
|
Daughter of the Oshabi is a ranger's ascendancy class viable only during the Legacy of Phrecia event. The passives that are of great interest to us are Roots of the Grove and Spellslinging. Roots of the Grove have an effect similar to the already existing combo of Vinespike Cordial and Inextricable Fate (which we have used in this build). After hitting an enemy a few times they'll be eligible for being Poisoned with any damage type. And you have a 100% chance of being Poisoned. They have to be affected by at least 5 Grasping Vines which you inflict on Hit; it's a stackable debuff that inherently only reduces Movement Speed. To play such a build comfortably you need to have a high Hit Rate. Kinetic Blast has a quite high Hit Rate on its own, even with low Attack Speed. The other ability that Hits is your actual main damaging skill - Detonate Dead of Chain Reaction. It deals Fire Damage so it's never used in Poison builds, but since we can Poison with Fire Damage, it makes for one of the best candidates. You won't cast it yourself since it's a huge waste of time. Instead, link it to Spellslinger and Trigger it on Hit with Kinetic Blast. Spellslinging passive is a major upgrade, as it reduces Mana Reservation of Spellslinging Skills and increases their Cooldown Recovery Rate by 50% both. Now, you can Detonate Corpses more than 3 times a second. The dead bodies will pop up now and then, but to have them always on hand you'll have to use Desecrate. Not by self-casting, but with another Spellslinging setup. Since Spellslinging comes at a discount, we'll use yet another such setup to cast various Curses like Despair, Enfeeble, Punishment, and, of course, Temporal Chains. To accomplish this you'll need the Anathema Ring.
All these Spells will cost you a lot of Mana, so to deal with it allocate Eldritch Battery and link one of your skills with Energy Leech. Defensive-wise is a very simple build with high Maximum Life, Spell Suppression, and some Evasion Rating. Life can be recovered via Leech, or better yet, on-hit. Enfeeble and Blind Effect from Asenath's Gloves will increase your survival rate big time. The Woodland Shrines Passive will boost your overall performance while mapping by creating various Shrines. Scaling up your DPS in a Detonate Dead build can be tricky, but more about that in the gear section of the guide.
You can also check all our Guides for the on-going Event right here: Best Builds for Legacy of Phrecia
1. Gameplay
It's a one-button build. You'll Attack with Kinetic Blast which triggers all the Spellslinging Spells - Detonate Dead, Curses, and Desecrate. Movement can be enhanced with Shield Charge and Frostblink. If you want a bit of extra damage, use Plague Bearer. Your passive skills are Grace and Precision.
|
|
|
|

2. Build's PROS & CONS
| PROS |
|
| CONS |
|
3. Leveling tips
We recommend starting as a Poisonous Concoction starter build. Allocate Woodland Shrines first for a smooth levelling experience. After that, you may go for the Roots of the Grove, and at this point, you'll be able to Poison with any damage, although it first requires a high hit rate. If you want to switch into a wand build, or a full-on Spell Slinger as soon as possible, go for Spellslinging instead, and take Roots of the Grove last. That would require you to Sling Spells that deal inherently Chaos or Physical Damage. Now, you can start shaping the build to resemble this final version of it.
Bandits:
Two Additional Passive Skill Points seem like the best option for this build
4. Final Skill Tree, Ascendancy Points, and Pantheon
Final Skill Tree:
109 Points Final Skill Tree (doesn't include Cluster or Unique Jewels)
123 Points Path of Building (PoB) link
Ascendancy points:
Preferably in that order:
- Woodland Shrines
- Roots of the Grove
- Illuminating Wisps
- Spellslinging
Pantheon:
Major God: Soul of the Brine King: You cannot be Stunned if you've been Stunned or Blocked a Stunning Hit in the past 2 seconds
Minor God: Soul of Ryslatha: 60% increased Life Recovery from Flasks used when on Low LifeLife Flasks; gain 3 Charges every 3 seconds if you haven't used a Life Flask Recently
5. Final Gems links
| [DPS] Spellslinger setup | |
 |
Spellslinger - Spellslinger triggers Detonate Dead of Chain Reaction, which is your main damage ability, on any Hit. |
 |
Detonate Dead of Chain Reaction - Explodes a Corpse which Poisons the enemy. It's generally a better version of Detonate Dead if there are many corpses to detonate and if the Cast Time and Mana Cost are of no consequence, which is the case here. |
 |
Unbound Ailments Support - More Poison Damage and Poison Duration. |
 |
Cruelty Support - More Hit Damage and Damage over Time via Cruelty buff. |
 |
Energy Leech Support - Energy Shield is used as a Mana Pool with the Eldritch Battery on. |
 |
Elemental Focus Support - More Elemental Damage with no drawback, since you're all about Poison. |
| [DPS] Kinetic Blast setup | |
 |
Kinetic Blast - Attack that slings all the other Spells. You don't need a lot of Attack Speed here since Spells Triggered this way are bound by their Cooldown, and the KB hits many times per attack, especially with four wisps. |
 |
Sacred Wisps Support - With Illuminating Wisps you can have two more Sacred Wisps, so it's wise to take advantage of it. They will use the Kinetic Blast alongside you. |
 |
Withering Touch Support - Applies Withered on enemies - a stackable debuff that increases Chaos Damage taken. |
 |
Faster Attacks Support - Increases your Attack Speed. If you don't need it, swap this Gem for Greater Multiple Projectiles. |
| [DPS] Curse setup | |
|
Spellslinger - Another Spellslinger. You can afford it since Spellslinging reduces Spellslinger Reservation by 50%. |
 |
Despair - Reduces Chaos Resistance so that the enemy takes more damage from Poison. |
 |
Enfeeble - Cursed enemies deal less damage and have reduced Accuracy Rating. |
 |
Punishment - Enemies are Debilitated and take greatly increased Damage while on Low Life. |
| [UTILITY] Desecrate setup | |
|
Spellslinger - Another Spellslinger to trigger a utility Spell. |
 |
Desecrate - Creates corpses to be later exploded with Detonate Dead. |
 |
Spell Cascade - Desecrate repeats two additional times which creates more corpses. |
| [MOBILITY] Shield Charge setup | |
 |
Shield Charge - You can move faster while charging. |
|
Faster Attacks Support - Shield Charge is faster. |
| [UTILITY] other gems | |
 |
Plague Bearer - Creates a damaging area around your character from the Poison it has stored. |
 |
Grace - More and additional Evasion Rating. |
 |
Precision - Added and increased Accuracy Rating to Hit enemies with Attacks. |
 |
Frostblink - Use it to instantly teleport if the situation requires it. |
 |
Temporal Chains - It's an obligatory Curse. It usually comes from Asenath's Gloves, so if you don't have them yet, put it in your Spellslinger setup instead of Punishment or Enfeeble. |
|
|
5. Gear Setup
We're expecting you to equip Asenath's Gentle Touch and Anathema, since they allow you to constantly apply 4 Curses on an enemy, boosting your offensive and defensive capabilities. If you don't have these Gloves you'll have to give up Punishment or Enfeeble. Leper's Alms is another great item that we cannot recommend enough. All the other gear pieces are Rare and there are not that many Unique substitutes to them. There you should look for Maximum Life, Resistances, and maybe Spell Suppression Chance if you can cap it. Mana Reservation Efficiency should not be needed at all, but it, or Maximum Mana, will be helpful if you wish to level up Precision all the way up. To trigger Spell more often, you may want to seek Cooldown Recovery Rate, found on Belt and Boots. With Spellslinger level 21 and Spellslinging allocated, you'll need 13% additional Cooldown Recovery Rate to reach the next breakpoint. You're dealing Poison Damage, which is Chaos Damage over Time; wand and jewels will increase these stats. Increases to the Gem Level of Detonate Dead are not very important since the damage scales with Corpses' Maximum Life more than anything.
|
Stat priorities on items:
|
 (Helmet) Rare Helmet - Prioritize Maximum Life, Resistances, and maybe Spell Suppression or Intelligence, since they can be found on a Helmet too. For the Eldritch mods get the increased Effect of one of your Curses and increased Duration of Ailments on Enemies or Physical-to-Elemental Damage shift. (Helmet) Rare Helmet - Prioritize Maximum Life, Resistances, and maybe Spell Suppression or Intelligence, since they can be found on a Helmet too. For the Eldritch mods get the increased Effect of one of your Curses and increased Duration of Ailments on Enemies or Physical-to-Elemental Damage shift. |
|
| Min. requirements: +100 to maximum Life +80% Elemental Resistances Optional affixes: Spell Suppression Chance Attributes Accuracy Rating Projectiles Pierce an additional Target (veiled Prefix) |
|
 (Body Armour) Rare Body Armour - Here aim for high Maximum Life, Resistances, Spell Suppression, and base defences like Energy Shield - it'll be used as Mana. For the Eldritch mods get Physical-to-Elemental Damage shift and increased Effect of your Curses. (Body Armour) Rare Body Armour - Here aim for high Maximum Life, Resistances, Spell Suppression, and base defences like Energy Shield - it'll be used as Mana. For the Eldritch mods get Physical-to-Elemental Damage shift and increased Effect of your Curses. |
|
| Min. requirements: +120 maximum Life +80% Elemental Resistances Optional affixes: Spell Suppression Chance Chaos Resistance Evasion and Energy Shield |
|
 (Weapon) Rare Wand - Seek a Wand with high Attack Speed and a lot of added local damage. Any damage will do since all damage can Poison. Chaos Damage and DoT Multiplier are, too, great additions. (Weapon) Rare Wand - Seek a Wand with high Attack Speed and a lot of added local damage. Any damage will do since all damage can Poison. Chaos Damage and DoT Multiplier are, too, great additions. |
|
| Min. requirements: 12% increased Attack Speed adds Elemental Damage Optional affixes: increased Chaos Damage Chaos Damage over Time Multiplier |
|
 (Off-hand) Leper's Alms - Leper's Alms Shield has Maximum Life, lots of Evasion, ES, and it increases the Duration of Ailments on Enemies by 40%, including Poison. It's cheap and common. (Off-hand) Leper's Alms - Leper's Alms Shield has Maximum Life, lots of Evasion, ES, and it increases the Duration of Ailments on Enemies by 40%, including Poison. It's cheap and common. |
|
| +5% chance to Suppress Spell Damage (500-600)% increased Evasion and Energy Shield +(60-80) to maximum Life 40% increased Duration of Ailments on Enemies +(3-4)% Chance to Block Shared Suffering |
|
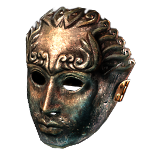
 (Gloves) Asenath's Gentle Touch - Excellent in any Poison Build. Temporal Chains will boost your damage and the explosions will enhance your clear speed. There's also Maximum Life and Intelligence, both will be needed. (Gloves) Asenath's Gentle Touch - Excellent in any Poison Build. Temporal Chains will boost your damage and the explosions will enhance your clear speed. There's also Maximum Life and Intelligence, both will be needed. |
|
| +(20-30) to Intelligence +(60-80) to maximum Life +(60-80) to maximum Mana Curse Enemies with Temporal Chains on Hit Non-Aura Curses you inflict are not removed from Dying Enemies Enemies near corpses affected by your Curses are Blinded Enemies Killed near corpses affected by your Curses explode, dealing 3% of their Life as Physical Damage |
|
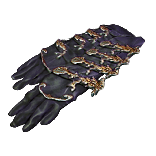
 (Gloves) The Embalmer - Increased Poison Duration increases Poison Damage directly. Here you can socket your Kinetic Blast setup and benefit from added and more Chaos Damage. This way, and with a Wand plentiful with added Damage, your Kinetic Blast will be quite strong on its own. It's comparable to Asenath's Gentle Touch. (Gloves) The Embalmer - Increased Poison Duration increases Poison Damage directly. Here you can socket your Kinetic Blast setup and benefit from added and more Chaos Damage. This way, and with a Wand plentiful with added Damage, your Kinetic Blast will be quite strong on its own. It's comparable to Asenath's Gentle Touch. |
|
| Socketed Gems are Supported by Level 20 Vile Toxins Adds (13-17) to (23-29) Chaos Damage +(50-70) to maximum Life +(17-29)% to Chaos Resistance (20-25)% increased Poison Duration |
|
 (Boots) Rare Boots - On your Boots you will find Maximum Life, Movement Speed, and Cooldown Recovery Rate. It's a Shaper/Crusader Suffix, but can be also found as Eater's Implicit. For the Exarch Implicit, you may want Action Speed. (Boots) Rare Boots - On your Boots you will find Maximum Life, Movement Speed, and Cooldown Recovery Rate. It's a Shaper/Crusader Suffix, but can be also found as Eater's Implicit. For the Exarch Implicit, you may want Action Speed. |
|
| Min. requirements: +90 maximum Life increased Cooldown Recovery Rate 25% increased Movement Speed Optional affixes: Elemental Resistances Spell Suppression Chance Chaos Resistance |
|
 (Belt) Rare Belt - Prioritize Maximum Life, Cooldown Recovery Rate, and Resistances of all kinds. Not much else can be found on a Belt. (Belt) Rare Belt - Prioritize Maximum Life, Cooldown Recovery Rate, and Resistances of all kinds. Not much else can be found on a Belt. |
|
| Min. requirements: +100 maximum Life +40% to Total Elemental Resistances increased Cooldown Recovery Rate Optional affixes: Attributes Chaos Resistance |
|
 (Amulet) Rare Amulet - The Amulet will be a source of DoT Multiplier, Maximum Life, and Resistances. Accuracy and Attributes will be fine. Reduced Mana Cost can be crafted. (Amulet) Rare Amulet - The Amulet will be a source of DoT Multiplier, Maximum Life, and Resistances. Accuracy and Attributes will be fine. Reduced Mana Cost can be crafted. |
|
| Min. requirements: Elemental Resistances +90 to Maximum Life Damage over Time Multiplier Optional affixes: Attributes Non-Channelling Skills have -(7-6) to Total Mana Cost Accuracy Rating |
|
| Recommended Anointments: Divine Judgement Acuity Growth and Decay |
|
 (Ring) Rare Ring - Prioritize Maximum Life and Resistances. Then, you can keep an eye out for Attributes, Accuracy, or added damage to Attack; damage of any type. (Ring) Rare Ring - Prioritize Maximum Life and Resistances. Then, you can keep an eye out for Attributes, Accuracy, or added damage to Attack; damage of any type. |
|
| Min. requirements: +90 to Maximum Life 80% total Resistance Optional affixes: Attributes Non-Channelling Skills have -(7-6) to Total Mana Cost Accuracy Adds damage to Attacks increased Elemental Damage with Attack Skills |
|
 (Ring) Anathema - After allocating the Infused, which you can do with just one point, you'll be able to inflict 4 Curses, which we can do easily with Spellslinger. (Ring) Anathema - After allocating the Infused, which you can do with just one point, you'll be able to inflict 4 Curses, which we can do easily with Spellslinger. |
|
| +(15-25) to maximum Energy Shield +(30-40) to Intelligence (10-15)% increased Cast Speed (10-20)% chance to gain a Power Charge when you Cast a Curse Spell Your Curse Limit is equal to your maximum Power Charges |
|
 (Jewel) Rare Jewels - There are several modifiers present here that will boost your Poison Damage, such as Poison Duration, Damage over Time, Damage with Poison, and Chaos Damage over Time Multiplier. Top it off with increased Maximum Life. (Jewel) Rare Jewels - There are several modifiers present here that will boost your Poison Damage, such as Poison Duration, Damage over Time, Damage with Poison, and Chaos Damage over Time Multiplier. Top it off with increased Maximum Life. |
|
| Recommended affixes: Maximum Life increased Damage with Poison Chaos Damage over Time Multiplier increased Damage over Time increased Poison Duration Attributes Resistances Attack Speed |
|
 (Jewel) Watcher's Eye - Your Auras are Grace and Precision. Precision has increased Attack Speed while Grace has several defensive options to choose from. Life on Hit while being under the effect of Vitality is so good that you may put on level 1 Vitality because of it. (Jewel) Watcher's Eye - Your Auras are Grace and Precision. Precision has increased Attack Speed while Grace has several defensive options to choose from. Life on Hit while being under the effect of Vitality is so good that you may put on level 1 Vitality because of it. |
|
| (4-6)% increased maximum Energy Shield (4-6)% increased maximum Life (4-6)% increased maximum Mana <Two or Three random aura modifiers> |
|
 (Jewel) The Light of Meaning - This may boost your Chaos Damage. Socket it near Fervour notable. (Jewel) The Light of Meaning - This may boost your Chaos Damage. Socket it near Fervour notable. |
|
| Passive Skills in Radius also grant 6% increased Chaos Damage | |
 (Jewel) Large Cluster Jewel - Chaos Damage Cluster Jewels can roll good notables, like Wicked Pall or Unholy Grace. We recommend one or two such Jewels. (Jewel) Large Cluster Jewel - Chaos Damage Cluster Jewels can roll good notables, like Wicked Pall or Unholy Grace. We recommend one or two such Jewels. |
|
| Recommended affixes: 1 Added Passive Skill is Wicked Pall 1 Added Passive Skill is Unholy Grace 1 Added Passive Skill is Unwaveringly Evil 1 Added Passive Skill is Dark Ideation |
|
|
Other suggested Flasks and Tinctures:
|
|
     |
|
|
If you have any other build requests, please leave that in the comments below.
Pictures used in this article are the intellectual property of Grinding Gear Games.
