Molten Strike Juggernaut Build
Juggernaut build that deals Fire Damage with Molten Strike and its' magma projectilesMolten Strike of Zenith
Juggernaut Build
Updated for Patch 3.27
The Best Crafty Guides by Odealo
| Guide notes |
| August 10, 2024 -Adjusted the Passive Tree and Item setups to massively improve Damage and Clear Speed August 28, 2025 -Updated for Patch 3.26 November 11, 2025 -Updated for Patch 3.27 |
| Build overview | |||
| Tags: [MELEE] [FIRE/CHAOS] [LIFE] [STARTER] | |||
|
Budget: Defenses: |
|
Boss DPS: AoE: |
|
The Molten Strike has always been historically one of the strongest Melee Skills in the game, and the recent changes further reinforced that statement. It is a Melee Skill, but most of its Damage comes from the Projectiles it creates, and more specifically, the AoE explosions they create on the ground, which allows for "Shotgunning", meaning all Projectiles can deal their Damage to the same Enemy. You can also make the Projectiles return back to you, dealing the Damage again in an even narrower area. The Transfigured Molten Strike of Zenith deals less Damage than the regular version until you Hit for the 5th time, which deals 1000% More Damage and creates more Projectiles. It can only be used with Two-handed Weapons.
There are many ways to Build your Character around this Skill, but the most prominent version, and rightfully so, is the Strength Stacking, which uses various Items or Passives to add more benefits to this Attribute. By default, you gain 2% Melee Physical Damage and 5 maximum Life for every 10 Strength you have. The Iron Will Keystone makes your Strength also affect all Spell Damage types, which you can convert again into generic Attack Damage with the Crown of Eyes Helmet, which allows you to use Elemental or Chaos Damage types instead of just Physical, and it also affects the Projectile component of the Molten Strike. The Iron Fortress Armour improves that bonus to 3% per 10 Strength and grants you a Chance to Block Attack Damage. The Juggernaut's Undeniable effectively grants you 1% Attack Speed per 75 Strength and solves your Accuracy problems. Lastly, as a source of your flat Damage, you can use the Replica Alberon's Warpath Boots for Chaos Damage or a Shaper-influenced Sword that grants 3-5 Fire Damage per 10 Strength. With a modest 1500 Strength, you will increase your Attack Damage by 675% and Attack Speed by 200%, so any Weapon with a decent DPS will be good.
Other than the Insane Attack Speed, the Juggernaut Ascendency offers very strong defensive bonuses. You will have 7 Endurance Charges, tons of Armour that also partially applies to Chaos Damage, a reliable Fortify Buff for 20% Hit Damage Reduction, and be Immune to Stuns and Slows. The Strength grants you maximum Life, so it is trivial to reach 8000 maximum Life. Thanks to the high number of Hits, the Vaal Pact instantly restores all your Life with each Attack, but it can be unreliable against Bosses that tend to disappear or become Invulnerable often.
In the 3.26 expansion, Mercenaries are employed to boost this build's damage and durability by applying the Despair Curse for you (it may come from items, and they may apply other additional Curses), providing Auras (Determination and Vitality; Haste is great too), and, most importantly, Wither enemies via Replica Innsbury Edge Swords (two, preferably).
Patch 3.27 took the Mercs away and gave nothing noteworthy back in return. The Foulborn Red Dream may get you a lot of Chaos Resistance, but that's it.
You can also check our other Path of Exile builds right over here Odealo's Crafty Guides - Full List
1. Gameplay
It is a Melee Build to the core, you will Leap Slam into the Enemy and Attack with Molten Strike. You should stand directly on top of the monsters so all Returning Projectiles can Hit them. Use Blood Rage and Berserk to boost your Damage. The Sniper's Mark will be applied automatically, but you can also manually use Despair or Flammability, depending on your setup.
|
Full gameplay video: |
|
|

2. Build's PROS & CONS
| PROS |
|
| CONS |
|
3. Leveling tips
The levelling process is very easy, although you won't benefit that much from stacking Strength without specific Items or Keystones. We recommend levelling up with a regular Melee Setup and transitioning to the final version once you reach Maps. You can use any Melee Skill you want, as the Molten Strike can be underwhelming in terms of Speed without additional Strike Targets. The Smite, Sunder, or Volcanic Fissure of Snaking are all excellent choices. For more tips visit our Marauder Leveling Guide for PoE.
Bandits:
Helping Alira will greatly help with early Gearing, but later on, it is recommended to get the bonus Passive Point.
Leveling Skill Trees:
41 Points Passive Tree
Start with a few Damage Notables and head toward the Blood Magic Keystone to solve the Mana problems entirely. The Resolute Technique is also very helpful.
80 Points Passive Tree
Pick up Martial Expertise for Life Leech and the Damage Notables for your Weapon type, presumably Axes as they offer the most DPS. After that, go for Fortify Mastery and Maximum Life.
4. Final Skill Tree, Ascendancy Points, and Pantheon
Final Skill Tree:
Fire, lower budget version:
110 Points Final Passive Tree (doesn't include Cluster Jewels)
120 Points Path of Building (PoB) link
Chaos, higher budget version:
110 Points Final Passive Tree (doesn't include Cluster Jewels)
120 Points Path of Building (PoB) link
Ascendancy points:
Preferably in that order:
- Unstoppable
- Unflinching
- Undeniable
- Unbreakable or Unrelenting
Pantheon:
Major God: Soul of Arakaali: 10% reduced Damage taken from Damage Over Time; +40% Chaos Resistance against Damage Over Time
Minor God: Soul of Shakari: 50% less Duration of Poisons on You, You cannot be Poisoned while there are at least 3 Poisons on you; 5% reduced Chaos Damage taken
5. Final Gems links
| [DMG] Molten Strike of Zenith setup | |
 |
Molten Strike of the Zenith - attacks with your Two-handed Weapon, releasing fiery Projectiles that fall on the ground dealing Damage in a small Area. Your every 5th Hit deals 1000% more Damage and releases 5 additional Projectiles. |
 |
Multistrike Support - all 3 repeats of your 5th Attack will deal More Damage, but the first 4 Attacks cause an even longer delay for the final payout. |
 |
Returning Projectiles Support - the Projectiles return to you, all overlapping in a single place for a massive burst. You can replace it when you obtain the Sword Enchant or Nimis Ring. |
| Fire Version | |
 |
Elemental Damage with Attacks Support - your Attacks deal more Elemental Damage, and the Awakened Version makes you immune to Elemental Reflect. |
 |
Fire Penetration Support - improves your Damage against Resistant Enemies and inflicts Fire Exposure. |
 |
Elemental Focus Support - in this Setup Ignite deals trivial Damage, so you can disable it to get more Elemental Damage for your Hits. |
| Chaos Version | |
 |
Void Manipulation Support - improves your Chaos Damage but disables Elemental Damage. |
 |
Volatility Support - it greatly improves your Maximum Damage and lowers the Minimum Damage, which is not disadvantageous, as it is very low anyway. |
 |
Endurance Charge on Melee Stun Support - in this Setup, Ignite deals trivial Damage, so you can disable it to get more Elemental Damage for your Hits. If your Sword has Elder's "Socketed Gems are Supported by Level 10 Endurance Charge on Melee Stun" Prefix, use Slower Projectiles instead of this Gem form. |
| [UTILITY] Mobility setup | |
 |
Leap Slam - a Movement Attack that allows you to move faster and jump over obstacles. |
 |
Faster Attacks Support - you can use Leap Slam more frequently, resulting in increased mobility. |
 |
Momentum Support - slightly improves your Attack Speed further. |
 |
Fortify Support - you can optionally get your Fortify Buff from this Setup, but it is not very reliable during Boss fights, where it matters the most. You can also use the Culling Strike Support. |
 |
Frostblink - your secondary Movement Skill, an instant teleport. You can use it without interrupting the Molten Strike repeats. |
| [UTILITY] Aura setup | |
 |
Determination - The Determination is a defensive Aura that improves your Armour Rating. You can also use the Purity of Elements for easier gearing and Ailment Immunity, or Purity of Fire if you have the Jewels for the 100% Cold and Lightning damage shift to Fire. |
 |
Eternal Blessing Support - you can Cast one Aura for free, but it disables all other Mana-reserving Skills. |
 |
Precision - improves your Accuracy and offers useful modifiers on the Watcher's Eye Jewel. You can keep it at level 1 to reduce the Reservation Cost. Instead of Precision, use Clarity if you can't keep up with Mana Spent on Attacks. |
| [UTILITY] Reservation setup | |
 |
Flesh and Stone - stay in Sand Stance to take less Physical Damage. |
 |
Arctic Armour - stay still to take less Physical and Fire Damage. |
| [UTILITY] Curse setup | |
 |
Sniper's Mark - your main Curse, it greatly increases the Damage taken by Enemies from your Projectiles. |
 |
Mark on Hit Support - automatically Triggers the Mark when you Hit an Enemy with any Attack. |
 |
Flammability - your secondary Curse for Fire Setup, it reduces the Fire Resistance of affected Enemies. You can automate it with Cast When Damage Taken Support. |
 |
Despair - The Chaos variant should use the Despair curse, which lowers the Chaos Res. Cast it manually to trigger the Balance of Terror Jewel. It is very important to mention that you have to have Whispers of Doom allocated for it (or Flammability) to work alongside Sniper's Mark. Alternatively, find another way to extend your Curse limit to two. |
| [UTILITY] Guard setup | |
 |
Molten Shell - The recommended guard skill for this build is the Molten Shell. It creates a barrier that absorbs large amounts of Damage and improves your Armour. It can be replaced with Immortal Call if you have the Endurance Charges to spend and to gain back quickly after. |
 |
Cast When Damage Taken Support - you will automatically Trigger linked Spells when you take enough Damage. |
| [UTILITY] Other Gems | |
 |
Blood Rage - a Buff that drains your Life but greatly improves your Attack Speed. You can link it with the Enhance Support, together with other Utility Setups. |
 |
Berserk - improves the effect of your Rage, but also consumes it at an accelerating pace. |
 |
Withering Step - you can use the Withering Step to instantly apply 8 stacks of withered Debuff on the Enemy, which is useful for the Chaos variant. It shares cooldown with Frostblink. It's a great idea to link it to Enhance Support alongside Sniper's Mark, since these two benefit from Quality a lot. |
|
|
6. Gear Setup
There are two possible Setups - Fire and Chaos, but they are very similar in terms of your Gear. The Chaos Version requires Replica Alberon's Warpath, offers more Damage, but is also much more expensive. The Fire version relies on a Rare Shaper-influenced Sword. The amount of Flat Damage from both sources is fairly similar, but the Chaos Version can utilise Withering Debuff, a different modifier on the Weapon, and Volatility Support. The other Gear pieces are identical, which allows for a smooth transition. Certain Unique Items are necessary for Build functionality, such as the Crown of Eyes Helmet, but some are optional. On your Rare Gear, you will need high maximum Life, Strength, Resistance, and other Attributes for Gem Requirements. Attack Speed and Chaos Resistance are also useful.
|
Stat priorities on items:
|
 (Helmet) Crown of Eyes - a core Unique, with the Iron Will Keystone it converts your Melee Physical Damage bonus into a generic Attack Damage bonus at 150% effectiveness and provides Leech. (Helmet) Crown of Eyes - a core Unique, with the Iron Will Keystone it converts your Melee Physical Damage bonus into a generic Attack Damage bonus at 150% effectiveness and provides Leech. |
|
| +(300-350) to Accuracy Rating (120-150)% increased Energy Shield -30% to Fire Resistance (0.4-0.8)% of Attack Damage Leeched as Life (0.2-0.4)% of Attack Damage Leeched as Mana Increases and Reductions to Spell Damage also apply to Attacks at 150% of their value |
|
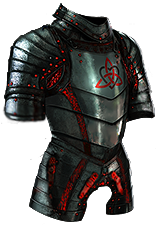 (Body Armour) The Iron Fortress - exceptionally good Unique, it grants you a lot of Strength and improves your Attack Damage bonus from Strength by 50%. It also grants plenty of Block Chance. Only high-end mirror-tier rares will outclass it. Nothing groundbreaking on them either, just tons of basic stats. (Body Armour) The Iron Fortress - exceptionally good Unique, it grants you a lot of Strength and improves your Attack Damage bonus from Strength by 50%. It also grants plenty of Block Chance. Only high-end mirror-tier rares will outclass it. Nothing groundbreaking on them either, just tons of basic stats. |
|
| +1% Chance to Block Attack Damage per 50 Strength Chance to Block Spell Damage is Unlucky +(60-120) to Strength (80-100)% increased Armour 10% reduced Movement Speed Strength's Damage Bonus instead grants 3% increased Melee Physical Damage per 10 Strength |
|
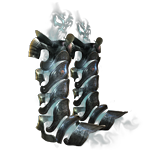 (Boots) Replica Alberon's Warpath - a core Unique for the Chaos Damage variant. It grants you a great amount of Chaos Damage per Strength. It averages out to slightly more than 5 Chaos Damage per 10 Strength, but the Volatility Support is exceptionally effective for the wide range of Damage it provides. It is very expensive. (Boots) Replica Alberon's Warpath - a core Unique for the Chaos Damage variant. It grants you a great amount of Chaos Damage per Strength. It averages out to slightly more than 5 Chaos Damage per 10 Strength, but the Volatility Support is exceptionally effective for the wide range of Damage it provides. It is very expensive. |
|
| (15-18)% increased Strength +(180-220) to Armour +(13-19)% to Chaos Resistance 25% increased Movement Speed Cannot deal non-Chaos Damage Adds 1 to 80 Chaos Damage to Attacks per 80 Strength |
|
 (Weapon) Shaper Sword - the Fire version relies on a Shaper-specific modifier that grants Fire Damage based on the Strength. A good roll averages 4 Fire Damage per 10 Strength, which is lower than the Boots, but also infinitely cheaper to obtain. Other than that you will look for Attack Speed, Elemental Penetration, and a chance to deal Double Damage. (Weapon) Shaper Sword - the Fire version relies on a Shaper-specific modifier that grants Fire Damage based on the Strength. A good roll averages 4 Fire Damage per 10 Strength, which is lower than the Boots, but also infinitely cheaper to obtain. Other than that you will look for Attack Speed, Elemental Penetration, and a chance to deal Double Damage. |
|
| Min. requirements: Adds (2–3) to (4–5) Fire Damage to Attacks with this Weapon per 10 Strength 1.5+ Attack Speed Optional affixes: Attacks with this Weapon Penetrate % Elemental Resistances Attack Projectiles Return to you % increased Elemental Damage with Attacks % chance to deal Double Damage |
|
| (Weapon) Shaper Sword - for the Chaos Version, you will also use a Shaper Sword, but for a different reason. You can get a 20% More Damage bonus for Skills socketed in here, plus some other mods for a local gem setup. Other than that, you will look for the same modifiers, such as high Attack Speed or Chaos Penetration. The actual DPS of this weapon is irrelevant. |
|
| Min. requirements: Socketed Skills deal 20% more Attack Damage 1.5+ Attack Speed Optional affixes: Attacks with this Weapon Penetrate % Chaos Resistances Attack Projectiles Return to you % chance to deal Double Damage |
|
 (Weapon) Echoforge - this Weapon is also a surprisingly strong option for a lower Budget which works very well when you don't have that much Strength for the Flat Damage scaling. You can also get the Corrupted version that grants Fortify Support for your main Setup, which saves you a few points on the Passive Tree. (Weapon) Echoforge - this Weapon is also a surprisingly strong option for a lower Budget which works very well when you don't have that much Strength for the Flat Damage scaling. You can also get the Corrupted version that grants Fortify Support for your main Setup, which saves you a few points on the Passive Tree. |
|
| 30% increased Chaos Damage Adds (600-650) to (750-800) Chaos Damage (-16-16)% increased Attack Speed +(-200-200) to maximum Life Your Chaos Damage can Shock (-40-40)% increased Area of Effect for Attacks Deal no Physical or Elemental Damage |
|
 (Boots) Rare Boots - at first you should use a Rare Boots that provide maximum Life, Strength, Resistance, and Action Speed. The Movement Speed is not that important as you will mostly use Leap Slam, but it can still be useful. (Boots) Rare Boots - at first you should use a Rare Boots that provide maximum Life, Strength, Resistance, and Action Speed. The Movement Speed is not that important as you will mostly use Leap Slam, but it can still be useful. |
|
| Min. requirements: +100 to maximum Life 20% increased Movement Speed +50 to Strength +40% to Elemental Resistances Optional affixes: increased Armour Chaos Resistance Action Speed % chance to gain Onslaught for 4 seconds on Kill |
|
 (Gloves) Rare Gloves - it is very important to have additional Targets for your Strike Skills, which you can get via Exarch Influence. Other than that, look for Attack Speed, maximum Life, Strength, and Resistance. (Gloves) Rare Gloves - it is very important to have additional Targets for your Strike Skills, which you can get via Exarch Influence. Other than that, look for Attack Speed, maximum Life, Strength, and Resistance. |
|
| Min. requirements: Strike Skills target 1 additional nearby Enemies +100 to maximum Life +50 to Strength +40% to Elemental Resistances Optional affixes: increased Attack Speed % increased Damage per 100 Strength +0.2 metres to Melee Strike Range |
|
 (Belt) Rare Belt - you should look for a Synthesised Belt that increases your Strength by 15%, which you can further enhance with Catalysts. Use the Essence of Rage to get bonus Strength until you get high maximum Life and some Resistance. (Belt) Rare Belt - you should look for a Synthesised Belt that increases your Strength by 15%, which you can further enhance with Catalysts. Use the Essence of Rage to get bonus Strength until you get high maximum Life and some Resistance. |
|
| Min. requirements: +100 to maximum Life 15% increased Strength +50 to Strength Optional affixes: Resistance |
|
 (Amulet) Rare Amulet - similarly, on the amulet look for a special Implicit that increases your Strength by 15%. For Suffixes, try to get both Strength and All Attribute modifiers. Other than that, look for maximum Life, Resistance, and lacking Attributes. Later on, you will want a simplex amulet with an increase to your strength, all attributes, and damage per strength, but it is very expensive. (Amulet) Rare Amulet - similarly, on the amulet look for a special Implicit that increases your Strength by 15%. For Suffixes, try to get both Strength and All Attribute modifiers. Other than that, look for maximum Life, Resistance, and lacking Attributes. Later on, you will want a simplex amulet with an increase to your strength, all attributes, and damage per strength, but it is very expensive. |
|
| Min. requirements: +80 to maximum Life 15% increased Strength +50 to Strength Optional affixes: Resistance All Attributes +0.1 metres to Melee Strike Range |
|
| Recommended Anointments: Whispers of Doom |
|
 (Ring) Rare Ring - you can use the Cogwork Ring to get more valuable Suffix modifiers, but it will be very expensive. At first, you should use a regular Ring crafted with Essence of Rage on a Fractured All Attribute modifier. You will also need maximum Life and Resistance. (Ring) Rare Ring - you can use the Cogwork Ring to get more valuable Suffix modifiers, but it will be very expensive. At first, you should use a regular Ring crafted with Essence of Rage on a Fractured All Attribute modifier. You will also need maximum Life and Resistance. |
|
| Min. requirements: +50 to Strength +80 to Maximum Life Optional affixes: Chaos Resistance All Attributes Intelligence Elemental Resistance |
|
 (Ring) Original Sin - there is the possibility to combine the Chaos Damage from Boots and Fire Damage from Sword into one Build using this Ring. It offers the most Damage, but it is insanely expensive. (Ring) Original Sin - there is the possibility to combine the Chaos Damage from Boots and Fire Damage from Sword into one Build using this Ring. It offers the most Damage, but it is insanely expensive. |
|
| +(17-23)% to Chaos Resistance All Elemental Damage Converted to Chaos Damage Nearby Enemies' Chaos Resistance is 0 |
|
 (Ring) Nimis - with this ring, all your projectiles will return to you, dealing the damage again. It is very expensive, but it is worth its price. If you don't have it, use Returning Projectiles Support Gem. (Ring) Nimis - with this ring, all your projectiles will return to you, dealing the damage again. It is very expensive, but it is worth its price. If you don't have it, use Returning Projectiles Support Gem. |
|
| +(20-30)% to Lightning Resistance +(30-50) to Dexterity (25-35)% increased Projectile Damage Projectiles Return to you Projectiles are fired in random directions |
|
 (Jewel) Rare Jewels - get Jewels that improve your maximum Life, Attack Speed, and provide lacking Resistances or Attributes which you couldn't get without sacrificing Strength. (Jewel) Rare Jewels - get Jewels that improve your maximum Life, Attack Speed, and provide lacking Resistances or Attributes which you couldn't get without sacrificing Strength. |
|
|
Recommended affixes: |
|
 (Jewel) Split Personality - this Jewel provides a large amount of Strength and maximum Life. You can also get the Intelligence bonus, which will greatly ease your other Gearing process, but maximum life seems to be the norm. You could make a convoluted path to maximize its bonuses if you're near level 100, but until then, don't bother with Split Personality. (Jewel) Split Personality - this Jewel provides a large amount of Strength and maximum Life. You can also get the Intelligence bonus, which will greatly ease your other Gearing process, but maximum life seems to be the norm. You could make a convoluted path to maximize its bonuses if you're near level 100, but until then, don't bother with Split Personality. |
|
| This Jewel's Socket has 25% increased effect per Allocated Passive Skill between it and your Class' starting location Recommended modifiers: +5 to maximum Life +5 to Strength +5 to Intelligence |
|
 (Jewel) Lethal Pride - a very important Jewel, it adds randomized bonuses to nearby Notables. You should look for one that grants a chance to deal Double Damage, intimidate Enemies, increase your Strength, or provide Fire Resistance. If you have the resources for Sublime Vision and Watcher's Eye that redirect Cold and Lightning Damage to be taken as Fire, invest in Tempered by War keystone to shift all the Elemental Damage to be taken as Fire. (Jewel) Lethal Pride - a very important Jewel, it adds randomized bonuses to nearby Notables. You should look for one that grants a chance to deal Double Damage, intimidate Enemies, increase your Strength, or provide Fire Resistance. If you have the resources for Sublime Vision and Watcher's Eye that redirect Cold and Lightning Damage to be taken as Fire, invest in Tempered by War keystone to shift all the Elemental Damage to be taken as Fire. |
|
| Commanded leadership over (10000-18000) warriors under (Akoya-Kaom-Rakiata) Passives in radius are Conquered by the Karui Historic |
|
 (Jewel) Watcher's Eye - Watcher's Eye - you will use Determination and Precision, so you have access to a wide variety of useful modifiers here. Look for one defensive and one offensive modifier, but you can also specialise in one Aura instead. If you have the aforementioned Sublime Vision and Tempered by War, you'll need the Purity of fire mod for a 20% Cold-and-Lightning-to-Fire damage shift. (Jewel) Watcher's Eye - Watcher's Eye - you will use Determination and Precision, so you have access to a wide variety of useful modifiers here. Look for one defensive and one offensive modifier, but you can also specialise in one Aura instead. If you have the aforementioned Sublime Vision and Tempered by War, you'll need the Purity of fire mod for a 20% Cold-and-Lightning-to-Fire damage shift. |
|
| (4-6)% increased maximum Energy Shield (4-6)% increased maximum Life (4-6)% increased maximum Mana <Two or Three random aura modifiers> (5-8)% additional Physical Damage Reduction while affected by Determination You take (60-40)% reduced Extra Damage from Critical Strikes while affected by Determination (10-15)% increased Attack Speed while affected by Precision (40-60)% increased Attack Damage while affected by Precision |
|
 (Jewel) The Balance of Terror - this Jewel is your main source of Withered Debuff for the Chaos version. It requires you to manually Cast the Despair once every 10 seconds. At maximum potential, the Withered Debuff increases the Chaos Damage Taken by 90%. Your other sources of Withered can be a Grasping Shade tincture or Sin's Rebirth. (Jewel) The Balance of Terror - this Jewel is your main source of Withered Debuff for the Chaos version. It requires you to manually Cast the Despair once every 10 seconds. At maximum potential, the Withered Debuff increases the Chaos Damage Taken by 90%. Your other sources of Withered can be a Grasping Shade tincture or Sin's Rebirth. |
|
| +(10-15)% to all Elemental Resistances <2 random curse modifiers> Inflict Withered for 2 seconds on Hit if you've cast Despair in the past 10 seconds |
|
 (Jewel) Foulborn The Red Dream - It has to be a specific kind of Foulborn. You'll sport 7 or more Endurance Charges, resulting in 28% Chaos Resistance from one Jewel. Socket it near Fire Resistance on the Skill Tree to gain more Life. (Jewel) Foulborn The Red Dream - It has to be a specific kind of Foulborn. You'll sport 7 or more Endurance Charges, resulting in 28% Chaos Resistance from one Jewel. Socket it near Fire Resistance on the Skill Tree to gain more Life. |
|
| +4% to Chaos Resistance per Endurance Charge Passives granting Fire Resistance or all Elemental Resistances in Radius also grant an equal chance to gain an Endurance Charge on Kill |
|
 (Jewel) Large Cluster Jewels - A two-handed Cluster Jewel can grant you Martial Mastery, which is a very generous source of Attack Speed. Try to match it with other useful modifiers, such as Martial Prowess. (Jewel) Large Cluster Jewels - A two-handed Cluster Jewel can grant you Martial Mastery, which is a very generous source of Attack Speed. Try to match it with other useful modifiers, such as Martial Prowess. |
|
| Recommended affixes: 1 Added Passive Skill is Graceful Execution 1 Added Passive Skill is Martial Mastery 1 Added Passive Skill is Martial Prowess |
|
 (Flask) Sin's Rebirth - the Chaos variant of this Build can use this Flask to get the Unholy Might Buff, which grants you a chance to inflict Withering Debuff on Hit. It is useful for Clearing Maps, but not reliable against harder Bosses. (Flask) Sin's Rebirth - the Chaos variant of this Build can use this Flask to get the Unholy Might Buff, which grants you a chance to inflict Withering Debuff on Hit. It is useful for Clearing Maps, but not reliable against harder Bosses. |
|
| Unholy Might during Effect Grants Immunity to Ignite for 4 seconds if used while Ignited Removes all Burning when used |
|
 (Tincture) Prismatic Tincture - the Fire Damage version can use the Prismatic tincture to greatly boost your Elemental Damage and get Fire Penetration or Attack Speed. To use tincture with Blood Magic you will need to allocate the Bloodsoaked Blade Keystone. (Tincture) Prismatic Tincture - the Fire Damage version can use the Prismatic tincture to greatly boost your Elemental Damage and get Fire Penetration or Attack Speed. To use tincture with Blood Magic you will need to allocate the Bloodsoaked Blade Keystone. |
|
| (70-100)% increased Elemental Damage with Melee Weapons Recommended affixes: 20% increased effect Melee Weapon Damage Penetrates 15% Elemental Resistances |
|
|
Suggested Flasks:
|
|
     |
|
|
If you have any other build requests please leave that in the comments below. We are always open to suggestions and constructive feedback.
Pictures used in this article are the intellectual property of Grinding Gear Games.
