Lightning Arrow Deadeye
Lightning Arrow Deadeye is one of Path of Exile’s most popular bow builds, offering fast clear speed, huge DPS, and smooth endgame mappingLightning Arrow
Deadeye Build
Updated for Patch 3.28
The Best Crafty Guides by Odealo
| Guide notes | |||
| March 24, 2026 -Updated for patch 3.28, introduced new Exceptional and Imbued Gems, gaining a lot of extra Damage in the process |
|||
| Build overview | |||
| Tags: [RANGED] [ELEMENTAL] [LIFE] | |||
|
Budget: Defenses: |
|
Boss DPS: AoE: |
|
Lightning Arrow is one of the most popular skills among Deadeye characters. It can be played as a starter build, and it's also SSF-viable. Lightning Arrow is a very basic Bow Attack - it fires an Arrow that strikes the enemy and nearby adjacent targets with lightning bolts. The Lightning Arrow has a built-in 50% Physical to Lightning Damage conversion, but in most cases, it is a better idea to use multiple Elements instead. Elemental Bows are usually much cheaper and easier to craft, while the Physical Bows can only be better if you acquire the Headhunter Belt to leverage multiple temporary Buffs that grant Extra Damage based on your Physical Damage. When facing a dangerous opponent without such Buffs, Elemental Bows are significantly better. You could also choose the Chaos Damage instead, with the newly buffed Voltaxic Rift Bow. It is a great option at the very beginning, but unfortunately, it still can't compete at the endgame.
The build is Life-based with a lot of Evasion Rating and Spell Suppression Chance. It lacks meaningful Physical Damage mitigation, so your best way of survival is to kill monsters quickly and move around to avoid taking damage at all. Using Bow often allows you to have two six-linked setups. We recommend a secondary DPS setup that uses Manaforged Arrows Support to trigger while you Attack, but you can also use a Ballista Totem. You will also use a purely Utility Setup that triggers useful Spells via Cast on Critical Support Gem. The Imbued Gems greatly expand this aspect, allowing you to fit even more Gems into your Setups.
Deadeye ascendancy specializes in Bow Attacks, so it's an easy choice. It is recommended to take Far Shot and Endless Munition. Other Ascendancy Keystones worth considering are Gathering Winds and Focal Point. There are no Uniques that are necessary, but a lot of them are immensely helpful, some of which can be somewhat expensive.
You can also check our other Path of Exile builds right over here Odealo's Crafty Guides - Full List
1. Gameplay
It's a simple bow build; you shoot enemies with Lightning Arrow while trying to stay at a safe distance. Staying away also improves your Damage due to the Far Shot mechanics. Most of the utility Skills will be activated automatically. As a movement Skill, use Frostblink.
|
|
|
|

2. Build's PROS & CONS
| PROS |
|
| CONS |
|
3. Leveling tips
Use our Ranger Leveling Guide for PoE - Classic Bow version. It's an in-depth guide to level a build that deals any Elemental Hit Damage with Bows.
Bandits:
Helping Alira will ease the early gearing, but helping the Kraityn is recommended later on to speed up your Clear Speed even more.
Leveling Skill Trees:
35 Points Skill Tree
Pick Damage for Bows, but also a bit of maximum Life, Accuracy Rating, and sustain to use your Skills comfortably. Movement Speed is extremely valuable to speed up your campaign, too.
77 Points Skill Tree
Get more Life, Damage, and Critical Strikes. Additional Arrows on the Passive Tree allow you to use a proper Damage Support instead of the Multiple Projectiles Gem.
4. Final Skill Tree, Ascendancy Points, and Pantheon
Final Skill Tree:
113 Points Final Skill Tree (doesn't include Cluster Jewels nor Intuitive Leap)
119 Points Path of Building (PoB) link
Ascendancy points:
Preferably in that order:
- Gathering Winds
- Far Shot
- Endless Munitions
- Focal Point
Pantheon:
Major God: Soul of Arakaali: 10% reduced Damage taken from Damage Over Time, +40% Chaos Resistance against Damage Over Time
Minor God: Soul of Abberath: Unaffected by Burning Ground
5. Final Gems links
| [DPS] Lightning Arrow setup | |
 |
Lightning Arrow - fires Projectiles that strike multiple Enemies upon contact. Try to Imbue the Increased Critical Damage Support Gem here, as it has the best value at level 1. |
 |
Greater Fork Support |
 |
Returning Projectiles Support |
 |
Mirage Archer Support |
 |
Trinity Support |
 |
Invert the Rules Support |
| [DPS] Manaforged setup | |
 |
Burning Arrow - this Skill will be used automatically as you use your main Arrow. The Burning Arrow simply deals a lot of Damage, although Storm Rain can be stronger if your opponent is stationary for longer periods of time. |
 |
Manaforged Arrow Support |
 |
Lifetap Support - By converting the Mana Cost, the Manaforged Arrow will trigger with any amount of Mana spent. |
 |
Elemental Damage with Attacks Support |
 |
Elemental Focus Support |
|
Invert the Rules Support |
| [UTILITY] Sniper's Mark setup | |
 |
Sniper's Mark - A Curse that increases the damage enemies take from Projectiles, and Projectiles that hit cursed enemies Split to hit four additional targets. |
 |
Mark on Hit Support |
| [UTILITY] Mana Reservation setup | |
 |
Purity of Elements - makes you immune against Elemental Ailments and provides a lot of Elemental Resistances. |
 |
Grace - adds and increases Evasion Rating, which makes your character more likely to avoid Attacks. |
 |
Herald of Ice - explodes Frozen Enemies you kill. It is expensive to fit into the Build, so you can skip it if you are short on resources. |
 |
Enlighten Support |
| [UTILITY] Utility setup | |
 |
Blood Rage - a temporary buff that increases your Attack Speed and a chance to gain Frenzy Charge upon killing opponents; however, it makes you take Physical DoT. |
 |
Frostblink - an instant teleport that leaves a Chilling Ground in both locations. Use it to quickly avoid danger. |
| [UTILITY] Manaforged Frenzy | |
 |
Frenzy - generates Frenzy Charges upon Hitting Enemies. Try to Imbue either of the Green Supports. |
 |
Tornado - creates a Tornado that absorbs incoming Projectiles to deal a portion of their Damage again. It also triggers various on-hit effects. |
 |
Power Charge on Critical Support |
|
Manaforged Arrow Support |
| Cast on Critical Strike Support | |
|
|
5. Gear Setup
There are many useful Unique Items, such as the Taming Ring or Hyrri's Ire, but you will also have to use plenty of Rare Items to fulfill the Attribute Requirements and cap your Elemental and Chaos Resistances. Your Damage priority is quite simple: you will want as much Elemental DPS on your Bow as possible, while also boosting your Critical Strikes and Attack Speed. Other gear pieces should provide a bit of extra Crit Multiplier or bonuses for Elemental Damage, but maximum Life and other defensive bonuses are usually more important. You will also need a bit of extra Intelligence to use the new Exceptional Gems.
|
Stat priorities on items:
|
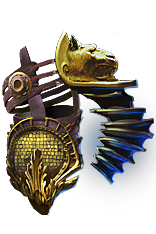
 (Helmet) The Fledgling - grants an absurd amount of Damage. The Far Shot granted by this Helmet stacks with Deadeye's Far Shot Notable. (Helmet) The Fledgling - grants an absurd amount of Damage. The Far Shot granted by this Helmet stacks with Deadeye's Far Shot Notable. |
|
| (150-200)% increased Armour and Evasion (30-50)% increased Projectile Speed (30-50)% increased Projectile Damage Projectiles cannot collide with Enemies in Close Range Far Shot |
|
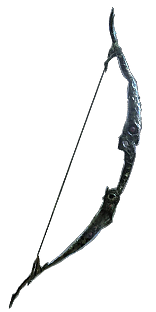 (Weapon) Rare Bow - Your best option is a rare bow. Seek mainly added Cold, Fire, and Lightning Damage. Include a bonus to Attack Speed as well. Critical Strike modifiers are immensely good too. (Weapon) Rare Bow - Your best option is a rare bow. Seek mainly added Cold, Fire, and Lightning Damage. Include a bonus to Attack Speed as well. Critical Strike modifiers are immensely good too. |
|
| Min. requirements: 8% Base Critical Strike Chance 800+ Elemental DPS Optional affixes: Bow Attacks fire 2 additional Arrows Damage Penetrates #% Elemental Resistances Chance to deal Double Damage increased Attack Speed Critical Strike Multiplier |
|
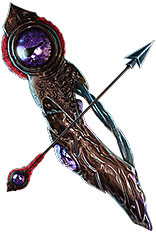 (Quiver) Voidfletcher - a great option for lower budgets. The Void Shot can deal a significant amount of Damage to supplement your burst, but ultimately it lacks useful stats. (Quiver) Voidfletcher - a great option for lower budgets. The Void Shot can deal a significant amount of Damage to supplement your burst, but ultimately it lacks useful stats. |
|
| Arrows Pierce an additional Target Consumes a Void Charge to Trigger Level 20 Void Shot when you fire Arrows with a Non-Triggered Skill Adds (30-40) to (80-100) Cold Damage to Attacks +(80-120) to maximum Energy Shield +(20-30)% to Cold Resistance +(20-40) Mana gained on Kill 30% increased Projectile Speed 5 Maximum Void Charges Gain a Void Charge every 0.5 seconds |
|
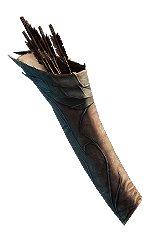 (Quiver) Rare Quiver - there are many useful modifiers to look for: Attack Speed, flat Damage for Attacks, various increases to your Attack Damage or Projectile Speed, and Critical Strikes. Additional Arrow is also great. (Quiver) Rare Quiver - there are many useful modifiers to look for: Attack Speed, flat Damage for Attacks, various increases to your Attack Damage or Projectile Speed, and Critical Strikes. Additional Arrow is also great. |
|
| Min. requirements: +90 to maximum Life Bow Attacks fire an additional Arrow Optional affixes: #% increased Attack Speed Adds # Lightning Damage to Attacks +#% to Critical Strike Multiplier with Bows % increased Critical Strike Chance with Bows #% increased Damage with Bow Skills #% increased Projectile Speed |
|
 (Body Armour) Hyrri's Ire - It may be the best option for Body Armour. It grants you no Life, so that you can allocate a proper Life Mastery for 15% increased Maximum Life. It is a huge bonus to your Evasion Rating and Spell Suppression Chance. On top of that, the flat Cold Damage it provides is really high. (Body Armour) Hyrri's Ire - It may be the best option for Body Armour. It grants you no Life, so that you can allocate a proper Life Mastery for 15% increased Maximum Life. It is a huge bonus to your Evasion Rating and Spell Suppression Chance. On top of that, the flat Cold Damage it provides is really high. |
|
| +(40-50) to Dexterity (140-220)% increased Evasion Rating 25% increased Chill Duration on Enemies (105-145) to (160-200) Added Cold Damage with Bow Attacks +30% chance to Suppress Spell Damage |
|
 (Boots) Rare Boots - your Boots should simply provide maximum Life, Movement Speed, and tons of Chaos and Elemental Resistances. Use Exarch Influence to gain even more Action Speed. (Boots) Rare Boots - your Boots should simply provide maximum Life, Movement Speed, and tons of Chaos and Elemental Resistances. Use Exarch Influence to gain even more Action Speed. |
|
| Min. requirements: 100 to Maximum Life 30% Increased Movement Speed 60% Total Elemental and Chaos Resistances Optional affixes: Chaos Resistances chance to gain Onslaught for 4 seconds on Kill chance to gain Elusive on Critical Strike Intelligence/Strength (crafted) |
|
 (Gloves) Rare Gloves - Maximum Life and Elemental Resistances are the most important here. Try to get a special Temple modifier to gain Damage against Chilled Enemies. For Eldritch mods, get Rage on Hit and Accuracy. (Gloves) Rare Gloves - Maximum Life and Elemental Resistances are the most important here. Try to get a special Temple modifier to gain Damage against Chilled Enemies. For Eldritch mods, get Rage on Hit and Accuracy. |
|
| Min. requirements: 80 Maximum Life 80% Total Elemental Resistances Optional affixes: Attack Speed Accuracy Increased Damage with Hits against Chilled enemies Intelligence/Strength (crafted) |
|
 (Belt) Rare Belt - Look for a Cord Belt with high defensive stats. Hunter's influence can grant you even more Maximum Life. The extra Anoint allows you to get the Assassination Notable. You can also include Life Regeneration or Flask sustain here. (Belt) Rare Belt - Look for a Cord Belt with high defensive stats. Hunter's influence can grant you even more Maximum Life. The extra Anoint allows you to get the Assassination Notable. You can also include Life Regeneration or Flask sustain here. |
|
| Min. requirements: 100 Maximum Life 100% Total Elemental Resistances Optional affixes: #% increased maximum Life increased Elemental Damage with Attacks increased Damage with Hits against Chilled Enemies |
|
 (Belt) Headhunter - it is the best Build to utilise this Belt. Other than generally useful modifiers such as Speed or extra defense, it often grants additional Projectiles or Extra Elemental Damage. In such cases, a Physical Bow with extra Conversion might be a better choice, but you will obliterate everything either way. (Belt) Headhunter - it is the best Build to utilise this Belt. Other than generally useful modifiers such as Speed or extra defense, it often grants additional Projectiles or Extra Elemental Damage. In such cases, a Physical Bow with extra Conversion might be a better choice, but you will obliterate everything either way. |
|
| +(25-40) to maximum Life +(40-55) to Strength +(40-55) to Dexterity +(50-60) to maximum Life (20-30)% increased Damage with Hits against Rare monsters When you Kill a Rare monster, you gain its Modifiers for 60 seconds |
|
 (Amulet) Hyrri's Truth - the best Amulet for this Setup, it provides tons of Accuracy via Precision Aura, plenty of Critical Strike Multiplier, and grants the Culling Strike Effect. (Amulet) Hyrri's Truth - the best Amulet for this Setup, it provides tons of Accuracy via Precision Aura, plenty of Critical Strike Multiplier, and grants the Culling Strike Effect. |
|
| +(20-30) to Dexterity Grants Level 30 Precision Skill +(40-80) to Dexterity +(25-50)% to Global Critical Strike Multiplier Bow Attacks have Culling Strike Precision has 100% increased Mana Reservation Efficiency |
|
| Recommended Anointments: Assassination Sovereignty |
|
 (Ring) The Taming - The ring that grants you a lot of Elemental Resistances and Elemental Damage, making it one of the best choices on a low budget. Remember to use Catalysts to make it even better. (Ring) The Taming - The ring that grants you a lot of Elemental Resistances and Elemental Damage, making it one of the best choices on a low budget. Remember to use Catalysts to make it even better. |
|
| +(8-10)% to all Elemental Resistances 20% increased Damage with Hits and Ailments per Freeze, Shock or Ignite on Enemy +(20-30)% to all Elemental Resistances 30% increased Elemental Damage 10% chance to Freeze, Shock and Ignite 30% increased Elemental Damage with Attack Skills |
|
 (Ring) Nimis - It makes hitting a particular target more difficult, but the Returning Projectiles are great, especially as your Arrows cover much of the screen anyway. (Ring) Nimis - It makes hitting a particular target more difficult, but the Returning Projectiles are great, especially as your Arrows cover much of the screen anyway. |
|
| +(20-30)% to Lightning Resistance +(30-50) to Dexterity (25-35)% increased Projectile Damage Projectiles Return to you Projectiles are fired in random directions |
|
 (Ring) Rare Ring - a Rare Ring can provide a lot of Damage, but it also offers some Defensive capabilities or Utility in the form of Mana Cost reduction. (Ring) Rare Ring - a Rare Ring can provide a lot of Damage, but it also offers some Defensive capabilities or Utility in the form of Mana Cost reduction. |
|
| Min. requirements: +80 to Maximum Life 60% Total Elemental and Chaos Resistances Optional affixes: #% increased Elemental Damage with Attack Skills #% to Global Critical Strike Multiplier Non-Channelling Skills have -(7-6) to Total Mana Cost Intelligence and Strength |
|
 (Jewel) Rare Jewels - look for a bonus to maximum Life and any applicable Critical Strike Multiplier, ideally at least two such modifiers at once. It can also provide a bit of Attributes or Resistances if you still lack them. (Jewel) Rare Jewels - look for a bonus to maximum Life and any applicable Critical Strike Multiplier, ideally at least two such modifiers at once. It can also provide a bit of Attributes or Resistances if you still lack them. |
|
|
Recommended affixes: |
|
 (Jewel) Large Cluster Jewel - the Two-handed Weapon Cluster applies to Bows too, which might be a bit cheaper. Try to get the Devastator Notable to gain a source of explosion, but there are multiple other decent combinations possible. (Jewel) Large Cluster Jewel - the Two-handed Weapon Cluster applies to Bows too, which might be a bit cheaper. Try to get the Devastator Notable to gain a source of explosion, but there are multiple other decent combinations possible. |
|
| Recommended Notables: 1 Added Passive Skill is Martial Prowess 1 Added Passive Skill is Fuel the Fight 1 Added Passive Skill is Feed the Fury 1 Added Passive Skill is Arcing Shot 1 Added Passive Skill is Prismatic Heart 1 Added Passive Skill is Sadist 1 Added Passive Skill is Disorienting Display |
|
 (Jewel) Watcher's Eye - with this Jewel, you can become even more evasive and mobile, while still improving your Damage by a decent amount. (Jewel) Watcher's Eye - with this Jewel, you can become even more evasive and mobile, while still improving your Damage by a decent amount. |
|
| (4-6)% increased maximum Energy Shield (4-6)% increased maximum Life (4-6)% increased maximum Mana <Two or Three random aura modifiers> Recommended Aura modifiers: +(20-30)% to Critical Strike Multiplier while affected by Precision (10-15)% increased Attack Speed while affected by Precision (10-15)% increased Movement Speed while affected by Grace +(5-8)% chance to Evade Attack Hits while affected by Grace +(30-50)% to Chaos Resistance while affected by Purity of Elements (75-50)% of Elemental Damage from your Hits cannot be Reflected while affected by Purity of Elements (40-60)% increased Attack Damage while affected by Precision |
|
 (Jewel) Lethal Pride - grants you tons of Strength, and it is easy to land multiple useful bonuses such as Intimidation on Hit, a chance to deal Double Damage, or a bonus to your maximum Life. (Jewel) Lethal Pride - grants you tons of Strength, and it is easy to land multiple useful bonuses such as Intimidation on Hit, a chance to deal Double Damage, or a bonus to your maximum Life. |
|
| Commanded leadership over (10000-18000) warriors under (Akoya-Kaom-Rakiata) Passives in radius are Conquered by the Karui Historic |
|
| 40% increased Damage Creates Consecrated Ground on Use (20-40)% increased Duration Consecrated Ground created by this Flask has Tripled Radius Consecrated Ground created during Effect applies (7-10)% increased Damage taken to Enemies (100-150)% increased Critical Strike Chance against Enemies on Consecrated Ground during Flask effect |
|
 (Flask) Cinderswallow Urn - a good source of Onslaught Buff and improved Life Recovery during clearing. It can also inflict Malediction Debuff on Enemies. (Flask) Cinderswallow Urn - a good source of Onslaught Buff and improved Life Recovery during clearing. It can also inflict Malediction Debuff on Enemies. |
|
| +(10-20) to Maximum Charges Recharges 5 Charges when you Consume an Ignited corpse Enemies Ignited by you during Effect take (7-10)% increased Damage Recover (1-3)% of Life when you Kill an Enemy during Effect Catarina's Veiled (prefix): Enemies Ignited by you during Effect have Malediction |
|
|
Other suggested Flasks:
|
|
    |
|
|
If you have any other build requests please leave that in the comments below. We are always open to suggestions and constructive feedback.
Pictures used in this article are the intellectual property of Grinding Gear Games.
