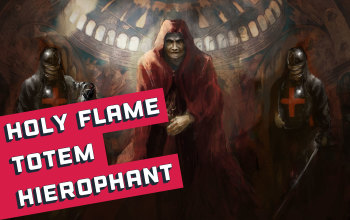
Holy Flame Totem Hierophant Templar build
End-game viable Totem build based on the most popular Templar's Ascendancy class - HierophantHoly Flame Totem
Hierophant build
Updated for Patch 3.22
The Best Crafty Guides by Odealo
| Guide notes |
| November 01, 2023 -Updated for Patch 3.22 |
| Build overview | |||
| Tags: [TOTEM] [ELEMENTAL] [LIFE] [STARTER] | |||
|
Budget: Defenses: |
|
Boss DPS: AoE: |
|
Holy Flame Totem is a reworked version of the old school Flame Totem skill gem, with plenty of changes made to it. The new version fires 3 projectiles instead of one, creates Consecrated Ground around the Totem, which makes you immune to Curses, and converts Physical Damage to Fire. Combined with Avatar of Fire it provides full Physical and half of other Elements Conversion to Fire, which scales insanely well with all additional Damage to Spells sources. This build has decent clear speed as well as single-target damage and great survivability, thanks to Totems taking most of the incoming damage. If you plan to create a Totem build it's a good start - Holy Flame Totem builds are the cheapest ones in the game, requiring almost no specific or expensive Items.
Thanks to the buff to Mind Over Matter keystone that increased the amount of damage transferred to mana instead of life this build gained a lot of survivability completely for free. Paired with the Totem playstyle, this makes playing this build very safe and satisfying. Not having to stand still to cast your skills allows you to focus on dodging incoming attacks making it much easier to learn new mechanics, which is great for any new league.
You can also check our other Path of Exile builds right over here Odealo's Crafty Guides - Full List
1. Gameplay
Hierophant Ascendancy is the best choice for this build - it not only provides a lot of Mana that works really well with Mind over Matter but also grants permanent Power and Endurance Charges generation. Pursuit of Faith and Ritual Awakening grants insane damage for Totems and allows us to summon an additional Totem. This build has great survivability thanks to High Life and additional Energy Shield and uses Mind over Matter, which converts Damage to be taken from Mana instead of Life. As for the gameplay, you place your totems and watch them burn all enemies with holy fire. This build is also recommended as a League Starter because it requires no unique items to farm even Red Maps with ease. With few investments, it's possible to kill all the Guardians and the Shaper himself.
|
This is a somewhat outdated video which should be updated shortly |
|
|

2. Build's PROS & CONS
| PROS |
|
| CONS |
|
3. Leveling tips
You are leveling with Holy Flame Totem since level 4, with all supporting skills that you will also use in the endgame. Three Totems with the first Ascendancy point in Pursuit of Faith are more than enough to carry you to the mapping phase. Below you will find some basic Gem setups for the early stages of the game, and several extremely useful Unique Items. You may also visit our Templar Leveling Guide using Totems for more details.
Suggested leveling Gem setups:
| Holy Flame Totem setup | |
 |
Holy Flame Totem - your primary Spell that will be used in the endgame build as well |
 |
Elemental Focus Support - grants more Elemental Damage but your Totems will not inflict ailments |
 |
Added Fire Damage Support - adds additional Fire Damage based on Physical Damage |
 |
Faster Casting Support - increases Flame Totem's rate of fire significantly |
| Flamethrower Trap setup | |
 |
Flamethrower Trap - a supplementary source of damage, which can be used if you lack DPS against Bosses. It can also apply Combustion debuff |
 |
Combustion Support - grants more Fire Damage and lowers enemies' Resistances, causing them to take even more damage |
 |
Trap and Mine Damage Support - adds additional Fire Damage based on Physical Damage |
 |
Charged Traps Support - slightly increases the damage of linked Trap, but also allows you to easily generate Power and Frenzy Charges with it |
| Flame Dash setup | |
 |
Flame Dash - your main Mobility Skill |
 |
Faster Casting Support - increases your Flame Dash casting speed and movement |
 |
Portal - it can save you tons of Portal Scrolls |
| Utility Gems | |
 |
Flammability - a great curse for Fire builds. Reduces cursed enemies Fire Resistance |
 |
Herald of Ash - grants more Fire and Burning Damage. If you kill the enemy, it will also burn all nearby enemies |
Bandits:
We recommend helping Alira for Mana Regeneration, Critical Strike Multiplier, and Elemental Resistances or killing all the Bandits for two extra Passives
Leveling Skill Trees:
33 Points Skill Tree
Priorities: 1) Discipline and Training 2) Light of Divinity 3) Ancestral Bond 4) Divine Judgement, Fury 5)Primal Manifestation
65 Points Skill Tree
Priorities: 1) Purity of Flesh 2) Shaman's Dominion 3) Cruel Preparation 4) Heart and Soul 5) Heart of Flame
Recommended leveling items:
 Le Heup of All - they provide everything - Attributes, Damage, and Resistances. Perfect choices for the whole leveling process Le Heup of All - they provide everything - Attributes, Damage, and Resistances. Perfect choices for the whole leveling process |
|
| (10-30)% increased Damage +(10-30) to all Attributes (10-30)% increased Rarity of Items found +(10-30)% to all Elemental Resistances |
 Goldrim - one of the best leveling Helmets in Path of Exile, will fix your Elemental Resistances during leveling Goldrim - one of the best leveling Helmets in Path of Exile, will fix your Elemental Resistances during leveling |
|
| +(30-50) to Evasion Rating 10% increased Rarity of Items found +(30-40)% to all Elemental Resistances Reflects 4 Physical Damage to Melee Attackers Level Requirement reduced by 100 (Hidden) |
 Tabula Rasa - insane leveling item, Tabula Rasa with its 6-link by itself will carry you through the leveling process Tabula Rasa - insane leveling item, Tabula Rasa with its 6-link by itself will carry you through the leveling process |
|
| Item has no level requirement and Energy Shield (Hidden) Item has 6 White Sockets and is fully linked (Hidden) |
 Axiom Perpetuum - best leveling weapon in the game for spellcasters. A lot of Additional Damage to Spells and an insane amount of Critical Strike Chance. Recommended to dual-wield them Axiom Perpetuum - best leveling weapon in the game for spellcasters. A lot of Additional Damage to Spells and an insane amount of Critical Strike Chance. Recommended to dual-wield them |
|
| (4-6)% increased Cast Speed (100-140)% increased Critical Strike Chance for Spells Adds (2-3) to (5-6) Fire Damage to Spells Adds (2-3) to (5-6) Cold Damage to Spells Adds 1 to (10-12) Lightning Damage to Spells |
|
|
|
| (130-150)% increased Armour +(40-60) to maximum Life 0.5% of Life Regenerated per second 15% increased Area of Effect for Skills used by Totems 0.5% of Damage dealt by your Totems is Leeched to you as Life |
 Trolltimber Spire
 4. Final Skill tree, Ascendancy Points, and Pantheon
Final Skill Tree:
117 Points Final Skill Tree (doesn't include Cluster or Unique Jewels)
122 Points Path of Building (PoB) link
Ascendancy points:
Preferably in that order:
- Pursuit of Faith
- Ritual of Awakening
- Conviction of Power
- Divine Guidance
Pantheon:
Major God: Soul of Lunaris 1% additional Physical Damage Reduction for each nearby Enemy, up to 8%; 1% increased Movement Speed for each nearby Enemy, up to 8%
Minor God: Soul of Gruthkul 1% additional Physical Damage Reduction for each Hit you've taken Recently up to a maximum of 5%
5. Final Gems links
| [DPS] Holy Flame Totem | |
|
Holy Flame Totem - your primary Spell in this build. All Support Gems listed below with the exception of Inspiration and Increased Critical Damage have an Awakened version, so it's worth considering picking those up for even higher DPS |
 |
Inspiration Support - increases the damage, Critical Strike Chance and reduces mana costs of your Holy Flame Totem |
|
Added Fire Damage Support - adds additional Fire Damage based on Physical Damage. This Gem has an Awakened version that can grant +1 to the level of your Holy Flame Totem |
 |
Increased Critical Damage Support - grants tons of Critical Strike Multiplier to Critical Strikes, which are you going to deal most of the times |
 |
Elemental Focus Support - a great boost to Elemental Damage which also makes your Totems unable to inflict Ailments, so you can apply Combustion debuff by another Spell |
 |
Fire Penetration Support - penetrates the enemy's Fire Resistances |
| [UTILITY] Wave of Conviction | |
 |
Wave of Conviction - you are going to use this skill with Spell Totems so that it allows you to summon an extra Totems via Multiple Totem Support, but also it will be able to Inflict ignite and apply Combustion debuff |
 |
Spell Totem Support - will allow you to create Totems that will cast your Wave of Conviction for extra Damage and debuffs |
 |
Multiple Totems Support - allows you to cast two additional Wave of Conviction Totems on top of the base 4 Holy Flame Totems that you should always have active |
| Combustion Support - enemies hit with Wave of Conviction will have their Fire Resistance reduced even further | |
| [MOBILITY] Flame Dash setup | |
|
Flame Dash - main Mobility Skill for faster movement through Maps. It also allows you to avoid big damage spikes |
|
Faster Casting Support - increases the Cast Time for non-Instant Flame Dash uses |
 |
Arcane Surge Support - after casting Flame Dash you will gain the Arcane Surge buff, which increases Spell Damage and Cast Speed. Keep this Gem at level 9 so it procs with each cast |
| [UTILITY] Flame Wall | |
 |
Flame Wall - projectiles that travel through Flame Wall deal additional Fire Damage. Cast it between totems and powerful enemies to take them down more quickly. Optional Phantasmal Alternate Quality provides easier application of Fire Exposure |
 |
Increased Area of Effect - Helps Flame Wall with covering greater areas and applying its bonus to more totems |
 |
Increased Duration Support - increases the uptime duration on Flame Wall so you don't have to cast it as often |
| [UTILITY] Steelskin/Vaal RF | |
 |
Steelskin - a great instant-cast Guard Spell that grants a protective shield that absorbs some incoming damage. Use when off-cooldown |
 |
Vaal Righteous Fire - use the Vaal part of this Spell for a short burst of Spell Damage |
|
Increased Duration Support - increases the duration of buff granted by Vaal Righteous Fire, which typically can be used only once per fight |
| [UTILITY] Herald of Ash setup | |
|
Herald of Ash - grants more Fire Spell Damage. We are using Calamitous Visions so it's mandatory to use this Herald |
| [UTILITY] Golem/Curse setup | |
 |
Summon Chaos Golem - Physical Damage is the type of damage that can hurt you the most so it's good to have the Chaos Golem for some extra Physical Damage mitigation |
 |
Sniper's Mark - grants the highest DPS possible. Depending on your gear  Assassin's Mark can be better, but that depends on your actual Critl. Multiplier. Just do the calculations in PoB and use the Mark that ends up giving you more DPS Assassin's Mark can be better, but that depends on your actual Critl. Multiplier. Just do the calculations in PoB and use the Mark that ends up giving you more DPS |
 |
Arcanist Brand - will automatically cast linked Curse and Golem, making the build much smoother to play |
|
Faster Casting Support - makes casting brand faster, and thus smoother |
|
|
5. Gear Setup
Below you will find all the recommended and required gear for this build. Most of the items should be easily obtained, and everything can be temporarily replaced with cheaper rare items.
Our recommended items will:
- Cap your resistances
- Give you enough DPS/Life to start mapping successfully
|
Stat priorities on items:
|
 (Helmet) Rare Helmet - this is a very solid option for this build. Picking up a rare helmet will make it much easier to cap Elemental Resistances and wear the other required unique gear (Helmet) Rare Helmet - this is a very solid option for this build. Picking up a rare helmet will make it much easier to cap Elemental Resistances and wear the other required unique gear |
|
| Min. requirements: 80 maximum Life +60% to Elemental Resistances Optional affixes: Maximum Mana Attributes |
|
 (Helmet) Crown of the Inward Eye - one of the best Helmets for this build which grants tons of Life, Energy Shield, and Mana. It also increases your DPS based on all those three stats (Helmet) Crown of the Inward Eye - one of the best Helmets for this build which grants tons of Life, Energy Shield, and Mana. It also increases your DPS based on all those three stats |
|
| 333% increased Armour and Energy Shield (9-21)% increased maximum Life, Mana and Global Energy Shield Transfiguration of Soul Transfiguration of Body Transfiguration of Mind |
|
| Helmet enchantments: Flame Totem fires 2 additional projectiles |
|
 (Weapon) Rare Shaper Sceptre - it's definitely the best in slot weapon for this build (Weapon) Rare Shaper Sceptre - it's definitely the best in slot weapon for this build |
|
|
Min. requirements: |
|
 (Shield) Rare Shield - since patch 3.5 we can craft +1 to the number of summoned Totems to shield, so it's our best offhand shield for this build (Shield) Rare Shield - since patch 3.5 we can craft +1 to the number of summoned Totems to shield, so it's our best offhand shield for this build |
|
| Min. requirements: 30% increased Spell Damage 80% increased Critical Strike Chance for Spells 80 to maximum Life Crafted: +1 to the maximum number of Summoned Totems Optional affixes: Increased Cast Speed |
|
 (Body Armour) Rare Armour - definitely our go-to armor. Aim for the highest Life bonuses and craft increased life and mana by up to 8% (Body Armour) Rare Armour - definitely our go-to armor. Aim for the highest Life bonuses and craft increased life and mana by up to 8% |
|
|
Min. requirements: |
|
 (Boots) Rare Boots - They are the best choice if you need to fix your Resistances. Get with the highest Life, Resistances, and Movement Speed (Boots) Rare Boots - They are the best choice if you need to fix your Resistances. Get with the highest Life, Resistances, and Movement Speed |
|
| Min. requirements: 70 maximum Life 25% increased Movement Speed +50% to Elemental Resistances |
|
| Min. requirements: 90 maximum Life 70% Total Elemental Resistances Optional affixes: Maximum Mana Spell Damage |
|
 (Belt) Rare Belt - preferably a Stygian Vise for extra Abyss Socket (Belt) Rare Belt - preferably a Stygian Vise for extra Abyss Socket |
|
| Min. requirements: 100 maximum Life 80% Total Elemental Resistances Optional affixes: increased Maximum Life Strength Increased Damage/Global Physical Damage |
|
 (Amulet) Rare Amulet - A very solid option, which with proper affixes will provide a big DPS boost with Global Critical Strike Multiplier and more Life. If you are using a Rare Amulet you need to pick Avatar of Fire Passive from your Tree. (Amulet) Rare Amulet - A very solid option, which with proper affixes will provide a big DPS boost with Global Critical Strike Multiplier and more Life. If you are using a Rare Amulet you need to pick Avatar of Fire Passive from your Tree. |
|
| Min. requirements: 60 maximum Life 30% Global Critical Strike Multiplier Optional affixes: Attributes +1 to Level of All Strength Skill Gems Spell Damage |
|
 (Amulet) Xoph's Blood - It's the best option. It boosts your DPS significantly and gives you an extra Passive Skill. Covering Enemies in Ash also means they will take greatly increased Damage (Amulet) Xoph's Blood - It's the best option. It boosts your DPS significantly and gives you an extra Passive Skill. Covering Enemies in Ash also means they will take greatly increased Damage |
|
| +(20-30) to Strength 10% increased maximum Life +(20-40)% to Fire Resistance 10% increased Strength Damage Penetrates 10% Fire Resistance Cover Enemies in Ash when they Hit you Avatar of Fire |
|
 (Amulet) Replica Dragonfang's Flight - You can use this one for much more damage and Reservation Efficiency. Both are usually in high demand. (Amulet) Replica Dragonfang's Flight - You can use this one for much more damage and Reservation Efficiency. Both are usually in high demand. |
|
| +(10-16) to all Attributes +3 to Level of all <Random Skill> Gems +(10-15)% to all Elemental Resistances (10-15)% increased Reservation Efficiency of Skills Items and Gems have (15-10)% reduced Attribute Requirements |
|
| Recommended Anointments: Heart of Flame Throatseeker |
|
 (Ring) Rare Ring - just aim for high defensive stats. You can also get an Elder Ring to use it with Mark of the Shaper for some massive Spell Damage boost. (Ring) Rare Ring - just aim for high defensive stats. You can also get an Elder Ring to use it with Mark of the Shaper for some massive Spell Damage boost. |
|
| Min. requirements: 60 maximum Life 80% Total Elemental Resistances Optional affixes: Attributes+ Minimum Frenzy Charges |
|
 (Ring) Mark of the Shaper - grant very high bonus Spell Damage if your other Ring is an Elder item making it one of the best budget choices for this slot (Ring) Mark of the Shaper - grant very high bonus Spell Damage if your other Ring is an Elder item making it one of the best budget choices for this slot |
|
| (15-25)% increased Elemental Damage 20% chance to Trigger Level 20 Summon Volatile Anomaly on Kill Adds (13-18) to (50-56) Lightning Damage to Spells (6-10)% increased maximum Energy Shield (6-10)% increased maximum Life (60-80)% increased Spell Damage if your other Ring is an Elder Item Cannot be Stunned by Spells if your other Ring is a Shaper Item |
|
 (Ring) Circle of Anguish - Herlad of Ash is very important in this build, use these Rings to increase its effect, Reservation efficiency, or your damage. (Ring) Circle of Anguish - Herlad of Ash is very important in this build, use these Rings to increase its effect, Reservation efficiency, or your damage. |
|
| <One to three random Synthesis implicit modifiers> +(20-30) to Strength Adds (20-25) to (26-35) Fire Damage +(20-30)% to Fire Resistance <Two Random Herald of Ash modifier> |
|
 (Jewel) Abyss Jewels - with added flat Fire Damage to Spells (Jewel) Abyss Jewels - with added flat Fire Damage to Spells |
|
| Recommended affixes: Added Fire Damage to Spells Increased Critical Strike Multiplier maximum Life |
|
 (Jewel) Rare Jewels - they should provide extra Life and damage (Jewel) Rare Jewels - they should provide extra Life and damage |
|
| Recommended affixes: increased maximum Life increased Spell Damage increased Global Critical Strike Multiplier Optional affixes: increased Fire Damage increased Cast Speed |
|
| (50-30)% reduced Totem Damage Totems fire 2 additional Projectiles |
|
 (Jewel) Unnatural Instinct - if you have some extra Currency to invest into this build, Unnatural Instinct offers tons of extra stats when socketed right above Witch's Starting Point (Jewel) Unnatural Instinct - if you have some extra Currency to invest into this build, Unnatural Instinct offers tons of extra stats when socketed right above Witch's Starting Point |
|
| Allocated Small Passive Skills in Radius grant nothing Grants all bonuses of Unallocated Small Passive Skills in Radius |
|
 (Jewel) Calamitous Visions - this Jewel grants the Lone Messenger Passive which allows you to use Herald of Ash with greatly increases the effect, but no other Auras can be used (Jewel) Calamitous Visions - this Jewel grants the Lone Messenger Passive which allows you to use Herald of Ash with greatly increases the effect, but no other Auras can be used |
|
| Adds Lone Messenger You can only have one Herald 50% more Effect of Herald Buffs on you 100% more Damage with Hits from Herald Skills 50% more Damage Over Time with Herald Skills Minions from Herald Skills deal 25% more Damage Your Aura Skills are Disabled |
|
 (Jewel) Large Cluster Jewel - we recommend getting one Large Cluster Jewel with either Spell or Elemental Damage bonuses. There is a bunch of useful Passives here, just don't bother getting extra Life/ES Leech as it won't affect you in any way (Jewel) Large Cluster Jewel - we recommend getting one Large Cluster Jewel with either Spell or Elemental Damage bonuses. There is a bunch of useful Passives here, just don't bother getting extra Life/ES Leech as it won't affect you in any way |
|
| Recommended affixes: 1 Added Passive Skill is Conjured Wall 1 Added Passive Skill is Mage Hunter 1 Added Passive Skill is Sap Psyche |
|
 (Jewel) Medium Cluster Jewel - you can use two Medium Cluster Jewels and we recommend getting the Totem-related Passives that give you utility bonuses like Onslaught, Totem Placement Speed, Totem Cast Speed, and obviously damage works too (Jewel) Medium Cluster Jewel - you can use two Medium Cluster Jewels and we recommend getting the Totem-related Passives that give you utility bonuses like Onslaught, Totem Placement Speed, Totem Cast Speed, and obviously damage works too |
|
| Recommended affixes: 1 Added Passive Skill is Ancestral Echo 1 Added Passive Skill is Sleepless Sentries |
|
 (Flask) Dying Sun - great Utility Flask, that provides additional projectiles for our Totems. Don't use it if you are going for Rain of Splinters as its effect is diminished then (Flask) Dying Sun - great Utility Flask, that provides additional projectiles for our Totems. Don't use it if you are going for Rain of Splinters as its effect is diminished then |
|
| (-10-10)% increased Charges used (15-25)% increased Area of Effect during Flask Effect Skills fire 2 additional Projectiles during Flask Effect |
|
| (30-15)% reduced Duration Consecrated Ground created by this Flask has Tripled Radius Consecrated Ground created during Effect applies (7-10)% increased Damage taken to Enemies (100-150)% increased Critical Strike Chance against Enemies on Consecrated Ground during Flask effect |
|
|
Other suggested Flasks:
|
|
    |
|
|
If you have any other build requests please leave that in the comments below. We are always open to suggestions and constructive feedback.
Pictures used in this article are the intellectual property of Grinding Gear Games.
