General's Cry Earthshatter Berserker Build
General's Cry build that uses Earthshatter to create multiple shotgunning SpikesGeneral's Cry Earthshatter
Berserker Build
Updated for Patch 3.21
The Best Crafty Guides by Odealo
| Guide notes |
| October 11, 2022 -Build created April 7, 2023 -Updated for Patch 3.21 |
| Build Overview | |||
| Tags: [MELEE] [PHYSICAL] [IMPALE] [LIFE] | |||
|
Budget: Defenses: |
|
Boss DPS: AoE: |
|
General's Cry is a very specific Warcry, after using it you summon Five mirage Warriors that perform an Attack linked to this Skill Gem. These are not Minions, it's an extension of your own Attack and is treated as such, just like Mirage Archers. There are however some differences we will mention later. You can't conjure them out of thin air, first, you need to create a Corpses via Desecrated Ground which is cast while you're Channeling Cyclone. The Warcry is typically used alongside powerful Attacks such as Shield Crush, Shield Charge, or Blade Flurry. This build uses Earthshatter - an equally good candidate for this role. Each Earthshatter, besides dealing their initial damage, creates five Fissures near you. These Fissures summon Spikes that can be detonated by using Slam Attack or Warcry, which is the case here. General's Cry is also a Warcry with the lowest Cooldown, it can be used approximately every 1,7 seconds. It generates a feedback loop where you create Mirage Warriors, which set up multiple Spikes, and these are then detonated with the same ability that summons the next batch of Mirage Warriors. You're able to have up to 15 of these at the same time, and the best part is, the damage of each can Hit the same enemy for a shotgun effect. It can be extremely powerful against bosses.
Berserker is the only viable ascendancy, it possesses War Bringer Keystone granting Rage after performing a Warcry, and upgrades your Exerted Attacks, which includes Spike Damage. Note that Mirage Warriors can't Exert their own Attacks, but the Spikes detonated by you using your Warcry are counted as your Hits, thus Exertion will apply to them, but not the initial impact. To generate more Rage pick Crave the Slaughter and Rite of Ruin. This maneuver will significantly upgrade your Damage, as will the Aspect of the Carnage Keystone. The build can use any weapon, it's even suited for unarmed combat with Facebreakers. We've settled on a powerful rare two-hand Warstaff, which has high base damage but takes away the secondary weapon slot, which would be a great opportunity to equip Redblade Banner. It would drastically improve your Rage generation. You can consider both options, for a two-hand setup as well as a Shield version - the difference is barely noticeable, a matter of relocating a few skill points on the skill tree. The build deals exclusively Physical Damage with Critical Strike Chance at around 50%. It has high Maximum Life and a lot of Armour.
You can also check our other Path of Exile builds right over here Odealo's Crafty Guides - Full List
1. Gameplay
As is the case with most of the General's Cry Builds, this one uses Cyclone linked with Cast while Channelling and Desecrate to spawn corpses continuously. You also have to constantly activate the General Cry itself to activate Eartshatters. It makes it feel like a regular shockwave cyclone build, but with a rather significant delay. For more Attack Speed and Damage use the two Ancestral Totems. Berserk is also an obvious choice for a quick DPS boost among all Berserker players. You should also passively use Blood Rage for extra damage and Leech. For a mobility Skill we've picked Leap Slam, and for a Guard Spell - Molten Shell. As for the Auras, the best options are Pride, Determination, Precision, Herald of Purity, Dread Banner, and Flesh and Stone. For a Curse, we can recommend Vulnerability, and if your Critical Strike Chance is exceptionally high - Assassin's Mark.
|
|
|
|

2. Build's PROS & CONS
| PROS |
|
| CONS |
|
3. Leveling tips
You can use our leveling guide. It should make leveling this character quite easy. Switch to the final version of this build after you start mapping.
Bandits:
you should kill all three Bandits for two additional Skill Points
Leveling Skill Trees:
31 Points Skill Tree
Start with Melee Damage, Accuracy, and Maximum Life
67 Points Skill Tree
Head for more Maximum Life, Chance to Impale, Mana Reservation Efficiency, and the damage of appropriate type - we've allocated a two-hand damage cluster. The next step is to allocate Cluster Jewels if you have them, Jewels Sockets, and Critical Strike or Warcry nodes.
4. Final Skill Tree, Ascendancy Points, and Pantheon
Final Skill Tree:
102 Points Final Skill Tree (doesn't include Cluster or Unique or Cluster Jewels)
117 Points Path of Building (PoB) link
Ascendancy points:
Preferably in that order:
- War Bringer
- Crave the Slaughter
- Rite of Ruin
- Aspect of Carnage
Pantheon:
Major God: Soul of the Brine King: You cannot be Stunned if you've been Stunned or Blocked a Stunning Hit in the past 2 seconds; Cannot be Frozen
Minor God: Soul of Abberath: 60% less Duration of Ignite on You; Unaffected by Burning Ground
5. Final Gems links
| [DPS] Earthshatter setup | |
 |
Earthshatter - A Slam Attack that deals initial impact damage and creates Spikes, later detonated with General's Cry. |
 |
General's Cry - It's the warcry that consumes up to five Corpses to use them as Mirage Warriors and perform the linked Attack Skill. |
 |
Impale Support - Increases Chance to Impalne and its effectiveness. |
 |
Pulverise Support - Less Attack Speed, but More Melee Area Damage. Increases Area of Effect and Area Damage. |
 |
Brutality Support - You're able to deal only Physical Damage, but it's greatly improved because of it. |
 |
Melee Physical Damage Support - Grants more Physical Melee Damage, but reduces your Attack Speed. |
| [UTILITY] Cyclone setup | |
 |
Cyclone - Cyclone is used only to spawn Corpses via Desecrate, it's a Channelling Attack that allows you to move around, very convenient. |
 |
Desecrate - It spawns Corpses, later to be used as ammunition for General's Cry. |
 |
Infused Channelling Support - reduces your damage taken from Physical Hits while Channeling Cyclone. Can be replaced with  Maim Support if the Maim debuff is not applied by Maim Support if the Maim debuff is not applied by  Flesh and Stone in your Case Flesh and Stone in your Case |
 |
Cast while Channeling - Desecrate Spell is being cast while you're Channeling Cyclone |
| [UTILITY] Ancestral Totems setup | |
 |
Ancestral Warchief - The buff from this Totem grants you more Melee Damage. |
 |
Ancestral Protector - The buff from this Totem grants you more Attack Speed. Use the Phantasmal version for an increased Buff Effect. |
 |
Multiple Totems Support - You're able to place both kinds of Totems at the same time. |
| [UTILITY] Mana Reservation setup | |
 |
Pride - Enemies within Pride's AoE receive more Physical Damage, this effect is doubled after four seconds of continuous exposure. |
|
Flesh and Stone - In Blood Stance makes nearby enemies Maimed, making them take more Physical Damage. Sand Stance Blind enemies and reduces the damage you take from them. |
 |
Herald of Purity - It's used only for the buff for more Physical Damage. |
 |
Enlighten Support - Increases the Mana Reservation Efficiency for linked Skills. If your other Skills reserve more Mana switch them, or include them here, as you're not limited to only one six-link setup. |
| [UTILITY] second Mana Reservation setup | |
 |
Precision - Precision grants you an additional Accuracy Rating and increases your Critical Strike Chance, Both are very useful. |
 |
Determination - Use it for more Armour. This Aura, or Pride, can be cast for free with a specific version of Aul's Uprising Amulet. |
 |
Dread Banner - Increases Chance to Impale and its effectiveness. Reduces Accuracy Rating of nearby enemies. |
| [MOBILITY] Leap Slam setup | |
 |
Leap Slam - A simple yet effective movement Attack you can use to jump forward. |
 |
Faster Attacks Support - You can use Leap Slam faster which increases your mobility. |
| [UTILITY] Berserk and Blood Rage setup | |
 |
Berserk - Slowly consumes your Rage and instantly grants you very powerful bonuses to Damage and Survivability alike. |
 |
Blood Rage - Slowly drains your Life and in return provides more Attack Speed and Life Leech. |
 |
Enhance Support - Increases the Quality of linked Skills. |
| [UTILITY] Molten Shell | |
 |
Molten Shell - Absorbs a portion of incoming Damage for a short time, it scales up with your Armour. |
| [UTILITY] Vulnerability | |
 |
Vulnerability - The best Curse for this build. Cursed enemies take increased Physical Damage. If your Critical Strike Chance is high it can be replaced with  Assassin's Mark. Assassin's Mark. |
|
|
6. Gear Setup
The build uses mostly Rare Items, they're just better in most cases. Try to aim for a lot of Resistances of all kinds, Maximum Life, and some Armour. Mana Reservation Efficiency might be an issue if you don't have Aul's Uprising, but ultimately it is the only piece of equipment needed to activate all the above-mentioned Auras. Attack Skills are usually very cheap, but you can still lower your dependency on Mana by lowering Mana Cost of Skills by Ring or Body Armour modifiers. It's a Crit build so you might want to invest in Critical Strike Chance, but most likely won't reach 100% Critical Strike Chance anyway. Look for added and increased damage with Attacks, only the Physical kind. Attack Speed is not very important, you're limited by Warcry Cooldown anyway. You will probably need a small amount of Dexterity and Intelligence too. Remember to gain enough Accuracy Rating.
Our recommended items will:
- Cap your resistances at 75%
- Provide you with enough DPS and Life to start mapping
|
Stat priorities on items:
|
 (Helmet) Rare Helmet - Use a Helmet for Life, Resistances, and Accuracy. You can also aim for some rare modifiers to make nearby enemies take increased Physical Damage. (Helmet) Rare Helmet - Use a Helmet for Life, Resistances, and Accuracy. You can also aim for some rare modifiers to make nearby enemies take increased Physical Damage. |
|
| Min. requirements: +80 to Maximum Life +60% to Elemental Resistances Accuracy Rating Optional affixes: increased Global Accuracy Rating Nearby Enemies take 9% increased Physical Damage Attributes Chaos Resistance |
|
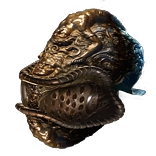 (Helmet) Abyssus - Use Abyssus if you don't mind dying. It lowers your survivability but adds a lot of Physical Damage. It's good with a lot of Armour and Critical Strike Chance. (Helmet) Abyssus - Use Abyssus if you don't mind dying. It lowers your survivability but adds a lot of Physical Damage. It's good with a lot of Armour and Critical Strike Chance. |
|
| +(20-25) to all Attributes Adds 40 to 60 Physical Damage to Attacks +(100-125)% to Melee Critical Strike Multiplier (100-120)% increased Armour (40-50)% increased Physical Damage taken |
|
| Helmet enchantments: Earthshatter enchantments |
|
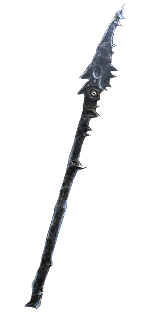 (Weapon) Rare Warstaff - We've used a Warstaff, it's one of the best bases for a weapon, but you can also use Swords or Axes if you happen to find a very good one. I'd require you to rearrange some of your Skill Points. Aim for over 500 Physical DPS and some Critical Strike modifiers. (Weapon) Rare Warstaff - We've used a Warstaff, it's one of the best bases for a weapon, but you can also use Swords or Axes if you happen to find a very good one. I'd require you to rearrange some of your Skill Points. Aim for over 500 Physical DPS and some Critical Strike modifiers. |
|
| Min. requirements: over 500 Physical DPS Optional affixes: increased and added Physical Damage increased Critica Strike Chance and Multiplier Accuracy Rating Quality |
|
 (Body Armour) Rare Body Armour - Body Armour can be a source of multiple defensive stats, but it can also reduce the Mana Cost of socketed Attacks, or allow you to apply an additional Curse. (Body Armour) Rare Body Armour - Body Armour can be a source of multiple defensive stats, but it can also reduce the Mana Cost of socketed Attacks, or allow you to apply an additional Curse. |
|
| Min. requirements: +120 to Maximum Life +80% to Elemental Resistances Optional affixes: Chance to Suppress Spell Damage increased Maximum Life You Can Apply Additional Curse Socketed Attacks have -15 to Total Mana Cost Armour |
|
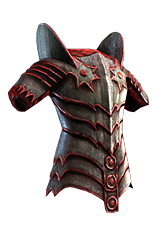
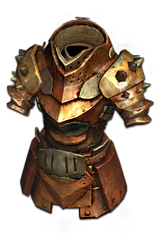 (Body Armour) The Brass Dome - If you don't mind the lack of Maximum Life or Elemental Resistances, then The Brass Dome is definitely a Body Armour to consider. (Body Armour) The Brass Dome - If you don't mind the lack of Maximum Life or Elemental Resistances, then The Brass Dome is definitely a Body Armour to consider. |
|
| (350-400)% increased Armour +(1-5)% to all maximum Elemental Resistances Strength provides no bonus to Maximum Life Take no Extra Damage from Critical Strikes |
|
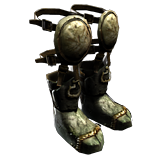 (Boots) Rare Boots - Life, Resistances, and Movement Speed are all mandatory modifiers to be found on your boots, but you might also find a source of Elusive, Tailwind, or Onslaught buffs. (Boots) Rare Boots - Life, Resistances, and Movement Speed are all mandatory modifiers to be found on your boots, but you might also find a source of Elusive, Tailwind, or Onslaught buffs. |
|
| Min. requirements: +60 to maximum Life 25% increased Movement Speed +70% to Elemental Resistances Optional affixes: Chaos Resistance Armour chance to gain Onslaught for 4 seconds on Kill You have Tailwind if you have dealt a Critical Strike Recently chance to gain Elusive on Critical Strike |
|
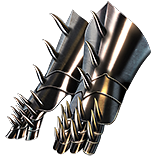 (Gloves) Rare Gloves - Gloves are often abundant with a lot of useful modifiers for Attack builds, such as added Damage, increased Melee Damage, or Accuracy Rating. (Gloves) Rare Gloves - Gloves are often abundant with a lot of useful modifiers for Attack builds, such as added Damage, increased Melee Damage, or Accuracy Rating. |
|
| Min. requirements: +60 to maximum Life +70% to Elemental Resistances Accuracy Rating Optional affixes: Adds Physical Damage to Attacks increased Melee Damage increased Damage while Leeching (crafted) |
|
 (Belt) Ryslatha's Coil - This Belt is one of the best accessories to improve your Damage, we heavily recommend one with some good rolls. (Belt) Ryslatha's Coil - This Belt is one of the best accessories to improve your Damage, we heavily recommend one with some good rolls. |
|
| (20-30)% increased Stun Duration on Enemies +(20-40) to Strength (30-40)% more Maximum Physical Attack Damage (40-30)% less Minimum Physical Attack Damage Adds 1 to (15-20) Physical Damage to Attacks +(80-100) to maximum Life Gain 50 Life when you Stun an Enemy |
|
 (Belt) Rare Belt - Rare Belt is used for Maximum Life and Resistances, there's not much more to gain here. (Belt) Rare Belt - Rare Belt is used for Maximum Life and Resistances, there's not much more to gain here. |
|
| Min. requirements: +90 to Maximum Life +90% to Elemental Resistances Optional affixes: increased Maximum Life Strength increased damage |
|
 (Amulet) Rare Amulet - You can use Amulet for an additional Maximum Life, Elemental Resistances, Attributes, added Damage, Accuracy, and reduced Mana Cost of Skills. (Amulet) Rare Amulet - You can use Amulet for an additional Maximum Life, Elemental Resistances, Attributes, added Damage, Accuracy, and reduced Mana Cost of Skills. |
|
| Min. requirements: +60 Maximum Life +70% to Elemental Resistances Optional affixes: Adds Physical Damage to Attacks Accuracy Rating Attributes Non-Channelling Skills have -# to Total Mana Cost |
|
 (Amulet) Aul's Uprising (Strength) - Aul's Uprising can completely negate the Reservation Cost for the most expensive Auras, namely Pride or Determination. It grants a lot of Maximum Life and some Attributes. (Amulet) Aul's Uprising (Strength) - Aul's Uprising can completely negate the Reservation Cost for the most expensive Auras, namely Pride or Determination. It grants a lot of Maximum Life and some Attributes. |
|
| +(10-16) to all Attributes +(20-30) to Strength (15-20)% increased Armour +(100-120) to maximum Life 10% reduced Stun and Block Recovery Nearby Enemies have 10% reduced Stun and Block Recovery <Pride or Determination Aura> has no Reservation |
|
| Recommended Anointments: Charisma |
|
 (Ring) Rare Rings - Rings are another piece of jewelry you can use for Maximum Life, Resistances, and many other modifiers which are also found on an Amulet. The distinctive mod you should seek on one of your Rings is the Vulnerability Curse on Hit. (Ring) Rare Rings - Rings are another piece of jewelry you can use for Maximum Life, Resistances, and many other modifiers which are also found on an Amulet. The distinctive mod you should seek on one of your Rings is the Vulnerability Curse on Hit. |
|
| Min. requirements: +60 to Maximum Life +80% to Elemental Resistances Optional affixes: Adds Physical Damage to Attacks Chaos Resistance Attributes Accuracy Rating Non-Channelling Skills have -# to Total Mana Cost Curse Enemies with Vulnerability on Hit |
|
 (Jewel) Rare Jewels - Use Jewels to fix your Resistances, Attributes, and Accuracy. If that's done, seek Maximum Life, increased Damage, and Critical Strike modifiers. (Jewel) Rare Jewels - Use Jewels to fix your Resistances, Attributes, and Accuracy. If that's done, seek Maximum Life, increased Damage, and Critical Strike modifiers. |
|
| Recommended affixes: increased maximum Life Attributes Elemental Resistance Chaos Resistance Increased Physical / Staff / Area Damage Critical Strike modifiers |
|
 (Jewel) Lethal Pride - Some of the upgrades for the Notable Passives can be very useful, it also grants more Strength. We've put one between Vigour and Savagery. (Jewel) Lethal Pride - Some of the upgrades for the Notable Passives can be very useful, it also grants more Strength. We've put one between Vigour and Savagery. |
|
| Commanded leadership over (10000-18000) warriors under Rakiata-Akoya-Kaom Passives in radius are Conquered by the Karui Historic |
|
  (Jewel) Forbidden Flame & Forbidden Flesh - Flawless Savagery and Unbreakable are both very good Keystones you can access via pair of Forbidden Jewels. The former is offensively oriented, and the latter provides more defenses. (Jewel) Forbidden Flame & Forbidden Flesh - Flawless Savagery and Unbreakable are both very good Keystones you can access via pair of Forbidden Jewels. The former is offensively oriented, and the latter provides more defenses. |
|
| Allocates <<Random Ascendancy Notable>> if you have the matching modifiers on Forbidden Flesh Allocates <<Random Ascendancy Notable>> if you have the matching modifiers on Forbidden Flame |
|
 (Jewel) Watcher's Eye - You're using Pride, Precision, and Determination. Pride's additional Impales are the best modifier, but any other Pride modifier is decent. The same goes for Precision and Determination. (Jewel) Watcher's Eye - You're using Pride, Precision, and Determination. Pride's additional Impales are the best modifier, but any other Pride modifier is decent. The same goes for Precision and Determination. |
|
| (4-6)% increased maximum Energy Shield (4-6)% increased maximum Life (4-6)% increased maximum Mana <Two or Three random aura modifiers> |
|
 (Jewel) Large Cluster Jewel - There are tons of very useful Notables you can find on a Cluster Jewel, you might even want to use two of them, but one is good enough for a start. (Jewel) Large Cluster Jewel - There are tons of very useful Notables you can find on a Cluster Jewel, you might even want to use two of them, but one is good enough for a start. |
|
| Recommended affixes: 1 Added Passive Skill is Smite the Weak 1 Added Passive Skill is Feed the Fury 1 Added Passive Skill is Fuel the Fight 1 Added Passive Skill is Battle-Hardened 1 Added Passive Skill is Force Multiplier 1 Added Passive Skill is Devastator 1 Added Passive Skill is Iron Breaker 1 Added Passive Skill is Martial Prowess 1 Added Passive Skill is Master the Fundamentals 1 Added Passive Skill is Overlord 1 Added Passive Skill is Heavy Hitter |
|
 (Jewel) Medium Cluster Jewel - We recommend the Warcry-related Medium Cluster Jewels. You can use the to gain Onslaught, generate Charges, and other utilities. (Jewel) Medium Cluster Jewel - We recommend the Warcry-related Medium Cluster Jewels. You can use the to gain Onslaught, generate Charges, and other utilities. |
|
| Recommended affixes: 1 Added Passive Skill is Haunting Shout 1 Added Passive Skill is Lead By Example 1 Added Passive Skill is Mob Mentality 1 Added Passive Skill is Rattling Bellow |
|
 (Flask) Lion's Roar - This Flask grants you more Armour and Melee Physical Damage. Your Attacks knock enemies back on Hit which might be a bit annoying. (Flask) Lion's Roar - This Flask grants you more Armour and Melee Physical Damage. Your Attacks knock enemies back on Hit which might be a bit annoying. |
|
| +1500 to Armour Adds Knockback to Melee Attacks during Flask effect Knocks Back Enemies in an Area when you use a Flask 75% chance to cause Enemies to Flee on use (7-10)% more Melee Physical Damage during effect |
|
 (Flask) Bottled Faith - It's a big boost to your damage, Critical Strike Chance, and creates Consecrated Ground for Life Regeneration and reduced effect of Curses. (Flask) Bottled Faith - It's a big boost to your damage, Critical Strike Chance, and creates Consecrated Ground for Life Regeneration and reduced effect of Curses. |
|
| 40% increased Damage Creates Consecrated Ground on Use (30-15)% reduced Duration Consecrated Ground created by this Flask has Tripled Radius Consecrated Ground created during Effect applies (7-10)% increased Damage taken to Enemies (100-150)% increased Critical Strike Chance against Enemies on Consecrated Ground during Flask effect |
|
|
Other suggested Flasks:
|
|
   |
|
|
If you have any other build requests please leave that in the comments below. We are always open to suggestions and constructive feedback.
Pictures used in this article are the intellectual property of Grinding Gear Games.
