Games Marketplace - Odealo
0.00 25 (Click on the icon to view details)

Articles

Frenzy Barbarian Build for Diablo 2 Resurrected

Frenzy Barbarian Build for Diablo 2 Resurrected

Guide on how to set up a Frenzy Barbarian which is one of the best Boss-killers for its class

Frenzy
Barbarian Build

For Diablo 2 Resurrected
 

Build notes:
September 29, 2021
-Build created 


Build Overview

Frenzy is a very powerful melee skill that allows you to roll through enemies like a steam train, as each successful hit made with it increases your Attack Speed and Velocity (movement speed). With it, you can achieve extremely high mobility that will allow you to blitz through areas at an incredible pace. When supported by the appropriate gear (it likes Damage Increases, Crushing Blows, and Deadly Strikes very much), Frenzy will simply obliterate anything that dares to stand on the Barbarian's path. 

The featured Frenzy Barbarian is a very dynamic melee fighter, capable of burying the opposition under a hailstorm of blows. Moreover, it is able to achieve unbelievably high movement speeds that even rival builds which utilize the Enigma. When properly equipped, it can also withstand a lot of punishment. However, it lacks a bit in the AoE department (and by a bit, we mean that it does not have AoE at all). 

You can also check our other  Diablo 2 Resurrected Builds


 Pros  Cons
 Amazing Single-Target Damage   Unable to hit more targets at once - severely lacks AoE 
 Very high Movement Speed. With this build, you don't really need Enigma for extra mobility   If you don't use Enigma, your Merc won't keep up with your movement speed (as you can't reset your Merc's position with a Teleport) 
 Great Survivability with proper gear   
 One of the best Boss killers for Barbarian class  
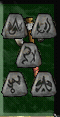
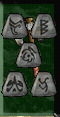
 

Skills

ATTRIBUTES
  1. Strength - All you want, in terms of Strength, is enough of it to equip everything you will want to use on your character. 
  2. Dexterity - Same as Strength - you only need enough Dexterity to meet gear requirements. 
  3. Vitality - You should put all your remaining points here - main stat. 
  4. Energy - Adding points to Energy is an extreme waste - don't do it. 
COMBAT SKILLS

As far as Combat Skills go, you're interested in Frenzy - the build's main offensive skill, and the Double Swing - its synergy, but you should also take Leap and Leap Attack for some extra mobility. 

Skills:
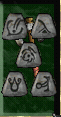
  1. Bash [1/20] - Prerequisite. An attack that also knocks the target back. 
  2. Leap [1/20] - Allows you to perform a long leap. Foes at your landing point are knocked back. This is a solid mobility skill that will allow you to jump out of danger and avoid big damage spikes. 
  3. Double Swing [20/20] - Allows the Barbarian to swing both of his weapons, striking two foes at once. This is a Frenzy Synergy skill, thus you should max it out. 
  4. Double Throw [1/20] - Prerequisite. With this skill, you can throw both of your weapons outwards, it requires throwing weapons in both hands. 
  5. Leap Attack [1/20] - Very similar to the regular Leap, however, Leap Attack makes you leap at an enemy instead. Upon landing, you strike your Target and knock back all surrounding foes. This serves a similar purpose to Leap, but you can use it more offensively. 
  6. Frenzy [20/20] - A powerful melee skill that makes you attack with both weapons. Each successful strike builds up charges of Frenzy; Each stack makes you move and attack more quickly. Bonus per stack is fixed, but the maximum bonus increases with skill levels. The bonus applies to all your skills, not just Frenzy itself, and lasts for 6 seconds. This is your main offensive skill, it will allow you to blitz through packs of enemies like a frenzied berserker (pun intended). 
WARCRIES

From here, you'll get some much-needed utility, an extra Skill Point, and a Frenzy Synergy Skill. 

Skills:
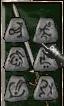
  1. Find Potion [1/20] - Prerequisite. Attempts to find a random potion in a monster's corpse. 
  2. Howl [1/20] - Prerequisite. Frightens nearby enemies, causing them to run away in fear. 
  3. Shout [1/20] - Prerequisite. An AoE Buff that improves the defense rating of you and your party.
  4. Taunt [X/20] - Forces a monster to engage you in melee combat while also reducing its damage. This is a very useful utility skill, as it allows you to force any ranged/caster enemies to come to you. Moreover, it Synergizes with Frenzy, so you should dump all your remaining points on it. 
  5. Find Item [1/20] - Attempts to find a random item in a monster's corpse. You'd be surprised how much rare loot you can actually find with this - don't forget to use it after a fight. 
  6. Battle Cry [1/20] - A shout that lowers the defense and the damage of all nearby monsters. Even at level 1, this will reduce the enemy's damage by 25% and their defense by 50% for 12 seconds. It suffers from heavy diminishing returns, but 1 point spent on it will serve you well. 
  7. Battle Orders [20/20] - Increases the max Life, Mana, and Stamina of you and your party. This is a very powerful utility skill that will greatly increase your survivability and sustain - have it active at all times. 
  8. Battle Command [1/20] - Increases all current skill levels for you and your party. With this, you can get +1 All Skills, which is great. Any subsequent points only increase the duration, so 1 hard point spent here is enough (just 5 soft points are enough to boost the duration to almost a minute). 
COMBAT MASTERIES

This Skill Tree contains some great passives - you should take full advantage of them. 

Skills:

  1. Sword/Axe/Mace Mastery {20/20] - Increases your Attack Rating, Critical Strike Chance, and Damage when using Swords/Axes/Maces. You should max out the mastery that corresponds to your main weapon. 
  2. Increased Stamina [1/20] - Boosts your Stamina Recovery Rate and increases your maximum Stamina. This Passive suffers from heavy diminishing returns, so you should spend just 1 point on it. 
  3. Iron Skin [1/20] - A passive skill that increases your overall Defense. At level one, it provides a 30% Bonus which is enough, especially if you have some soft points from gear. 
  4. Increased Speed [1/20] - Increases your Run/Walk Speed. Just as Increased Stamina, this skill suffers from heavy diminishing returns - spending more than 1 point on it is a waste. 
  5. Natural Resistance [1/20] - A passive skill that increases your natural resistances to elemental and poison damage. Spending 1 point here is a good investment, especially if you have +Skills bonuses from gear. 


Items

First of all, Damage Increases work extremely well with this Build - you should try to get as many of them as possible (things like Fortitude and Grief work extremely well). Secondly, Crushing Blow and Deadly Strike synergize very well with Frenzy's massive attack speed. Thirdly, Defensive stats, like Resistances and Faster Hit Recovery are also welcome. Moreover, Extra Health and Vitality will come in handy as well. Faster Run/Walk and extra Stamina/Stamina Regen are also very useful to have as they will boost your mobility. 

HELMETS

Arreat's Face (Slayer Guard) - This amazing Helmet is widely considered to be the best-in-slot headpiece for most Barbarian builds, and our Frenzy Barb is no exception. It will give you a total of +4 to Combat Skills, a lot of bonus resistances, life leech, and some attributes. 

Arreat's Face


  • Defense: 310-387
  • Required Level: 83
  • Required Strength: 102
  • Durability: 20  
    • +2 to Combat Skills (Barbarian Only) 
    • +2 to Barbarian Skill Levels 
    • +30% Faster Hit Recovery 
    • 20% Bonus to Attack Rating 
    • [3-6]% Life Stolen per Hit (varies) 
    • +[150-200]% Enhanced Defense (varies) 
    • +20 to Strength 
    • +20 to Dexterity 
    • All Resistances +30 

Guillaume's Face (Winged Helm) - This powerful Helmet gives a whopping 35% Chance of Crushing Blow and a 15% chance for a Deadly Strike, which makes it great for this build. Pick it if you lack Crushing Blow and Deadly Strike from other items. 

Guillaume's Face

  • Defense: 85 to 98
  • Required Level: 24
  • Required Strength: 115
  • Durability: 40
    • +120% Enhanced Defense 
    • +30% Faster Hit Recovery 
    • 15% Chance of Deadly Strike 
    • 35% Chance of Crushing Blow 
    • +15 to Strength 

Harlequin Crest (Shako) - If you want some extra Magic Find, Shako would be a good alternative to the Arreat's Face. It won't give you as much power, instead, it will give you 50% higher Magic Find. 

Harlequin Crest 

  • Defense: 98 to 141 
  • Required Level: 62
  • Required Strength: 50
  • Durability: 20
    • +2 to All Skills 
    • +1-148 to Life (+1.5 per Character Level) 
    • +1-148 to Mana (+1.5 per Character Level) 
    • Damage Reduced By 10% 
    • 50% Better Chance of Getting Magic Items 
    • +2 to All Attributes 

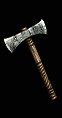
WEAPONS

Important Note: Remember to always use two weapons of the same type (Swords/Axes/Maces), and have the corresponding Mastery maxed out. 

Grief (Runeword) - This is a BiS Main Hand Weapon for this build. It can almost singlehandedly take care of your Increased Attack Speed Breakpoint. Moreover, it greatly increases your Damage and nullifies the enemy's defense. You can even use another Grief in your off-hand if you want to. 

Grief

  • Damage:  Depends on base Weapon
  • Required Level: 59
  • Required Dexterity: Depends on base Weapon
  • Required Strength: Depends on base Weapon
  • Durability: Depends on base Weapon 
  • Eth + Tir + Lo + Mal + Ral
    • 35% Chance To Cast Level 15 Venom On Striking 
    • Damage +340-400 (varies) 
    • +30-40% Increased Attack Speed (varies) 
    • Ignore Target's Defense 
    • -25% Target Defense 
    • +(1.875 Per Character Level) 1.875-185.625% Damage To Demons (Based On Character Level) 
    • Adds 5-30 Fire Damage 
    • -20-25% To Enemy Poison Resist (varies) 
    • 20% Deadly Strike 
    • Prevent Monster Heal 
    • +2 To Mana After Each Kill 
    • +10-15 Life After Each Kill (varies) 

Death (Runeword) - This mighty Runeword gives you a very high chance of Crushing Blow and Deadly Strike which makes it work extremely well with Frenzy and its high attack speed. It works better as an off-hand. 

Death

  • Damage:  Depends on base Weapon
  • Required Level: 55
  • Required Dexterity: Depends on base Weapon
  • Required Strength: Depends on base Weapon
  • Durability: Depends on base Weapon 
  • Hel + El + Vex + Ort + Gul
    • Indestructible 
    • 100% Chance to Cast Level 44 Chain Lightning when you Die 
    • 25% Chance to Cast Level 18 Glacial Spike on Attack 
    • +[300-385]% Enhanced Damage (varies) 
    • 20% Bonus to Attack Rating 
    • +50 to Attack Rating 
    • Adds 1-50 Lightning Damage 
    • 7% Mana Stolen per Hit 
    • 50% Chance of Crushing Blow 
    • [0-49]% Deadly Strike (0.5 per Character Level) 
    • +1 to Light Radius 
    • Level 22 Blood Golem (15 Charges) 
    • Requirements -20% 

Breath of the Dying (Runeword) - Another amazing off-hand Weapon choice for this build. This one gives an insane boost to Attack Speed, a massive increase to all attributes, and a very strong Life Leech effect. 

Breath of the Dying

  • Damage:  Depends on base Weapon
  • Required Level: 69
  • Required Dexterity: Depends on base Weapon
  • Required Strength: Depends on base Weapon
  • Durability: Depends on base Weapon 
  • Vex + Hel + El + Eld + Zod + Eth
    • 50% Chance to Cast Level 20 Poison Nova when you Kill an Enemy 
    • Indestructible 
    • +60% Increased Attack Speed 
    • +[350-400]% Enhanced Damage (varies) 
    • -25% Target Defense 
    • +50 to Attack Rating 
    • +200% Damage to Undead 
    • +50 to Attack Rating against Undead 
    • 7% Mana Stolen per Hit 
    • [12-15]% Life Stolen per Hit (varies) 
    • Prevent Monster Heal 
    • +30 to All Attributes 
    • +1 to Light Radius 
    • Requirements -20% 

Doom (Runeword) - Yet another amazing Weapon Runeword for a Frenzy Barb. This one gives +2 to all Skills, greatly increases attack speed, and offers Deadly Strike as well as Chance of Open Wounds. Moreover, it makes you spread a Level 12 Holy Freeze Aura. All of the above make it a great and versatile candidate for an off-hand. 

Doom

  • Damage:  Depends on base Weapon
  • Required Level: 67
  • Required Dexterity: Depends on base Weapon
  • Required Strength: Depends on base Weapon
  • Durability: Depends on base Weapon 
  • Hel + Ohm + Um + Lo + Cham
    • 5% Chance to cast level 18 Volcano on Striking 
    • Level 12 Holy Freeze Aura when Equipped 
    • +2 to All Skills 
    • +45% Increased Attack Speed 
    • +[330-370]% Enhanced Damage (varies) 
    • -[40-60]% to Enemy Cold Resistance (varies) 
    • 20% Deadly Strike 
    • 25% Chance of Open Wounds 
    • Prevent Monster Heal 
    • Freezes Target +3 
    • Requirements -20% 
WEAPON SWAP

Magic Weapons with +3 to Warcries - As Call to Arms does not work on a Barbarian, dual-wielding Rare Weapons with bonuses to Warcries is the best way to strengthen your pre-buffing ability. A Rare Weapon with +2 to Barbarian Skills could work as well, but it won't be as effective. 

Rare Weapon

You should have two of these on weapon swap for the best effect. 

  • In Magic Weapons, Look for: 
    • +3 to Warcries
  • In Rare Weapons, Look for:
    • +2 to Barbarian Skills 

AMULETS

Highlord's Wrath - The optimal choice for this build. Highlord's Wrath offers a great boost to your Attack Speed. Moreover, it gives you a scaling chance for a Deadly Strike and +1 to all Skills. 

Highlord's Wrath

  • Required Level: 65
    • +1 to All Skills 
    • 20% Increased Attack Speed 
    • +0-37% Deadly Strike (+0.375 per Character Level) 
    • Lightning Resist +35% 
    • Adds 1-30 Lightning Damage 
    • Attacker Takes Lightning Damage of 15 

Mara's Kaleidoscope - This amazing Amulet provides a great combination of offensive (+2 to all skills) and defensive (+20-30 to all resistances) properties. If you lack elemental resistances, pick this one over the Highlord's Wrath.  

Mara's Kaleidoscope

  • Required Level: 67
    • +2 To All Skills 
    • All Resistances +20-30 (varies) 
    • +5 To All Attributes 

ARMORS

Fortitude (Runeword) - This extremely solid Armor Runeword will give you a lot of offensive power and survivability. Moreover, it will take care of your mana problems. A Frenzy simply Barbarian can't go wrong with Fortitude. 

Fortitude

  • Defense: Depends on base Armor 
  • Required Level: 59 
  • Required Strength: Depends on base Armor 
  • Durability: Depends on base Armor 
  • El + Sol + Dol + Lo   
    • 20% Chance To Cast Level 15 Chilling Armor when Struck 
    • +25% Faster Cast Rate 
    • +300% Enhanced Damage 
    • +200% Enhanced Defense 
    • +15 Defense 
    • +[1-148] To Life (Based on Character Level, [1-1.5] per Level) 
    • Replenish Life +7 
    • +5% To Maximum Lightning Resist 
    • All Resistances +[25-30] (varies) 
    • Physical Damage Taken Reduced by 7 
    • 12% Damage Taken Gained as Mana when Hit 
    • +1 To Light Radius 

Chains of Honor (Runeword) - Very strong runeword that mixes solid defenses (resistances, leech, and enhanced def) with a nice +2 bonus to all Skills. Moreover, it will boost your magic find by a bit. Chains of Honor will singlehandedly take care of your Resistance needs, opening up some interesting options for other gear slots. If you're farming maps that feature Demons, this is an interesting alternative to Fortitude. 

Chains of Honor

  • Defense: Depends on base Armor 
  • Required Level: 63 
  • Required Strength: Depends on base Armor 
  • Durability: Depends on base Armor 
  • Dol + Um + Ber + Ist 
    • +2 To All Skills 
    • +200% Damage to Demons 
    • +100% Damage to Undead 
    • 8% Life stolen per hit 
    • +70% Enhanced Defense 
    • +20 Strength 
    • Replenish Life +7 
    • All Resistances +65
    • Damage reduced by 8% 
    • 25% Better Chance of Getting Magic Items 

RINGS

Raven Frost - Seeing this one in the recommendations shouldn't surprise anyone. Raven Frost provides Freeze Immunity, you need freeze immunity, thus you need Raven Frost. Simple as that. 

Raven Frost

  • Required Level: 45
    • +150-250 Attack Rating (varies) 
    • 15-45 Cold Damage 
    • +15-20 Dexterity (varies) 
    • +40 Mana 
    • Cold Absorb 20%
    • Cannot be Frozen 

Bul-Kathos Wedding Band - A solid ring that grants +Skills, a rather high bonus to Life, and a nice Life Leech. If you're after a balanced choice, here it is. 

Bul-Kathos Wedding Band

  • Required Level: 58
    • +1 To All Skills 
    • + (0.5 Per Character Level) 0-49 To Life) 
    • 3-5% Life Stolen Per Hit (varies) 
    • +50 Maximum Stamina 

The Stone of Jordan - Less optimal than Bul-Kathos, but it still provides +1 to all Skills. If you have it laying around, by all means, use it. 

The Stone of Jordan 

  • Required Level: 29
    • +1 to All Skills
    • Increase Maximum Mana by 25% 
    • Adds 1-12 Lightning Damage 
    • +20 to Mana 

GLOVES

Laying of Hands (Bramble Mitts) - These are very powerful, but also very specialized Gloves. With them, your Damage dealt to Demons will simply skyrocket. 

Laying of Hands

  • Defense: 79-87
  • Required Level: 63
  • Required Strength: 50
  • Durability: 12
    • 10% Chance to Cast Level 3 Holy Bolt on Striking 
    • +20% Increased Attack Speed 
    • +350% Damage to Demons 
    • +25 Defense 
    • Fire Resist +50% 

Dracul's Grasp (Vampirebone Gloves) - These amazing gloves grant a 25% Chance of Open Wounds. Moreover, they give you high Life Steal, life after each kill, and a good chance to cast Life Tap on Striking. A great balanced choice that should keep you alive in melee. 

Dracul's Grasp

  • Defense: 125-145
  • Required Level: 76
  • Required Strength: 50
  • Durability: 14
    • +90-120% Enhanced Defense (varies) 
    • +10-15 to Strength (varies) 
    • +5-10 Life After Each Kill (varies) 
    • 25% Chance of Open Wounds 
    • 7-10% Life Stolen Per Hit (varies) 
    • 5% Chance to Cast Level 10 Life Tap on Striking 

BOOTS

Gore Rider (War Boots) - This powerful pair of boots gives a high chance of Open Wounds, Deadly Strike, and Crushing Blow, which makes it ideal for the build.  

Gore Rider

  • Defense: 140-162
  • Required Level: 47
  • Required Strength: 94
  • Durability: 34
  • Kick Damage: 39-80  
    • +160-200% Enhanced Defense
    • 30% Faster Run/Walk
    • 10% Chance Of Open Wounds
    • 15% Chance Of Crushing Blow
    • 15% Deadly Strike
    • Requirements -25%
    • +20 Maximum Stamina 

Goblin Toe (Light Plated Boots) - Another great pair of boots. These ones have a very high chance of a Crushing Blow but don't have Deadly Strike. 

Goblin Toe

  • Defense: 33-34 
  • Required Level: 22
  • Required Strength: 95
  • Kick Damage: 8-16 
  • Durability: 18
    • +50-60% Enhanced Defense (varies) 
    • +15 Defense 
    • 25% Chance of Crushing Blow 
    • -1 to Light Radius 
    • Damage Reduced by 1 
    • Magic Damage Reduced by 1 

BELTS

Verdungo's Hearty Cord (Mithril Coil) - A very solid defensive belt that gives 40 (!) Vitality and high Damage Reduction. If you feel like you need a bit more sustainability and resilience, this belt is a great choice. 

Verdungo's Hearty Cord

  • Defense: 125-158
  • Potion Slots: 16 
  • Required Level: 63
  • Required Strength: 106
  • Durability: 16
    • +90-140% Enhanced Defense 
    • 10% Faster Hit Recovery  
    • +30-40 To Vitality 
    • Replenish Life +10-13 
    • +100-120 Maximum Stamina 
    • Damage Reduced By 10-15% 

String of Ears (Demonhide Sash) - Another amazing defensive belt, this one doesn't only reduce Damage taken, it also reduces Magic Damage taken and provides some Life Leech. 

String of Ears

  • Defense: 102-113 
  • Potion Slots: 16 
  • Required Level: 29
  • Required Strength: 20
  • Durability: 22
    • [6-8]% Life Stolen per Hit (varies)  
    • +[150-180]% Enhanced Defense (varies) 
    • +15 Defense 
    • Physical Damage Taken Reduced by [10-15]% (varies) 
    • Magic Damage Taken Reduced by [10-15] (varies) 
    • +10 Durability 

CHARMS

  1. Annihilus - This fabled Charm boosts your Skills, Stats, and Resistances. It's the best Unique Small Charm, and it's limited to just 1 in your equipment. 
  2. Gheed's Fortune - pretty much a must-have if you're after the best available charms. It adds 80-160% extra gold from monsters, reduces vendor prices by up to 15%, and gives up to 40% MF stat. 
  3. Hellfire Torch - The BiS Unique Large Charm that increases your Vitality and All Skills. 
  4. Grand Charms - These should have + Combat Skills or Warcries. 
  5. Small Charms - With these, you should get Max Damage, Attack Rating, and Life. 

MERCENARY

We recommend picking up Act 2 Might Mercenary for extra damage bonuses. He should be equipped with: 

  1. The Reaper's Toll - This Unique Thresher has a 33% chance to cast level 1 Decrepify on striking, which is perfect as it makes enemies take increased physical damage and can break their immunities. With this, you won't have problems with monsters immune to physical damage ever again. 
  2. Fortitude Rune Word in Armor - This will ensure that your merc doesn't die (it will make him almost immortal). 
  3. Andariel's Visage - An extremely solid and versatile headgear that will make your merc better in all respects. 


END NOTE

This is the initial version of our Diablo 2 Resurrected Frenzy Barbarian Build, where we tried to include all of the important information on how to set up this character while keeping the guide as compact as possible. If we've missed something of importance, please let us know! 

If you have any Build requests, please post them in the Comments section below. We will be happy to cover your most requested builds in the future! Also, we hope that you have found this guide useful and informative. Also, we will be happy to receive constructive criticism that will help us improve our future work, so don't hesitate to give us your feedback. 


Pictures used in this article are the intellectual property of Blizzard Entertainment