Essence Drain Trickster Build - Odealo's Crafty Guide
Essence Drain/Bane Trickster with insane defenses and unparalleled end-game melting potentialEssence Drain
Trickster build
Updated for Patch 3.12
The Best Crafty Guides by Odealo
BUILD OUTDATED PLEASE CHECK THE NEW VERSION FOR PATCH 3.25:
Essence Drain of Desperation Trickster
Essence Drain is one of the most popular skills in Path of Exile, and the best Chaos/Damage over Time Spell overall. When used right after Contagion it melts entire screens of monsters regardless of the current Map Tier. Since your primary DPS comes from Passives and Active Gems, this build is perfect as a League Starter and with end-game equipment, you can reach level 30 on your Essence Drain Gem, which has simply absurd DPS.
On the other hand, this build utilizes Trickster Ascendancy Class for maximum DPS and mobility. This build is optimized for maximum clear speed with the use of Queen of the Forest, which also allows us to scale Evasion Rating up to nearly 50,000, which equals over 70% effective Evade Chance and up to 75% bonus Movement Speed from the Body Armour.
You can also check our other Path of Exile builds right here: Odealo's Crafty Guides - Full List
1. Gameplay
Essence Drain fires a single projectile that deals insane DoT to the first enemy Hit. While on its own it seems very unreliable, if you cast Contagion first, it will spread to enemies beyond your base Line of Sight and melt everything. For that purpose, we try to maximize Contagion's Area of Effect by linking it with Increased Area Support and Unleash
|
|
|
|

2. Build's PROS & CONS
| PROS |
|
| CONS |
|
3. Leveling tips
Essence Drain is a perfect leveling Skill. It clears entire areas within seconds, and your only concern will be staying alive and increasing your Cast and Movement Speed to progress faster. Below you will find the base Skill Setups and several useful uniques that will help you level up faster. You can also follow the final Skill Tree without the necessity to refund any Passives, saving you a bunch of Orb of Regrets.
Suggested leveling Gem setups:
| Essence Drain setup | |
 |
Essence Drain - your primary DPS Spell which deals insane Damage over Time and is spread by using Contagion first |
 |
Void Manipulation Support - increases Chaos Damage dealt with Supported Skills |
 |
Controlled Destruction Support - grants very high Spell Damage at the cost of reduced Critical Hit Chance. While Spell Damage applies to Essence Drain's DoT, the downside is negligible since DoT can't Crit anyway |
| Contagion setup | |
 |
Contagion - Contagion makes up for this build's insane clear speed by spreading your Essence Drain debuff to enemies in the radius |
 |
Increased Area of Effect Support |
 |
Faster Casting Support |
| Utility Gems | |
 |
Flame Dash - used for mobility on lower levels. Can be linked with low-level Arcane Surge for extra Spell Damage/Mana Regen. before you get Eldritch Battery later on |
 |
Malevolence - most important Aura in this build which increases your Damage over Time and Skill Effect Duration |
 |
Despair - recommended Curse for this build which increases the Damage over Time cursed enemies receive |
|
|
Bandits:
We recommend killing all the Bandits for two additional Passive Points
Leveling Skill Trees:
35 Points Skill Tree
Priorities: 1) Trickery 2) Fangs of the Viper 3) Growth and Decay 4) Written in Blood
63 Points Skill Tree
Priorities: 1) Atrophy 2) Arcanist's Dominion 3) Cruel Preparation 4) Method to the Madness
Recommended leveling items:
 Lifesprig - amazing leveling Wand which grants increased Spell Damage, Cast Speed and Life Regen. which is extremely useful on lower levels Lifesprig - amazing leveling Wand which grants increased Spell Damage, Cast Speed and Life Regen. which is extremely useful on lower levels |
|
| (8-12)% increased Spell Damage +1 to Level of Socketed Spell Gems (20-28)% increased Spell Damage (5-8)% increased Cast Speed +(15-20) to maximum Life +(15-20) to maximum Mana Regenerate (6-8) Life over 1 second when you Cast a Spell |
|
 Wanderlust - amazing leveling Boots which grant high bonus Movement Speed and Freeze Immunity Wanderlust - amazing leveling Boots which grant high bonus Movement Speed and Freeze Immunity |
|
| +5 to Dexterity (20-40)% increased Mana Regeneration Rate +(10-20) to maximum Energy Shield 20% increased Movement Speed Cannot be Frozen |
|
 Goldrim - one of the best leveling Helmets which covers up your needs for Elemental Resistances Goldrim - one of the best leveling Helmets which covers up your needs for Elemental Resistances |
|
| +(30-50) to Evasion Rating 10% increased Rarity of Items found +(30-40)% to all Elemental Resistances Reflects 4 Physical Damage to Melee Attackers Level Requirement reduced by 100 (Hidden) |
|
 Praxis - a great leveling Ring which makes you forget Mana-related issues during leveling Praxis - a great leveling Ring which makes you forget Mana-related issues during leveling |
|
| +(20-25) to maximum Mana +(30-60) to maximum Mana (3-6) Mana Regenerated per second -(8-4) to Total Mana Cost of Skills 8% of Damage taken gained as Mana over 4 seconds when Hit |
|
4. Final Skill Tree, Ascendancy Points, and Pantheon
Final Skill Tree:
No Cluster Jewels variant which
114 Points Final Skill Tree
114 Points Path of Building (PoB) link
Cluster Jewels variant
116 Points Final Skill Tree
116 Points Path of Building (PoB) link
Ascendancy points:
Preferably in that order:
- Patient Reaper
- Ghost Dance
- Escape Artist
- Prolonged Pain
Pantheon:
Major God: Soul of Solaris 6% Physical Damage Reduction if there is only one nearby Enemy; 20% chance to take 50% less Area Damage from Hits
Minor God: Soul of Garukhan +5% chance to Evade Attacks if you've taken a Savage Hit recently
5. Final Gems links
| [DPS] Essence Drain setup (in the recommended +3 Bow) |
|
|
Essence Drain - your main DPS Spell. In this setup, it can reach up to level 30 which is the maximum possible and has simply insane DoT DPS |
|
Void Manipulation Support - increases Essence Drain's Chaos Damage |
 |
Efficacy Support - increases both Spell Damage and Damage over Time, both of which apply to Essence Drain |
 |
Empower Support - a must-have in this build. Its level is further increased by the Bow Craft, and you can increase the Essence Drain's level by up to 7 that way |
|
Controlled Destruction Support - greatly increases supported skills' Spell Damage. Since Damage over Time cannot Crit. there is no downside from using this Support Gem |
 |
Swift Affliction Support - increases your Damage over Time |
| [DPS] Bane/Despair setup | |
 |
Bane - Bane is used to apply your Curse and deal moderate extra Damage over Time |
|
Despair - recommended Curse for this build which increases Damage over Time and reduces affected enemies' Chaos Resistance |
|
Efficacy Support |
|
Void Manipulation Support |
|
Controlled Destruction Support |
|
Swift Affliction Support |
| [UTILITY] Wither Spell Totem setup | |
 |
Spell Totem Support - summons a Totem which will cast Wither at your enemies for its' powerful debuff |
 |
Wither - applies Withering stacks which increase Chaos Damage taken by affected enemies |
|
Faster Casting Support |
 |
Multiple Totems Support - doubles the number of Totems summoned with each cast, and lets you summon up to 3 Spell Totems |
| [UTILITY] Contagion setup | |
|
Contagion - AoE Spell which deals a small amount of Chaos DoT and spreads your Essence Drain effects across the area. It's your initiator which has to be followed up by Essence Drain to melt all the enemies on your screen |
|
Increased Area of Effect Support - increases Contagions Area of Effect |
 |
Intensify Support - again used to increase the radius of Contagion |
| [AURAS] various Auras (in Devouring Diadem) |
|
|
Malevolence - Aura which increases your Damage over Time and Skill Effect Duration |
 |
Discipline - increases your Energy Shield Pool and makes Mind over Matter much more efficient in this build |
 |
Flesh and Stone - reduces your chance to be Hit by nearby enemies and reduces damage taken from enemies that are further away from you |
 |
Enlighten Support - with level 4 Enlighten you will have enough Mana to use Aspect of the Spider in this build which increases your damage |
| [MOBILITY] Dash | |
 |
Dash - I personally recommend Dash for mobility, however, it's mainly used to quickly avoid big AoE Hits as you will most likely move faster than any available Movement Skill |
|
|
5. Gear Setup
Below you will find the recommended gear for this build. These are the end-game items based on an at least +3 Crafted Bow, though this build has more budget-friendly variations based on a either Wand and a Shield or a Staff. If you would like to have them included please leave a comment below.
We would like to take this opportunity to invite you to visit our Path of Exile marketplace. You can find all types of PoE Orbs offered for sale there.
The recommended items from our list will:
- Cap your resistances
- Give you enough Energy Shield and DPS to start mapping
|
Stat priorities on items:
|
 (Helmet) The Devouring Diadem - grants Eldritch Battery which saves you three Passive Points. It also increases the level of Gems and reduces Mana Reservation allowing us to use three different Auras. For the Veiled Mod, it's best to pick Elemental + Chaos Resistance for the Veiled modifier (Helmet) The Devouring Diadem - grants Eldritch Battery which saves you three Passive Points. It also increases the level of Gems and reduces Mana Reservation allowing us to use three different Auras. For the Veiled Mod, it's best to pick Elemental + Chaos Resistance for the Veiled modifier |
|
| +1 to Level of Socketed Gems Socketed Gems have 20% reduced Mana Reservation Trigger Level 15 Feast of Flesh every 5 seconds (180-220)% increased Energy Shield 10% chance for Energy Shield Recharge to start when you use a Skill Eldritch Battery <One Veiled Mod> |
|
| Helmet enchantment: 40% increased Essence Drain Damage 12% increased Contagion Area of Effect |
|
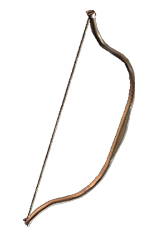 (Weapon Slot) Crafted +3 Bow - a crafted +3 Bow (Weapon Slot) Crafted +3 Bow - a crafted +3 Bow |
|
| Min. requirements: +1 to level of Socketed Gems +2 to level of Socketed Support Gems +30% non-ailment Chaos Damage over Time Multiplier Optional affixes: Cast Speed/Chance to gain Arcane Surge on Kill Chaos Damage +1 to level of Socketed Strength or Intelligence Gems (Fossil Crafted) |
|
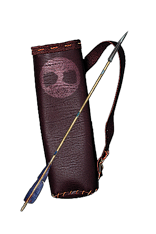 (Quiver) Rare Quiver - used to stack as much Life and Elemental Resistances as possible. A Shaper quiver with a chance to gain Onslaught on Kill will be also nice (Quiver) Rare Quiver - used to stack as much Life and Elemental Resistances as possible. A Shaper quiver with a chance to gain Onslaught on Kill will be also nice |
|
| Min. requirements: 90 maximum Life 110% Total Elemental Resistances Optional affixes: Chance to gain Onslaught on Kill (Shaper Mod) Increased Area of Effect (Elder Mod) |
|
 (Body Armour) Queen of the Forest - has very high base Evasion Rating, decent Life and Resistances, and on top of it, grants up to 75% bonus Movement Speed (Body Armour) Queen of the Forest - has very high base Evasion Rating, decent Life and Resistances, and on top of it, grants up to 75% bonus Movement Speed |
|
| (200-240)% increased Evasion Rating +(60-70) to maximum Life +(6-10)% to Fire Resistance +(26-40)% to Cold Resistance +(11-25)% to Lightning Resistance 25% reduced Movement Speed 1% increased Movement Speed per 600 Evasion Rating, up to 75% -(50-40) Physical Damage taken when Hit by Animals |
|
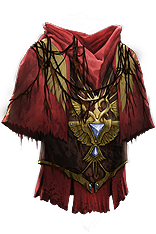
 (Body Armour) Carcass Jack - greatly increases your damage and the radius of your skills. It's perfect for clearing screens ahead (Body Armour) Carcass Jack - greatly increases your damage and the radius of your skills. It's perfect for clearing screens ahead |
|
| (120-150)% increased Evasion and Energy Shield +(50-70) to maximum Life +(9-12)% to all Elemental Resistances (40-50)% increased Area of Effect (40-50)% increased Area Damage Extra gore |
|
 (Boots) Rare Boots - preferably pair with some extra Evasion (Boots) Rare Boots - preferably pair with some extra Evasion |
|
| Min. requirements: 75 maximum Life 30% increased Movement Speed 35% Fire Resistance 25% Chaos Resistance Optional affixes: Evasion Rating Dexterity |
|
| Boot enchantment: 16% increased Attack and Cast Speed if you've Killed Recently |
|
 (Belt) Rare Belt - again, we try to grab one with the highest defensive stats (Belt) Rare Belt - again, we try to grab one with the highest defensive stats |
|
| Min. requirements: 40 Strength 80 maximum Life 25% Chaos Resistance Optional affixes: Elemental Resistances increased Damage |
|
 (Amulet) Rare Amulet - an Elder Amulet with non-Ailment Chaos Damage over Time multiplier will be the best in the slot. Some extra Attributes and Resistances will also come in handy (Amulet) Rare Amulet - an Elder Amulet with non-Ailment Chaos Damage over Time multiplier will be the best in the slot. Some extra Attributes and Resistances will also come in handy |
|
| Min. requirements: 55 maximum Life 30 Strength +10% non-ailment Chaos Damage over Time Multiplier Optional affixes: Cast Speed Spell Damage Elemental Resistances |
|
| Recommended Anointments: Corruption Aspect of Stone |
|
 (Ring) Rare Ring - preferably an Elder Base Ring which will allow you to benefit from Mark of the Shaper's powerful bonuses (Ring) Rare Ring - preferably an Elder Base Ring which will allow you to benefit from Mark of the Shaper's powerful bonuses |
|
| Min. requirements: 60 maximum Life 110% Total Elemental Resistances Optional affixes: Chaos Resistance +#% Chance to Evade Attacks (Elder Mod) |
|
 (Ring) Mark of the Shaper - grants up to 80% increased Spell Damage if your other Ring is and Elder item (Ring) Mark of the Shaper - grants up to 80% increased Spell Damage if your other Ring is and Elder item |
|
| (15-25)% increased Elemental Damage 20% chance to Trigger Level 20 Summon Volatile Anomaly on Kill Adds (13-18) to (50-56) Lightning Damage to Spells (6-10)% increased maximum Energy Shield (6-10)% increased maximum Life (60-80)% increased Spell Damage if your other Ring is an Elder Item Cannot be Stunned by Spells if your other Ring is a Shaper Item |
|
| Min. requirements: 60 maximum Life 12% non-ailment Chaos Damage over Time Multiplier 60% Total Elemental Resistances Optional affixes: increased Spell Damage |
|
 (Jewels) Rare Jewels - this should provide extra Life and damage bonuses (Jewels) Rare Jewels - this should provide extra Life and damage bonuses |
|
| Recommended affixes: increased maximum Life non-ailment Chaos Damage over Time Multiplier Optional affixes: increased Chaos Damage/Spell Damage/Damage over Time |
|
 (Jewels) Abyss Jewels - you can use one Abyssal Jewel if you are using a Stygian Vise, otherwise, Rare Jewels will provide more DPS (Jewels) Abyss Jewels - you can use one Abyssal Jewel if you are using a Stygian Vise, otherwise, Rare Jewels will provide more DPS |
|
| Recommended affixes: maximum Life increased Cast Speed increased Damage if you have Killed Recently Optional affixes: Evasion Rating |
|
 (Jewels) Medium Cluster Jewels - the newly added Cluster Jewels can push this build's DPS to its maximum. They are quite expensive, but they are the only way to increase your DPS above the previous threshold because of giving you an additional way to scale Chaos Damage over Time (Jewels) Medium Cluster Jewels - the newly added Cluster Jewels can push this build's DPS to its maximum. They are quite expensive, but they are the only way to increase your DPS above the previous threshold because of giving you an additional way to scale Chaos Damage over Time |
|
| Recommended Notable Passives: Exposure Therapy Circling Oblivion |
|
 (Jewels) Small Cluster Jewel - if you are using Cluster Jewels at all, you should aim to get Small ones with Fettle Passive for high bonus Life (Jewels) Small Cluster Jewel - if you are using Cluster Jewels at all, you should aim to get Small ones with Fettle Passive for high bonus Life |
|
| Recommended Notable Passives: Fettle |
|
 (Jewels) Transcendent Mind - socketed right above Witch's starting point will give you additional 24% Chaos Damage over Time Multiplier making it the best possible Jewel for this slot (Jewels) Transcendent Mind - socketed right above Witch's starting point will give you additional 24% Chaos Damage over Time Multiplier making it the best possible Jewel for this slot |
|
| -1 Intelligence per 1 Intelligence on Allocated Passives in Radius +3% to Damage over Time Multiplier per 10 Intelligence on Unallocated Passives in Radius 3% increased Mana Recovery Rate per 10 Intelligence on Allocated Passives in Radius 2% reduced Mana Recovery Rate per 10 Intelligence on Unallocated Passives in Radius |
|
 (Flask) Witchfire Brew - a mandatory Flask which greatly increases your Damage over Time and grants extra Evasion (Flask) Witchfire Brew - a mandatory Flask which greatly increases your Damage over Time and grants extra Evasion |
|
| 100% increased Evasion Rating Creates a Smoke Cloud on Use 50% increased Charges used (25-40)% increased Damage Over Time during Flask Effect Grants Level 21 Despair Curse Aura during Flask Effect |
|
 (Flask) Cinderswallow Urn - grants very high Life/Mana/Energy Shield Recovery which combined with this build's massive AoE will instantly replenish all three making it one of the best utility Flasks you can use for this build (Flask) Cinderswallow Urn - grants very high Life/Mana/Energy Shield Recovery which combined with this build's massive AoE will instantly replenish all three making it one of the best utility Flasks you can use for this build |
|
| Recharges 1 Charge when you Consume an Ignited corpse Enemies Ignited by you during Flask Effect take 10% increased Damage Recover (1-3)% of Life when you Kill an Enemy during Flask Effect Recover (1-3)% of Mana when you Kill an Enemy during Flask Effect Recover (1-3)% of Energy Shield when you Kill an Enemy during Flask Effect <One Veiled Mod> |
|
Other suggested flasks:
|
|
    |
|
|
If you have any other build requests, please leave that in the comments below.
Pictures used in this article are the intellectual property of Grinding Gear Games.
