Earthshatter Berserker Build
Presumably the best Melee build in the game currently, which utilizes Warcries to deal devastating damage with your SlamsEarthshatter
Berserker Build
Updated for Patch 3.27
The Best Crafty Guides by Odealo
| Guide notes | |||
| August 2, 2024 -Build created October 28, 2025 -Updated for Patch 3.27 |
|||
| Build overview | |||
| Tags: [MELEE] [PHYSICAL] [LIFE] [STARTER] | |||
|
Budget: Defenses: |
|
Boss DPS: AoE: |
|
Eartshatter is a Slam Attack that creates Spikes, which you can then detonate using a Warcry or another Slam. The reason for selecting this particular Skill is this exact feature. You can have only 18 Spikes at a time, which is not a lot; you can reach this limit with 3 Attacks. This build employs almost all Warcries that there are, most of which are linked to Autoexertion, which, as of patch 3.25, causes them to Reserve Mana, and grant no Buff, but they all have an independent Cooldown and are all Triggered whenever it's possible, mostly to Exert Attacks but also to detonate Spikes only. This is the case with General's Cry, which grants no Buff and Exerts no Attacks but has only a 3-second Cooldown. Slams have great Synergy with Warcries, mostly because they're too slow to run out of Exertions, but generally deal more damage per Hit than other types of Attacks. To ensure that every Attack is Exerted, allocate Berserker's War Bringer, Measured Fury notable, Deep Breaths, and maybe passives from a Medium Cluster Jewel that specialises in Warcries. Berserker is also good with Rage thanks to Crave the Slaughter and with Rite of Ruin - you will reach around 2.5 Attacks per second, which is relatively high for Slams that are always Exerted.
The build uses the Echoes of Creation Helmet, which grants more damage for each individual Exertion that affects your Attacks, which adds up to a lot as you're using all the Exertion the game has to offer. Withstanding the self-inflicted Physical Damage is trivial with up to 50k of Armour and additional Physical Damage Reduction coming from Endurance Charges and Body Armour. The character is also great against Elemental Damage. Since patch 3.25, you can find Maximum Elemental Resistances on regular Jewels, which this build can fit a lot of. You will also pick up Maximum Resistances from the Passive Skill Tree - that's 6% additional Maximum Resistance to a specific Element, combined with 2% from Exarch's mod on a Rare Body Armour, and 2% per Jewel. It's a good opportunity to use Melding of the Flesh, but that's not necessary. You're also Fortified. Life Recovery is gained from Regeneration, Leech, Enduring Cry, and Life Flask. Overall, it's one of the best examples of a Melee build which benefited immensely from the Melee buffs in the Settlers update. It's also good as a starter.
3.27 did not affect this build in the slightest. The only noteworthy addition is the potential power of a Bloodline Ascendancy. Schizophrenic Dissociation is great with high Life Recovery, for example.
You can also find our other Path of Exile builds right over here Odealo's Crafty Guides - Full List
1. Gameplay
Besides your Slam, you will have to use 3 different Warcries that don't fit in your Autoexertion setup or are just not useful when Autoexerted. If that's one too many, you can get a 6-link setup for Autoexertion. Blood Rage and Vulnerability are yet other buttons to press, albeit rarely. To move around and Maim use Leap Slam. Molten Shell is Triggered automatically. Your sole Aura is Pride.
|
|
|
|
2. Build's PROS & CONS
| PROS |
|
| CONS |
|
3. Leveling tips
Use our Marauder Levelling Guide. It's the most efficient way to level up using Two-Hand Axe.
Bandits:
Two Additional Passive Skill Points seem like the best option for this build
4. Final Skill Tree, Ascendancy Points, and Pantheon
Final Skill Tree:
111 Points Final Skill Tree (doesn't include Cluster or Unique Jewels)
123 Points Path of Building (PoB) link
Ascendancy points:
Preferably in that order:
- Crave the Slaughter
- Aspect of Carnage
- Rite of Ruin
- War Bringer
Pantheon:
Major God: Soul of the Brine King: You cannot be Stunned if you've been Stunned or Blocked a Stunning Hit in the past 2 seconds
Minor God: Soul of Abberath: 60% less Duration of Ignite on You
5. Final Gems links
| [DPS] Earthshatter setup | |
 |
Earthshatter - A Slam that creates Spikes, later detonated with Warcry to deal a fair amount of damage. |
 |
Overexertion Support - Deal more Damage for each Exertion affecting Earthshatter. The Attack should be boosted by 5 Warcries. |
 |
Melee Physical Damage Support - More Melee Physical Damage but less Attack Speed. |
 |
Brutality Support - More Physical Damage at the cost of being unable to deal Elemental Damage. |
 |
Pulverise Support - More AoE and Melee Damage, but less Attack Speed. |
 |
Fortify Support - More Melee Damage and Fortify on Hit. If you're already Fortified, swap it with  Fist of War Support. Fist of War Support. |
| [UTILITY] Reservation setup | |
 |
Autoexertion - Linked Warcries Reserve Mana and are triggered automatically. They grant no Buffs and are used only to Exert Attacks, so you might as well keep them all at level 1. |
 |
Battlemage's Cry - Exerts 5 Attacks that in this case will have no impact on the Attack. |
 |
General's Cry - A Warcry that's here only for the sake of using a Warcy, it doesn't even Exert Attacks. It has a very short Cooldown so it's great with the Lead by Example notable. |
 |
Seismic Cry - Exerts 6 Attacks to grant them 50% more AoE. |
 |
Rallying Cry - Exerts 5 Attacks. If you have Allies, such as Sentinels of Purity, it will grant you 5% more damage per Ally. |
 |
Pride - Nearby enemies take increased Physical Damage. This effect is double as effective after 4 seconds of continuous exposure. |
| [UTILITY] Warcry setup socketed in Echoes of Creation |
|
 |
Urgent Orders Support - Linked Warcries are used manually because they grant useful buffs. Intimidating Cry and Infernal Cry can be swapped with Warcries in the Autoexertion setup. This Support Gem increases your Warcry Speed. |
 |
Enduring Cry - Grantes Endurance Charges and Regenerates Life. |
 |
Intimidating Cry - Exerts 2 Attacks and causes them to deal double damage. It's the most potent Exertion, The Buff increases your Movement Speed. |
 |
Infernal Cry - Exerts 6 Attacks, the first Exerted Attack Triggers Combust on Hit. Combust deals Fire damage based on enemies' Maximum Life. The Buff grants Fire Damage as extra Physical Damage. |
| [UTILITY] Molten Shell setup | |
 |
Molten Shell - Prevents a portion of Hit Damage before it expires or can absorb no more. |
 |
Cast when Damage Taken Support - Linked Skill is Triggered after you take enough damage. |
| [MOBILITY] Leap Slam setup | |
 |
Leap Slam - A movement Attack to move faster and jump over rocks and ledges. |
 |
Faster Attacks Support - Faster Attack to move faster with Leap Slam. |
 |
Maim Support - Maims enemies to reduce their movement Speed and make them take increased Physical Damage. |
 |
Lifetap Support - Leap Slam costs Life instead of Mana. |
| [UTILITY] Blood Rage | |
 |
Blood Rage - Life Leech, more Attack Speed, and Frenzy Charges on Kill. |
| [UTILITY] Vulnerability | |
 |
Vulnerability - Cursed enemies take 30% increased Physical Damage. |
|
|
5. Gear Setup
The build is very basic, and because of it, you can fairly easily reach 90% of all Maximum Elemental Resistances via Melding of the Flesh. The missing Resistances can be found on Rare Items, which this build has a lot of, and the Maximum Resistance to the particular element is sourced from the Passive Skill Tree, Body Armour, and Jewels, so you don't even need the Purity Aura. Combined with good Life Recover via Leech, Regeneration, and Flask, and a high Armour Rating, the build has the potential to be extremely durable. The damage comes from a weapon; all you need there is high Physical DPS. The only Unique Item that's exceptionally good is the Echoes of Creation Helmet, which you'll have to get at some point. Keep an eye out for Attributes; the build requires 155 Dexterity and 68 Intelligence.
|
Stat priorities on items:
|
 (Helmet) Echoes of Creation - Here, you will socket the Warcries linked to the Urgent Orders. It grants up to 75% more damage if all 5 Warcries that can Exert your Attack do so. To withstand the self-inflicted damage, get some Armour. (Helmet) Echoes of Creation - Here, you will socket the Warcries linked to the Urgent Orders. It grants up to 75% more damage if all 5 Warcries that can Exert your Attack do so. To withstand the self-inflicted damage, get some Armour. |
|
| Socketed Warcry Skills have +1 Cooldown Use (80-120)% increased Armour +(50-70) to maximum Life When you Attack, take (15-20)% of Life as Physical Damage for each Warcry Exerting the Attack Skills deal (10-15)% more Damage for each Warcry Exerting them |
|
 (Body Armour) Rare Body Armour - On a Body Armour seek Maximum Life and Armour with additional Physical Damage Reduction. Resistances and Life Regeneration can be found here, too, if needed. For the Eldritch mods, get Maximum Elemental Resistance and increased effect of an Aura. (Body Armour) Rare Body Armour - On a Body Armour seek Maximum Life and Armour with additional Physical Damage Reduction. Resistances and Life Regeneration can be found here, too, if needed. For the Eldritch mods, get Maximum Elemental Resistance and increased effect of an Aura. |
|
| Min. requirements: +150 maximum Life +40% to Total Elemental Resistances Additional Physical Damage Reduction Optional affixes: Armour Life Regeneration |
|
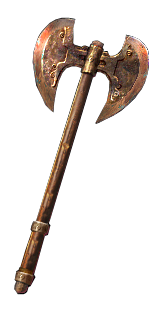
 (Weapon) Rare Two Handed Axe - A Vaal Axe with as high Physical DPS as you can afford. (Weapon) Rare Two Handed Axe - A Vaal Axe with as high Physical DPS as you can afford. |
|
| Min. requirements: 1000 Physical DPS Optional affixes: Attack Speed |
|
 (Gloves) Rare Gloves - A lot of Maximum Life, Armour, Resistances, and maybe Dexterity, as it's commonly found on Gloves. For the Eldritch mods, get increased Attack Speed and increased Exerted Attack Damage. (Gloves) Rare Gloves - A lot of Maximum Life, Armour, Resistances, and maybe Dexterity, as it's commonly found on Gloves. For the Eldritch mods, get increased Attack Speed and increased Exerted Attack Damage. |
|
| Min. requirements: +90 maximum Life +40% to Total Elemental Resistances Dexterity Optional affixes: Armour Chaos Resistance |
|
 (Boots) Rare Boots - Aim for high Maximum Life, Resistances, and Movement Speed. The Eldritch mods may grant you Action Speed and Life Regeneration per Endurance Charge. (Boots) Rare Boots - Aim for high Maximum Life, Resistances, and Movement Speed. The Eldritch mods may grant you Action Speed and Life Regeneration per Endurance Charge. |
|
| Min. requirements: +90 maximum Life 30% increased Movement Speed Optional affixes: Resistances Attributes Freeze Immunity |
|
 (Belt) Rare Belt - Here again seek Maximum Life, Resistances, and maybe Life Regeneration or Armour. Various Flask modifiers will also be fitting. (Belt) Rare Belt - Here again seek Maximum Life, Resistances, and maybe Life Regeneration or Armour. Various Flask modifiers will also be fitting. |
|
| Min. requirements: +100 maximum Life +80% to Total Elemental Resistances Life Regeneration or Armour Optional affixes: increased Maximum Life Strength Flask modifiers |
|
 (Amulet) Rare Amulet - On the Amulet, focus on Maximum Life, Resistances, and Attributes. These are all very common here. (Amulet) Rare Amulet - On the Amulet, focus on Maximum Life, Resistances, and Attributes. These are all very common here. |
|
| Min. requirements: +90 Maximum Life +80% to Elemental Resistances Optional affixes: Life Regeneration Attributes Chaos Resistance |
|
 (Amulet) The Eternal Struggle - It's quite good on its own with the amount of Attributes it grants. It increases Armour and possesses two Eldritch modifiers that can be extremely beneficial. Try to get one with a dominant Exarch for culling. (Amulet) The Eternal Struggle - It's quite good on its own with the amount of Attributes it grants. It increases Armour and possesses two Eldritch modifiers that can be extremely beneficial. Try to get one with a dominant Exarch for culling. |
|
| <<Random Searing Exarch implicit>> <<Random Eater of Worlds implicit>> +(20-50) to Strength +(20-50) to Dexterity +(20-50) to Intelligence (10-15)% increased Global Defences Critical Strikes inflict Malignant Madness if The Eater of Worlds is dominant Kill Enemies that have 15% or lower Life on Hit if The Searing Exarch is dominant |
|
| Recommended Anointments: Charisma |
|
 (Ring) Rare Rings - Rings are a great source of Maximum Life, Resistances, and Attributes. You don't really need anything else. (Ring) Rare Rings - Rings are a great source of Maximum Life, Resistances, and Attributes. You don't really need anything else. |
|
| Min. requirements: +90 Maximum Life +80% to Elemental Resistances Optional affixes: Life Regeneration Attributes Chaos Resistance |
|
 (Jewel) Brutal Restraint - You may implement it mainly to get the required Dexterity. Socket it near Stamina. (Jewel) Brutal Restraint - You may implement it mainly to get the required Dexterity. Socket it near Stamina. |
|
| Denoted service of (500-8000) dekhara in the akhara of (Asenath-Balbala-Nasima) Passives in radius are Conquered by the Maraketh Historic |
|
 (Jewel) Melding of the Flesh - You're using a lot of Rare Jewels which may increase one of your Maximum Elemental Resistance by 2%. Combined with the abundance of Rare gear pieces, Eldritch mod on a Body Armour, Soul of Steel, Prismatic Skin, Nomadic Teachings, and small nodes nearby, you're able to reach 90% of all Elemental Resistances with no Purity Aura. (Jewel) Melding of the Flesh - You're using a lot of Rare Jewels which may increase one of your Maximum Elemental Resistance by 2%. Combined with the abundance of Rare gear pieces, Eldritch mod on a Body Armour, Soul of Steel, Prismatic Skin, Nomadic Teachings, and small nodes nearby, you're able to reach 90% of all Elemental Resistances with no Purity Aura. |
|
| -(80-70)% to all Elemental Resistances Elemental Resistances are capped by your highest Maximum Elemental Resistance instead -(6-4)% to all maximum Elemental Resistances |
|
 (Jewel) Sublime Vision - It just so happens that you don't have Mana for any other Aura than Pride, you might as well use Sublime Vision because of that. (Jewel) Sublime Vision - It just so happens that you don't have Mana for any other Aura than Pride, you might as well use Sublime Vision because of that. |
|
| Enemies you Kill while using Pride have 25% chance to Explode, dealing a tenth of their maximum Life as Physical Damage Aura Skills other than Pride are Disabled (20-40)% increased Effect of Non-Curse Auras from your Skills on Enemies |
|
  (Jewel) Forbidden Flesh & Flame - Marauder has tons of great passives you can snatch from other ascendancies with a pair of forbidden Jewels. We have used Tukohama, but almost anything is good. (Jewel) Forbidden Flesh & Flame - Marauder has tons of great passives you can snatch from other ascendancies with a pair of forbidden Jewels. We have used Tukohama, but almost anything is good. |
|
| Allocates <Random Ascendancy Notable> if you have the matching modifier on Forbidden Flesh Allocates <Random Ascendancy Notable> if you have the matching modifier on Forbidden Flame |
|
 (Jewel) Rare Jewels - With 2 Large Cluster Jewels you'll have 8 Jewel Sockets to spare. We recommend using Jewels to increase a specific Elemental Resistance for Melding of the Flesh, but the more generic modifiers for all Maximum Elemental Resistances with no Melding will work too. (Jewel) Rare Jewels - With 2 Large Cluster Jewels you'll have 8 Jewel Sockets to spare. We recommend using Jewels to increase a specific Elemental Resistance for Melding of the Flesh, but the more generic modifiers for all Maximum Elemental Resistances with no Melding will work too. |
|
| Recommended affixes: increased maximum Life Attributes Resistances Reduced Effect of Ailments on you Mana Reservation Efficiency Maximum Elemental Resistance |
|
 (Jewel) Watcher's Eye - You're using Pride. Increased Damage is the only good modifier here. (Jewel) Watcher's Eye - You're using Pride. Increased Damage is the only good modifier here. |
|
| (4-6)% increased maximum Energy Shield (4-6)% increased maximum Life (4-6)% increased maximum Mana <Two or Three random aura modifiers> |
|
 (Jewel) Large Cluster Jewel - A Large Physical or Attack Cluster Jewel or two with 8 passives and 3 notables from the list is what you're looking for. (Jewel) Large Cluster Jewel - A Large Physical or Attack Cluster Jewel or two with 8 passives and 3 notables from the list is what you're looking for. |
|
| Recommended affixes: 1 Added Passive Skill is Battle-Hardened 1 Added Passive Skill is Furious Assault 1 Added Passive Skill is Master the Fundamentals 1 Added Passive Skill is Drive the Destruction 1 Added Passive Skill is Fuel the Fight 1 Added Passive Skill is Smite the Weak |
|
 (Jewel) Medium Cluster Jewel - Cry Wolf grants Damage and increased Warcry Power. Lead by Example grants Onslaught. (Jewel) Medium Cluster Jewel - Cry Wolf grants Damage and increased Warcry Power. Lead by Example grants Onslaught. |
|
| Recommended affixes: 1 Added Passive Skill is Cry Wolf 1 Added Passive Skill is Lead by Example |
|
|
Other suggested Flasks and Tinctures:
|
|
     |
|
|
If you have any other build requests, please leave that in the comments below.
Pictures used in this article are the intellectual property of Grinding Gear Games.


