Dual Strike of Ambidexterious Slayer
A very strong setup for Dual Wielding Slayer for all Melee enjoyers who like to have insane single-target Damage even on a low budgetDual Strike of Ambidexterity
Slayer Build
Created for Patch 3.26
The Best Crafty Guides by Odealo
| Guide notes |
| February 25, 2024 -Build created June 13, 2024 -Updated for Patch 3.26 |
| Build Overview | |||
| Tags: [ATTACK] [PHYSICAL] [LIFE] [CRIT] | |||
|
Budget: Defenses: |
|
Boss DPS: AoE: |
|
The Dual Strike of Ambidexterity is a transfigured version of the iconic Dual-wielding Melee Skill. It combines the Damage of each Weapon into one Strike, averaging their properties. The Transfigured version requires you to wield two different Weapon Types in each hand but offers insanely strong benefits for doing so. Your Main Weapon Damage will deal 70% More Damage, and all Attack Speed will be sourced from your Off-hand Weapon. The main idea here is to combine a very slow but hard-hitting Weapon with an Off-hand with the fastest Attack Speed possible.
The best combination for such circumstances is the Paradoxica and Brightbeak. The Paradoxica is a sword with fairly low Physical DPS but always deals Double Damage, which works very well with sources of Physical Damage from your other Gear pieces, such as Abyssus or Rare Jewellery. The other Weapon, Britghtbeak, is a common leveling Unique that has abysmally low Physical Damage but offers extremely fast Attack Speed. Due to its accessibility, it will be easy to obtain useful Corrupted Implicits that increase its Attack Speed further or grant Fortify on Hit. Another interesting interaction is the particular Dual Wielding Notable found on the Passive Tree and Cluster Jewels - it increases your Main Hand Damage by 60%, and the Attack Speed of your Off-hand by 30%.
The Slayer Ascendency offers universally good bonuses for any Attack Build. You will deal More Damage against Bosses and Cull them twice as fast, endless Leech offers very potent Life Recovery and a bit of Damage Reduction, while the additional Endurance Charges grant you even more Damage Reduction against Physical Damage. You can also borrow the Master of Metal Notable via Forbidden Jewels, which significantly improves your Damage with Impale.
You can also check our other Path of Exile builds right over here Odealo's Crafty Guides - Full List
1. Gameplay
The Dual Strike of Ambidexterity is a simple Melee Skill with no additional secondary effects. To move around you will use the Leap Slam. To improve your Damage against Bosses you will have the Dread Banner and Vulnerability Curse in your arsenal. Assassin's Mark is triggered on Hit; Molten Shell is linked with Automation. Your passive skills are Precision, Pride, Determination, and Flesh and Stone.
|
|
|
|

2. Build's PROS & CONS
| PROS |
|
| CONS |
|
3. Leveling tips
The leveling experience is quite usual. You can start using the Dual Strike of Ambidexterity right from the start, but at that point, you won't have access to the powerful interactions that make it shine, so you can pick any other Skill. The most popular Skill to power-level through the Campaign is the Splitting Steel with a Two-handed Axe due to good base Damage and abundance of useful Notables on the Passive Tree. We recommend our Leveling Guide for Melee Duelist Builds to see more Leveling Tips.
Bandits:
Kill all Bandits to get additional Passive Tree Skill Point
Leveling Skill Trees:
31 Points Passive Tree
Pick nearby Two-handed and Projectile Notables. You will refund them later, but will make your leveling much faster.
58 Points Passive Tree
Allocate:
Head towards the Precise Technique Keystone to gain a solid boost to your DPS. Pick the Axe and Projectile Notables on your way. You will also need plenty of Accuracy and maximum Life.
4. Final Skill Tree, Ascendancy Points, and Pantheon
Final Skill Tree:
100 Points Final Passive Tree (doesn't include Cluster or Unique Jewels)
120 Points Path of Building (PoB) link
Ascendancy points:
Preferably in this order:
- Bane of Legends
- Headsman
- Brutal Fervour
- Impact
Pantheon:
Major God: Soul of the Brine King: You cannot be Stunned if you've been Stunned or Blocked a Stunning Hit in the past 2 seconds; 100% chance to Avoid being Frozen
Minor God: Soul of Shakari: 50% less Duration of Poisons on You, You cannot be Poisoned while there are at least 3 Poisons on you
5. Final Gems links
| [DPS] Dual Strike of Ambidexterity setup | |
 |
Dual Strike of Ambidexterity - your main source of Damage comes from this Skill. It strikes your target with both Weapons, combining their Damage into one Hit. It boosts the Damage of your Main-hand Weapon while using the Attack Speed only of your Off-hand Weapon. |
 |
Impale Support - improves your chance to Impale and its effectiveness. |
 |
Multistrike Support - repeats your Attacks additional times, increasing the Damage with each swing. |
 |
Increased Critical Damage Support - provides tons of Critical Strike Multiplier. You can also use the Increased Critical Strikes Support if your Crit Chance is unreliable. |
 |
Brutality Support - greatly improves your Physical Damage, which is the only type dealt by this Build. |
 |
Melee Physical Damage Support - further boosts your Physical Damage. The Awakened version also provides a chance to Intimidate Enemies. |
| [UTILITY] Aura setup | |
 |
Pride - a very powerful Aura that affects your Enemies instead of you. It increases the Physical Damage they take. The effect starts low and increases over time. |
 |
Determination - a defensive Aura that improves your Armour Ratin significantly. |
 |
Flesh and Stone - allows you to change your Stance and grants defensive or offensive bonuses depending on the stance you are in. |
 |
Dread Banner - greatly improves your Impale effectiveness, and lowers the Accuracy rating of nearby Enemies, making you more likely to Evade even without the Grace Aura. |
 |
Precision - improves your Accuracy Rating and Critical Strike Chance. If you lack Mana to Reserve, consider using it with the Arrogance Support. |
 |
Enlighten Support - lowers the amount of Mana Reserved by your Auras. Link it with your three most expensive Auras. |
| [UTILITY] Mark setup | |
 |
Assassin's Mark - improves your Critical Strike Chance and Multiplier against Enemies affected by this Spell. |
 |
Mark on Hit Support - automatically Marks your Enemies when you Hit them with any Attack. |
 |
Lifetap Support - allows you to pay the Mana Cost with your Life instead. |
| [UTILITY] Movement setup | |
 |
Leap Slam - a quick jump toward the targeted location. It also Stuns Enemies on Full Life making it safer to engage. |
 |
Faster Attacks Support - improving your Attack Speed is crucial for this Movement Skill. |
 |
Rage Support - Leap Slam now grants Rage on Hit. With 10 Rage, it has increased Attack Speed. |
| [UTILITY] Ancestral Totems setup | |
 |
Molten Shell - creates a protective barrier that increases your Armour Rating and absorbs part of the incoming Damage. |
 |
Automation - Triggers Molten Shell as soon as it's possible. |
 |
Enhance Support - Quality for Molten Shell and Automation for more Duration and Cooldown Recovery Rate. |
| [UTILITY] Other Utility setups | |
 |
Vulnerability - if you have a source of additional Curse you can use the Vulnerability to make your Enemies Take more Physical Damage. |
 |
Blood Rage - a Buff that applies a Physical DoT to you but increases your Attack Speed and generates Frenzy Charges. |
|
|
6. Gear Setup
Your Unique Weapons have very impactful properties that make them worth using, but their pure Physical DPS is quite low, so you should aim to get sources of Added Physical Damage elsewhere. The Abyssus will greatly improve your Damage but make you more vulnerable to Physical Damage, so you should consider swapping it to a defensive piece if your DPS is comfortable enough without it. There are no Build-enabling Unique, although it would be hard to find a Rare Item that outperforms certain pieces in terms of Damage they provide. The Cluster Jewels are very important, as the Quick and Deadly Notable is extremely effective for this Build. It is a Life-based Build with a focus on Armour, but you should have a bit of Evasion from the hybrid bases. The Spell Suppression is quite easy to cap if you are willing to sacrifice some Damage.
|
Stat priorities on items:
|
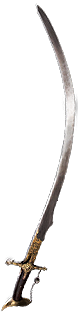 (Main-hand Weapon) Paradoxica - even the worst-rolled Paradoxica will be better than any Weapon in its price range. Ideally, it should have Veiled modifiers that increase its Physical Damage, improve your Chance to Impale Enemies, and have a higher Critical Strike Chance. The Attack Speed doesn't impact your DPS, as you will use the Attack Speed of your Off-hand instead. (Main-hand Weapon) Paradoxica - even the worst-rolled Paradoxica will be better than any Weapon in its price range. Ideally, it should have Veiled modifiers that increase its Physical Damage, improve your Chance to Impale Enemies, and have a higher Critical Strike Chance. The Attack Speed doesn't impact your DPS, as you will use the Attack Speed of your Off-hand instead. |
|
| +25% to Global Critical Strike Multiplier Attacks with this Weapon deal Double Damage Recommended Veiled modifiers: (28-32)% increased Critical Strike Chance (120-139)% increased Physical Damage (21-25)% chance to Impale Enemies on Hit with Attacks |
|
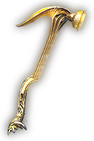 (Off-hand Weapon) Brightbeak - a very fast Weapon that deals a minuscule amount of Damage. You can Corrupt it to gain even more Attack Speed or get Fortification on Hit. It can be outperformed by a Rare Weapon, but it will be very expensive and you would lose the Corrupted Implicits. (Off-hand Weapon) Brightbeak - a very fast Weapon that deals a minuscule amount of Damage. You can Corrupt it to gain even more Attack Speed or get Fortification on Hit. It can be outperformed by a Rare Weapon, but it will be very expensive and you would lose the Corrupted Implicits. |
|
| (50-75)% increased Physical Damage 45% increased Attack Speed 25% increased Critical Strike Chance +(20-30)% to Fire Resistance +(20-30)% to Lightning Resistance Recommended Corrupted Implicits: (10–15)% chance to Fortify on Melee hit (10–15)% chance to gain Onslaught for 4 seconds on Kill (5–7)% increased Attack Speed |
|
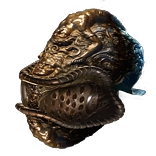 (Helmet) Abyssus - an iconic Helmet that greatly improves your Damage, but also makes you more vulnerable against Physical Damage, including DoTs like Bleeding. (Helmet) Abyssus - an iconic Helmet that greatly improves your Damage, but also makes you more vulnerable against Physical Damage, including DoTs like Bleeding. |
|
| +(20-25) to all Attributes Adds 40 to 60 Physical Damage to Attacks +(100-125)% to Melee Critical Strike Multiplier (100-120)% increased Armour (40-50)% increased Physical Damage taken |
|
 (Helmet) Rare Helmet - a Rare Helmet can be used to greatly boost your defense, but it provides very little towards your DPS. It can grant you a lot of maximum Life, Spell Suppression, Mana Reservation Efficiency, and Resistance. It can also shift some of the Physical Damage to be Taken as Elemental. (Helmet) Rare Helmet - a Rare Helmet can be used to greatly boost your defense, but it provides very little towards your DPS. It can grant you a lot of maximum Life, Spell Suppression, Mana Reservation Efficiency, and Resistance. It can also shift some of the Physical Damage to be Taken as Elemental. |
|
| Min. requirements: +70 to maximum Life 10% Chance to Suppress Spell Damage 50% to Elemental Resistance Optional affixes: Mana Reservation Efficiency Chaos Resistance Attributes Physical Damage Taken as Elemental Damage |
|
 (Body Armour) Rare Armour - use an influenced body Armour that improves your Critical Strike Chance with Attacks. It can also grant you additional Curse, but you should prioritize a high amount of Spell Suppression first. Top it up with some Resistance or Physical Damage Reduction. (Body Armour) Rare Armour - use an influenced body Armour that improves your Critical Strike Chance with Attacks. It can also grant you additional Curse, but you should prioritize a high amount of Spell Suppression first. Top it up with some Resistance or Physical Damage Reduction. |
|
| Min. requirements: Attacks have +1% to Critical Strike Chance 20% Chance to Suppress Spell Damage 40% to Elemental Resistance Optional affixes: Mana Reservation Efficiency Chaos Resistance You can apply an additional Curse Attributes Physical Damage Taken as Elemental Damage |
|
 (Boots) Ralakesh's Impatience - those Boots are used purely for convenience, you can generate your Charges via Assassin's Mark, Sword Mastery, and Endurance Cry or certain Notable on Cluster Jewel. (Boots) Ralakesh's Impatience - those Boots are used purely for convenience, you can generate your Charges via Assassin's Mark, Sword Mastery, and Endurance Cry or certain Notable on Cluster Jewel. |
|
| (15-25)% increased Movement Speed +(15-25)% to Cold Resistance +(15-25)% to Chaos Resistance Immune to Corrupted Blood Count as having maximum number of <Endurance, Frenzy, or Power> Charges |
|
 (Boots) Rare Boots - if you use Rare Boots you should aim for high maximum Life, Spell Suppression, Resistances, Elemental Avoidances, and Action Speed. It will certainly be stronger but requires more effort. Movement Speed is optional, as you will travel using the Leap Slam most of the time. (Boots) Rare Boots - if you use Rare Boots you should aim for high maximum Life, Spell Suppression, Resistances, Elemental Avoidances, and Action Speed. It will certainly be stronger but requires more effort. Movement Speed is optional, as you will travel using the Leap Slam most of the time. |
|
| Min. requirements: +70 to maximum Life 40% to Elemental Resistance 10% Chance to Suppress Spell Damage Optional affixes: Action Speed Chaos Resistance Onslaught on Kill Tailwind on Crit Ailment Avoidance |
|
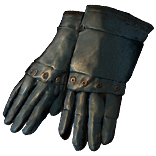 (Gloves) Rare Gloves - here you should aim for maximum Life, Spell Suppression, Resistance, Attack Speed, and Accuracy Rating. The Eldritch Implicit can improve your Clear Speed via additional Strike Targets or improve your Damage via Rage generation. (Gloves) Rare Gloves - here you should aim for maximum Life, Spell Suppression, Resistance, Attack Speed, and Accuracy Rating. The Eldritch Implicit can improve your Clear Speed via additional Strike Targets or improve your Damage via Rage generation. |
|
| Min. requirements: +70 to maximum Life 40% to Elemental Resistance 15% increased Attack Speed 10% Chance to Suppress Spell Damage Optional affixes: % increased Damage while Leeching Chaos Resistance Gain 1 Rage on Hit with Attacks, no more than once every 1.2 seconds Strike Skills target 1 additional nearby Enemy Accuracy Rating |
|
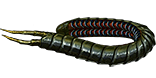 (Belt) Ryslatha's Coil - it greatly improves your DPS by manipulating the Damage range. It also adds plenty of maximum Life and flat Physical Damage. The Base Implicit of this Belt is useless, try to overwrite it with useful Corruption, but remember about correct rolls on the Minimum and Maximum Damage. (Belt) Ryslatha's Coil - it greatly improves your DPS by manipulating the Damage range. It also adds plenty of maximum Life and flat Physical Damage. The Base Implicit of this Belt is useless, try to overwrite it with useful Corruption, but remember about correct rolls on the Minimum and Maximum Damage. |
|
| +(20-40) to Strength (30-40)% more Maximum Physical Attack Damage (40-30)% less Minimum Physical Attack Damage Adds 1 to (15-20) Physical Damage to Attacks +(80-100) to maximum Life Gain 50 Life when you Stun an Enemy |
|
 (Amulet) Rare Amulet - you can get a lot of flat Physical Damage and Critical Strike Multiplier from your Amulet. It should also provide you with some maximum Life and Resistances. Try to get an empty Prefix so you can add the Mana Cost reduction via Crafting Bench. (Amulet) Rare Amulet - you can get a lot of flat Physical Damage and Critical Strike Multiplier from your Amulet. It should also provide you with some maximum Life and Resistances. Try to get an empty Prefix so you can add the Mana Cost reduction via Crafting Bench. |
|
| Min. requirements: +70 to maximum Life 40% to Elemental Resistance Non-Channelling Skills have -(7-6) to Total Mana Cost Optional affixes: % to Global Critical Strike Multiplier Adds # to # Physical Damage to Attacks Accuracy Rating |
|
| Recommended Anoint: Panopticon Charisma |
|
 (Amulet) Aul's Uprising - this Amulet allows you to use one Aura completely for free, which you can link with the Arrogance Support to get a 24% increased Aura Effect. It can be used to remove the necessity of the Mana Reservation investments or add one extra Aura to your setup. (Amulet) Aul's Uprising - this Amulet allows you to use one Aura completely for free, which you can link with the Arrogance Support to get a 24% increased Aura Effect. It can be used to remove the necessity of the Mana Reservation investments or add one extra Aura to your setup. |
|
| +(10-16) to all Attributes +(20-30) to Strength (15-20)% increased Armour +(50-70) to maximum Life Recommend Aura modifier: Determination has no Reservation Grace has no Reservation Pride has no Reservation |
|
 (Ring) Rare Ring - on your Rings you should look for exactly the same modifiers as your Amulet, although the rolls will be slightly lower. The Amethyst Ring is the best defensive Base, but you can opt for Steel or Diamond Ring if you want more Damage. (Ring) Rare Ring - on your Rings you should look for exactly the same modifiers as your Amulet, although the rolls will be slightly lower. The Amethyst Ring is the best defensive Base, but you can opt for Steel or Diamond Ring if you want more Damage. |
|
| Min. requirements: +60 to maximum Life 40% to Elemental Resistance Non-Channelling Skills have -(7-6) to Total Mana Cost Optional affixes: % to Global Critical Strike Multiplier Adds # to # Physical Damage to Attacks Accuracy Rating |
|
 (Jewel) Rare Jewels - use Jewels to improve your maximum Life, Attack Speed, and Critical Strike Multiplier. You can also use them to fix your Resistance or Attributes. (Jewel) Rare Jewels - use Jewels to improve your maximum Life, Attack Speed, and Critical Strike Multiplier. You can also use them to fix your Resistance or Attributes. |
|
| Min. requirements: increased maximum Life Recommended affixes: Attack Speed Critical Strike Multiplier Resistances Attribute Accuracy Rating |
|
 (Jewel) Large Cluster Jewel - the Quick and Deadly Notable is roughly 3 times more effective than any other Notable found here. The Feed the Fury is also very potent, as your Leech will last even when you fill up your Life. The last Notable is less impactful, although Martial Prowess is the best choice due to the Accuracy Rating it provides. (Jewel) Large Cluster Jewel - the Quick and Deadly Notable is roughly 3 times more effective than any other Notable found here. The Feed the Fury is also very potent, as your Leech will last even when you fill up your Life. The last Notable is less impactful, although Martial Prowess is the best choice due to the Accuracy Rating it provides. |
|
| Recommended affixes: 1 Added Passive Skill is Feed the Fury 1 Added Passive Skill is Martial Prowess 1 Added Passive Skill is Quick and Deadly |
|
 (Jewel) Megalomaniac - you can fit even more Quick and Deadly Notables to your Build using this Jewel. Pair it with at least 1 synergistic Notable to make it worth it. (Jewel) Megalomaniac - you can fit even more Quick and Deadly Notables to your Build using this Jewel. Pair it with at least 1 synergistic Notable to make it worth it. |
|
| Adds 4 Passive Skills Added Small Passive Skills grant Nothing <3 Random notable mods> |
|
  (Jewel) Forbidden Flame & Flesh - the Master of Metal Notable from the Champion Ascendency is very powerful for any Build that relies on Impale. It will also add plenty of Physical Damage to your Attacks, which gets doubled by your Sword. (Jewel) Forbidden Flame & Flesh - the Master of Metal Notable from the Champion Ascendency is very powerful for any Build that relies on Impale. It will also add plenty of Physical Damage to your Attacks, which gets doubled by your Sword. |
|
| Allocates Master of Metal if you have the matching modifiers on Forbidden Flesh/Flame | |
 (Jewel) Watcher's Eye - the Pirde-specific modifier allows you to inflict more Impale stacks on your Enemies. You can also look for useful modifiers from the Precision or Determination Aura, but Impale is your priority. (Jewel) Watcher's Eye - the Pirde-specific modifier allows you to inflict more Impale stacks on your Enemies. You can also look for useful modifiers from the Precision or Determination Aura, but Impale is your priority. |
|
| (4-6)% increased maximum Energy Shield (4-6)% increased maximum Life (4-6)% increased maximum Mana <Two or Three random aura modifiers> Recommended Aura mods: Impales you inflict last 2 additional Hits while using Pride Gain a Flask Charge when you deal a Critical Strike while affected by Precision (40-60)% increased Attack Damage while affected by Precision (5-8)% additional Physical Damage Reduction while affected by Determination |
|
|
|
|
| Commanded leadership over (10000-18000) warriors under (Akoya-Kaom-Rakiata) Passives in radius are Conquered by the Karui Historic |
|
 (Flask) Bottled Faith - a very strong offensive Flask that improves your Critical Strike Chance and Damage against Enemies standing on the Consecrated Ground it creates. (Flask) Bottled Faith - a very strong offensive Flask that improves your Critical Strike Chance and Damage against Enemies standing on the Consecrated Ground it creates. |
|
| (30-15)% reduced Duration Consecrated Ground created by this Flask has Tripled Radius Consecrated Ground created during Effect applies (7-10)% increased Damage taken to Enemies (100-150)% increased Critical Strike Chance against Enemies on Consecrated Ground during Effect |
|
|
Suggested Flasks:
|
|
    |
 (Jewel) Lethal Pride - this Jewel adds very potent bonuses to nearby Notables. You should seek Physical Damage mitigation, Critical Strike Chance and Multiplier for Melee Attacks, or maximum Life.
 |
|
If you have any other build requests please leave that in the comments below. We are always open to suggestions and constructive feedback.
Pictures used in this article are the intellectual property of Grinding Gear Games.
