
Dominating Blow of Inspiring Guardian
Surprisingly powerful Melee build that scales its damage purely via Minions and their damage modifiersDominating Blow of Inspiring
Guardian/Farrul Build
Created for Patch 3.27
The Best Crafty Guides by Odealo
| Guide notes |
| December 06, 2025 - Build created |
| Build overview | |||
| Tags: [LIFE] [ATTACK] [ELEMENTAL] [NON-CRIT] | |||
|
Budget: Defenses: |
|
Boss DPS: AoE: |
|
The Dominating Blow is an Attack that summons fallen Enemies as your own Minions when you kill them. The Transfigured version of Inspiring shifts a lot of power to your own Damage instead. All increases to your Minions' Damage will be applied to you at 300% Effectiveness, and you can raise it up to 450% with some investments to Gem Quality. With a specially tailored way of building up your character, you can easily reach up to 4000% increased Damage. Doing so will also yield a lot of Attack Speed, also sourced from Minion bonuses, thanks to the Spiritual Command Notable. However, it doesn't leave a lot of room for scaling Critical Strikes, so we recommend picking the Elemental Overload Keystone instead. You will still be summoning an army of Minions, but their main purpose is to provide Buffs, such as occasional Haste or Damage Aura.
The Guardian Ascendency is not very impactful, but provides a lot of Block Chance and Reservation Efficiency, allowing you to use more Auras. The Harmony of Purpose is a very unique Notable that grants you a random Shrine Buff. Combined with Runegraft of the Warp and the Gull Helmet, you will have at least 2 Shrine Buffs active at all times. We recommend pairing it with the Atlas Tree that boosts your Shrines on Maps to greatly improve your Clear Speed, but it is not mandatory.
The Farrul Bloodline greatly synchronises with this playstyle. You will summon 5 Spectral Wolves that boost your Attack Speed and Critical Strike Chance, and you will gain even more Attack Speed for each nearby Minion. You can also pick the regular Guardian Ascendency Notables to gain free Wrath and Anger Auras.
You can also check our other Path of Exile builds right over here Odealo's Crafty Guides - Full List
1. Gameplay
Use Dominating Blow to defeat Enemies. Against tougher Enemies, use Smite to gain extra Lightning Damage and Curse them with Conductivity to lower their Resistance. You can also use the Warcry to gain a decent bonus for your Damage and Attack Speed for 4 seconds.
|
|
|
|

2. Build's PROS & CONS
| PROS |
|
| CONS |
|
3. Leveling tips
We recommend starting out with the regular Summoner Leveling style to unlock the Minion Notables as soon as possible. You can start using the Dominating Blow of Inspiring at level 28, and apply all those Minion Damage bonuses to yourself at 300% Effectiveness. The Radiant and Unwavering Crusade Ascendency Notables are also insanely valuable during the campaign. If you don't mind levelling with a different Skill, you can also visit our BAMA leveling Guide for all Classes.
Bandits:
Kill all three bandits to get one additional Passive Skill Point or kill Alira to help with Gearing.
Leveling Skill Trees:
35 Points Passive Tree
Rush the Minion Notables, but don't forget to pick a bit of Life and Mana for better sustain.
67 Points Passive Tree
Head towards the Tribal Fury Notable, and pick any Life or Mana Notable on the way there. You can also pick up a bit of Rage, or allocate the Elemental Overload Keystone.
4. Final Skill Tree, Ascendancy Points, and Pantheon
Final Skill Tree:
78 Points Final Passive Tree (doesn't include Cluster or Unique Jewels)
122 Points Path of Building (PoB) link
Ascendancy points:
Preferably in that order:
- Bastion of Hope
- Harmony of Purpose
- Huntleader
- Primal Roar
Pantheon:
Major God: Soul of Arakaali: 10% reduced Damage taken from Damage Over Time, +40% Chaos Resistance against Damage Over Time
Minor God: Soul of Ralakesh: Moving while Bleeding doesn't cause you to take extra Damage, Corrupted Blood cannot be inflicted on you if you have at least 5 Corrupted Blood Debuffs on you
5. Final Gems links
| [DPS] Dominating Blow of Inspiring Setup | |
 |
Dominating Blow of Inspiring - a quite basic Attack that leaves a Debuff on Enemies that resurrects them and forces them to serve your will for a short Duration. The Transfigured variant greatly boosts your own Damage. |
 |
Volatility Support |
 |
Added Lightning Damage Support |
 |
Lightning Penetration Support |
 |
Multistrike Support |
 |
Elemental Damage with Attacks Support |
| [UTILITY] Animate Guardian Setup | |
 |
Animate Guardian - a Minion that wears sacrificed Gear, granting you various Buffs and enabling one additional Aura. It is an optional Setup. |
 |
Determination - a defensive Aura that greatly improves your Armour Rating. |
 |
Guardian's Blessing Support |
 |
Meat Shield Support |
| [UTILITY] Aura Setup | |
 |
Wrath - an offensive Aura that provides tons of Lightning Damage for your Attacks. It can also be obtained via Unwavering Crusade instead. |
 |
Purity of Elements - improves your Elemental Resistances and makes you immune against various Ailments. |
 |
Tempest Shield - greatly boosts your chances to Block Spell Damage. It also grants you immunity against Shock. |
 |
Enlighten Support |
| [UTILITY] Herald Setup | |
 |
Herald of Purity - an optional Setup used to create more Minions to gain better Attack Speed bonuses. It creates up to 15 Minions, granting you up to 40% Attack Speed if they activate Feeding Frenzy Buff as well. |
 |
Summon Phantasm Support |
 |
Feeding Frenzy Support |
| [UTILITY] Guard Setup | |
 |
Molten Shell - a defensive Guard Spell that improves your Armour and absorbs incoming Damage during its effect. |
 |
Automation - you can also use the usual Cast when Damage Taken Support instead. |
| [UTILITY] Movement Setup | |
 |
Frostblink - an instant teleport Spell that creates Chilling Ground. You should use it often to upkeep the Spell Block Buff. |
 |
Shield Charge - a quick charge towards the targeted location. Thanks to the Minion Attack Speed scaling, it will be very fast. |
| [UTILITY] Other Utility Setup | |
 |
Conductivity - a Curse Spell that lowers the Lightning Resistance of affected foes. |
 |
Smite - an Attack that creates a temporary Aura that grants you Lightning Damage for all your Attacks. Use the Vaal version for an even stronger Aura. |
 |
Enduring Cry - using a Warcry grants you Onslaught Buff, generates Endurance Charges, and increases the Minion Damage by 80% for 4 seconds, but it can be quite tiresome, so it is optional. |
|
|
6. Gear Setup
The Build does not require any specific Unique, but there are some that are particularly more helpful than their Rare counterparts. The extra Quality for your Gems sourced from Ashes of the Stars and Foulborn Skin of the Lords greatly helps scaling your Damage through Minion Bonuses, but even without them, it is very effective. To scale your Damage, you will look for flat Lightning Damage, increases to Minion Damage, and Attack Speed. Remember that More Minion Damage bonuses do not apply.
|
Stat priorities on items:
|
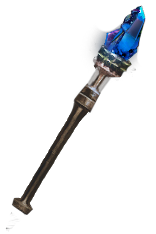 (Weapon) Rare Weapon - use Essence of Fear on a Sceptre to get the Minion Damage bonuses. Other than that, try to get Attack Speed, Lightning Damage, and the possibility to Craft a modifier to never miss an Attack. Dominating blow can be used with many Weapon types, but Sceptres have easy access to Fortify Buff. (Weapon) Rare Weapon - use Essence of Fear on a Sceptre to get the Minion Damage bonuses. Other than that, try to get Attack Speed, Lightning Damage, and the possibility to Craft a modifier to never miss an Attack. Dominating blow can be used with many Weapon types, but Sceptres have easy access to Fortify Buff. |
|
| Min. requirements: Hits can't be Evaded Minions deal 80% increased Damage Adds 150+ Lightning Damage Optional affixes: Minions have #% increased Attack Speed % increased Attack Speed |
|
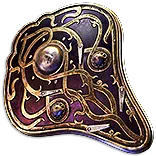 (Shield) Azadi Crest - if you can make your Hits Lucky, this Shield will greatly boost your Damage. It is quite cheap, so you should look for useful Corrupted Implicits as well. (Shield) Azadi Crest - if you can make your Hits Lucky, this Shield will greatly boost your Damage. It is quite cheap, so you should look for useful Corrupted Implicits as well. |
|
| 6% increased Movement Speed +(1-100) to maximum Life +(1-10)% Chance to Block (1-10)% chance to avoid Projectiles Your Lucky or Unlucky effects use the best or worst from three rolls instead of two |
|
 (Shield) Rare Shield - a Rare Shield can provide tons of defense and Recovery, while also providing plenty of Damage. Try to get the special Recovery on Block modifier. (Shield) Rare Shield - a Rare Shield can provide tons of defense and Recovery, while also providing plenty of Damage. Try to get the special Recovery on Block modifier. |
|
| Min. requirements: Recover 5% of Life when you Block 30% chance to Block Minions deal 80% increased Damage Optional affixes +# to maximum Life +#% to all maximum Resistances |
|
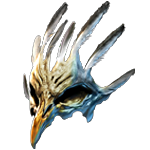 (Helmet) The Gull - greatly boosts the Shrine Buffs on you. It boosts the Buffs granted by your Ascendency, allowing you to have at least 2 Shrine Buffs permanently. (Helmet) The Gull - greatly boosts the Shrine Buffs on you. It boosts the Buffs granted by your Ascendency, allowing you to have at least 2 Shrine Buffs permanently. |
|
| Trigger Level 1 Create Lesser Shrine when you Kill an Enemy (120-150)% increased Evasion and Energy Shield +(30-45) to maximum Energy Shield +(60-80) to maximum Life +(30-40)% to Cold Resistance 75% increased Effect of Shrine Buffs on you 50% increased Duration of Shrine Effects on you |
|
 (Body Armour) Foulborn Skin of the Lords - greatly improves the Quality of Socketed Gems, while also providing decent bonuses for all Defences. Getting the right Socket Colours can be a bit tricky. (Body Armour) Foulborn Skin of the Lords - greatly improves the Quality of Socketed Gems, while also providing decent bonuses for all Defences. Getting the right Socket Colours can be a bit tricky. |
|
| Sockets cannot be modified +30% to Quality of Socketed Gems 100% increased Global Defences You can only Socket Corrupted Gems in this item |
|
 (Body Armour) Dialla's Malefaction - it is a worse alternative, as this Armour barely provides any defence, but it is easier to get the right Setup. Mixing Quality and extra Gem Levels of your Support Gems can yield slightly better DPS. (Body Armour) Dialla's Malefaction - it is a worse alternative, as this Armour barely provides any defence, but it is easier to get the right Setup. Mixing Quality and extra Gem Levels of your Support Gems can yield slightly better DPS. |
|
| Gems can be Socketed in this Item ignoring Socket Colour Gems Socketed in Red Sockets have +2 to Level Gems Socketed in Green Sockets have +30% to Quality Gems Socketed in Blue Sockets gain 100% increased Experience Has no Attribute Requirements |
|
 (Belt) Rare Belt - use the Belt to get tons of maximum Life and Resistances. You can get a bit of Damage here as well, but it is a very small bonus compared to the Minion scaling. (Belt) Rare Belt - use the Belt to get tons of maximum Life and Resistances. You can get a bit of Damage here as well, but it is a very small bonus compared to the Minion scaling. |
|
| Min. requirements: +120 to maximum Life 90% total Elemental and Chaos Resistance Optional affixes: % increased maximum Life %% increased Flask Charges gained % increased Elemental Damage with Attack Skills |
|
 (Jewel) Abyss Jewel - the Abyssal Jewel can provide plenty of flat Lightning Damage for your Attacks. It should also include bonuses for maximum Life, Resistances, or Attributes. (Jewel) Abyss Jewel - the Abyssal Jewel can provide plenty of flat Lightning Damage for your Attacks. It should also include bonuses for maximum Life, Resistances, or Attributes. |
|
| Min. requirements: +30 to maximum Life Adds 20 Lightning Damage to Attacks Optional affixes: % total Elemental Resistance Attributes |
|
 (Gloves) Rare Gloves - look for high bonus to Attack Speed, maximum Life, and tons of Resistances. You might also be able to get a bit of Minion Damage as well. The Eldritch Implicits are very useful here. (Gloves) Rare Gloves - look for high bonus to Attack Speed, maximum Life, and tons of Resistances. You might also be able to get a bit of Minion Damage as well. The Eldritch Implicits are very useful here. |
|
| Min. requirements: 15% increased Attack Speed +130 to maximum Life Non-Vaal Strike Skills target 1 additional nearby Enemies 80% total Elemental and Chaos Resistance Optional affixes: Inflict Lightning Exposure on Hit, applying -#% to Lightning Resistance |
|
 (Boots) Rare Boots - the Boots are purely defensive. Look for high amounts of maximum Life, Resistance, and Movement Speed. You could also go for the Bleed Avoidance or Onslaught on Kill. (Boots) Rare Boots - the Boots are purely defensive. Look for high amounts of maximum Life, Resistance, and Movement Speed. You could also go for the Bleed Avoidance or Onslaught on Kill. |
|
| Min. requirements: +130 to maximum Life 80% total Elemental and Chaos Resistance +30% increased Movement Speed Optional affixes: #% increased Action Speed #% chance to gain Onslaught for 4 seconds on Kill % chance to Avoid Bleeding |
|
 (Amulet) Ashes of the Stars - improves the Quality of your Gems, and thus improves your scaling with Minion Damage. Anointing the Sione's Ambition is very important for all Strike Skills. (Amulet) Ashes of the Stars - improves the Quality of your Gems, and thus improves your scaling with Minion Damage. Anointing the Sione's Ambition is very important for all Strike Skills. |
|
| +(10-16) to all Attributes (5-10)% increased Experience Gain of Gems +1 to Level of all Skill Gems +(20-30)% to Quality of all Skill Gems |
|
 (Ring) Rare Ring - the Bone Rings can grant you tons of Damage and Attack Speed, but you will also need plenty of maximum Life, Mana Cost reduction, and Resistances or Attributes. (Ring) Rare Ring - the Bone Rings can grant you tons of Damage and Attack Speed, but you will also need plenty of maximum Life, Mana Cost reduction, and Resistances or Attributes. |
|
| Min. requirements: +70 to maximum Life 40% total Elemental and Chaos Resistance Optional affixes: Minions deal #% increased Damage Minions have #% increased Attack and Cast Speed Non-Channelling Skills have -7 to Total Mana Cost Adds # Lightning Damage to Attacks |
|
 (Jewel) Large Cluster Jewels - it is your biggest source of Minion Damage and Attack Speed, thanks to the increased effect of small Passives. They should also grant additional Resistances or Attributes to make your gearing easier. (Jewel) Large Cluster Jewels - it is your biggest source of Minion Damage and Attack Speed, thanks to the increased effect of small Passives. They should also grant additional Resistances or Attributes to make your gearing easier. |
|
| Min. requirements: Added Small Passive Skills also grant: Minions have 3% increased Attack and Cast Speed Added Small Passive Skills have 35% increased Effect Optional affixes: Added Small Passive Skills also grant: +# to Attributes/Resistances |
|
 (Jewel) Megalomaniac - there are plenty of Attack Notables you will want to pick, but the Minion Large Clusters are very important. You can get those Notables via Megalomaniac instead. A combination of Attack and Minion Notables is usually considered bad, so it is easy to get a good deal. (Jewel) Megalomaniac - there are plenty of Attack Notables you will want to pick, but the Minion Large Clusters are very important. You can get those Notables via Megalomaniac instead. A combination of Attack and Minion Notables is usually considered bad, so it is easy to get a good deal. |
|
| Min. requirements: Feed the Fury Fuel the Fight Overlord |
|
 (Jewel) Elegant Hubris - this Jewel can replace your regular Notables with the Slum Lord Notable, increasing your Minion's Damage by 80%, meaning over 350% increase for your own Damage for each Notable. (Jewel) Elegant Hubris - this Jewel can replace your regular Notables with the Slum Lord Notable, increasing your Minion's Damage by 80%, meaning over 350% increase for your own Damage for each Notable. |
|
| Commissioned (2000-160000) coins to commemorate (Cadiro-Caspiro-Victario) Passives in radius are Conquered by the Eternal Empire Historic |
|
 (Jewel) Foulborn The Blue Nightmare - the Foulborn version of this Jewel makes your Hits Lucky if you have Blocked Spell Damage Recently, which happens almost all the time. (Jewel) Foulborn The Blue Nightmare - the Foulborn version of this Jewel makes your Hits Lucky if you have Blocked Spell Damage Recently, which happens almost all the time. |
|
| Lightning Damage with Hits is Lucky if you've Blocked Spell Damage Recently Passives granting Lightning Resistance or all Elemental Resistances in Radius also grant Chance to Block Spell Damage at 50% of its value |
|
 (Jewel) Watcher's Eye - you will have plenty of Auras, so this Jewel can be very effective. Look for a mix of offense and defense, and remember that you can easily add level 1 Precision or Vitality Auras for even more effects. (Jewel) Watcher's Eye - you will have plenty of Auras, so this Jewel can be very effective. Look for a mix of offense and defense, and remember that you can easily add level 1 Precision or Vitality Auras for even more effects. |
|
| Recommended modifiers: Damage Penetrates (10-15)% Lightning Resistance while affected by Wrath +(5-8)% Chance to Block Attack Damage while affected by Determination (5-8)% additional Physical Damage Reduction while affected by Determination +(30-50)% to Chaos Resistance while affected by Purity of Elements |
|
  (Jewel) Forbidden Flame&Flesh - with those Jewels, you can skip the Radiant Faith Notable and pick the Unwavering Faith directly. It can be quite expensive, but the Aura Setup is easy to adjust. (Jewel) Forbidden Flame&Flesh - with those Jewels, you can skip the Radiant Faith Notable and pick the Unwavering Faith directly. It can be quite expensive, but the Aura Setup is easy to adjust. |
|
| Allocates Unwavering Faith if you have the matching modifier on Forbidden Flesh/Flame | |
 (Flask) Oriath's End - creates explosions when you kill Enemies, significantly improving your Clear Speed. The Minion Damage modifiers do not apply to the explosions, so it is not very effective. (Flask) Oriath's End - creates explosions when you kill Enemies, significantly improving your Clear Speed. The Minion Damage modifiers do not apply to the explosions, so it is not very effective. |
|
| +(20-40)% increased Charge Recovery Enemies you Kill during Effect have a (20-30)% chance to Explode, dealing a tenth of their maximum Life as Damage of a Random Element |
|
|
Suggested Flasks:
|
|
    |
|
|
If you have any other build requests please leave that in the comments below. We are always open to suggestions and constructive feedback.
Pictures used in this article are the intellectual property of Grinding Gear Games.
