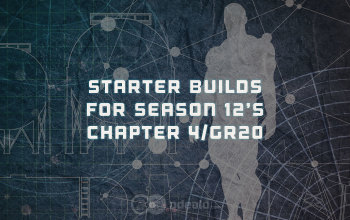
Diablo 3 Season 12 Starter GR20 Builds and Tips - All classes
Find out what are the best starter builds for Season 12, and how to complete the Chapter IV of the journey with easeDiablo 3 Season 12 Starter Builds
How to complete Chapter IV of the Seasonal Journey?
Season 12 is launching on Thursday, November 9. The newest patch brought back to life plenty of exciting builds, and we believe this is a great time to start your new Diablo 3 adventure. Like always, the crucial part is completing Chapters II, III and IV of the Seasonal journey to obtain all the pieces of your starter set. Clearing a level 20 Greater Rift solo is the most challenging task, and we have decided to put up this guide to help you out with completing it.
To check the full list of our Best Diablo 3 builds visit: The Best Diablo 3 builds by Odealo
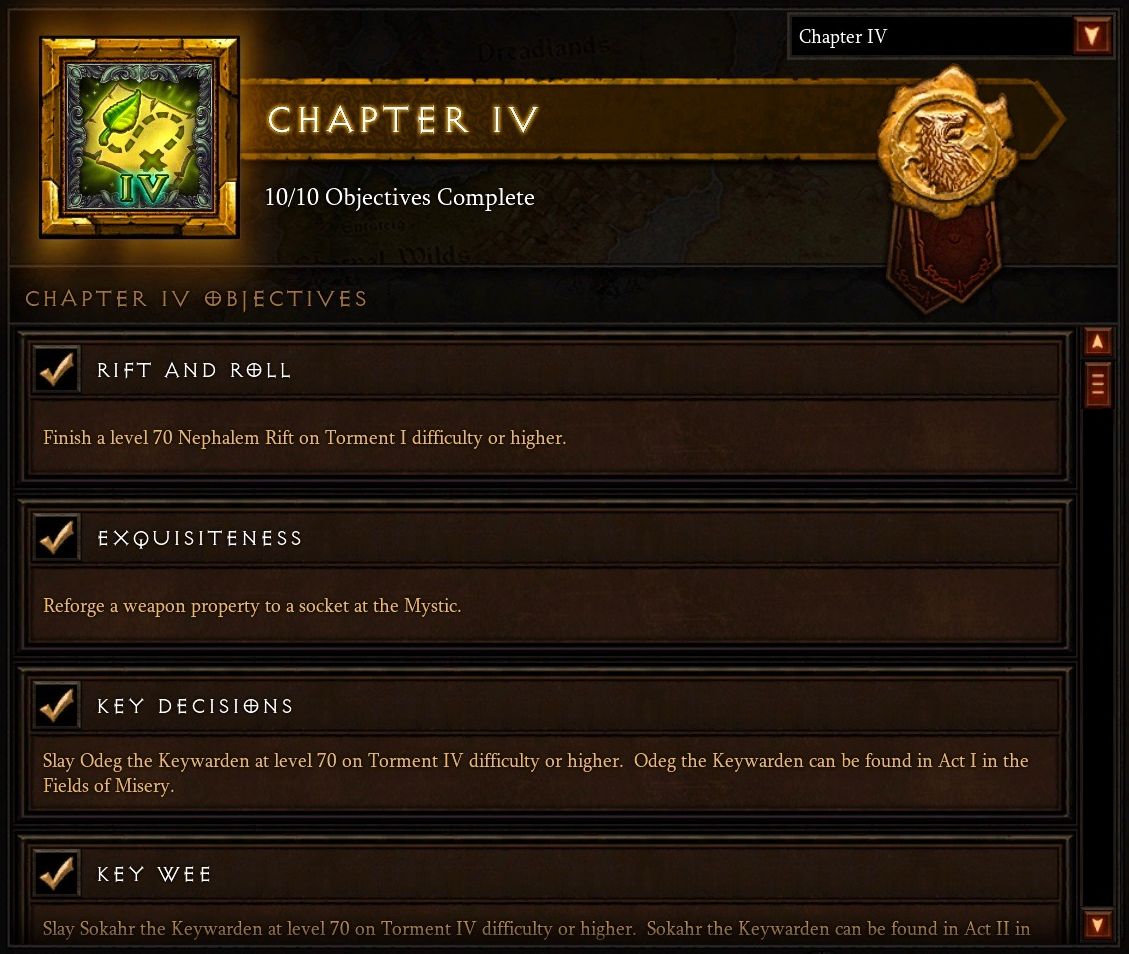
Table of contents
- General tips & tricks
- Suggested items and skills for:
- Barbarian class
- Crusader class
- Demon Hunter class
- Monk class
- Necromancer class
- Witch doctor class
- Wizard class
|
|

General tips & tricks

This is not going to be a leveling guide (even though some of the tips will apply to this part of the game). If you would like to find out how Power Leveling is done, you can read our other article about Diablo 3 Power Leveling.
- You do not have to complete the campaign when playing season mode. You can play in Adventure mode as soon as you create your first character. Keep in mind that after the season ends, you will be unable to start adventure mode games until you kill Malthael in the campaign mode with at least one of your characters.
- After Season 12 starts, you can complete a Challenge Rift for the extra rewards
- When you start the game on your fresh Season 12's character you should get the weapon from the Templar follower. It has higher damage than the default starting weapon.
- After you grab the weapon, kill Zoltan Kull or Maghda on Hard (possibly Master) difficulty level. Choose the one that has an active Bounty as it will grant better rewards. If you want, you can kill them both as well. This step will grant you a few rare items, that will give you a significant boost during your first levels.
- The fastest way to level up your character is through Nephalem Rifts.
- Players can share, and exchange completed Bounties. If you finish all five bounties in any of the Acts, just go to the next one straight away instead of collecting the rewards. After you have all 5 Acts completed, you can invite your friends. This way all of you will receive the prizes.
Your friends or community members should eventually return the favor. - Always keep legendary items that amplify skill damage or boost them in any way. You can extract legendary powers in Kanai Cube from low-level items as well. And even though they will carry nearly no attribute bonuses, the legendary powers are the same as when on level 70.
- Collect all crafting materials you find when leveling.
- Do not craft rare items at Blacksmith and Jeweler until level 70. You will need both the gold and materials later on.
- Seek out for Puzzle rings. After you reach level 70 you can start a game way above your current difficulty level and invite people from the Game Chat and Communities to join it and clear the Greed's Domain for you.
- Spend only excess Blood shards until you reach level 70. And when you do, buy only belts and bracers - this two give the highest chance of getting skill supporting item for your class
- If you did not find any of the damage amplification items that are listed under your class in the following part of this guide, craft the suggested items after you reach level 70
- Craft rare rings and amulet at level 70. This is incredibly cheap and easy damage boost. You should aim for the following:
1) Base stat
2) Vitality (enchant a socket here after you get your Legendary gems)
3) Critical Hit Chance
4) Critical Hit Damage
(optional) Attack speed, Added av. damage, %Elemental damage on the amulet - Quality (rolls, stats) of legendary and set items do not depend on game difficulty or the level of Greater Rifts. It's better to farm in low-level Greater Rifts and finish them in a couple of minutes, instead of struggling in higher Greater Rifts and barely making it in time to upgrade the gems
|
|
Suggested items and skills
Keep in mind our listed "Supporting Items" are not always fit for the following sets and builds. We made more or less complete listings of gear you might come across and which will help you clear GR20 solo.
|
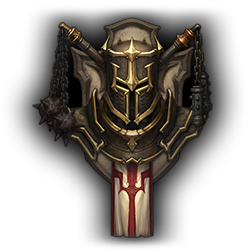
BARBARIAN CLASS |
|
| Starting set: Immortal King's Call | |
|
Set Bonuses:
It is pretty much the best Barbarian set in 2.6.1. Considering how many "forgotten" builds will be viable right now, we expect it to be also trendy. It does not provide any bonuses from the four-piece bonuses, so completing the GR20 Solo will be heavily reliant on supporting legendary items. |
|
| Supporting Items | |
 Fury of the Vanished Peak Reduces the Fury cost of Seismic Slam by 50% and increases its damage by 400-500% |
 The Gavel of Judgement Hammer of the Ancients deals 600–800% increased damage and returns 25 Fury if it hits 3 or fewer enemies. |
 Bracers of Destruction Seismic Slam deals 400-500% increased damage to the first five enemies it hits. |
 Bracers of the First Men Hammer of the Ancients attacks 50% faster and deals 375-500% increased damage. |
 Dread Iron Ground Stomp causes an Avalanche. Increases Avalanche Damage by +150-200% |
 Girdle of Giants Seismic Slam increases Earthquake damage by 200–250% for 3 seconds. |
 Fury of the Ancients Call of the Ancients gains the effect of the Ancients' Fury rune. |
 Band of Might After casting Furious Charge, Ground Stomp, or Leap, take 60–80% reduced damage for 8 seconds. |
 Blade of the Tribes War Cry and Threatening Shout cause an Avalanche and Earthquake. Increases Earthquake Damage by 150–200% |
|
| Crafting | |
|
When you reach level 70, you should craft a Two-Handed Mighty Weapon. There is a total of 6 available weapons of this type, and 3 of them grant fantastic damage bonuses, that will help you clear GR20 solo with ease.
|
|
| Suggested Skills | |
|
Passive skills:
|
|
 Hammer of the Ancients - Smash
 (optional) Seismic Slam - Shattered Ground
 Furious Charge - Merciless Assault
 War Cry - Impunity
 Battle Rage - Bloodshed
 Call of the Ancients - Together as One
 Wrath of the Berserker - Insanity
 Threatening Shout - Falter (instead of Battle Rage)
 Earthquake - Molten Fury (in place of WotB or FC)
 Ruthless
 Nerves of Steel
 Rampage
 Bloodthirst
|
CRUSADER CLASS |
|
| Starting set: Seeker of the Light | |
|
Set Bonus:
One of the most powerful Crusader sets, however extremely reliant on supporting items. If you choose to play Crusader, you should expect to complete GR20 solo with an entirely different skill set than as in the original Hammerdin build. It will directly depend on which supporting item you get, and most likely go for this skill. |
|
| Supporting Items | |
 Johanna's Argument Increases the attack speed and damage of Blessed Hammer by 100% |
 Guard of Johanna Blessed Hammer damage is increased by 200–250% for the first three enemies it hits. |
 Gabriel's Vambraces When your Blessed Hammer hits 3 or fewer enemies, 75–100% of its Wrath cost is refunded. |
 Drakon's Lesson When Shield Bash hits 3 or fewer enemies, its damage is increased by 300–400% and 25% of its Wrath Cost is refunded. |
 Faithful Memory Each enemy hit by Falling Sword increases the damage of Blessed Hammer by 60-80% for 10 seconds. This effect stacks up to 10 times. |
 Gyrfalcon's Foote Removes the resource cost of Blessed Shield and increases its damage by 275-350%. |
 Akkhan's Leniency Each enemy hit by Blessed Shield increases the damage of Blessed Shield by 15–20% for 3 seconds. |
 Jekangbord Blessed Shield deals 225-300% increased damage and ricochets to 6 additional enemies. |
 Fate of the Fell Gain two additional rays of Heaven's Fury and increases its damage by 375-500%. |
 Golden Flense Sweep Attack deals 225-300% increased damage and restores 6 Wrath for each enemy hit |
 Frydehr's Wrath Condemn has no cooldown and deals 600-800% increased damage, but costs 40 Wrath |
 Unrelenting Phalanx Phalanx now casts twice Increases Phalanx Damage by 45–60% |
 Denial Each enemy hit by your Sweep Attack increases the damage of your next Sweep Attack by 100-125%, stacking up to 5 times |
 Hammer Jammers Enemies take 300–400% increased damage from Blessed Hammers for 10 seconds after being hit with a Blind, Immobilize, or Stun |
| Crafting | |
|
The best option for crusaders is crafting either a Crusader Shield (4/11 chances to get the "right" one) or Two-Handed Flail (3/7 chances)
|
|
| Suggested Skills | |
|
Main damage skill (depending on equipped supporting items)
Passive Skills:
|
|
 Blessed Hammer - Limitless
 Falling Sword - Rapid Descent
 Akarat's Champion - Prophet
 Shield Glare - Divine Verdict
 Laws of Valor - Unstoppable Force
 Blessed Shield - Shattering Throw
 Condemn - Unleashed
 Heaven's Fury - Ascendancy
 Shield Bash - Crumble
 Sweep Attack - Gathering Sweep
 Phalanx - Bowmen
 Heavenly Strength (Two-handed weapons only)
 Fervor (One-handed weapons only)
 Finery
 Indestructible
 Long Arm of the Law
|
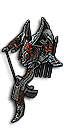
DEMON HUNTER CLASS |
|
| Starting set: Natalya's Vengeance | |
|
Set Bonus:
We believe Demon Hunter is the best class in terms of getting to GR20 solo fast. Both two and four-piece set bonuses grant significant damage boost, and completing Chapter IV can be done without any supporting items. |
|
| Supporting Items | |
 K'mar Tenclip Strafe gains the effect of the Drifting Shadow rune Increases Strafe Damage by 75–100% |
 Valla's Bequest Strafe projectiles pierce Increases Strafe Damage by 75–100% |
 Dawn Reduce the cooldown of Vengeance by 50–65%. |
 Crashing Rain Rain of Vengeance also summons a crashing beast that deals 3000–4000% damage |
| Crafting | |
|
The only viable crafting option for Demon Hunters are Hand Crossbows. Not only you can craft several Legendary crossbows for the regular Natalya's build, but also you can craft the Natalya's Slayer. This might help you complete Natalya's Set before even completing Chapter IV
|
|
| Suggested Skills | |
|
Passive Skills:
|
|
 Strafe - Rocket Storm
 Rain of Vengeance - Anathema
 Smoke Screen - Displacement
 Vengeance - Seethe/Dark Heart
 Companion - Wolf companion
 Preparation - Punishment
 Awareness
 Ballistics
 Blood Vengeance
 Cull of the Weak
|
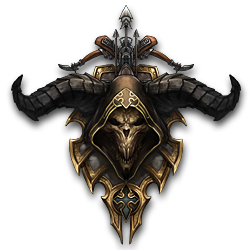
MONK CLASS |
|
| Starting set: Uliana's Strategem | |
|
Set Bonus:
Uliana Strategem is the monk set that got the highest boost in patch 2.6.1. Uliana's Exploding Palm will be extremely powerful build, but still hard to master. The good part is that it provides incredible damage boost when wearing just four pieces, so completing Chapter IV of season journey as a monk is extremely easy. |
|
| Supporting Items | |
 Lion's Claw Seven-Sided Strike performs an additional seven strikes |
 The Fist of Az'Turrasq Exploding Palm's on-death explosion damage is increased by 400–500% |
 Spirit Guards Spirit Generators reduce all damage taken by 45-60% for 3 seconds |
 Gungdo Gear Exploding Palm's on-death explosion applies Exploding Palm |
 Flow of Eternity Increases the damage of Seven-Sided Strike by 100% and reduces its cooldown by 45–60% |
 Binding of the Lost Each hit with Seven-Sided Strike grants 4.0–5.0% damage reduction for 7 seconds |
| Crafting | |
|
There aren't too items you could easily craft for Monk. If you have excess Death Breaths, you might try your luck to get one of the Fist weapons or remaining set parts. No items will need to complete level 20 GR solo when wearing four parts of Uliana set.
|
|
| Suggested Skills | |
|
Passive skills:
|
|
 Way of the Hundred Fists - Assimilation
 Dashing Strike - Blinding Dash
 Exploding Palm - Impending Doom
 Seven-sided Strike - Sudden Assault
 Epiphany - Desert Shroud
 Mantra of Salvation - Agility
 Exalted Soul
 Harmony
 Mythic Rhythm
|
|
|
NECROMANCER CLASS |
|
| Starting set: Trag'Oul's Avatar | |
|
Set Bonus:
Trag'Oul's Avatar is one of the most powerful sets in the entire Diablo 3. Sadly it's completely unreliable when it comes to starting off a new Season; its general performance is highly reliant on various supporting items synergy and high paragon level. The only good part of playing a Necromancer is a high chance of creating powerful legendary items in Kanai Cube. |
|
| Supporting Items | |
 Reilena's Shadowhook Every point of Maximum Essence increases all damage done by 0.5%, and Bone Spikes generate 2–5 additional Essence for each enemy hit |
 Maltorius' Petrified Spike Bone Spear now costs 40 Essence and deals 550–700% increased damage. |
 Bloodtide Blade Death Nova deals 80–100% increased damage for every enemy within 25 yards |
 Nayr's Black Death Each different poison skill cast increases the damage of all poison skills by 75–100% for 15 seconds |
 Trag'oul's Corroded Fang The Cursed Scythe rune for Grim Scythe now has a 100% chance to apply a curse and the Necromancer deals 150–200% increased damage to cursed enemies |
 Scythe of the Cycle Secondary skills deal 350–400% additional damage while Bone Armor is active but reduce the remaining duration of Bone Armor by 4 seconds |
 The Johnstone Land of the Dead grants 50 stacks of Macabre Knowledge when it expires. Macabre Knowledge increases the damage of Corpse Lance and Corpse Explosion by 150–200% |
 Krysbin's Sentence Deal 75–100% increased damage against slowed enemies or triple this bonus against enemies afflicted by any other type of control-impairing effect |
 Dayntee's Binding Grants a 40–50% reduction in all damage taken as long as there is an enemy afflicted by one or more of the Necromancer's Curses |
 Corpsewhisper Pauldrons Corpse Lance damage is increased by 25–30% for 3 seconds when the Necromancer consumes a corpse, stacking up to 20 times. |
| Crafting | |
|
We recommend crafting either One-handed or Two-handed Scythes (up to your personal preferences). While ALL (just what the hell?) of the Two-handed Scythes will greatly boost your damage, you will have a 66% chance of crafting the "right" one-handed scythe.
|
|
| Suggested Skills | |
|
Main DPS skill (depending on preference or supporting items equipped)
Passive skills:
|
|
 Grim Scythe - Cursed Scythe
 Blood Rush - any rune
 Devour - Cannibalize
 Land of the Dead - Frozen Land
 (Optional - Corpse Lance)Command Golem - Flesh Golem
 (Optional - any skill)Simulacrum - Blood Debt
 Bone Spear - Blood Spear
 Death Nova - Blood Nova
 Corpse Lance - Blood Lance
 Blood for Blood
 Blood is Power
 Final Service
 Overwhelming Essence
|
WITCH DOCTOR CLASS |
|
| Starting set: Spirit of Arachyr | |
|
Set Bonus:
Spirit of the Arachyr will be the best, and most powerful Witch Doctor set in 2.6.1 (Season 12). Firebats, which is the main damage dealing skill for the Arachyr builds has been significantly boosted in the recent update, rendering the build viable for high gr pushing. The set also grants a quite nice DPS boost while wearing two parts of it, making it rather a good pick for a GR20 solo rush. |
|
| Supporting Items | |
 Staff of Chiroptera Firebats attack 100% faster, cost 75% less Mana and deal 125-150% more damage |
 Bakuli Jungle Wraps Firebats deal 250-300% increased damage to enemies affected by Locust Swarm or Piranhas |
 Ring of Emptiness Deal 250–300% increased damage to enemies affected by both Haunt and Locust Swarm |
 Coils of the First Spider While channeling Firebats, take 30% reduced damage and gain 60000–80000 Life per Hit |
 The Short Man's Finger Gargantuan instead summons three smaller Gargantuan more powerful than before, dealing 500-650% more damage each |
 The Tall's Man Finger Zombie Dogs instead summons a single Gargantuan dog with more damage and health than all other dogs combined |
| Crafting | |
|
There aren't many powerful Witch Doctor's class-specific items. Most of the items you should be looking for are from the common types. It means you will need a bit of luck to get anything from the list above craft. The most effective solution is to spend Blood Shards on belts for the Bakuli Jungle Wraps, and when finally getting to level 70 craft a legendary Staff. If you are lucky you might find the Staff of Chiroptera (SuWong Diviner is not bad either), or simply a high DPS two-handed weapon.
|
|
| Suggested Skills | |
|
Ring of Emptiness version:
Passive skills:
|
|
 Corpse Spiders - Widowmakers
 Spirit Walk - Jaunt
 Firebats - Cloud of Bats
 Piranhas - Piranhado
 Gargantuan - Humongoid
 Summon Zombie Dogs - Leeching Beasts
 Haunt - Poisoned Spirit (for Piranhas)
 Locust Swarm - Cloud of Insects (for Zombie Dogs)
 Confidence Ritual
 Grave Injustice
 Midnight Feast
 Spirit Vessel
|
WIZARD CLASS |
|
| Starting set: Vyr's Amazing Arcana | |
|
Set Bonus:
Vyr's Amazing Arcana is the least popular and the worst Wizard set. It does not carry any end-game potential on its own. It is usually used in combination with Tal'Rasha's set (the previously best Wizard build - Vyr'Rasha's Paralysis Archon). Vyr's set is not the worst starter set in Season 12, but after completing Chapter IV and getting it, the only thing you will grinding for are parts of any other Wizard set. |
|
| Supporting Items | |
 Fazula's Improbable Chain Automatically start with 40–50 Archon kill stacks when entering Archon form |
 The Swami All bonuses from kill stacks acquired in Archon form now last for 15–20 seconds after Archon expires |
 Chantodo's Will (set) Every second while in Archon form expels a Wave of Destruction, dealing 1000% damage to enemies within 30 yards Every time the Wizard hits with an attack while not in Archon form, 600% damage is added to the Wave of Destruction, stacking up to 20 times |
 Chantodo's Force (set) Every second while in Archon form expels a Wave of Destruction, dealing 1000% damage to enemies within 30 yards Every time the Wizard hits with an attack while not in Archon form, 600% damage is added to the Wave of Destruction, stacking up to 20 times |
 Unstable Scepter Arcane Orb's explosion triggers an additional time, and Arcane Orb deals 350-450% increased damage |
 Triumvirate Your Signature Spells increase the damage of Arcane Orb by 300-400% for 6 seconds, stacking up to 3 times |
 Wand of Woh Three additional Explosive Blasts are triggered after casting Explosive Blast, and the damage of Explosive Blast is increased by 300-400% |
 Nilfur's Boast Increase the damage of Meteor by 600%. When your Meteor hits 3 or fewer enemies, the damage is increased by 675-900% |
 The Grand Vizier Reduces the Arcane Power cost of Meteor by 50% and increases its damage by 300-400% |
 Etched Sigil Arcane Torrent, Disintegrate, and Ray of Frost also cast one of other damaging Arcane Power Spenders every second and increase damage of Arcane Power spenders by 125-150% |
| Crafting | |
|
The best crafting options for Wizards are either Wands or Sources. They both carry around 20% chance of getting something useful though (in terms of helping you in the GR20 solo task). If you have enough Death Breaths feel free to go for it.
|
|
| Suggested Skills | |
|
DPS Skills depending on equipped supporting items:
Passive skills:
|
|
| Diablo 3 Marketplace | |
 Spectral Blades - Barrier Blades
 Teleport - Safe Passage
 Archon - any rune
 Black Hole - Absolut Zero/Spellsteal
 Energy Armor - Force Armor
 Arcane Orb - Frozen Orb
 Meteor - Meteor Shower
 Explosive Blast - Chain Reaction
 Audacity
 Arcane Dynamo
 Unstable Anomaly
 Unwavering Will
|
|
If you have any tips on how to get a good start in Season 12, feel free to share them in the comments below.
Pictures used in this article are the intellectual property of Blizzard Entertainment.