Detonate Dead of Chain Reactions Trickster
A very powerful setup for a Trickster that uses a double Cast on Crit setup to deal insane amounts of DamageDetonate Dead of Chain Reactions
Trickster build
Updated for Patch 3.23
The Best Crafty Guides by Odealo
| Guide notes |
| January 16, 2024 -Build created |
| Build overview | |||
| Tags: [CRIT] [ELEMENTAL] [LIFE] [TRIGGER] | |||
|
Budget: Defenses: |
|
Boss DPS: AoE: |
|
Detonating a Corpse is one of the easiest ways to deal a lot of Damage in Path of Exile. The Damage of those explosions is based on the maximum Life of the Corpse you use, so as the difficulty of your Enemies rises so does your Damage. The new Detonate Dead of Chain Reactions causes up to 8 Corpses to explode in a large radius. To start the chain reaction you will need to summon Corpses with the Desecrate. To make this playstyle enjoyable we use a double Cast on Critical Strike Setup, which is possible thanks to the Manaforged Arrows and Lifetap Supports. By using a single Attack you will trigger the Detonate Dead and Blast Rain, which will then trigger Desecrate.
As your main Triggering Skill, we use Rain of Arrows of Saturation, which has great Area Coverage and built-in delay between each falling Arrow, which is simply perfect for continuously triggering Spells. The Manaforged Arrows can't trigger the same Skill, so you will have to use the Blast Rain there. It is also a very good triggering Skill for Cast on Crit Setup, just not as good as the Rain of Arrows.
The Corpse Explosions are caused by a Spell, but the Explosion itself is not a Spell. To improve your Damage you can use only generic modifiers, with the addition of Minion Damage modifiers after you anoint the Spiritual Aid Notable on your Amulet. The Critical Strike Chance is even more problematic, which is why we decided to use the Leadership's Price Amulet which grants access to Brittle, Scorch, and Sap Conflux. It is the only way to inflict those Ailments while doing only Fire Damage. The Brittle is the most important here, as it adds up to 6% base Critical Strike Chance.
The Desecrate summon Corpses that match the Area Level, but not all of them are equal. Some monsters have significantly more maximum Life than others. You can use the Raise Spectre Gem to add those durable monsters to the Desecrate pool. The Kitava's Herald found in the Canals in Act 10 has the highest possible Life out of all Spectres. After summoning it once you can throw away the Raise Spectre Gem.
You can also check our other Path of Exile builds right over here Odealo's Crafty Guides - Full List
1. Gameplay
The setup is a bit complicated to assemble, but once it is done, the gameplay is very straightforward. You will use the Rain of Arrows to trigger Detonate Dead of Chain Reactions, Blast Rain, and Desecrate. Your main Curse is Assassin's Mark, but you can raise your Curse Limit and add the Flammability, Enfeble, or Elemental Weakness. For Movement, use the Frostblink which can be used without interrupting your Attacks.
|
|
|
|

2. Build's PROS & CONS
| PROS |
|
| CONS |
|
3. Leveling tips
Unfortunately, neither Cast on Crit nor Corpse Explosions are suitable for leveling due to a lack of scaling without a full setup. To level up we recommend using Fire Trap or Cold DoTs, as those archetypes require minimal investments to clear a campaign on their own. You should check out our Leveling Guide for Shadow using Traps for more tips.
Bandits:
Killing all Bandits for 2 bonus Skill Points is the best option, but helping Alira is also a good choice.
4. Final Skill Tree, Ascendancy Points, and Pantheon
Final Skill Tree:
104 Points Final Skill Tree (doesn't include Unique or Cluster Jewels)
119 Points Path of Building(PoB) link
Ascendancy points:
Preferably in the order:
- Polymath
- One Step Ahead
- Escape Artist
- Soul Drinker
Pantheon:
Major God: Soul of Arakaali 10% reduced Damage taken from Damage Over Time; +40% Chaos Resistance against Damage Over Time
Minor God: Soul of Shakari 50% less Duration of Poisons on You; 5% reduced Chaos Damage taken
5. Final Gems links
| [DPS] Detonate Dead of Chain Reaction setup | |
 |
Detonate Dead of Chain Reaction - detonates up to 8 Corpses to deal Fire Damage in a large Area. The short delay between each explosion gives enough time to generate a sufficient amount of corpses. |
 |
Rain of Arrows of Saturation - multiple arrows fall from the sky, with a slight delay between each salvo. It is the best triggering Bow Skill for both Single-target and AoE clear. |
 |
Cast on Critical Strike Support - triggers linked Spells when you land a Critical Strike with an Attack. The Awakened version is somewhat expensive but can grant you up to 37% Cooldown Recovery Rate, which is very important. |
 |
Energy Leech Support - thanks to the Soul Drinker you will always Leech Energy Shield. It also makes it easy to always have it full. |
 |
Increased Critical Damage Support - significantly improves your Critical Strike Multiplier. You can also use the Increased Critical Strikes if your trigger rate is still low. Remember that the in-game tooltip doesn't include Brittle or Assassin's Mark. |
 |
Inspiration Support - improves your Damage, Critical Strike Chance, and lowers Mana Costs. |
| [DPS] Desecrate setup | |
 |
Desecrate - creates Corpses that you can explode with your Detonate Dead. By default, it summons random Monsters from the Area, but you can influence it with a Raise Spectre Gem to also summon certain corpses of your choosing. |
 |
Blast Rain - a few Arrows rain down from the sky, dealing Damage in a large Area. You can also use regular Rain of Arrows or various variations of the Storm Rain if you like them more. |
 |
Manaforged Arrows Support - spending enough Mana with your main Attack will trigger a Bow Attack, however, it can't trigger the same Skill. |
| Cast on Critical Strike Support - you can use a second Cast on Critical Strike Support here to trigger another Spell. It doesn't have to be the Awakened version, since it creates more Corpses than you can explode. | |
 |
Lifetap Support - thanks to this Support you need to spend only 1 Mana to trigger the Manaforged Setup. |
 |
Spell Cascade Support - the Desecrate will create more Corpses. You can create up to 12 Corpses at once. |
| [UTILITY] Auras setup | |
 |
Summon Skitterbots - thanks to the Skitterbots you can still apply Chill and Shock despite using the Leadership's Price. You can also use them to inflict Curse if you use Profane Proxy. |
 |
Grace - this grants you a lot of Evasion Rating, which is the main defensive layer of this Build. |
 |
Discipline - another defensive Aura that grants you tons of Energy Shield. You can use the Vaal version to make the recharge uninterruptable for a short moment. |
 |
Enlighten Support - reduces the Mana Reservation of all linked Auras. It is not necessary but greatly helps if you can't fully sustain your Mana. |
| [UTILITY] Arrogance setup | |
 |
Clarity - a very important Aura that grants you Mana Regeneration. You won't trigger your Spells if you can't pay their Mana Cost. |
 |
Precision - improves your Accuracy Rating and Critical Strike Chance. You can keep it at a low level if your Gear is good enough. |
 |
Arrogance Support - significantly improves the effect of your Auras, but causes them to reserve Life instead of Mana. |
| [UTILITY] Mark setup | |
 |
Assassin's Mark - greatly improves your Critical Strike Chance and generates Power Charges on Hit, which further improves your Crit Chance. |
 |
Mark on Hit Support - automatically applies linked Mark on Hit with any Attack. |
| [UTILITY] Various Utility Skills | |
 |
Frostblink - an instant blink that you can use to move faster or dodge incoming attacks without interrupting dealing Damage. |
 |
Flammability - if you use the Anathema Ring you can use 3 additional Curses. The Flammability grants you the most Damage by reducing the Fire Resistance of affected Enemies. |
 |
Elemental Weakness - this curse further lowers the Elemental Resistance of your foes. You only deal Fire Damage, so other Elements are irrelevant. |
 |
Enfeeble - a defensive Curse that lowers the Damage and Accuracy Rating of Cursed Monsters, however, it can be hard to find enough Sockets for those Curses. |
 |
Steelskin - creates a protective barrier that absorbs part of the incoming Damage and disables Bleed Effects on you. |
|
|
5. Gear Setup
You will need only a 14% increased Cooldown Recovery Rate on your gear to have 7,5 Casts per second, but to reach over 10 triggers per second you will need at least a 52% Cooldown Recovery Rate. The Awakened Cast on Crit Support will cover the majority of it. You can also use the Bow with a special modifier that grants you a 7-link with regular Cast on Crit Support, but it is expensive to Craft, and the result is roughly the same if you can't reach that breakpoint. To improve your Damage you should look for generic or Minion Damage modifiers, Attack Speed, Accuracy Rating, and obviously Critical Strike Chance and Multiplier. Remember that Spell Damage does not affect the Corpse Explosion. It is a hybrid Build - you should look for bonuses to maximum Life and Energy Shield. Evasion and Spell Suppression are also important.
|
Stat priorities on items:
|
 (Helmet) Rare Helmet - look for maximum Life, Resistance, Spell Suppression, and Energy Shield. You can get additional Physical Damage Mitigation, or craft a modifier that automatically casts all your Curses when you use Focus. The Assassin Mark should be automated with Mark on Hit Support for Mapping purposes. (Helmet) Rare Helmet - look for maximum Life, Resistance, Spell Suppression, and Energy Shield. You can get additional Physical Damage Mitigation, or craft a modifier that automatically casts all your Curses when you use Focus. The Assassin Mark should be automated with Mark on Hit Support for Mapping purposes. |
|
| Min. requirements: +70 to maximum Life 70% Total Elemental Resistances 10% chance to Suppress Spell Damage Optional affixes: #% increased Mana Reservation Efficiency of Skills Accuracy Rating #% of Physical Damage from Hits taken as Fire Damage Trigger Socketed Spells when you Focus |
|
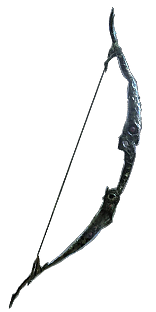 (Weapon) Rare Bow - look for a high Critical Strike Chance or Attack Speed Fracture modifier and use Essence of Fear to craft Minion Damage until you get the other one. Finish it up with Additional Gem Levels for your Supports, which will further improve your Cooldown Recovery Rate. You can also use a special Shaper's modifier to get a pseudo 7-link, but it will be insanely expensive to get a similar result. The Bone Bow is the most balanced Base, but you can opt for better Attack Speed or Crit Chance. (Weapon) Rare Bow - look for a high Critical Strike Chance or Attack Speed Fracture modifier and use Essence of Fear to craft Minion Damage until you get the other one. Finish it up with Additional Gem Levels for your Supports, which will further improve your Cooldown Recovery Rate. You can also use a special Shaper's modifier to get a pseudo 7-link, but it will be insanely expensive to get a similar result. The Bone Bow is the most balanced Base, but you can opt for better Attack Speed or Crit Chance. |
|
| Min. requirements: 8% Critical Strike Chance 1.5 Attacks per Second Minions deal 100% increased Damage Optional affixes: +2 to Level of Socketed Support Gems Socketed Gems are supported by Level # Cast On Critical Strike % chance to deal Double Damage while Focused |
|
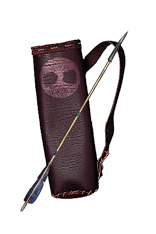 (Weapon) Rare Quiver - here you can improve your Attack Speed, Critical Strike Chance, or Accuracy. It can grant you a Critical Strike Multiplier if you use the Essence of Scorn, the natural modifier on Quivers affects only Bow Attacks. You can also craft a Frenzy Charge generation here. (Weapon) Rare Quiver - here you can improve your Attack Speed, Critical Strike Chance, or Accuracy. It can grant you a Critical Strike Multiplier if you use the Essence of Scorn, the natural modifier on Quivers affects only Bow Attacks. You can also craft a Frenzy Charge generation here. |
|
| Min. requirements: 15% increased Attack Speed +50 to maximum Life Optional affixes: % increased Critical Strike Chance with Bows % to Global Critical Strike Multiplier % chance to gain a Frenzy Charge on Critical Strike Accuracy Rating |
|
 (Body Armour) Rare Body Armour - due to the Trickster Ascendency you should look for Armour that provides tons of Evasion and Energy Shield. It should also grant a decent amount of Spell Suppression and mitigation against Physical Damage. You can skip the Life modifiers to reduce cost and enable the Life Mastery. (Body Armour) Rare Body Armour - due to the Trickster Ascendency you should look for Armour that provides tons of Evasion and Energy Shield. It should also grant a decent amount of Spell Suppression and mitigation against Physical Damage. You can skip the Life modifiers to reduce cost and enable the Life Mastery. |
|
| Min. requirements: 1000 Evasion Rating 300 Energy Shield 15% chance to Suppress Spell Damage Optional affixes: #% increased Mana Reservation Efficiency of Skills #% of Physical Damage from Hits taken as Elemental Damage Resistance |
|
 (Boots) Rare Boots - look for maximum Life, Movement Speed, and Spell Suppression. Use Eldritch Implicit to get Cooldown Recovery Rate. You can also use Shaper or Crusader Influence to get higher values of that modifier, but it would be very expensive. Try to get an empty Suffix so you can improve the effect of your Ailments. (Boots) Rare Boots - look for maximum Life, Movement Speed, and Spell Suppression. Use Eldritch Implicit to get Cooldown Recovery Rate. You can also use Shaper or Crusader Influence to get higher values of that modifier, but it would be very expensive. Try to get an empty Suffix so you can improve the effect of your Ailments. |
|
| Min. requirements: 25% Movement Speed +60 to maximum Life 5% increased Cooldown Recovery Rate 10% chance to Suppress Spell Damage 40% Total Elemental Resistances Optional affixes: %increased Effect of Non-Damaging Ailments Life Regeneration % chance to Avoid Elemental Ailments |
|
 (Gloves) Rare Gloves - those can grant you a lot of Damage, but do not forget about maximum Life or Spell Suppression. Look for Attack Speed, Accuracy Rating, and various Damage increases. Use the Eldritch Implicits to inflict Fire Exposure or get Life Leech. (Gloves) Rare Gloves - those can grant you a lot of Damage, but do not forget about maximum Life or Spell Suppression. Look for Attack Speed, Accuracy Rating, and various Damage increases. Use the Eldritch Implicits to inflict Fire Exposure or get Life Leech. |
|
| Min. requirements: 70 maximum Life 40% Total Elemental Resistances 10% increased Attack Speed 10% chance to Suppress Spell Damage Optional affixes: % increased Damage during any Flask Effect Inflict Fire Exposure on Hit (Eater) % increased Damage with Hits against Chilled Enemies % increased Elemental Damage % increased Minion Damage |
|
 (Belt) Rare Belt - here you should focus on getting maximum Life, Strength, and Cooldown Recovery Rate. Any Flask modifiers will also be very useful to have, but lacking Resistances are more important. (Belt) Rare Belt - here you should focus on getting maximum Life, Strength, and Cooldown Recovery Rate. Any Flask modifiers will also be very useful to have, but lacking Resistances are more important. |
|
| Min. requirements: 60 maximum Life +40 to Strength 40% Total Elemental Resistances 12% increased Cooldown Recovery Rate Optional affixes: Chaos Resistance maximum Life % Flasks applied to you have #% increased Effect Increased Flask Charges Gained/Used |
|
 (Belt) Rare Abyss Jewel - use the Abyss Jewel to fix your Attributes or Resistances. Other than that, it can get you a bit of maximum Life, Crit Multiplier, or Attack Speed here. You can also get a Cooldown Recovery Rate if you need only 3% to reach the next breakpoint. (Belt) Rare Abyss Jewel - use the Abyss Jewel to fix your Attributes or Resistances. Other than that, it can get you a bit of maximum Life, Crit Multiplier, or Attack Speed here. You can also get a Cooldown Recovery Rate if you need only 3% to reach the next breakpoint. |
|
| Min. requirements: 30 maximum Life Optional affixes: Attributes Resistances Attack Speed Cooldown Recovery Rate Critical Strike Multiplier |
|
 (Amulet) Leadership's Price - the Conflux it grants allows you to inflict those Ailments with your Fire Damage. You will need exactly 30 Intelligence on your Gear to match your highest Attributes. You will need the Tainted Oil to anoint the Spiritual Aid, as those Amulets are always Corrupted. (Amulet) Leadership's Price - the Conflux it grants allows you to inflict those Ailments with your Fire Damage. You will need exactly 30 Intelligence on your Gear to match your highest Attributes. You will need the Tainted Oil to anoint the Spiritual Aid, as those Amulets are always Corrupted. |
|
| +(10-16) to all Attributes +(-3-3)% to maximum Fire Resistance +(-3-3)% to maximum Cold Resistance +(-3-3)% to maximum Lightning Resistance You have Scorching Conflux, Brittle Conflux and Sapping Conflux while your two highest Attributes are equal Cannot Ignite, Chill, Freeze or Shock Corrupted |
|
 (Ring) Rare Ring - on a Rare Ring you should look for maximum Life, Mana Regeneration or Cost Reduction, Resistances, or Attributes. You can also get a bit of Critical Strike Multiplier or get minimum Endurance Charges. (Ring) Rare Ring - on a Rare Ring you should look for maximum Life, Mana Regeneration or Cost Reduction, Resistances, or Attributes. You can also get a bit of Critical Strike Multiplier or get minimum Endurance Charges. |
|
| Min. requirements: 50 to Maximum Life 60% Total Elemental Resistances Optional affixes: Non-Channelling Skills have -(7-6) to Total Mana Cost % increased Mana Regeneration Rate Attributes Critical Strike Multiplier |
|
 (Ring) Anathema - grants you additional Curses. Try to get one that balances your Intelligence with Dexterity. The Energy Shield from the Implicit is somewhat useful, but you can also look for Corrupted Implicits that have more value for you. (Ring) Anathema - grants you additional Curses. Try to get one that balances your Intelligence with Dexterity. The Energy Shield from the Implicit is somewhat useful, but you can also look for Corrupted Implicits that have more value for you. |
|
| +(30-40) to Intelligence (10-15)% increased Cast Speed (10-20)% chance to gain a Power Charge when you Cast a Curse Spell Your Curse Limit is equal to your maximum Power Charges |
|
 (Ring) Profane Proxy - you can use this Ring to automate one of your many Curses. It is best to disable the Chilling Aura, as you can inflict that ailment with the Frozen Ground from the Frostblink. (Ring) Profane Proxy - you can use this Ring to automate one of your many Curses. It is best to disable the Chilling Aura, as you can inflict that ailment with the Frozen Ground from the Frostblink. |
|
| +3 to Level of Socketed Curse Gems +(20-30)% to Cold Resistance +(20-30)% to Lightning Resistance Left Ring Slot: Your Chilling Skitterbot's Aura applies Socketed Hex Curse instead Right Ring Slot: Your Shocking Skitterbot's Aura applies Socketed Hex Curse instead |
|
 (Jewel) Rare Jewels - here you can get a lot of maximum Life, Resistance, Critical Strike Multiplier, or various increases to your Damage. You can get a Corrupted Implicit that protects you from the Corrupting Blood debuff. (Jewel) Rare Jewels - here you can get a lot of maximum Life, Resistance, Critical Strike Multiplier, or various increases to your Damage. You can get a Corrupted Implicit that protects you from the Corrupting Blood debuff. |
|
| Recommended affixes: Critical Strike Multiplier with Elemental/Fire Skills Global Critical Strike Multiplier increased Maximum Life Elemental Resistances Attributes |
|
 (Jewel) Large Cluster Jewel - use a Large Cluster to get Life Leech or Fire Exposure, depending on what you have on your Gloves. Other than that, look for any useful modifiers that would improve your Fire or Elemental Damage. (Jewel) Large Cluster Jewel - use a Large Cluster to get Life Leech or Fire Exposure, depending on what you have on your Gloves. Other than that, look for any useful modifiers that would improve your Fire or Elemental Damage. |
|
| Recommended affixes: 1 Added Passive Skill is Cremator 1 Added Passive Skill is Doryani's Lesson 1 Added Passive Skill is Smoking Remains 1 Added Passive Skill is Burning Bright 1 Added Passive Skill is Corrosive Elements 1 Added Passive Skill is Disorienting Display |
|
 (Jewel) Medium Cluster Jewel - you can use Cluster Jewel that boosts your Critical Strike and Damage, or one that improves the effect of your Ailments, which may be necessary to get maximum benefits of them against Bosses. (Jewel) Medium Cluster Jewel - you can use Cluster Jewel that boosts your Critical Strike and Damage, or one that improves the effect of your Ailments, which may be necessary to get maximum benefits of them against Bosses. |
|
| Recommended affixes: 1 Added Passive Skill is Astonishing Affliction 1 Added Passive Skill is Eye of the Storm 1 Added Passive Skill is Pressure Points 1 Added Passive Skill is Quick Getaway |
|
 (Jewel) Watcher's Eye - you can get a multitude of useful modifiers here. The offensive possibilities are rather limited, you should focus on defense or utility instead. (Jewel) Watcher's Eye - you can get a multitude of useful modifiers here. The offensive possibilities are rather limited, you should focus on defense or utility instead. |
|
| (4-6)% increased maximum Energy Shield (4-6)% increased maximum Life (4-6)% increased maximum Mana <Two or Three random aura modifiers> Recommended modifiers: +(12-15)% chance to Suppress Spell Damage while affected by Grace Gain (20-30) Energy Shield per Enemy Hit while affected by Discipline Gain a Flask Charge when you deal a Critical Strike while affected by Precision |
|
 (Jewel) Lethal Pride - this Jewel adds extra bonuses to the Passives you picked up in its radius. Try to get at least 10% Physical Damage taken as Fire, but you can also focus on the Double Damage chance instead. It also grants you a lot of Strength. (Jewel) Lethal Pride - this Jewel adds extra bonuses to the Passives you picked up in its radius. Try to get at least 10% Physical Damage taken as Fire, but you can also focus on the Double Damage chance instead. It also grants you a lot of Strength. |
|
| Commanded leadership over (10000-18000) warriors under Akoya Passives in radius are Conquered by the Karui Historic |
|
 (Flask) Bottled Faith - it is the best offensive Flask, especially for Builds that use Critical Strikes as a primary source. It significantly improves your Critical Strike Chance and Damage, but only against Enemies who stand on the Consecrated Ground. (Flask) Bottled Faith - it is the best offensive Flask, especially for Builds that use Critical Strikes as a primary source. It significantly improves your Critical Strike Chance and Damage, but only against Enemies who stand on the Consecrated Ground. |
|
| (30-15)% reduced Duration Consecrated Ground created by this Flask has Tripled Radius Consecrated Ground created during Effect applies (7-10)% increased Damage taken to Enemies (100-150)% increased Critical Strike Chance against Enemies on Consecrated Ground during Effect |
|
|
Other suggested Flasks:
|
|
    |
|
|
If you have any other build requests please leave that in the comments below. We are always open to suggestions and constructive feedback.
Pictures used in this article are the intellectual property of Grinding Gear Games.
