
Consecrated Path of Endurance Juggernaut Build
The Endurance-stacking Juggernaut build that uses Consecrated Path of EnduranceConsecrated Path of Endurance
Juggernaut Build
Updated for Patch 3.25
The Best Crafty Guides by Odealo
| Guide notes |
| December 30, 2022 -Build created July 25, 2024 -Updated for Patch 3.25 |
| Build overview | |||
| Tags: [MELEE] [ELEMENTAL] [LIFE] [SARTER] | |||
|
Budget: Defenses: |
|
Boss DPS: AoE: |
|
The Endurance-stacking archetype wasn't popular until the Affliction League which introduced the Consecrated Path of Endurance Skill. It's a Consecrated Path that grows in size and damage with your Endurance Charges. In turn, it has a 2-second Cooldown which can be bypassed by spending one Endurance Charge. This skill will suit a build that can quickly generate a lot of these Charges back. It's similar to Flicker Strike in this regard, it just consumes a different type of Charge. We've selected Juggernaut for this role due to the Unflinching passive that generates a lot of Endurance Charges quickly. Additionally, you will gain them with Enduring Cry, Endurance Charge on Melee Stun Support Gem, Unyielding, and Replica Farrul's Fur, the last one being optional - you should have more than enough of these Charges for your Attack Speed is low. Consecrated Path is a Slam Attack which allows us to expand on some Slam-specific gimmicks which are often tied to Warcries cause of their low base Attack Speed. We've decided to implement four Warcries and Echoes of Creation Helmet to gain even more Damage, especially with Exerted Attacks. The Area of Effect combined with extremely high Hit Damage makes the Attack Speed redundant for clearing. The downside of such a playstyle, that often discourages players, is the overabundance of buttons to press. We tried to mitigate this issue with possible Gem swaps and upgrades to automate some of the Skills.
The Attack has a built-in 50% Physical-to-Fire Damage Conversion, so the most sound approach is to convert the remaining 50% to Fire with Avatar of Fire and invest in Fire Penetration. Fire Exposure should be applied with Gloves, and Scorch - with Boots. Get the Flammability Curse and passives like Lava Lash, Galvanic Hammer, and Divine Fury for some more Penetration. The bulk of the damage comes from a Weapon, Support Gems, Precise Technique, and Endurance Charges which also provide you with Elemental Resistances and Physical Damage Reduction. Aim for 10 or 11 Endurance Charges in total, it will make the build very tanky. As a Juggernaut, you're already predisposed to withstand a lot of Damage of all types. It specializes in Armour, but the Elemental Damage is also not a huge issue with its Unbreakable Passive that applies a portion of Armour to Elemental Resistances. Add to that Defiance of Destiny Amulet and The Brass Dome or The Fourth Vow Body Armour to make the character more tanky. The additional Fortify Buff with high Life Regeneration makes one of the most durable builds for its price.
For patch 3.25m we've made some major necessary changes. The build now uses Autoexertion for 5 of its Warcries so you won't have to waste time using them. The sixth Warcry can be activated manually. All the Exerted Attacks will have over 200% more damage thanks to the Unique Helemt and the new Overexertion Support Gem. You'll Attack around 1 time a second so the Intimidating Cry may not always be available, it Exerts only 2 Attacks (3 with Measured Fury and 6 with War Bringer from a pair of Forbidden Jewels). The Rage is now gained with Rage Mastery.
You can also check our other Path of Exile builds right over here Odealo's Crafty Guides - Full List
1. Gameplay
For mapping attack with Consecrated Path. To generate Endurance Charges use Enduring Cry. For more Damage, use Seismic Cry, Infernal Cry, Intimidating Cry. and place Ancestral Totems. Flammability should be applied with Hextouch, Corrupted Gloves' Implicit, or cast manually. Molten Shell and Blood Rage can be liked with CwDT - you will undoubtedly take a lot of damage to activate these Skills, your Evasion is non-existent. For Mana-reserving Skills use Determination, Precision, Herald of Ash, and Vitality. Blood and Sand can be used too if you can afford it.
|
|
|
|

2. Build's PROS & CONS
| PROS |
|
| CONS |
|
3. Leveling tips
Follow our detailed Marauder Leveling Guide. It's meant to be used by any Marauder wielding a 2-hand weapon and using Melee Attack, which is what this build is all about. Make the switch to the Consecrated Path of Endurance if you're positive you can withstand the Endurance Charge drain.
Bandits:
you should kill all three Bandits for two additional Skill Points
Leveling Skill Trees:
26 Points Skill Tree
Start with Maximum Life, some Damage, and Convert your remaining Damage to Fire
67 Points Skill Tree
Get more Maximum Life, Elemental Damage, and start gathering Maximum Endurance Charges
4. Final Skill Tree, Ascendancy Points, and Pantheon
Final Skill Tree:
121 Points Final Skill Tree (doesn't include Cluster nor Timeless Jewels)
122 Points Path of Building (PoB) link
Ascendancy points:
Preferably in that order:
- Undeniable
- Unflinching
- Unbreakable
- Unyielding for AoE and to generate Charges, or Unrelenting for much more durability
Pantheon:
Major God: Soul of Solaris: 6% additional Physical Damage Reduction while there is only one nearby Enemy; 20% chance to take 50% less Area Damage from Hits
Minor God: Soul of Abberath: 60% less Duration of Ignite on You
5. Final Gems links
| [DPS] Consecrated Path of Endurance setup | |
 |
Consecrated Path of Endurance - It has worse damage scaling than the regular Consecrated Path but grants 10% more Damage and 10% more AoE per Endurance Charge, which you can have over 10 of. It has a Cooldown of 2 seconds that you can bypass by spending one Charge. |
 |
Endurance Charge on Melee Stun Support - Grants Endurance Charge on Melee Stun, making it an obligatory Support Gem. It's baked into the Tidebreaker weapon that you can use. |
 |
Overexertion Support - More Damage per each Exertion on your Attack, which is 5. |
 |
Elemental Damage with Attacks Support - You're dealing converted Fire Damage, so this Gem is very beneficial. |
 |
Melee Physical Damage Support - Grants more Physical Melee Damage, later Fully Converted. It can be swapped for  Pulverise Support for almost the same DPS but better AoE and Attack Speed. Pulverise Support for almost the same DPS but better AoE and Attack Speed. |
 |
Fist of War Support - Every 1.8 seconds, your next Slam deals close to 100% more Damage and has increased AoE. It's excellent on this low-Attack Speed build, but if your Attack Speed is somehow very high, swap it for  Added Fire Damage Support. Added Fire Damage Support. |
| [UTILITY] Autoexertion setup | |
 |
Infernal Cry - Exerts 6 Attacks that Trigger Combust which deals Physical to Fire Damage. |
 |
Battlemage's Cry - Exerts 5 Attacks that Trigger linked Spell on Hit. There are no Spells here, use it only for Exertion. |
 |
Seismic Cry - Exerts 6 Attacks that have now 50% more AoE. |
 |
Intimidating Cry - Exerts 2 Attacks and makes them deal Double Damage. It's the best Exertion here so try to have it always on. |
 |
Rallying Cry - Exerts 5 Attacks which will deal 5% more damage per Ally nearby, up to 25%. |
 |
Autoexertion - Linked Warcries Reserve Mana and are Triggered automatically with an increased Cooldown Recovery Rate, but grant no Buffs, only Exert Attacks. |
| [UTILITY] Enduring Cry | |
 |
Enduring Cry - Generates Endurance Charges and Recovers Life on use. It improves your Resistances and Physical Damage reduction. It doesn't Exert Attack so you better use it manually. |
| [UTILITY] CwDT setup | |
 |
Flammability - A Hex that lowers the Fire Resistance of your enemies. You can gain it by Corrupting Gloves to cast it with each Hit automatically. |
 |
Lifetap Support - Linked Skills cost no Mana but Life instead. |
 |
Molten Shell - Prevents a portion of incoming damage for some time. It can absorb more Damage the more Armour you have. |
 |
Cast when Damage Taken - Use it to proc Blood Rage, Flammability, and Molten Shell automatically after taking damage. |
| [UTILITY] Leap Slam and Blood Rage setup | |
 |
Leap Slam - A simple mobility Skill to dodge attacks and move quicker. |
 |
Blood Rage - Grants Life Leech, Attack Speed, and Frenzy Charges on Kill. It drains your Life and refreshes its Duration after each kill. |
|
Lifetap Support |
| [UTILITY] Berserk | |
 |
Berserk - Increases the effect of Rage by 60% and drains it at an accelerating rate. |
| [UTILITY] Auras | |
 |
Herald of Ash - Grants Physical Damage as Extra Fire Damage and Burns nearby enemies on Kill, which results in better Map Clear. |
 |
Determination - Adds and increases Armour which is crucial in his build. |
 |
Enlighten Support - Linked Spells Reserve less Mana. |
 |
Precision - You won't have more sockets or Mana for this Gem, but if you do via Ring, use it. It adds some Accuracy Rating to benefit from the Precise Technique. Level it up only as much as you need. |
|
|
6. Gear Setup
It's a simple Melee Build that sources its power from Endurance Charges. The weapon is however still the most important part of an Attack Build and you will need one with high Physical DPS, later converted to Fire. You can start with a cheap Tidebreaker, it perfectly fits this build. Boots and Rings is where you can get additional Maximum Endurance Charges. Replica Farrul's Fur Body Armour can supply you with them which is very important, as the Consecrated Path of Endurance will spend one Endurance Charge to bypass its Cooldown, much like Flicker Strike does with Frenzy Charges. You will also gain Endurance Charges with Enduring Cry, Endurance Charge on Melee Stun Support Gem, and Ascendancy Passives. We have also included the Echoes of Creation Helmet that's good if you use multiple Warcries. You may not like pressing that many buttons, so if that's not your thing use a regular Rare Helmet instead with fewer Warcries. There are other Unique Items that you can use, such as Corrupted Death's Door, Precursor Emblems, and Defiance of Destiny. Aim to have more Accuracy than Maximum Life to benefit from Precise Technique. Also, aim to balance your Attack Speed in such a way as to synchronize your Fist of War or to not run out of Exerted Attacks - Attack Speed is not as valuable in this build as in others of that type. It's a league starter and it's possible to make the build work with very inexpensive items like Kaom's Sign Ring and makeshift Rare Items to then slowly progress to something more pricey as we have shown.
Our recommended items will:
- Cap your resistances at 75%
- Provide you with enough DPS and Life to start mapping
|
Stat priorities on items:
|
 (Helmet) Echoes of Creation - It's what we recommend wearing. It grants much more Damage for each Warcry Exerting your Attack. It's the main reason to use four different Warcries. (Helmet) Echoes of Creation - It's what we recommend wearing. It grants much more Damage for each Warcry Exerting your Attack. It's the main reason to use four different Warcries. |
|
| Socketed Warcry Skills have +1 Cooldown Use (80-120)% increased Armour +(50-70) to maximum Life When you Attack, take (15-20)% of Life as Physical Damage for each Warcry Exerting the Attack Skills deal (10-15)% more Damage for each Warcry Exerting them |
|
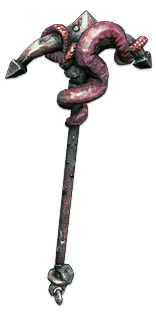 (Weapon) Tidebreaker - Tidebreaker has low damage, but you gain more of it per Endurance Charge with the built-in Support Gem that you would use anyway. It's cheap and good for its price, but a Rare Mace will be better. (Weapon) Tidebreaker - Tidebreaker has low damage, but you gain more of it per Endurance Charge with the built-in Support Gem that you would use anyway. It's cheap and good for its price, but a Rare Mace will be better. |
|
| 10% increased Strength Socketed Gems are Supported by Level 20 Endurance Charge on Melee Stun +40 to Intelligence Adds (70-80) to (340-375) Physical Damage 10% increased Physical Damage per Endurance Charge (20-30)% reduced Enemy Stun Threshold with this Weapon |
|
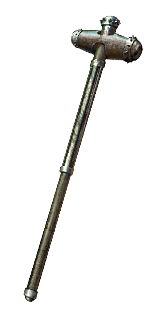 (Weapon) Rare Mace - Seek the weapon with the highest possible Physical DPS. Experimented Impact Force Propagator can be good, it lets you Exert two additional Attacks. You can even go for the Evantuality Rod Staff for one extra Endurance Charge, but it requires some adjustment to the Passive Skill Tree. (Weapon) Rare Mace - Seek the weapon with the highest possible Physical DPS. Experimented Impact Force Propagator can be good, it lets you Exert two additional Attacks. You can even go for the Evantuality Rod Staff for one extra Endurance Charge, but it requires some adjustment to the Passive Skill Tree. |
|
| Min. requirements: at least 750 Physical DPS Optional affixes: Accuracy Rating +1 to Maximum Endurance Charges (Shaper's Suffix) |
|
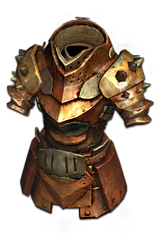
 (Body Armour) Rare Body Armour - Rare Body Armour is good if it has a lot of Maximum Life, Armour, and some good Eldritch Implicits. You can go for all maximum Resistances, increased Curse Effect, or increased effect of Auras with increased Armour or increased Life Recovery rate. (Body Armour) Rare Body Armour - Rare Body Armour is good if it has a lot of Maximum Life, Armour, and some good Eldritch Implicits. You can go for all maximum Resistances, increased Curse Effect, or increased effect of Auras with increased Armour or increased Life Recovery rate. |
|
| Min. requirements: +180 to Maximum Life +80% to Elemental Resistances a lot of Armour Optional affixes: Chance to Suppress Spell Damage increased Maximum Life Gain 1 Endurance Charge every second if you've been Hit Recently (Warlord's Suffix) |
|
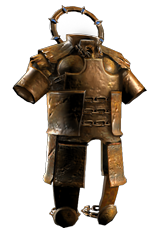
 (Body Armour) The Brass Dome - Brass Dome grants the most Armour of any other Body Armour with up to 5% to all max ele res, which is what this build needs a lot. It's one of the best Armours. (Body Armour) The Brass Dome - Brass Dome grants the most Armour of any other Body Armour with up to 5% to all max ele res, which is what this build needs a lot. It's one of the best Armours. |
|
| (350-400)% increased Armour +(1-5)% to all maximum Elemental Resistances Strength provides no bonus to Maximum Life Take no Extra Damage from Critical Strikes |
|
 (Body Armour) The Fourth Vow - The Fourth Vow is only good with Divine Flesh and capped Chaos Resistance. It will protect you from the biggest Elemental and Chaos Hits. (Body Armour) The Fourth Vow - The Fourth Vow is only good with Divine Flesh and capped Chaos Resistance. It will protect you from the biggest Elemental and Chaos Hits. |
|
| Physical Damage taken bypasses Energy Shield (150-250)% increased Armour and Energy Shield +(17-29)% to Chaos Resistance Regenerate 3% of Life per second Armour also applies to Chaos Damage taken from Hits |
|
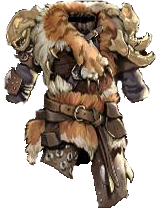 (Body Armour) Replica Farrul's Fur - This Armour should be used to generate Endurance Charges, which your Consecrated Path will consume to bypass its Cooldown. Reduce your Aspect of the Cat's Skill Effect Duration with Support Gems to gain Charges more often. (Body Armour) Replica Farrul's Fur - This Armour should be used to generate Endurance Charges, which your Consecrated Path will consume to bypass its Cooldown. Reduce your Aspect of the Cat's Skill Effect Duration with Support Gems to gain Charges more often. |
|
| (100-150)% increased Armour and Evasion +(80-100) to maximum Life +2.00 seconds to Cat's Agility Duration Aspect of the Cat has no Reservation Gain up to your maximum number of Frenzy and Endurance Charges when you gain Cat's Agility You have Onslaught while you have Cat's Agility |
|
 (Boots) Rare Boots - Basic Boots with Life, Movement Speed, and Resistances are good for a start. For Eldritch Implicits get Scorched Ground and % of Physical Damage as Extra Fire Damage or increased Warcry Speed. (Boots) Rare Boots - Basic Boots with Life, Movement Speed, and Resistances are good for a start. For Eldritch Implicits get Scorched Ground and % of Physical Damage as Extra Fire Damage or increased Warcry Speed. |
|
| Min. requirements: +60 to maximum Life 30% increased Movement Speed +70% to Elemental Resistances Optional affixes: Chaos Resistance Armour |
|
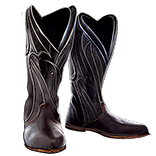 (Boots) Death's Door - You can Corrupt any Boots for a chance of gaining one extra Maximum Endurance Charge. Death's Door may grant you up to two Maximum Endurance Charges this way on top of some rudimentary stats. (Boots) Death's Door - You can Corrupt any Boots for a chance of gaining one extra Maximum Endurance Charge. Death's Door may grant you up to two Maximum Endurance Charges this way on top of some rudimentary stats. |
|
| +(20-40) to Strength 200% increased Armour and Energy Shield +(10-15)% to all Elemental Resistances 25% increased Movement Speed +1 to Maximum Endurance Charges 50% increased Elemental Ailment Duration on you Bleeding cannot be inflicted on you |
|
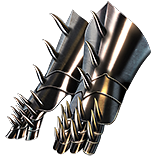 (Gloves) Rare Gloves - Here, get Accuracy, Maximum Life, Armour, and Resistances. For Eldritch mods, get Rage on Hit or Herald of Ash buff Effect, and Fire Exposure. (Gloves) Rare Gloves - Here, get Accuracy, Maximum Life, Armour, and Resistances. For Eldritch mods, get Rage on Hit or Herald of Ash buff Effect, and Fire Exposure. |
|
| Min. requirements: +60 to maximum Life +70% to Elemental Resistances up to 600 Accuracy Rating Optional affixes: increased Melee Damage increased Attack Speed Chaos Resistance Armour |
|
 (Ring) Precursor's Emblem (Endurance Charge) - It's by far the best type of Ring that you may even want to mirror. Look for +1 to Maximum Endurance Charges with two other Endurance Charge mods. Kaom's Sign can be used here instead as it's much cheaper while also granting you one Maximum Endurance Charge. (Ring) Precursor's Emblem (Endurance Charge) - It's by far the best type of Ring that you may even want to mirror. Look for +1 to Maximum Endurance Charges with two other Endurance Charge mods. Kaom's Sign can be used here instead as it's much cheaper while also granting you one Maximum Endurance Charge. |
|
| +(20-30)% to Fire Resistance +20 to Strength 5% increased maximum Energy Shield 5% increased maximum Life <Three Endurance Charge mods> |
|
 (Ring) Circle of Anguish - Upgrade your Herald of Ash or lower its Reservation Efficiency with Circle of Anguish. (Ring) Circle of Anguish - Upgrade your Herald of Ash or lower its Reservation Efficiency with Circle of Anguish. |
|
| <One to three random Synthesis implicit modifiers> +(20-30) to Strength Adds (20-25) to (26-35) Fire Damage +(20-30)% to Fire Resistance <Two Random Herald of Ash modifier> |
|
 (Belt) Ryslatha's Coil - This Belt provides you with a lot of Melee Damage, Maximum Life, and Life on Stun. It's very cheap for how good it is. (Belt) Ryslatha's Coil - This Belt provides you with a lot of Melee Damage, Maximum Life, and Life on Stun. It's very cheap for how good it is. |
|
| (20-30)% increased Stun Duration on Enemies +(20-40) to Strength (30-40)% more Maximum Physical Attack Damage (40-30)% less Minimum Physical Attack Damage Adds 1 to (15-20) Physical Damage to Attacks +(80-100) to maximum Life Gain 50 Life when you Stun an Enemy |
|
 (Belt) Rare Belt - Try to acquire a lot of Maximum Life, Elemental and Chaos Resistances, and Increased Elemental Damage with Attacks on your Stygian Vise. (Belt) Rare Belt - Try to acquire a lot of Maximum Life, Elemental and Chaos Resistances, and Increased Elemental Damage with Attacks on your Stygian Vise. |
|
| Min. requirements: +90 to Maximum Life 90% Total Elemental Resistances Optional affixes: Attributes increased Elemental Damage with Attack Skills Chaos Resistance |
|
 (Amulet) Uul-Netol's Vow - It lets you use one extra Support Gem, given you're not using the Tidebreaker already. It will improve your Damage. (Amulet) Uul-Netol's Vow - It lets you use one extra Support Gem, given you're not using the Tidebreaker already. It will improve your Damage. |
|
| Has 1 Socket Socketed Support Gems can also Support Skills from Equipped Body Armour +(-30-30)% to Fire Resistance +(-30-30)% to Cold Resistance +(-30-30)% to Lightning Resistance +(-23-23)% to Chaos Resistance |
|
 (Amulet) Defiance of Destiny - Defiance of Destiny is the defensive option for a lot of Life, Resistances, and Life Recovery. You will need a source of Life Recovery, it's what this build lacks the most. (Amulet) Defiance of Destiny - Defiance of Destiny is the defensive option for a lot of Life, Resistances, and Life Recovery. You will need a source of Life Recovery, it's what this build lacks the most. |
|
| (20-30)% increased Mana Regeneration Rate +(60-80) to maximum Life +(10-40)% to Fire Resistance +(10-40)% to Cold Resistance +(10-40)% to Lightning Resistance Gain (10-20)% of Missing Unreserved Life before being Hit by an Enemy |
|
| Recommended Anointments: Deep Breaths Measured Fury Weathered Hunter Charisma |
|
 (Jewel) Rare Jewels - Get increased Maximum Life with missing Resistances or Attributes. For Damage seek increased Damage with Two Handed Weapons or Maces. (Jewel) Rare Jewels - Get increased Maximum Life with missing Resistances or Attributes. For Damage seek increased Damage with Two Handed Weapons or Maces. |
|
| Min. requirements: increased Maximum Life Elemental Resistances Chaos Resistance Mana Reservation Efficiency Attributes Reduced Effect of Curses on you |
|
 (Jewel) Lethal Pride - You may socket it near Vigour and look for notable passive upgrades such as "Gain 5% of Physical Damage as Extra Fire Damage" or "5% chance to deal Double Damage". It's highly optional, there are 4 to 6 notables socketed in this radius. (Jewel) Lethal Pride - You may socket it near Vigour and look for notable passive upgrades such as "Gain 5% of Physical Damage as Extra Fire Damage" or "5% chance to deal Double Damage". It's highly optional, there are 4 to 6 notables socketed in this radius. |
|
| Commanded leadership over (10000-18000) warriors under (Akoya-Kaom-Rakiata) Passives in radius are Conquered by the Karui Historic |
|
  (Jewel) Forbidden Flame & Flesh - Marauder has some of the best passives to borrow from other ascendancies, or even from his own. Look for Tasalio, Tukohama, War Bringer, Aspect of Carnage, or Indomitable Resolve. (Jewel) Forbidden Flame & Flesh - Marauder has some of the best passives to borrow from other ascendancies, or even from his own. Look for Tasalio, Tukohama, War Bringer, Aspect of Carnage, or Indomitable Resolve. |
|
| Allocates <Random Ascendancy Notable> if you have the matching modifiers on Forbidden Flesh Allocates <Random Ascendancy Notable> if you have the matching modifiers on Forbidden Flame |
|
 (Jewel) Watcher's Eye - Determination's Armour and Physical Damage Reduction are good. Precision has increased Damage and Attack Speed. (Jewel) Watcher's Eye - Determination's Armour and Physical Damage Reduction are good. Precision has increased Damage and Attack Speed. |
|
| (4-6)% increased maximum Energy Shield (4-6)% increased maximum Life (4-6)% increased maximum Mana <Two or Three random aura modifiers> |
|
 (Flask) Lion's Roar - Use it for more Armour and Physical Damage. It's good in a build that kills enemies in one Hit as the knockback can be annoying. (Flask) Lion's Roar - Use it for more Armour and Physical Damage. It's good in a build that kills enemies in one Hit as the knockback can be annoying. |
|
| +1500 to Armour Adds Knockback to Melee Attacks during Flask effect Knocks Back Enemies in an Area when you use a Flask 75% chance to cause Enemies to Flee on use (7-10)% more Melee Physical Damage during effect |
|
|
Other suggested Flasks:
|
|
    |
|
|
If you have any other build requests please leave that in the comments below. We are always open to suggestions and constructive feedback.
Pictures used in this article are the intellectual property of Grinding Gear Games.
