
Cold Exsanguinate Miner Trickster Build
An Exsanguinate build that uses Mines for a proxyCold Exsanguinate Miner
Trickster Build
Updated for Patch 3.27
The Best Crafty Guides by Odealo
| Guide notes |
| October 27, 2025 -Adjusted the Build with new changes in mind, resulting in higher Damage and better Speed. |
| Build Overview | |||
| Tags: [MINE] [ELEMENTAL] [HYBRID] [STARTER] | |||
|
Budget: Defenses: |
|
Boss DPS: AoE: |
|
Exsanguinate is a Physical Spell that releases bloody tendrils. They're delivering damage instantaneously, which, combined with their number, automatic targeting, and the ability to Chain, makes them one of the best Skills for clearing maps. This Build combines them with Mines to deal damage via Proxy and ignore their Cast Time completely. With Minefield Support, the character will throw more Mines, with Chain - the tendrils will bounce additional times, and after allocating Trick Shot, their Chaining Range is vastly improved, resulting in the death of all the enemies within and off-screen after a single use of a skill. Exsanguinate costs no Mana, only Life. The Mines don't reserve a lot of it, and won't last long anyway, but you have to recover it somehow. As a Miner, you can't use Leech or on-kill effects, so Life Regeneration is recommended. Usually, the very cheap Kikazaru Ring is the best solution. To increase damage, you will Convert all Physical Damage to Cold and Freeze enemies. Top it off with a Heatshiver Helmet to add tons of Fire Damage to the mix.
The Arkhon's Tools Belt greatly empowers your Skitterbots by increasing their Ailment Effect and adding the Scorch to their arsenal. However, those Ailments will affect you as well. You can take advantage of that with the Winterweave Ring to reverse the effect of Chill on you, gaining roughly 20% Action Speed bonus. You will have to get 100% Shock Avoidance or Immunity, and overcome the Resistance Penalty of the Scorch. At first we recommend using Purity of Elements, as the bonus Action Speed may not be worth the costs.
Note that Exsanguinate doesn't fire Projectiles, so instead of a Deadeye, we recommend Trickster. Even after the nerfs, it is still one of the best Ascendencies that offer great Damage and Defense at the same time. The Spell Suppression is slightly weaker and harder to obtain, but it remains the best way to mitigate Damage from Spells. You will also be very likely to Evade almost every Attack due to its high Evasion Rating, and the few Hits that do reach the character are cushioned with Ghost Dance.
You can also check our other Path of Exile builds right over here Odealo's Crafty Guides - Full List
1. Gameplay
Throw Mines ahead and move forward using Shield Charge and Frostblink. Cast Elemental Weakness and throw the Bear Trap against tough enemies. Your Mines are Detonated automatically as soon as you throw them. Your Mana-reserving Skills are Grace, Hatred, and Skitterbots.
|
|

2. Build's PROS & CONS
| PROS |
|
| CONS |
|
3. Leveling tips
Start as a Pyroclast Mine ES/Low-Life Saboteur. Pyroclast Mine is one of the best leveling Skills in general. You can easily complete the Atlas and kill the Pinnacle Bosses using it. You can make the switch to Exsanguinate earlier as it is better at clearing maps, and for that, you will need Hrimsorrow and Kikazaru. These items can be expensive during the first two days of a new league, but you should be able to afford them relatively quickly. Before being able to acquire The Dark Seer, use Singularity or a Rare weapon with increased Cold or Spell Damage, which can be crafted using Essences.
Bandits:
Kill all three Bandits for one additional Skill Point or help Alira to help with gearing.
4. Final Skill Tree, Ascendancy Points, and Pantheon
Final Skill Tree:
107 Points Final Skill Tree (doesn't include Unique or Cluster Jewels)
120 Points Path of Building (PoB) link
Ascendancy points:
Preferably in that order:
- Polymath
- Swift Killer
- Escape Artist
- Spellbreaker
Pantheon:
Major God: Soul of Solaris: 6% additional Physical Damage Reduction while there is only one nearby Enemy; 20% chance to take 50% less Area Damage from Hits
Minor God: Soul of Abberath: 60% less Duration of Ignite on You
5. Final Gems links
| [DPS] Exsanguinate setup | |
 |
Exsanguinate - A Physical Spell that deals Cold Damage after you Convert it. It's very good at clearing maps with its instant damage delivery and Chaining. |
 |
Chain Support - Magnifies clear speed substantially. When fighting pinnacle bosses you should swap it for  Trap and Mine Damage Support. Trap and Mine Damage Support. |
 |
High-Impact Mine Support |
 |
Charged Mines Support |
 |
Minefield Support |
 |
Increased Critical Damage Support |
| [UTILITY] Mana-reserving setup | |
 |
Purity of Elements - makes you immune to self-inflicted Ailments, and helps with Gearing. You can replace it with Grace once you solve those issues via other methods. |
 |
Hatred - Grants extra Cold Damage based on your Physical Damage and enables very powerful Watcher's Eye modifiers. |
 |
Summon Skitterbots - Skitterbots grant more Mine Damage, detonate your Mines and re-arm them, and Shock enemies. |
 |
Unbound Ailments Support - your Skitterbots inflict more powerful Ailments. |
| Bonechill Support - the Chill will also increase the Cold Damage taken by Enemies. It increases the Reservation Cost, so you can link it with Frostblink for free, but less reliable effect. | |
| [UTILITY] Frostblink setup | |
 |
Frostblink - Creates Chilled Ground that causes enemies to take increased damage after linking it with Bonechill. You can use it to teleport, too. |
| [UTILITY] Automation setup | |
 |
Steelskin - Removes Bleeding and forms a barrier that absorbs a portion of incoming Hit Damage. |
 |
Detonate Mines - Detonates your Mines. |
 |
More Duration Support |
 |
Automation - Triggers linked Skill as soon as it's possible, that is every 0.2 seconds. |
| [MOBILITY] Shield Charge setup | |
 |
Shield Charge - Your main mobility Skill. Use it to move faster. |
 |
Faster Attacks Support |
 |
Lifetap Support |
| [UTILITY] Debuff setup | |
 |
Elemental Weakness - A Curse that lowers all Elemental Resistances of affected Enemies, so Added Damage from other sources is useful too. |
 |
Bear Trap - slows Trapped Enemies and increases the Damage they take from all Mines and Traps. |
| [UTILITY] Golem setup | |
 |
Summon Stone Golem - a helpful Golem that provides a lot of Life Regeneration, helping you sustain the Costs of your Mines. |
 |
Cast when Damage Taken Support - automatically resummons your Golem every so often. |
|
|
6. Gear Setup
It's a fairly basic Spell Damage Build with just a few quirks. It relies heavily on the Hatred Aura and gaining Physical Damage as Extra Cold Damage, to then gain Extra Fire Damage from Cold with Heatshiver. It results in mixed Elemental Damage which is mostly Cold - you have to Convert 100% of Physical Damage to Cold with your Gloves. On the items, you will seek increases to the Gem Level of Exsanguinate (a Physical Spell) with generic Physical and Cold Spell Damage. You should be able to reach a 100% Critical Strike Chance with a high Crit Multiplier. For defenses, seek Maximum Life, Evasion, Energy Shield, and Spell Suppression with Resistances until capped. Additional Life Regeneration won't be necessary with Kikazaru. A bit of Strength however will be needed. Attack Speed will make you faster if you'd like to use Shield Charge instead of moving regularly. For additional durability, find a way to Blind your enemies.
Our recommended items will:
- Cap your resistances at 75%
- Provide you with enough DPS and Life to start mapping
|
Stat priorities on items:
|
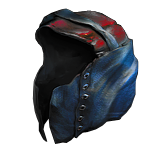 (Helmet) Heatshiver - Provides you with unmatched amounts of damage against Chilled and Frozen enemies. (Helmet) Heatshiver - Provides you with unmatched amounts of damage against Chilled and Frozen enemies. |
|
| (80-100)% increased Evasion Rating 60% increased Mana Regeneration Rate +(20-30)% to Fire Resistance +(20-30)% to Cold Resistance Gain 1% of Cold Damage as Extra Fire Damage per 1% Chill Effect on Enemy Gain 30% of Cold Damage as Extra Fire Damage against Frozen Enemies |
|
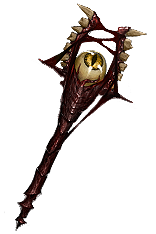 (Weapon) The Dark Seer (Life ES) - It's an excellent option. Increases the Gem Level of Exsanguinate by 2, Blinds enemies, applies Malediction, grants Life, and Energy Shield. An expensive Rare weapon might be better. (Weapon) The Dark Seer (Life ES) - It's an excellent option. Increases the Gem Level of Exsanguinate by 2, Blinds enemies, applies Malediction, grants Life, and Energy Shield. An expensive Rare weapon might be better. |
|
| 22% increased Elemental Damage +2 to Level of all Spell Skill Gems 10% Global chance to Blind Enemies on hit Unaffected by Blind Enemies Blinded by you have Malediction +(1-2) Maximum Energy Shield per Level +(1-2) Maximum Life per Level |
|
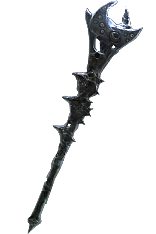 (Weapon) Rare Wand or Sceptre - To outclass The Dark Seer, it has to have a lot of Cold or Spell Damage with Critical Strike modifiers on top of one or two Gem Levels to Physical Spells. (Weapon) Rare Wand or Sceptre - To outclass The Dark Seer, it has to have a lot of Cold or Spell Damage with Critical Strike modifiers on top of one or two Gem Levels to Physical Spells. |
|
| Min. requirements: 80% Increased Cold/Spell Damage +1 to Level of all Physical/Spell Skill Gems Optional affixes: +1 to Level of all Physical/Spell Skill Gems Global Critical Strike Multiplier increased Critical Strike Chance for Spells increased Mine Throwing Speed (crafted) |
|
 (Off-Hand) Rare Shield - Use a Shield with Energy Shield only - it can roll valuable offensive modifiers like additional gem level to Physical Spells and Spell or Cold Damage. (Off-Hand) Rare Shield - Use a Shield with Energy Shield only - it can roll valuable offensive modifiers like additional gem level to Physical Spells and Spell or Cold Damage. |
|
| Min. requirements: +80 to maximum Life +1 to Level of all Physical Skill Gems +40% to Elemental Resistances Optional affixes: increased Spell Damage increased Cold Damage Chaos Resistance |
|
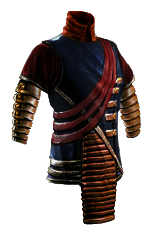 (Body Armour) Rare Body Armour - Get a Sadist Garb with a lot of Evasion, Energy Shield, and Maximum Life for Prefixes. Evasion is especially important due to the Escape Artist passive. If you don't have the Maximum Life mod it's not a big deal, you can seize this opportunity and allocate a Life mastery for 15% more Life. For Suffixes seek Resistances and Spell Suppression. The Eldritch mods shall improve your Hatred Aura Effect and general Aura Effect. (Body Armour) Rare Body Armour - Get a Sadist Garb with a lot of Evasion, Energy Shield, and Maximum Life for Prefixes. Evasion is especially important due to the Escape Artist passive. If you don't have the Maximum Life mod it's not a big deal, you can seize this opportunity and allocate a Life mastery for 15% more Life. For Suffixes seek Resistances and Spell Suppression. The Eldritch mods shall improve your Hatred Aura Effect and general Aura Effect. |
|
| Min. requirements: 400 Energy Shield 2000 Evasion Rating +100 to maximum Life Optional affixes: Spell Suppression Chance Resistances |
|
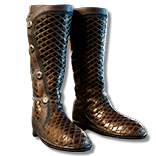 (Boots) Rare Boots - Boots should be easy to find. Look for the most generic pair with Life, Movement Speed, and Resistances. For the Eldritch mods, get increased Action Speed and a bit of Physical Damage as Extra Cold Damage or a chance to Avoid Elemental Ailments. A 50% Chance to Avoid Elemental Ailments here would make you immune to them in combination with Ancestral Vision and capped Spell Suppression Chance. (Boots) Rare Boots - Boots should be easy to find. Look for the most generic pair with Life, Movement Speed, and Resistances. For the Eldritch mods, get increased Action Speed and a bit of Physical Damage as Extra Cold Damage or a chance to Avoid Elemental Ailments. A 50% Chance to Avoid Elemental Ailments here would make you immune to them in combination with Ancestral Vision and capped Spell Suppression Chance. |
|
| Min. requirements: +40% to Elemental Resistances +60 to Maximum Life 25% increased Movement Speed Optional affixes: Resistances Attributes Spell Suppression Chance Chance to Avoid Elemental Ailments (crafted) Life Regeneration |
|
| Min. requirements: +80 to Maximum Life +40% to Elemental Resistances 60% of Physical Damage Converted to Cold Damage (in total) Optional affixes: Resistances Spell Suppression Chance |
|
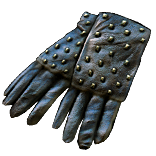 (Gloves) Hrimsorrow - We recommend starting with cheap Hrimsorrow Gloves, they're great. Corrupt them for a valuable Vaal Implicit such as Extra Frenzy Charge or Crit Chance. (Gloves) Hrimsorrow - We recommend starting with cheap Hrimsorrow Gloves, they're great. Corrupt them for a valuable Vaal Implicit such as Extra Frenzy Charge or Crit Chance. |
|
| +(20-30) to Strength +(40-50) to Evasion Rating +(20-30)% to Cold Resistance 100% of Physical Damage Converted to Cold Damage Reflects 100 Cold Damage to Melee Attackers |
|
 (Belt) The Arkhon's Tools - inflicts stronger Shock, Chill, and Scorch on nearby Enemies and yourself. It also massively lowers the Reservation Cost of your Auras. (Belt) The Arkhon's Tools - inflicts stronger Shock, Chill, and Scorch on nearby Enemies and yourself. It also massively lowers the Reservation Cost of your Auras. |
|
| (15-25)% increased Stun and Block Recovery +(20-30) to Dexterity and Intelligence (10-20)% increased Mana Reservation Efficiency of Skills (15-25)% increased Trap and Mine Throwing Speed Summon Skitterbots also summons a Scorching Skitterbot Summoned Skitterbots' Auras affect you as well as Enemies (50-75)% increased Effect of Non-Damaging Ailments inflicted by Summoned Skitterbots |
|
 (Amulet) Replica Dragonfang's Flight - Depending on the popularity of this build, Replica Dragonfang's Flight for Exsanguinate may be expensive, but it is simply the best Amulet here. Grants a lot of damage and utility. Until you get one, use a Rare Amulet with similar stats. (Amulet) Replica Dragonfang's Flight - Depending on the popularity of this build, Replica Dragonfang's Flight for Exsanguinate may be expensive, but it is simply the best Amulet here. Grants a lot of damage and utility. Until you get one, use a Rare Amulet with similar stats. |
|
| +(10-16) to all Attributes +3 to Level of all <Random Skill> Gems +(10-15)% to all Elemental Resistances (10-15)% increased Reservation Efficiency of Skills Items and Gems have (15-10)% reduced Attribute Requirements |
|
| Recommended Anointments: Charisma Sovereignty |
|
 (Ring) Kikazaru - It is often implemented mainly for its Life Regeneration, so you may be able to replace it later on. Its other stats are definitely useful as well. (Ring) Kikazaru - It is often implemented mainly for its Life Regeneration, so you may be able to replace it later on. Its other stats are definitely useful as well. |
|
| +(20-30)% to Lightning Resistance +(10-15) to all Attributes (20-40)% increased Mana Regeneration Rate 60% reduced Effect of Curses on you Regenerate 3 Life per second per Level |
|
 (Ring) Polaric Devastation - You can use it to Cover enemies with Frost so that they have a 50% less Critical Strike Chance and take 20% increased Cold Damage. (Ring) Polaric Devastation - You can use it to Cover enemies with Frost so that they have a 50% less Critical Strike Chance and take 20% increased Cold Damage. |
|
| (15-25)% increased Elemental Damage (15-25)% increased Global Critical Strike Chance +(20-40)% to Fire Resistance +(20-40)% to Cold Resistance (10-20)% increased Duration of Ailments on Enemies Left Ring slot: Cover Enemies in Ash for 5 seconds when you Ignite them Right Ring slot: Cover Enemies in Frost for 5 seconds when you Freeze them |
|
 (Ring) Rare Rings - It's a great place to get a lot of Resistances, especially Chaos Resistance. You can pick the Amethyst Ring and improve it with Catalysts. Maximum Life should be here too. (Ring) Rare Rings - It's a great place to get a lot of Resistances, especially Chaos Resistance. You can pick the Amethyst Ring and improve it with Catalysts. Maximum Life should be here too. |
|
| Min. requirements: +60 to Maximum Life +80% total Resistances Optional affixes: Strength more Maximum Life and Resistances |
|
 (Jewel) Rare Jewels - On Jewels look for Maximum Life and Critical Strike Chance or Critical Strike Multiplier. Your other items should be enough to cap your Resistances and get you enough Strength, but you can find these on Jewels too. (Jewel) Rare Jewels - On Jewels look for Maximum Life and Critical Strike Chance or Critical Strike Multiplier. Your other items should be enough to cap your Resistances and get you enough Strength, but you can find these on Jewels too. |
|
| Recommended affixes: Chaos Resistance Elemental Resistances Strength Maximum Life Mine throwing Speed Critical Strike modifiers |
|
 (Jewel) Ancestral Vision - Combined with a pair of Rare Boots and capped Spell Suppression, you can reach a 100% chance to Avoid all Elemental Ailments. (Jewel) Ancestral Vision - Combined with a pair of Rare Boots and capped Spell Suppression, you can reach a 100% chance to Avoid all Elemental Ailments. |
|
| +(5-10) to Dexterity Modifiers to Chance to Suppress Spell Damage also apply to Chance to Avoid Elemental Ailments at 50% of their Value |
|
  (Jewel) Forbidden Flesh & Flame - Born in the Shadows, Explosive Expert, or Demolitions Specialist would be excellent additions to this build. (Jewel) Forbidden Flesh & Flame - Born in the Shadows, Explosive Expert, or Demolitions Specialist would be excellent additions to this build. |
|
| Allocates <Random Ascendancy Notable> if you have the matching modifier on Forbidden Flesh Allocates <Random Ascendancy Notable> if you have the matching modifier on Forbidden Flame |
|
 (Jewel) Watcher's Eye - Hatred offers Cold Penetration and Crit Chance - both are excellent. Grace has various defensive modifiers. (Jewel) Watcher's Eye - Hatred offers Cold Penetration and Crit Chance - both are excellent. Grace has various defensive modifiers. |
|
| (4-6)% increased maximum Energy Shield (4-6)% increased maximum Life (4-6)% increased maximum Mana <Two or Three random aura modifiers> |
|
 (Jewel) The Light of Meaning - this Jewel can provide you with a large amount of Physical Damage. (Jewel) The Light of Meaning - this Jewel can provide you with a large amount of Physical Damage. |
|
| Passive Skills in Radius also grant 6% increased Physical Damage | |
 (Jewel) Lethal Pride - grants tons of extra Strength, making your Gearing much easier, and possibly improves your maximum Life, Physical Damage, or grants a chance to deal Double Damage. (Jewel) Lethal Pride - grants tons of extra Strength, making your Gearing much easier, and possibly improves your maximum Life, Physical Damage, or grants a chance to deal Double Damage. |
|
| Commanded leadership over (10000-18000) warriors under (Akoya-Kaom-Rakiata) Passives in radius are Conquered by the Karui Historic |
|
 (Jewel) The Balance of Terror - manually casting your Curse will reward you with an immense amount of Extra Damage added to your Mines. (Jewel) The Balance of Terror - manually casting your Curse will reward you with an immense amount of Extra Damage added to your Mines. |
|
| +(10-15)% to all Elemental Resistances Gain (30-40)% of Physical Damage as a Random Element if you've cast Elemental Weakness in the past 10 seconds |
|
 (Jewel) Large Cluster Jewel - The build uses one Large Cluster Jewel. Cold Damage, Elemental Damage, or Physical Damage all have their merits. (Jewel) Large Cluster Jewel - The build uses one Large Cluster Jewel. Cold Damage, Elemental Damage, or Physical Damage all have their merits. |
|
| Recommended affixes: 1 Added Passive Skill is Blanketed Snow 1 Added Passive Skill is Doryani's Lesson 1 Added Passive Skill is Prismatic Heart 1 Added Passive Skill is Battle-Hardened 1 Added Passive Skill is Force Multiplier 1 Added Passive Skill is Iron Breaker |
|
 (Jewel) Medium Cluster Jewel - Expert Sabotage and Guerrilla Tactics are the two best notables in terms of damage and utility. (Jewel) Medium Cluster Jewel - Expert Sabotage and Guerrilla Tactics are the two best notables in terms of damage and utility. |
|
| Recommended affixes: 1 Added Passive Skill is Expert Sabotage 1 Added Passive Skill is Guerilla Tactics |
|
|
Other suggested Flasks:
|
|
     |
|
|
If you have any other build requests please leave that in the comments below. We are always open to suggestions and constructive feedback.
Pictures used in this article are the intellectual property of Grinding Gear Games.
