
Chain Hook Berserker Build
A simple Chain Hook for a Berserker that uses Rage to deal high Physical DamageChain Hook
Berserker Build
Updated for Patch 3.20
The Best Crafty Guides by Odealo
| Guide notes |
| January 13, 2023 -Build created |
| Build overview | |||
| Tags: [MELEE] [PHYSICAL] [IMPALE] [LIFE] | |||
|
Budget: Defenses: |
|
Boss DPS: AoE: |
|
Chain Hook is not a very good Attack, it requires you to aim precisely at the enemy (no matter how big of an area of effect it has), and then, after a quick dash, it deals damage. The damage has a shape of a cone which is actually pretty large, it can reach the edge of your screen with no additional AoE enhancements. It doubles as a movement attack, as long as there is an enemy you can aim for. The other distinctive quality of Chain Hook is its Rage generation, one per Hit. The effectiveness of the Weapon's Damage and Attack Speed Multiplier are not exceptionally good, at around the same level as Infernal Blow (minus added Fire Damage). It's a good skill to quickly generate Rage and move around while Attacking, but overall it's too clunky and weak to be considered a powerful end-game build, more proof of a concept that all attacks work well on a Berserker.
As the Attack Generates Rage, We've decided to pick Crave the Slaughter and Rite of Ruin to get more Rage faster, and with triple effect. Rage increases Attack Speed, Attack Damage, and Movement Speed. With 80 Rage, which is easy to get, it will get you 240% increased Damage, 120% increased Attack Speed, and 48% increased Movement Speed. You can then spend this Rage on Berserk for a brief and extremely ponent buff to all these qualities - it will shred most bosses in seconds if you've entered their area with a lot of Rage already, and if not, it will be quickly generated in no time. For even more Damage, we've selected Flawless Savagery and Blitz for more added Damage, Attack Speed, and Critical Strike modifiers. The Chain Hook will deal purely Physical Damage with a high Crit Chance and 100% Chance to Impale. For defenses, it uses basic Armour, Block Chance, and a lot of Life and Life Leech.
You can also check our other Path of Exile builds right over here Odealo's Crafty Guides - Full List
1. Gameplay
Use Chain Hook to dash to your target, try to be precise or it won't work at all. Pase Run is used for Phasing and more Damage. For even more Damage use Ancestral Protector and Warchief which will Maim on Hit. For more Attack Speed and Frenzy Charges use Blood Rage and occasionally Berserk Skill when fighting bigger opponents. As for a Guard Spell, pick Molten Shell and link it with Cast when Damage Taken. For a Curse, we recommend Assassin's Mark, and if you can apply a second one (via Whispers of Doom), get a ring with Vulnerability on Hit. The best Auras are Pride, Precision, and Determination. War Banner or Blood and Sand can be added if you have some space left.
|
|
|
|
2. Build's PROS & CONS
| PROS |
|
| CONS |
|
3. Leveling tips
A compelling leveling guide for this build can be found here: Marauder Leveling Guide, 2-handed weapon version. It's a guide for 2-hand weapons, which are in most cases better for leveling, but with little to no adjustments, it can be used with on-hand weapons.
Bandits:
Kill all three bandits and be rewarded with two additional Skill Points
Leveling Skill Trees:
27 Points Passive Tree
Allocate Maximum Life, Elemental Resistances, and Attack Damage.
57 Points Passive Tree
More Maximum Life, some Damage, Reservation Efficiency, Life and Mana Leech, Onslaught on Kill, and Phasing. You're free to pick some nearby nodes for more Physical Damage or Impale if you don't have a good weapon.
4. Final Skill Tree, Ascendancy Points, and Pantheon
Final Skill Tree:
103 Points Final Passive Tree (doesn't include Cluster Jewels)
123 Points Path of Building (PoB) link
Ascendancy points:
Preferably in that order:
- Crave the Slaughter
- Flawless Savagery
- Blitz
- Rite of Ruin
Pantheon:
Major God: Soul of Lunaris: 1% additional Physical Damage Reduction for each nearby Enemy, up to 8%; 1% increased Movement Speed for each nearby Enemy, up to 8%
Minor God: Soul of Ralakesh: Moving while Bleeding doesn't cause you to take extra Damage; 25% reduced Physical Damage over Time Damage taken while moving
5. Final Gems links
| [DPS] Chain Hook setup | |
 |
Chain Hook - A Melee Attack that makes you dash to the targeted enemy dealing Area Damage as you land. It generates Rage with each successful Hit. |
 |
Impale Support - Use for an extra 60% Chance to Impale and to increase its effect. You have to reach 100%. |
 |
Melee Physical Damage Support - Grants more Melee Physical Damage and slightly lowers Attack Speed. |
 |
Brutality Support - Provides much more Physical Damage, and inability to deal any other kind of Damage. |
 |
Pulverise Support - Much more Area Damage and Area of Effect, but lower Attack Speed. You can switch it with  Increased Critical Strikes or Increased Critical Strikes or  Increased Critical Damage for better single-target Damage. Increased Critical Damage for better single-target Damage. |
 |
Multistrike Support - One of the best Support Gems for a raw DPS output, but due to how Chain Hooks Works, attacking twice each time might be too awkward. If that's the case, use  Faster Attacks instead. Faster Attacks instead. |
| [UTILITY] Mana-reserving Spells setup | |
 |
Precision - Adds Accuracy Rating and increases Critical Strike Chance, both are useful. |
 |
Pride - Enemies near you take increased Physical Damage, the effect is doubled after four seconds of continuous exposure. |
 |
Determination - Adds and Increases Armour, the primary defensive layer. |
 |
Enlighten Support - It increases Mana Reservation Efficiency. You may not need it at all if you've allocated Champion of the Cause, or have a Shield with local Reservation Efficiency. |
| [UTILITY] Mark/Phase Run setup | |
 |
Phase Run - Phase Run grants more Damage, Movement Speed, and Phasing for a brief moment, it lasts longer for each Frenzy Charge consumed. Use it as your movement key. |
 |
Assassin's Mark - Assassin's Mark is a Curse that increases your Critical Strike Chance and Damage against the Marked enemy. |
 |
Lifetap Support - Linked Skills cost Life instead of Mana. |
 |
Mark on Hit Support - Assassin's Mark will apply to all Rare and Unique enemies you Hit with any of your Attacks. |
| [UTILITY] Ancestral Totems setup | |
 |
Ancestral Warchief - A Totem that increases your Melee Damage. |
 |
Ancestral Protector - A Totem that increases your Attack Speed. We recommend the Phantasmal version of it. |
 |
Multiple Totems - You can place both totems at the same time for two of the Ancestral Buffs. |
 |
Maim Support - Attacks have a chance to Maim, Maimed enemy will receive more Physical Damage. |
| [UTILITY] Various gems | |
 |
Berserk - Consumes all your Rage to grant a temporary bonus to Attack Speed, Attack Damage, Movement Speed, and less Damage taken. The more Rage you have, the longer it lasts. |
 |
Blood Rage - Increases Attack Speed, Life Leech, and generates Frenzy Charges on Kill while draining your Life. Its duration is refreshed on kill. |
 |
Enhance Support - Quality is great for both of these linked Skills, it increases your DPS. |
| [UTILITY] Molten Shell setup | |
 |
Molten Shell - Use Molten Shell to mitigate incoming Hit Damage for a brief time. |
 |
Cast when Damage Taken - Molten Shell will be activated automatically after taking damage. |
| [UTILITY] War Banner | |
 |
War Banner - You should be able to fit in a Spell or two that reserves little to no Mana. War Banner increases Accuracy and increases damage nearby enemies take.  Blood and Sand can be used too, it grants more AoE or more Area Damage, depending on stance. Blood and Sand can be used too, it grants more AoE or more Area Damage, depending on stance. |
|
|
6. Gear Setup
The build can run only on Rare Items, these perform exceptionally well and oftentimes are the best-in-slot if you want to min-max DPS. In terms of DPS, you prioritize your Weapon - One-Handed Mace, Sceptre, Sword, or Axe. We've selected Axe due to the multiple great Axe cluster and masteries near Marauder's starting location. Axes or good Paradoxica Swords have usually the highest DPS. Besides Physical Damage, seek Critical Strike, Accuracy, and Attack Speed mods. For defenses, Maximum Life and Armour are the most fundamental pieces, later you can invest more in Block Chance, Spell Suppression, Life regeneration, and Chaos Resistance. Assassin's Mark requires a lot of Intelligence, Blood Rage a lot of Dexterity - you will have to get it from your gear. Mana Reservation Efficiency should not be an issue. Remember to get Life and Mana Leech to sustain the self-inflicted damage from Blood Rage. It might be hard to achieve a 100% Critical Strike Chance.
Our recommended items will:
- Cap your resistances at 75%
- Provide you with enough DPS and Life to start mapping
|
Stat priorities on items:
|
 (Helmet) Rare Helmet - The Helmet can be a source of Maximum Life, Resistances, Accuracy, Attributes, Critical Strike modifiers, and increased Physical Damage taken by nearby enemies. (Helmet) Rare Helmet - The Helmet can be a source of Maximum Life, Resistances, Accuracy, Attributes, Critical Strike modifiers, and increased Physical Damage taken by nearby enemies. |
|
| Min. requirements: +60 to Maximum Life +60% to Elemental Resistances Optional affixes: Accuracy Rating Attributes Nearby Enemies take increased Physical Damage Armour Global Critical Strike Multiplier |
|
 (Helmet) Abyssus - Abyssus is the softcore option that grants more Damage than any other Helmet could provide, but increases the Physical Damage taken by your character too. (Helmet) Abyssus - Abyssus is the softcore option that grants more Damage than any other Helmet could provide, but increases the Physical Damage taken by your character too. |
|
| +(20-25) to all Attributes Adds 40 to 60 Physical Damage to Attacks +(100-125)% to Melee Critical Strike Multiplier (100-120)% increased Armour (40-50)% increased Physical Damage taken |
|
| Helmet enchantments: Chain Hook enchantment mods |
|
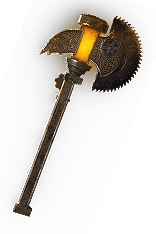 (Weapon) Rare One-Handed Weapon - A weapon with increased and added Physical Damage and Attack Speed should result in around 500 total Physical DPS. Psychotic Axe for more Rage would be excellent. (Weapon) Rare One-Handed Weapon - A weapon with increased and added Physical Damage and Attack Speed should result in around 500 total Physical DPS. Psychotic Axe for more Rage would be excellent. |
|
| Min. requirements: around 500 DPS Optional affixes: Accuracy Rating Attack Speed Critical Strike Multiplier Critical Strike Chance |
|
 (Weapon) Paradoxica - Paradoxica can roll some great mods for increased Physical Damage and Attack Speed, and then double the Damage. A good Paradoxica is however expensive. (Weapon) Paradoxica - Paradoxica can roll some great mods for increased Physical Damage and Attack Speed, and then double the Damage. A good Paradoxica is however expensive. |
|
| +25% to Global Critical Strike Multiplier Attacks with this Weapon deal Double Damage Veiled Prefix Veiled Suffix |
|
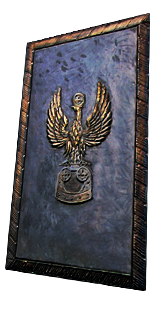 (Off-hand) Rare Shield - Block Chance, tons of Life, and Resistances are the most optimal mods to get on a Shield. There's also a Shaper's Suffix to increase Mana Reservation Efficiency for socketed Gems. (Off-hand) Rare Shield - Block Chance, tons of Life, and Resistances are the most optimal mods to get on a Shield. There's also a Shaper's Suffix to increase Mana Reservation Efficiency for socketed Gems. |
|
| Min. requirements: +90 to Maximum Life +60% to Elemental Resistances Optional affixes: Maximum Life +#% to any maximum Elemental Resistance Elemental Resistances Block Chance Socketed Gems have 30% increased Reservation Efficiency |
|
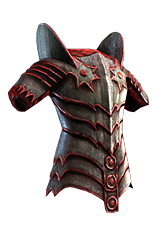 (Body Armour) Rare Body Armour - besides Maximum Life and Elemental Resistances, aim for added Critical Strike Chance for Attacks, or an additional Curse. Explosions would help with clear speed. (Body Armour) Rare Body Armour - besides Maximum Life and Elemental Resistances, aim for added Critical Strike Chance for Attacks, or an additional Curse. Explosions would help with clear speed. |
|
| Min. requirements: +80 to Maximum Life +50% to Elemental Resistances Attacks have +1% to Critical Strike Chance Optional affixes: You can apply an additional Curse Enemies you Kill have a #% chance to Explode, dealing a tenth of their Maximum increased Area of Effect increased Maximum Life |
|
 (Body Armour) Farrul's Fur - Farrul's Fur is a reliable source of Power and Frenzy Charges but requires a Cat's buff on one of your other items, which can be crafted. It's overall a very good Armour for most Attack builds. (Body Armour) Farrul's Fur - Farrul's Fur is a reliable source of Power and Frenzy Charges but requires a Cat's buff on one of your other items, which can be crafted. It's overall a very good Armour for most Attack builds. |
|
| (100-150)% increased Armour and Evasion +(80-100) to maximum Life Aspect of the Cat has no Reservation +2 seconds to Cat's Stealth Duration Gain up to your maximum number of Frenzy and Power Charges when you gain Cat's Stealth You have Phasing while you have Cat's Stealth |
|
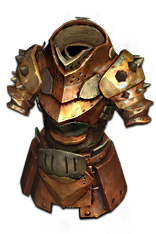 (Body Armour) The Brass Dome - An extremely defensive-oriented Armour with a lot of Armour and Maximum Elemental Resistances. It slightly lowers your Maximum Life, but it's still very good. (Body Armour) The Brass Dome - An extremely defensive-oriented Armour with a lot of Armour and Maximum Elemental Resistances. It slightly lowers your Maximum Life, but it's still very good. |
|
| (350-400)% increased Armour +(1-5)% to all maximum Elemental Resistances Strength provides no bonus to Maximum Life Take no Extra Damage from Critical Strikes |
|
 (Boots) Rare Boots - We recommend a pair of boots with Elemental Resistances, Movement Speed, Maximum Life, and some additional offensive mods. (Boots) Rare Boots - We recommend a pair of boots with Elemental Resistances, Movement Speed, Maximum Life, and some additional offensive mods. |
|
| Min. requirements: +50 to maximum Life 25% increased Movement Speed +50% to Elemental Resistances Optional affixes: chance to gain Onslaught o Kill You have Tailwind if you have dealt a Critical Strike Recently chance to gain Elusive on Critical Strike |
|
 (Gloves) Rare Gloves - Maximum Life and Resistances are a must-have, you can then additionally get Attack Speed, Accuracy, or use Eldritch Currency to generate Rage on Hit. Corrupted Gloves can apply a Vulnerability Curse on Hit. (Gloves) Rare Gloves - Maximum Life and Resistances are a must-have, you can then additionally get Attack Speed, Accuracy, or use Eldritch Currency to generate Rage on Hit. Corrupted Gloves can apply a Vulnerability Curse on Hit. |
|
| Min. requirements: +60 to Maximum Life +60% to Elemental Resistances Optional affixes: increased Critical Strike Chance Attack Speed Adds Physical Damage Accuracy Rating |
|
 (Gloves) Kaom's Spirit - With enough Life Leech you can safely use Kaom's Spirit to gain even more Rage, but combined with Blood rage it may be just too much of a Life Drain. (Gloves) Kaom's Spirit - With enough Life Leech you can safely use Kaom's Spirit to gain even more Rage, but combined with Blood rage it may be just too much of a Life Drain. |
|
| +(50-70) to maximum Life +(20-30)% to Fire Resistance (0.3-0.5)% of Physical Attack Damage Leeched as Life Life Recovery from Regeneration is not applied Regenerate 1 Rage per second for every 100 Life Recovery per second from Regeneration |
|
 (Gloves) Oskarm - Oskarm will trigger Assassin's Mark against tough enemies, provide a significant portion of Accuracy, and some extra Critical Strike Chance. Good if corrupted or with a lot of Accuracy. (Gloves) Oskarm - Oskarm will trigger Assassin's Mark against tough enemies, provide a significant portion of Accuracy, and some extra Critical Strike Chance. Good if corrupted or with a lot of Accuracy. |
|
| (30-40)% increased Global Accuracy Rating +(40-50) to maximum Life -(20-10)% to Chaos Resistance +(10-12)% chance to Suppress Spell Damage Trigger Level 10 Assassin's Mark when you Hit a Rare or Unique Enemy and have no Mark 2% increased Attack Critical Strike Chance per 200 Accuracy Rating |
|
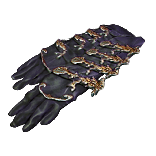 (Gloves) Asenath's Gentle Touch - Asenath's gloves are known for exposing enemies on death resulting in a much better clear speed. It inflicts Temporal Chain Curse on Hit, and at the end of the day can be swapped for Oriath's End Flask or Rare Chest modifier. (Gloves) Asenath's Gentle Touch - Asenath's gloves are known for exposing enemies on death resulting in a much better clear speed. It inflicts Temporal Chain Curse on Hit, and at the end of the day can be swapped for Oriath's End Flask or Rare Chest modifier. |
|
| +(20-30) to Intelligence +(60-80) to maximum Life +(60-80) to maximum Mana Curse Enemies with Temporal Chains on Hit Non-Aura Curses you inflict are not removed from Dying Enemies Enemies near corpses affected by your Curses are Blinded Enemies Killed near corpses affected by your Curses explode, dealing 3% of their Life as Physical Damage |
|
 (Belt) Rare Belt - Stygian Vise with just Life and Resistances will do, there you can get a lot of them. (Belt) Rare Belt - Stygian Vise with just Life and Resistances will do, there you can get a lot of them. |
|
| Min. requirements: +90 to Maximum Life +100% to Elemental Resistances Optional affixes: Attributes increased Maximum Life Chaos Resistance |
|
 (Belt) Ryslatha's Coil - Ryslatha's Coil is exceptionally good for all Physical Attack builds, it grants a lot of Damage and Maximum Life, but no Resistances. (Belt) Ryslatha's Coil - Ryslatha's Coil is exceptionally good for all Physical Attack builds, it grants a lot of Damage and Maximum Life, but no Resistances. |
|
| (20-30)% increased Stun Duration on Enemies +(20-40) to Strength (30-40)% more Maximum Physical Attack Damage (40-30)% less Minimum Physical Attack Damage Adds 1 to (15-20) Physical Damage to Attacks +(80-100) to maximum Life Gain 50 Life when you Stun an Enemy |
|
 (Belt) Bear's Girdle - Bear's Girdle adds 20 Maximum Rage, increases Damage per Rage, Crushes enemies, and adds Physical Damage to Attacks. It's extremely good if you can generate Rage rapidly, which you should be able to. (Belt) Bear's Girdle - Bear's Girdle adds 20 Maximum Rage, increases Damage per Rage, Crushes enemies, and adds Physical Damage to Attacks. It's extremely good if you can generate Rage rapidly, which you should be able to. |
|
| +(25-40) to maximum Life Adds (5-7) to (11-12) Physical Damage to Attacks (20-30)% increased Stun Duration on Enemies Nearby Enemies are Crushed while you have at least 25 Rage (4-6)% increased Physical Damage per 10 Rage +20 to Maximum Rage |
|
 (Amulet) Rare Amulet - Life, Resistances, and Critical Strike modifiers are very common on an Amulet, it should be easy to get it. Mana Reservation Efficiency for specific Auras can be found on Warlord's Amulets. (Amulet) Rare Amulet - Life, Resistances, and Critical Strike modifiers are very common on an Amulet, it should be easy to get it. Mana Reservation Efficiency for specific Auras can be found on Warlord's Amulets. |
|
| Min. requirements: 50 Maximum Life +70% to Elemental Resistances 25% increased Global Critical Strike Chance Optional affixes: Adds Physical Damage to Attacks increased Global Critical Strike Chance Attributes Pride or Determination has (40–50)% increased Mana Reservation Efficiency |
|
 (Amulet) Uul-Netol's Vow - The build could really benefit from an extra 7th Support Gem, try to get an Uul-Netol's Vow with good rolls. (Amulet) Uul-Netol's Vow - The build could really benefit from an extra 7th Support Gem, try to get an Uul-Netol's Vow with good rolls. |
|
| Has 1 SocketSocketed Support Gems can also Support Skills from your Body Armour +(-30-30)% to Fire Resistance +(-30-30)% to Cold Resistance +(-30-30)% to Lightning Resistance +(-23-23)% to Chaos Resistance |
|
| Recommended Anointments: Feller of Foes (Axe) Fatal Blade (Sword) Whispers of Doom Panopticon Discipline and Training |
|
 (Ring) Rare Ring - On Rings, we recommend gathering a lot of Dexterity and Intelligence, Maximum Life, and Resistances. Accuracy, Critical Strike modifiers, Mana Leech, and reduced Mana Cost of Skills would work well too. (Ring) Rare Ring - On Rings, we recommend gathering a lot of Dexterity and Intelligence, Maximum Life, and Resistances. Accuracy, Critical Strike modifiers, Mana Leech, and reduced Mana Cost of Skills would work well too. |
|
| Min. requirements: +60% to Elemental Resistances +60 to Maximum Life Optional affixes: Adds Physical Damage to Attacks Accuracy Rating Global Critical Strike Chance Vulnerability on Hit (if you can apply more than one Curse) Non-Channelling Skills have -7 to Total Mana Cost (crafted) |
|
 (Jewel) Rare Jewels - You can fix your Elemental Resistances and Attributes if needed, but try to prioritize Maximum Life on your Jewels. (Jewel) Rare Jewels - You can fix your Elemental Resistances and Attributes if needed, but try to prioritize Maximum Life on your Jewels. |
|
| Recommended affixes: 7% Maximum Life Elemental Resistances Attributes Optional affixes: increased Attack Speed or Damage with Swords, Axes, or One-Handed Weapons Melee Critical Strike Chance or Multiplier |
|
 (Jewel) Thread of Hope - If socketed near Savagery, Thread of Hope with a Large Ring allows you to pick up Master of the Arena, Art of the Gladiator, Deflection, Panopticon, Hatchet Master, Rampart, or even Spirit Void if needed. (Jewel) Thread of Hope - If socketed near Savagery, Thread of Hope with a Large Ring allows you to pick up Master of the Arena, Art of the Gladiator, Deflection, Panopticon, Hatchet Master, Rampart, or even Spirit Void if needed. |
|
| Only affects Passives in Large Ring Passives in Radius can be Allocated without being connected to your tree -(20-10)% to all Elemental Resistances |
|
  (Jewel) Forbidden Flame & Flesh - Marauder is known to have many excellent Keystones. The Aspect of Carnage, Tukohama, Undeniable, Unstoppable, Untiring, Unbreakable, Indomitable Resolve, or the already selected Blitz and Rite of Ruin are all good. (Jewel) Forbidden Flame & Flesh - Marauder is known to have many excellent Keystones. The Aspect of Carnage, Tukohama, Undeniable, Unstoppable, Untiring, Unbreakable, Indomitable Resolve, or the already selected Blitz and Rite of Ruin are all good. |
|
| Allocates <Random Ascendancy Notable> if you have the matching modifiers on Forbidden Flesh Allocates <Random Ascendancy Notable> if you have the matching modifiers on Forbidden Flame |
|
 (Jewel) Watcher's Eye - your Auras are Pride, Determination, and Precision, try to get a Watcher's Eye with the affixes for increased Critical Strike Chance or any of the Pride mods. (Jewel) Watcher's Eye - your Auras are Pride, Determination, and Precision, try to get a Watcher's Eye with the affixes for increased Critical Strike Chance or any of the Pride mods. |
|
| (4-6)% increased maximum Energy Shield (4-6)% increased maximum Life (4-6)% increased maximum Mana <Two or Three random aura modifiers> |
|
 (Jewel) Large Cluster Jewels - Regular Large Cluster Jewel with a base of Attack Damage or Physical Damage should have some great Notable Passives for the build. We recommend just one. (Jewel) Large Cluster Jewels - Regular Large Cluster Jewel with a base of Attack Damage or Physical Damage should have some great Notable Passives for the build. We recommend just one. |
|
| Recommended affixes: 1 Added Passive Skill is Drive the Destruction 1 Added Passive Skill is Iron Breaker 1 Added Passive Skill is Martial Prowess 1 Added Passive Skill is Fuel the Fight 1 Added Passive Skill is Feed the Fury 1 Added Passive Skill is Master the Fundamentals 1 Added Passive Skill is Force Multiplier |
|
 (Jewel) Medium Cluster Jewels - Critical Strike Notables from Medium Cluster Jewels would greatly improve the build. (Jewel) Medium Cluster Jewels - Critical Strike Notables from Medium Cluster Jewels would greatly improve the build. |
|
| Recommended affixes: 1 Added Passive Skill is Pressure Points 1 Added Passive Skill is Basics of Pain |
|
 (Flask) Lion's Roar - Lion's Roar can improve any Melee Physical build, it grants more Damage. (Flask) Lion's Roar - Lion's Roar can improve any Melee Physical build, it grants more Damage. |
|
| +1500 to Armour Adds Knockback to Melee Attacks during Effect Knocks Back Enemies in an Area when you use a Flask 75% chance to cause Enemies to Flee on use (7-10)% more Melee Physical Damage during effect |
|
 (Flask) Bottled Faith - More Damage, more Critical Strike Chance, and the bonuses of Consecrated Ground make this flask one of the best of its kind. (Flask) Bottled Faith - More Damage, more Critical Strike Chance, and the bonuses of Consecrated Ground make this flask one of the best of its kind. |
|
| 40% increased Damage Creates Consecrated Ground on Use (30-15)% reduced Duration Consecrated Ground created by this Flask has Tripled Radius Consecrated Ground created during Effect applies (7-10)% increased Damage taken to Enemies (100-150)% increased Critical Strike Chance against Enemies on Consecrated Ground during Flask effect |
|
|
Other suggested Flasks:
|
|
     |
|
|
If you have any other build requests please leave that in the comments below. We are always open to suggestions and constructive feedback.
Pictures used in this article are the intellectual property of Grinding Gear Games.


