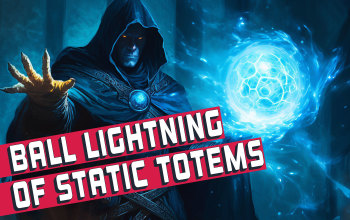
Ball Lightning of Static Totem Hierophant Build
A simple Hierophant build that uses the Ball Lightning of Static with TotemsBall Lightning of Static Totem
Hierophant build
Updated for Patch 3.23
The Best Crafty Guides by Odealo
| Guide notes |
| January 26, 2024 - Build created |
| Build overview | |||
| Tags: [TOTEM] [ELEMENTAL] [LIFE] | |||
|
Budget: Defenses: |
|
Boss DPS: AoE: |
|
The Ball Lightning of Static is a new version of a very basic Lightning Spell that deals Lightning Hit Damage to enemies around it. This one, as the name suggests, is static (not a Projectile anymore), allowing it to hit the same stationary target more times, but it is worse for clearing maps with a lot of enemies on them, as it cannot move. A clever way in which you can mitigate this downside is by using Totems. Each Totem can cast its own Static Ball Lightning which has its own Cooldown (this version of Ball Lightning has Cooldown and Charges, much like Flame Dash), making it already much better with Totems than by self-casting it. You're allowed to have as many Ball Lightning of Static as you can conjure (they do have a fixed duration and Hit frequency), and the best way to increase your DPS is by placing more Totems, or by reducing Your Cooldown Recovery Rate, so that your Totems can spawn a new Ball sooner.
The obvious choice for most Spell Totem builds is a Hierophant. The Pursuit of Faith and Ritual of Awakening passives are simply the best ones you can get. While you're a Hierophant, grab the Conviction of Power for Charges, and Arcane Blessing for Arcane Surge. With Mind over Matter, your Mana Pool serves as a secondary Life Pool, and you should take advantage of that. Mana Pool will be a very potent defensive layer with Arcane Cloak that creates a defensive layer out of your Mana. Try to equalize your Mana and Life to benefit from MoM. Your defensive layers are Mana, Armour, Evasion, Spell Suppression, Block Chance, and Life/Mana Regeneration. Energy Shield is somewhat high. It's a perfect build for an SSF character as it does not require any unique or complex items.
You can also check our other Path of Exile builds right over here Odealo's Crafty Guides - Full List
1. Gameplay
Spawn the Totems ahead of you, each has a large AoE so clearing maps should not be as bad as you may have initially thought. If you stumble across a tough enemy, cast your Arcanist Brand and spawn additional Searing Bond Totems. Activate your temporary Aura, and cast the Vaal Righteous Fire if you have one. Arcane Cloak and Sigil of Power can be deployed there too. Your passive Skills are Zealotry, Clarity, and Vitality Auras. You can use Determination if you really need it.
|
|
|
|
2. Build's PROS & CONS
| PROS |
|
| CONS |
|
3. Leveling tips
Follow our in-depth leveling guide - Templar Leveling Guide using Toems. It's a basic Totem Spell gimmick that will carry you all the way to the Red Maps, and and that point you should be able to comfortably switch to this specific version of a Totem Build.
Bandits:
When dealing with the bandits, kill all of them for the two additional Skill Points.
4. Final Skill Tree, Ascendancy Points, and Pantheon
Final Skill Tree:
116 Points Final Skill Tree (doesn't include Unique nor Cluster Jewels)
123 Points Path of Building (PoB) link
Ascendancy points:
Preferably in that order:
- Pursuit of Faith
- Ritual of Awakening
- Arcane Blessing
- Conviction of Power
Pantheon:
Major God: Soul of the Brine King: You cannot be Stunned if you've been Stunned or Blocked a Stunning Hit in the past 2 seconds; 100% chance to Avoid being Frozen
Minor God: Soul of Garukhan: 60% reduced Effect of Shock on you
5. Final Gems links
| [DPS] Ball Lightning of Static setup | |
 |
Ball Lightning of Static - A stationary ball with fixed hit frequency and duration. It stores charges that are regained over time, just like in the case of Flame Dash. It has no limit on how many balls you can have, so the only limiting factor is your Cooldown Recovery Rate (improved with Gem Quality). |
 |
Lightning Penetration Support - Use the awakened version for free Exposure on Hit (that's additional Resistance Penetration). It causes you to Penetrate the Lightning Resistance of your enemies. |
 |
Cruelty Support - Cruelty grants more Damage. It's hard to find a better Support Gem for this setup. |
 |
Increased Critical Strikes Support - Increases Critical Strike Chance for linked Spell. |
 |
Increased Critical Damage Support - Increases Critical Strike Damage. |
 |
Spell Totem Support - It transforms the linked Spell to be cast by a Totem. You should be able to summon up to 4 of these Totems. |
| [UTILITY] Searing Bond Totem setup | |
 |
Searing Bond - Place them to benefit from the Ironwood notable and Ritual of Awakening passive. With Multiple Totems, Ashes, and level 4 Enhance you will be able to summon 13 of these Totems. |
 |
Multiple Totems Support - This lets you bypass the global Totem Limit, just summon Searing Bond Totems first during boss fights. |
 |
Enhance Support - Improves Quality of Linked Skill Gems. |
 |
Flame Dash - This Skill lets you dash around to avoid being damaged and to move faster. Quality improves its Cooldown Recovery Rate. |
| [UTILITY] Arcanist Brand setup | |
 |
Arcanist Brand - This Skill casts linked Spells with each activation while being attached to an enemy. |
 |
Faster Casting Support - The Brand activates faster. |
 |
Creeping Frost - Creates Chilled Ground beneath the target, so that you can benefit from Algor Mortis. |
 |
Assassin's Mark - Increases your Critical Strike Chance Chance and Critical Strike Multiplier against marked enemies. Your Crit Chance is quite high. |
| [UTILITY] Arcane Cloak and Sigil of Power setup | |
 |
Arcane Cloak - Sacrifies a portion of your actual Mana (which is mostly unreserved) to create a protective barrier around you. It's a potent defensive layer in this build. |
 |
Sigil of Power - As you spend Mana inside the circle, you gain additional Lightning Damage and you take less Damage while inside of it. |
 |
Increased Duration Support - Increases the Skill Effect Duration. Arcane Cloak and Sigil of Power last longer. |
 |
Arcane Surge Support - As you spend enough Mana (which is not difficult with Arcane Cloak) you gain the Arcane Surge buff for increased Mana Regeneration Rate and Cast Speed. |
| [UTILITY] Wrath setup | |
 |
Wrath - Wrath simply grants you more Lightning Damage with Spells. |
 |
Divine Blessing - Wrath is now a temporary Spell Aura that you can activate when you need more damage. It costs a lot of Mana. |
 |
Inspiration Support - Divine Wrath costs less Mana to activate. |
| [UTILITY] Auras setup | |
 |
Vitality - Vitality Regenerteas a fixed amount of Life over time. |
 |
Clarity - Clarity Regenerates Mana over Time. |
| [UTILITY] Vaal Righteous Fire | |
 |
Vaal Righteous Fire - As you activate it, you deal more Spell Damage for the next few seconds. It consumes your Life and ES.  Determination can be used here instead if you really need the extra Physical Damage Reduction - it's great, especially against small enemies. Determination can be used here instead if you really need the extra Physical Damage Reduction - it's great, especially against small enemies. |
|
|
6. Gear Setup
The build does not need any Unique Items, you can assemble it in an SSF environment. However, we do recommend Mark of the Shaper Ring, Algor Mortis Gloves, and Ashes of the Stars Amulet. These are the best-in-slot items, at least for a regular player. If you feel like your damage is not enough, even after acquiring a good weapon, get the Soul Mantle Body Armour. However, the Ball Lightning of Static is so good against bosses that it should not be a necessity. Focus on Cooldown Recovery Rate, Spell Damage, and Critical Strike Chance to maximize your DPS. Maximum Mana (with Mind over Matter) and Maximum Life will provide you with a large Life Pool. If you want to be even more tanky seek Physical Damage Reduction, Chaos Resistance, and Spell Suppression Chance. You can even reach a 100% Spell Suppression Chance with the right items.
Our recommended items will:
- Cap your resistances
- Give you enough DPS/Life to start mapping successfully
|
Stat priorities on items:
|
 (Helmet) Viridi's Veil - This Helmet can be used with one Magic Ring to be Hexproof. Consider it only if you're wearing Soul Mantle. Socket your Auras here. (Helmet) Viridi's Veil - This Helmet can be used with one Magic Ring to be Hexproof. Consider it only if you're wearing Soul Mantle. Socket your Auras here. |
|
| +(1-2) to Level of Socketed Gems (120-160)% increased Armour and Energy Shield +(15-25)% to all Elemental Resistances Damage of Enemies Hitting you is Unlucky while you have a Magic Ring Equipped You are Hexproof if you have a Magic Ring in right slot Take no Extra Damage from Critical Strikes if you have a Magic Ring in left slot |
|
 (Helmet) Rare Helmet - Use Helmet for Maximum Life, Maximum Mana, Resistances, and Spell Suppression Chance. It's also an opportunity to reduce Physical Damage Taken. Seek Physical Damage Taken as Fire Damage as Eldritch Implicit. The other one may increase your Crit Chance for Spells. (Helmet) Rare Helmet - Use Helmet for Maximum Life, Maximum Mana, Resistances, and Spell Suppression Chance. It's also an opportunity to reduce Physical Damage Taken. Seek Physical Damage Taken as Fire Damage as Eldritch Implicit. The other one may increase your Crit Chance for Spells. |
|
| Min. requirements: +80 Maximum Life +40% total Elemental Resistance +60 Maximum Mana +10% Chance to Suppress Spell Damage Optional affixes: Attributes Life Regeneration Physical Damage taken as Elemental |
|
 (Weapon) Rare Weapon - +1 or +2 wand for Lightning Spells with additional Maximum Mana, Spell Damage, and Critical Strike Chance for Spells is what you should look for. (Weapon) Rare Weapon - +1 or +2 wand for Lightning Spells with additional Maximum Mana, Spell Damage, and Critical Strike Chance for Spells is what you should look for. |
|
| Min. requirements: 60% increased Spell/Lightning/Elemental Damage +1 to level of all Lightning Spell Skill Gems +80 Maximum Mana Optional affixes: +1 to level of all Spell Skill Gems increased Critical Strike Chance for Spells Global Critical Strike Multiplier Added Lightning Damage |
|
 (Off-hand) Rare Shield - Get a Shaper's Shield for +1 Maximum Totem. There are tons of other modifiers a Spell Shield has to offer. Maximum Life, Crit Chance, Spell Damage, Maximum Mana, and Spell Suppression are the most important. (Off-hand) Rare Shield - Get a Shaper's Shield for +1 Maximum Totem. There are tons of other modifiers a Spell Shield has to offer. Maximum Life, Crit Chance, Spell Damage, Maximum Mana, and Spell Suppression are the most important. |
|
| Min. requirements: +1 to maximum number of Summoned Totems (Shaper's Prefix) +70 to maximum Life (crafted) Optional affixes: Chance to Suppress Spell Damage Resistances Maximum Mana (crafted) increased Critical Strike Chance for Spells Life Regeneration increased Spell/Lightning/Elemental Damage |
|
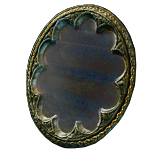 (Off-hand) Atziri's Reflection - A rather poor Shield (at least when compared to expensive Rare ones) for an end-game build, but it's still quite good. It can be used with Soul Mantle to become Hexproof. It has tons of Intelligence, Energy Shield, Evasion, and some Elemental Resistances. (Off-hand) Atziri's Reflection - A rather poor Shield (at least when compared to expensive Rare ones) for an end-game build, but it's still quite good. It can be used with Soul Mantle to become Hexproof. It has tons of Intelligence, Energy Shield, Evasion, and some Elemental Resistances. |
|
| 6% increased Movement Speed +(40-60) to Intelligence (180-200)% increased Evasion Rating +(180-200) to maximum Energy Shield +(20-30)% to all Elemental Resistances Hex Reflection Unaffected by Curses (15-20)% increased Effect of your Curses |
|
 (Body Armour) Soul Mantle - Use it for the built-in Spell Totem Support Gems - it lets you make a 7-link setup for the Ball Lightning. A good Rare Body Armour is still better unless you have a Corrupted Soul Mantle with +2 or even +3 (twice Corruppted) to Level of socketed Aoe Gems. Be sure you're Hexproof if wearing it. (Body Armour) Soul Mantle - Use it for the built-in Spell Totem Support Gems - it lets you make a 7-link setup for the Ball Lightning. A good Rare Body Armour is still better unless you have a Corrupted Soul Mantle with +2 or even +3 (twice Corruppted) to Level of socketed Aoe Gems. Be sure you're Hexproof if wearing it. |
|
| Socketed Gems are Supported by Level 20 Spell Totem (20-25)% increased Spell Damage (100-120)% increased Energy Shield (20-30)% increased Totem Life Inflicts a random Hex on you when your Totems die |
|
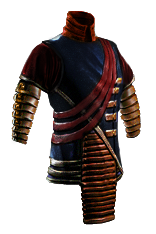 (Body Armour) Rare Body Armour - A basic Armour with a lot of Maximum Life, Resistances, Spell Suppression, and Maximum Mana will be perfect. Remember to Craft a Prefix that shifts a portion of Physical Damage to Fire and Lightning. For the Eldritch mods, get an increased Aura Effect and a Frenzy Charge every 15 seconds. (Body Armour) Rare Body Armour - A basic Armour with a lot of Maximum Life, Resistances, Spell Suppression, and Maximum Mana will be perfect. Remember to Craft a Prefix that shifts a portion of Physical Damage to Fire and Lightning. For the Eldritch mods, get an increased Aura Effect and a Frenzy Charge every 15 seconds. |
|
| Min. requirements: +100 to maximum Life 70% total Resistances +15% Chance to Suppress Spell Damage Optional affixes: Maximum Mana Life Regeneration per Second % of Physical Damage from Hits taken as Fire/Lightning Damage (crafted) increased effect of Non-Curse Auras from your Skills |
|
 (Boots) Rare Boots - Boots, besides the default Maximum Life, Movement Speed, and Resistances, should also get you additional Maximum Mana and Cooldown Recovery Rate. It's a Shaper/Crusader Suffix. Alternatively, it can be added via Eldritch Orb. (Boots) Rare Boots - Boots, besides the default Maximum Life, Movement Speed, and Resistances, should also get you additional Maximum Mana and Cooldown Recovery Rate. It's a Shaper/Crusader Suffix. Alternatively, it can be added via Eldritch Orb. |
|
| Min. requirements: 25% Movement Speed +80 to Maximum Life +80 to Maximum Mana 40% Total Elemental Resistances Cooldown Recovery Rate Optional affixes: Chance to Suppress Spell Damage Chaos Resistance |
|
 (Gloves) Algor Mortis - These Gloves are the best. They Sap enemies and cause them to take increased Lightning Damage, but only if they're on Chilled ground. You create them with Creeping Frost on your Arcanist Brand. (Gloves) Algor Mortis - These Gloves are the best. They Sap enemies and cause them to take increased Lightning Damage, but only if they're on Chilled ground. You create them with Creeping Frost on your Arcanist Brand. |
|
| +(50-70) to maximum Energy Shield +(15-20)% to Cold and Lightning Resistances (20-30)% chance to Sap Enemies in Chilling Areas Enemies in your Chilling Areas take (25-35)% increased Lightning Damage (15-20)% increased Effect of Non-Damaging Ailments |
|
 (Belt) Rare Belt - A Belt with Maximum Life, Resistances, and increased Cooldown Recovery, which can be Crafted, is good enough, but to improve it seek Maximum Mana, Armour, and Life Regeneration. (Belt) Rare Belt - A Belt with Maximum Life, Resistances, and increased Cooldown Recovery, which can be Crafted, is good enough, but to improve it seek Maximum Mana, Armour, and Life Regeneration. |
|
| Min. requirements: +90 to Maximum Life 90% Total Elemental Resistances 12% increased Cooldown Recovery Rate Optional affixes: increased Maximum Life Chaos Resistance Maximum Mana Armour Life Regeneration |
|
 (Amulet) Ashes of the Stars - Ashes is the best Amulet in our opinion. The extra Skill Gem Level improves damage, whilst the Quality upgrades all your Skill Gems, which is particularly great in Ball Lightning of Static, Flame Dash, Searing Bond, Arcane Cloak, and many others. Only the finest Rare Amulet can outclass it. (Amulet) Ashes of the Stars - Ashes is the best Amulet in our opinion. The extra Skill Gem Level improves damage, whilst the Quality upgrades all your Skill Gems, which is particularly great in Ball Lightning of Static, Flame Dash, Searing Bond, Arcane Cloak, and many others. Only the finest Rare Amulet can outclass it. |
|
| +(10-16) to all Attributes (5-10)% increased Experience Gain of Gems +1 to Level of all Skill Gems +(20-30)% to Quality of all Skill Gems |
|
| Recommended Anointments: Ironwood Whispers of Doom (Conductivity) |
|
 (Ring) Rare Ring - Here you will seek missing Attributes, mostly Strength and Dexterity. Maximum Life and Mana are the best Prefixes that can be crafted. Look mostly for these, as much as you can afford. Influence it with Elder. (Ring) Rare Ring - Here you will seek missing Attributes, mostly Strength and Dexterity. Maximum Life and Mana are the best Prefixes that can be crafted. Look mostly for these, as much as you can afford. Influence it with Elder. |
|
| Min. requirements: +50 to Maximum Life +60 to Maximum Mana 40% Total Resistances Attributes Optional affixes: more Attributes and Resistances global Critical Strike Multiplier |
|
 (Ring) Mark of the Shaper - It adds Lightning Damage to Spells and increases Spell Damage by 80% if your other Rare Ring is influenced by Elder. It has Maximum Life, some ES, and a Volatile Anomaly which is not really useful. (Ring) Mark of the Shaper - It adds Lightning Damage to Spells and increases Spell Damage by 80% if your other Rare Ring is influenced by Elder. It has Maximum Life, some ES, and a Volatile Anomaly which is not really useful. |
|
| (15-25)% increased Elemental Damage 20% chance to Trigger Level 20 Summon Volatile Anomaly on Kill Adds (13-18) to (50-56) Lightning Damage to Spells (6-10)% increased maximum Energy Shield (6-10)% increased maximum Life (60-80)% increased Spell Damage if your other Ring is an Elder Item Cannot be Stunned by Spells if your other Ring is a Shaper Item |
|
 (Jewel) Rare Jewels - Seek missing Resistances, Attributes, Maximum Life, Maximum Mana, and maybe Crit Chance or added Lightning Damage if it's an Abyss Jewel. (Jewel) Rare Jewels - Seek missing Resistances, Attributes, Maximum Life, Maximum Mana, and maybe Crit Chance or added Lightning Damage if it's an Abyss Jewel. |
|
| Recommended affixes: Totem Damage Critical Strike Chance Elemental Resistances increased Maximum Life increased Maximum Mana |
|
 (Jewel) Large Cluster Jewel - The Scintillating Idea is the most important - it Grants Maximum Mana and Lightning Penetration. Supercharge is better the lower your Crit Chance is, which we don't expect to be capped anyway. (Jewel) Large Cluster Jewel - The Scintillating Idea is the most important - it Grants Maximum Mana and Lightning Penetration. Supercharge is better the lower your Crit Chance is, which we don't expect to be capped anyway. |
|
| Recommended affixes: 1 Added Passive Skill is Widespread Destruction 1 Added Passive Skill is Overshock 1 Added Passive Skill is Prismatic Heart 1 Added Passive Skill is Supercharge 1 Added Passive Skill is Scintillating Idea |
|
 (Jewel) Medium Cluster Jewel - Sleepless Sentries is used for Onslaught, while Ancestral Reach increases Totem Damage, Placement Speed, and Placement Range. (Jewel) Medium Cluster Jewel - Sleepless Sentries is used for Onslaught, while Ancestral Reach increases Totem Damage, Placement Speed, and Placement Range. |
|
| Recommended affixes: 1 Added Passive Skill is Sleepless Sentries 1 Added Passive Skill is Ancestral Reach |
|
 (Jewel) Self-Flagellation - Good only with Soul Mantle and while Hexproof. It increases your Damage by a lot. (Jewel) Self-Flagellation - Good only with Soul Mantle and while Hexproof. It increases your Damage by a lot. |
|
| (10-20)% increased Damage per Curse on you An additional Curse can be applied to you |
|
 (Jewel) Watcher's Eye - You're using Vitality, Clarity, Zealotry, and maybe Determination or Wrath. Look for Crit Chance and Elemental Penetration. Vitality has minor Life Regeneration mods, and Clarity offers Damage taken from Mana before Life, Mana Recoup, or Mana Recovery. (Jewel) Watcher's Eye - You're using Vitality, Clarity, Zealotry, and maybe Determination or Wrath. Look for Crit Chance and Elemental Penetration. Vitality has minor Life Regeneration mods, and Clarity offers Damage taken from Mana before Life, Mana Recoup, or Mana Recovery. |
|
| (4-6)% increased maximum Energy Shield (4-6)% increased maximum Life (4-6)% increased maximum Mana <Two or Three random aura modifiers> |
|
 (Flask) Bottled Faith - It's a Consecrated Ground, grants more damage, and increased Crit Chance against enemies on it. Use it during boss fights. (Flask) Bottled Faith - It's a Consecrated Ground, grants more damage, and increased Crit Chance against enemies on it. Use it during boss fights. |
|
| 40% increased Damage Creates Consecrated Ground on Use (30-15)% reduced Duration Consecrated Ground created by this Flask has Tripled Radius Consecrated Ground created during Effect applies (7-10)% increased Damage taken to Enemies (100-150)% increased Critical Strike Chance against Enemies on Consecrated Ground during Effect |
|
|
Other suggested Flasks:
|
|
     |
|
|
If you have any other build requests please leave that in the comments below. We are always open to suggestions and constructive feedback.
Pictures used in this article are the intellectual property of Grinding Gear Games.


