 Buy/Sell
 Log in


Artillery Ballista Assassin
A very powerful Artillery Ballista Setup that utilises Assassin's ability to Poison with Elemental Damage to deliver tremendous damage! Poison Artillery Ballista
Assassin build
Updated for Patch 3.30
The Best Crafty Guides by Odealo
| Guide notes | |||
| November 14, 2026 -Build created |
|||
| Build overview | |||
| Tags: [RANGED] [CHAOS] [TOTEM] [HYBRID] | |||
|
Budget: Defenses: |
|
Boss DPS: AoE: |
|


The Artillery Ballista is often used as supplementary setup for Bow users, as it can deal tons of Damage without any specialised investment in the Passive Tree. This build focuses heavily on them as your main source of Damage, which makes them extremely deadly. By default, the Ballista fires 7 Arrows; at least half of them are expected to hit your target. Increasing the amount of Projectiles is not very efficient due to messy targeting, but improving the AoE greatly enhances the odds of multihit. Thanks to Wilma's Requital, Rare Artillery Quiver, and Totem Notables on the Passive Tree, you can summon 8 Ballistas at the same time.
The Clear Speed of Artillery Ballista is not very great due to its relatively small AoE Coverage. To help with that, you should use Artillery Ballista of Focus Fire as your main Clearing Skill, and swap for the original Artillery Ballista only against the toughest opponents. The Transfigured variant fires a single Projectile at 6 different targets. It deals twice as much damage as a single regular Projectile, but it can't overlap against isolated Enemies.
To scale your Damage, we recommend a very synergistic combination of Elemental Critical Poison, which is enabled by Assassin Ascendancy, but can also work on Pathfinder if you equip specific Unique Boots. Wilma's Requital grants the Ancestral Bond Keystone for +1 Totem limit, but also disables your personal Damage. Your own attacks still count as Hits or Critical Strikes, but they can't deal Damage or apply Ailments. This Helmet also allows you to improve your Attack Speed through Cast Speed modifiers. Placing Totems can trigger Manaforged Setup, which will fire Frenzy to generate Frenzy Charges, and Storm Rain to recover Life, generate Power Charges, and enable the Unholy Might Buff, which in turn allows you to apply the Withered Debuff very quickly.
Critical Hits do not directly affect your Poisons, but thanks to Assassin Ascendancy and Notables such as Dire Torment, they will deal significantly more Damage if applied by Critical Strike. You will reach very high Crit Chance with almost no investments, but it is not reliable enough to opt for the Perfect Agony approach, as it requires a total commitment to reach 100% Crit Chance.
Your Frenzy Charges can be converted to Affliction Charges, which grant 8% More Damage with Ailments each. You can still preserve the original Frenzy bonuses by wearing Ralakesh's Impatience boots. It can also grant you a decent defensive boost, as the Replica Badge of the Brotherhood can apply the Frenzy Limit to Endurance Charges as well. It is especially potent if you can get a pair of Forbidden Flesh&Flame Jewels to borrow +2 Frenzy from Trickster Ascendancy. However, this setup can easily reach the 35 Million DoT cap anyway, so we opted for regular defensive Rares instead. The Assassin Ascendancy provides limited defensive bonuses, so you will have to take care of that aspect via other means.
Our recommendation is a hybrid approach of maximum Life, Energy Shield, Spell Suppression, and Evasion, which can get quite durable, but relies heavily on proper Rare Items. Your Totems will also Taunt Enemies, and you will have great Life Recovery thanks to the Manaforged Setup, but the Energy Shield is recovered only via Ghost Dance and avoiding getting hit for a few seconds.
You can also find our other Path of Exile builds right over here Odealo's Crafty Guides - Full List
1. Gameplay
Use Lancing Steel or Cyclone to trigger your Soulrend of Reaping. The Despair Curse is useful against Bosses. Your Mobility comes from Shield Charge and Frostblink. Your remaining Utility Spells should be used automatically.
|
Full gameplay video: |
|
|


2. Build's PROS & CONS
| PROS |
|
| CONS |
|
3. Leveling tips
The Poisonous Concoction is the golden standard for leveling up Poison Builds. You can switch to the Artillery Ballista after completing the second Labyrinth Trial, which unlocks applying Poisons with Elemental Damage. We recommend following our Poisonous Concoction Pathfinder Build for a smooth campaign run, as it shares many features on the Passive Tree, making it very easy to transition to your final Setup.
Bandits:
We recommend killing all the Bandits for the additional Passive Point, but helping Alira is also a good option.
4. Final Skill Tree, Ascendancy Points, and Pantheon
Final Skill Tree:
115 Points Final Skill Tree (doesn't include Unique or Cluster Jewels)
121 Points Path of Building (PoB) link
Ascendancy points:
Preferably in that order:
- Toxic Delivery
- Infused Toxins
- Knife in the Back
- Opportunistic
Pantheon:
Major God: Soul of Brine King: You cannot be Stunned if you've been Stunned or Blocked a Stunning Hit in the past 2 seconds, 100% chance to Avoid being Frozen
Minor God: Soul of Ralakesh: 25% reduced Physical Damage over Time taken while moving, Moving while Bleeding doesn't cause you to take extra Damage
5. Final Gem Links
| [DPS] Artillery Ballista setup | |
 |
Artillery Ballista - a Totem that fires several arrows into the air, which fall into a specific area after a short while. Multiple arrows can overlap, dealing the damage again. |
 |
Artillery Ballista of Focus Fire - fires stronger arrows, but only one per individual target. It has much greater AoE coverage, but worse Bossing potential. |
 |
Unbound Ailment Support |
 |
Deadly Ailments Support |
 |
Elemental Damage with Attacks Support |
 |
Vicious Projectiles Support |
 |
Volatility Support |
| [DPS] Manaforged setup | |
 |
Frenzy - a simple Projectile that generates Frenzy Charge upon hitting a target. |
 |
Storm Rain - a sticky projectile that rapidly hits nearby enemies. Keep those Skills at level 1 to keep Costs low. |
 |
Manaforged Arrows Support - triggers linked Skills when you spend Mana on other Bow Skills, including summoning Totems. |
 |
Life gain on Hit Support |
 |
Power Charge on Critical Support |
 |
Maim/Blind/Withering Touch Support - your Hits don't deal Damage, but they can still apply on-hit effects. |
| [UTILITY] Aura setup | |
 |
Purity of Elements - improves your Resistances and makes you immune to Ailments. You can swap it for Grace or Haste later on. |
 |
Herald of Agony - grants plenty of Poison Chance and improves your Damage with Poisons. |
 |
Malevolence - your main offensive Aura; it greatly enhances your Damage with Poisons. |
 |
Precision - use a low-level Precision to get a bit of Accuracy and enable Watcher's Eye modifiers. |
 |
Enlighten Support |
| [UTILITY] Curse setup | |
 |
Despair - greatly lowers Chaos Resistances. |
 |
Temporal Chains - slows down enemies and prolongs the Poisons on them. |
 |
Enfeeble - weakens enemy Damage and Accuracy rating. |
 |
Bane - applies all linked Curses at once, with a slight penalty to their effectiveness. You can also use Arcanist Brand, which is slower, but incurs no penalty to their effectiveness. |
| [UTILITY] Mark setup | |
 |
Poacher's Mark - adds a bit of Physical Damage to your attacks, grants Life and Mana on Hit, and generates Frenzy Charges, which can replace Frenzy in the Manaforged Arrows if needed. |
 |
Mark on Hit Support |
| [UTILITY] Guard setup | |
 |
Immortal Call - to avoid high Strength requirements, use Immortal Call as your Guard, as it's quite effective even at level 1. |
 |
Automation/Cast when Damage Taken Support |
| [MOBILITY] Mobility setup | |
 |
Frostblink - you will mostly run around on your feet, but to traverse through terrain gaps, use the instant Frostblink. |
| [UTILITY] Golem setup | |
 |
Summon Chaos Golem - improves your Chaos Resistance and DoT Multiplier. |
|
|
5. Gear Setup
There is no mandatory Unique for functionality, but there is plenty of options you can use to boost your Damage or survivability depending on your needs and budget. The Wilma's Requital might sound necessary for a Totem build, but you will have a base of 6 Totems just from your Passive Tree anyway. The Frenzy-stacking shell is a great starting point to skyrocket your Damage for a rather low price, but it makes your defense lackluster. Your Gear is a combination of a regular Elemental Attack Build with a bit of Damage over Time Multiplier, and optionally Cast Speed. The defense is heavily tied to maximum Life, capping Resistances, Evasion, and Energy Shield. At a higher budget, try to include Spell Suppression and Chaos Resistance.
|
Stat priorities on items:
|
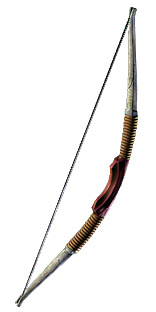 (Weapon) Rare Bow - you will need a very usual Bow that features high Elemental DPS and Critical Strikes. You can potentially include Damage over Time Multiplier, but it is not very impactful compared to regular DPS. |
|
| Min. requirements: 1000+ Elemental DPS 6% Critical Strike Chance Optional affixes: % increased Chaos Damage % increased Damage over Time % to Chaos Damage over Time Multiplier +#% to Damage over Time Multiplier for Poison inflicted with this Weapon (Elder) |
|
 (Weapon) Rare Quiver - the Quiver is all about increasing your Damage. Make sure to use Artillery Quiver to get an additional totem limit. |
|
| Min. requirements: +1 to maximum number of Summoned Totems Optional affixes: +#% to Damage over Time Multiplier with Attack Skills Adds # Elemental Damage to Attacks #% increased Attack Speed +# to maximum Life Bow Attacks fire an additional Arrow #% increased Damage with Bow Skills #% increased Elemental Damage with Attack Skills |
|
 (Helmet) Wilma's Requital - adds an extra Totem and allows you to use Cast Speed to scale your Attacks, but disables your personal Damage, which disqualifies Corpse Explosions. |
|
| +(300-500) to Accuracy Rating (200-250)% increased Energy Shield Increases and Reductions to Cast Speed apply to Attack Speed (20-30)% increased Elemental Damage with Attack Skills Ancestral Bond |
|
 (Body Armour) Hyrri's Ire - a very good offensive Body Armour that grants a large amount of Damage to your Attacks and makes it easy to cap your Suppression Chance. |
|
| +(40-50) to Dexterity (140-220)% increased Evasion Rating 25% increased Chill Duration on Enemies (105-145) to (160-200) Added Cold Damage with Bow Attacks +30% chance to Suppress Spell Damage |
|
 (Body Armour) Rare Body Armour - a Rare Armour can grant you tons of Energy Shield and Evasion Rating. It is a purely defensive option. |
|
| Min. requirements: +1500 Evasion Rating +600 Energy Shield Optional affixes: #% of Physical Damage from Hits taken as Elemental Damage Gain an Endurance Charge every # seconds % faster start of Energy Shield Recharge Resistances and Attributes |
|
 (Belt) Olesya's Delight - turns your Frenzy Charges into Affliction Charges, each granting 8% More Damage with Ailments, which is only a bit stronger than a regular Frenzy Charge. |
|
| (15-25)% increased Stun and Block Recovery +(600-700) to Evasion Rating +(40-60)% to Cold Resistance (8-12)% increased Movement Speed +1 to Maximum Frenzy Charges Modifiers to Minimum Frenzy Charges instead apply to Minimum Affliction Charges Maximum Affliction Charges is equal to Maximum Frenzy Charges Gain Affliction Charges instead of Frenzy Charges |
|
 (Boots) Ralakesh's Impatience - those Boots lower your Charge limit, but allow you to benefit from Frenzy and Affliction Charges at the same time. |
|
| +(15-25)% to Cold Resistance +(15-25)% to Chaos Resistance (15-25)% increased Movement Speed Corrupted Blood cannot be inflicted on you Count as having maximum number of Frenzy Charges -1 to maximum Frenzy Charges |
|
 (Amulet) Replica Badge of the Brotherhood - with this Amulet you will be able to apply the Frenzy Charge limit to Endurance Charges. Getting enough Resistances and Suppression with this setup is a tough fit. |
|
| +(16-24) to Dexterity and Intelligence Your Maximum Endurance Charges is equal to your Maximum Frenzy Charges +1 to maximum Fortification per Endurance Charge (7-10)% increased Cooldown Recovery Rate of Travel Skills per Frenzy Charge (20-25)% chance to lose a Frenzy Charge when you use a Travel Skill (20-25)% chance to lose an Endurance Charge when you gain Fortification |
|
 (Belt) Rare Belt - if you don't need DPS, you can get a regular defensive Belt with Life and Resistances. Try to get a Stygian Vise to make use of additional Abyssal Jewel. |
|
| Min. requirements: +100 maximum Life +80% to Total Elemental and Chaos Resistances Optional affixes: Strength #% increased Elemental Damage with Attack Skills #% increased Maximum Life |
|
 (Boots) Rare Boots - if you are ot using the Olesya's Delight Belt, you won't need the Unique Boots either, so you can use regular defensive Boots. |
|
| Min. requirements: +100 to maximum Life +70% Elemental and Chaos Resistance 30% Increased Movement Speed Optional affixes: % increased Energy Shield Recharge Rate % chance to Suppress Spell Damage % increased Action Speed (Exarch) |
|
 (Amulet) Rare Amulet - can grant you plenty of Damage through DoT Multiplier and Elemental Damage for Attacks, help with basic defenses, and can lower your Mana Costs. |
|
| Min. requirements: +100 to maximum Life +40% Elemental and Chaos Resistance Optional affixes: +#% to Damage over Time Multiplier Adds # Elemental Damage to Attacks #% increased Elemental Damage with Attack Skills Non-Channelling Skills have -7 to Total Mana Cost Attributes Recommended Anoint: Surveillance |
|
 (Ring) Anathema - a very valuable Ring that grants you 3 extra Curses for free. The Cast Speed is also useful due to your Helmet properties, but you can seek other useful Corruptions if necessary. |
|
| (7-10)% increased Cast Speed +(30-40) to Intelligence (10-15)% increased Cast Speed (10-20)% chance to gain a Power Charge when you Cast a Curse Spell Your Curse Limit is equal to your maximum Power Charges |
|
 (Ring) Betrayal's Sting - the best Ring for any Poison Build, especially once you boost it with Chaos Catalysts. However, it makes capping your Resistances quite hard. |
|
| Adds (3-4) to (10-14) Physical Damage to Attacks +(20-35) to Dexterity -(30-20)% to all Elemental Resistances +(20-30)% to Chaos Resistance 5% increased Movement Speed (25-40)% chance to inflict an additional Poison on the same Target when you inflict Poison |
|
 (Ring) Mokou's Embrace - you can use this cheap Ring to get over 80% Attack Speed, but the constant Burn will remove any Energy Shield from you. Great for early progression, but shouldn't be used in endgame. |
|
| +(20-30)% to Fire Resistance +(25-40)% to Cold Resistance (25-40)% increased Attack Speed while Ignited (25-40)% increased Cast Speed while Ignited +25% chance to be Ignited All Damage Taken from Hits can Ignite you |
|
 (Ring) Rare Ring - you won't be able to cap your Resistances with all those Unique Items, so a Rare Ring might be necessary. It still can provide plenty of Damage, but to a lesser extent. |
|
| Min. requirements: +100 to maximum Life +40% Elemental and Chaos Resistance Optional affixes: +#% to Damage over Time Multiplier Adds # Elemental Damage to Attacks #% increased Elemental Damage with Attack Skills Non-Channelling Skills have -7 to Total Mana Cost Attributes |
|
 (Gloves) Southbound - a great option for early progression. Your Poisons will kill non-Frozen Enemies, so it has no downsides. Ideally, try to get a Corrupted version with a useful Implicit, such as Extra Crit chance for Attacks. |
|
| Adds (60-72) to (88-100) Cold Damage to Attacks (12-16)% increased maximum Life +(40-50)% to Cold Resistance 100% increased Freeze Duration on Enemies Your Hits can only Kill Frozen Enemies |
|
 (Gloves) Rare Gloves- eventually you will want regular Rare Gloves to fill your defenses, improve Attack Speed, and potentially raise your Accuracy. |
|
| Min. requirements: +100 to maximum Life +70% Elemental and Chaos Resistance 15% increased Attack Speed Optional affixes: % increased Energy Shield Recharge Rate % chance to Suppress Spell Damage +# to Accuracy Rating |
|
 (Jewel) Watcher's Eye - this Jewel can grant you tons of Damage and valuable defense, but getting the exact best combo might be impossible due to high demand. |
|
| (4-6)% increased maximum Energy Shield (4-6)% increased maximum Life (4-6)% increased maximum Mana <Two or Three random aura modifiers> Recommended modifiers: +(18-22)% to Damage over Time Multiplier while affected by Malevolence (10-15)% increased Attack Speed while affected by Precision +(30-50)% to Chaos Resistance while affected by Purity of Elements +(5-8)% chance to Evade Attack Hits while affected by Grace +(12-15)% chance to Suppress Spell Damage while affected by Grace |
|
 (Jewel) The Light of Meaning - a well-placed Jewel can grant you over 150% increased Chaos Damage. Alternatively, you can use it to cap your Chaos Resistances. |
|
| Passive Skills in Radius also grant 6% increased Chaos Damage Passive Skills in Radius also grant 4% to Chaos Resistance |
|
 (Jewel) Lethal Pride - almost no other Build seeks Totem Damage and Placement Speed on this Jewel, so getting good Seeds should be fairly cheap. It can also be used to generate Endurance Charges during Mapping, since Kills from Poison are attributed to you. |
|
| Commanded leadership over (10000-18000) warriors under <Akoya • Kaom • Rakiata> Passives in radius are Conquered by the Karui Historic |
|
  (Jewel) Forbidden Flesh Flame - you can borrow the Swift Killer to stack Frenzy, Polymath for a large chunk of Damage and some Recovery during Mapping, Spellbreaker for stronger Suppression, or Born in the Shadows for generic Damage Reduction and automatic Blind. |
|
| Allocates <random Ascendancy Notable> if you have the matching modifier on Forbidden Flesh | |
 (Jewel) Rare Abyssal Jewels - if you have Stygian Vise Belt, you can use this Jewel to grant Taunt for your Ballistas. A bit of Life and Damage is also useful to have. Remember that Cast Speed can be applied to your Attacks via Helmet. |
|
| Recommended affixes: +# to maximum Life #% increased Damage over Time while wielding a Two Handed Weapon #% chance to Taunt Enemies on Hit with Attacks #% increased Cast Speed if you've dealt a Critical Strike Recently |
|
 (Jewel) Large Cluster Jewel - the Overwhelming Malice enables automatic Wither application; you can get it on Large Chaos or Medium Critical Strike Clusters. The Large Bow cluster is more optimal, but requires more Passive Points in total. |
|
| Recommended affixes (Chaos Damage): 1 Added Passive Skill is Unholy Grace 1 Added Passive Skill is Overwhelming Malice 1 Added Passive Skill is Wicked Pall Recommended affixes (Bow Damage): 1 Added Passive Skill is Broadside 1 Added Passive Skill is Martial Prowess 1 Added Passive Skill is Tempered Arrowheads |
|
 (Jewel) Medium Cluster Jewel - the Totem Cluster is a reliable source of Onslaught Buff; pair it with any useful Notable, ideally Ancestral Reach for better Placement. The Crit Cluster can grant you Overwhelming Malice, which you can pair with Basics of Pain or Haemorrhage. |
|
| Recommended affixes (Totem Damage): 1 Added Passive Skill is Sleepless Sentries 1 Added Passive Skill is Ancestral Reach Recommended affixes (Critical Strikes): 1 Added Passive Skill is Overwhelming Malice 1 Added Passive Skill is Basics of Pain 1 Added Passive Skill is Haemorrhage |
|
 (Flask) Coralito's Signature - a perfect fit for this Build; it grants plenty of DoT Multiplier and improves your Crit Chance. The self-damage is not really noticeable, even at low Chaos Resistance. |
|
| 25% chance to Poison on Hit during Effect Your Critical Strikes do not deal extra Damage during Effect +(20-30)% to Damage over Time Multiplier for Poison from Critical Strikes during Effect Take 250 Chaos Damage per Second during Effect |
|
|
Other suggested Flasks:
|
|
    |
|
|
If you have any other build requests, please leave that in the comments below.
Pictures used in this article are the intellectual property of Grinding Gear Games.
