
Arc of Surging Inquisitor Build
Spell Caster build with a simply absurd level of single-target DPS that allows you to exploit end-game BossesArc of Surging
Inquisitor build
Updated for Patch 3.23
The Best Crafty Guides by Odealo
| Guide notes |
| February 4, 2024 -Build updated |
| Build overview | |||
| Tags: [CRIT] [ELEMENTAL] [ES] [CASTER] | |||
|
Budget: Defenses: |
|
Boss DPS: AoE: |
|
The new Arc of Surging is a very intriguing Skill. It drastically changes the behavior of the regular Arc, instead of Chaining between nearby Enemies it will Split towards 9 targets after Hitting the first Enemy. By default, it is actually a weaker variant of the regular Arc, as the Damage doesn't scale with amounts of remaining Chains. However, its unique interaction with the Hydrosphere Spell allows it to Split all additional beams toward a single Enemy, improving your Damage tenfold, which makes it one of the best Single-target abilities in the game.
As mentioned, the concept of this Build relies on the Hydrosphere. It creates a stationary Orb that can be targeted by your other abilities, but you can Hit it only once per second. It also applies Cold and Lightning Exposure to nearby Enemies. The Arc of Surging will Split up to 10 times upon Hitting the Hydropshere, and all Splits will be targeted at nearby Enemy. The additional repeats from the Unleash Support bypass the Hit Cooldown of the Hydrosphere, for a total of 40 Hits per single Cast. You can further increase the amount of Seals for even stronger Burst, but you will also have to wait longer for their recharge.
This playstyle is rather restrictive in terms of scaling your Damage. You don't need any Cast Speed, instead, you should emphasize dealing very high amounts of Damage per Cast. Additionally, the Arc of Surging has a rather good effectiveness of Added Damage. All things considered, the best option for this setup is to use Energy Blade and Spellblade Support to add massive amounts of Lightning Damage to your Spells, sourced from your Energy Shield. Arguably the best Ascendency option for such a style is the Inquisitor. It provides the Battlemage effect, which has the same effect as the Spellblade Support, i.e. adds the Damage of your Weapon to your Spells. The Inquisitor also allows you to very efficiently scale your Energy Shield, Critical Strike Chance, and Damage by stacking Strength and Intelligence. Furthermore, it provides a great defensive value of constant Regeneration.
You can also check our other Path of Exile builds right over here Odealo's Crafty Guides - Full List
1. Gameplay
You will start the fight by summoning the Hydrosphere. You shouldn't place it too close to your target so your cursor doesn't accidentally lock on the Boss instead of Hydrosphere. The Arc of Surging will Split upon hitting the first Enemy. To weaken your foe you shall use the conductivity and Elemental Weakness Curses.
|
|
|
|

2. Build's PROS & CONS
| PROS |
|
| CONS |
|
3. Leveling tips
The final setup requires many end-game Items, we would advise leveling your character as a regular Spell Cast. The Arc of Surging can be used as soon as you acquire the Hydrosphere, which is at level 34. You should check out our Leveling Guide for Templar using Lightning Spells for more tips.
Bandits:
Killing all Bandits for 2 bonus Skill Points is the best option, the Build is very Passive Points starved.
4. Final Skill Tree, Ascendancy Points, and Pantheon
Final Skill Tree:
113 Points Final Skill Tree (doesn't include Unique or Cluster Jewels)
122 Points Path of Building(PoB) link
Ascendancy points:
Preferably in the order:
- Righteous Providence
- Sanctuary
- Instruments of Virtue
- Augury of Penitence
Pantheon:
Major God: Soul of the Brine King: You cannot be Stunned if you've been Stunned or Blocked a Stunning Hit in the past 2 seconds; 100% chance to Avoid being Frozen
Minor God: Soul of Shakari: 50% less Duration of Poisons on You; 5% reduced Chaos Damage taken
5. Final Gems links
| [DPS] Arc of Surging setup | |
 |
Arc of Surging - a Lightning Arc surges toward the targeted Enemy, dealing Damage and Splitting simultaneity toward nearby Enemies. |
 |
Unleash Support - stores Seals over time, which are being used to repeat your Cast when you use the Skill. All repeats will target the Hydrosphere, which bypasses its Hit time limit. |
 |
Spellblade Support - adds 135% of your Weapon Damage to your Spells. |
 |
Lightning Penetration Support - your Lightning damage will Penetrate Enemy Lightning Resistances. |
 |
Increased Critical Damage Support - greatly improves your Critical Strike Multiplier. |
 |
Cruelty Support - this Support simply improves your Damage with Hits. Use the Increased Critical Strikes Support if your Crit Chance is still low. |
| [DPS] Hydrosphere setup | |
 |
Hydrosphere - summons a stationary Orb that drenches nearby Enemies. It can interact with your Skills to cause secondary effects. You can Hit it only once per second, but the additional repeats from the Unleash Support can bypass that cooldown. |
 |
Faster Casting Support - makes summoning your Orb faster. |
| [DPS] Energy Blade setup | |
 |
Energy Blade - a toggleable Buff, it significantly lowers your maximum Energy Shield and replaces your current Weapon with the Energy Blade which Damage is based on your Energy Shield. |
 |
Enhance Support - improves the quality of the Energy Blade Gem, which slightly reduces the maximum Energy Shield penalty. |
| [UTILITY] Auras setup | |
 |
Wrath - an offensive Aura that improves your Lightning Damage. You can also use the Zealotry instead, depending on the Watcher's Eye Jewel you get. |
 |
Grace - a defensive Aura, it greatly improves your Evasion Rating, allowing you to Evade incoming Attacks. |
 |
Discipline - improves your Energy Shield, which is the main source of Damage and survivability. |
 |
Enlighten Support - this Support significantly reduces the Mana Reservation of all linked Auras. It also applies to Life Reservation when you are using Blood Magic Keystone. |
| [UTILITY] Arrogance setup | |
 |
Determination - a defensive Aura that grants a lot of flat Armour Rating and helps improve it further. |
 |
Eternal Blessing Support - improves the Effectiveness of supported Aura and removes the Reservation. It disables any other Mana-reserving Aura, which doesn't affect this Setup. |
| [UTILITY] Movement setup | |
 |
Frostblink - an instant short-ranged teleport that leaves a Chilling Ground in both teleport locations. It can be used during other actions. |
 |
Shield Charge - a quick charge towards the targeted location. It scales with your Attack and Movement Speed and has no Cooldown. |
 |
Faster Attacks Support - improves the Attack Speed of your Shield Charge. |
| [UTILITY] Various Utility Skills | |
 |
Conductivity - your main Curse, it lowers the Lightning Resistance of affected enemies. |
 |
Elemental Weakness - you can use a second Curse after you anoint the Whispers of Doom Notable on your Amulet. It further lowers the Elemental Resistance of your foes. |
 |
Steelskin - creates a small barrier that absorbs incoming Damage and disables Bleeding on you. |
 |
Defiance Banner - a Banner that improves your Armour and Evasion Rating, as well as reduces the Critical Strike Chance of nearby Enemies. You can also use Vitality Aura if you don't have enough Reservation Efficiency |
|
|
5. Gear Setup
The Build consists of many mandatory Unique Items, which are used to boost your Energy Shield. The majority of your Energy Shield comes from the Ivory Tower Armour, which grants you flat ES based on the amount of maximum Life you reserve with your Auras. Scaling maximum Life also synergizes very well with the Rathpith Globe Shield, which grants you an insane amount of Damage and Crit Chance. You will also use the usual Attribute-stacking Unique Items such as Cyclopean Coil or Eyes of the Greatwolf. On the very few Rare Items you will wear you should aim for lacking Resistances, Attributes, maximum Life, or Spell Suppression. To improve your Damage via other means than Attributes you should focus only on the Critical Strike Multiplier. Most of your Resistances will be sourced from your Flasks, but you might need some of them on your remaining Rare Items as well.
|
Stat priorities on items:
|
 (Helmet) Crown of the Inward Eye - improves your maximum Life and Energy Shield, which is very important for this Build. The Transfiguration modifiers also scale your Damage a bit. (Helmet) Crown of the Inward Eye - improves your maximum Life and Energy Shield, which is very important for this Build. The Transfiguration modifiers also scale your Damage a bit. |
|
| 333% increased Armour and Energy Shield (9-21)% increased maximum Life, Mana and Global Energy Shield Transfiguration of Soul Transfiguration of Body Transfiguration of Mind |
|
 (Weapon) Rare Weapon - your Weapon will be replaced by an Energy Blade, retaining Sockets. You can use any Rare Weapon with an Abyssal Socket to use additional Abyss Jewel. (Weapon) Rare Weapon - your Weapon will be replaced by an Energy Blade, retaining Sockets. You can use any Rare Weapon with an Abyssal Socket to use additional Abyss Jewel. |
|
| Min. requirements: Has 1 Abyssal Socket |
|
 (Weapon) Rathpith Globe - greatly improves your Spell Damage and Critical Strike Chance. It also grants a bit of maximum Life, Energy Shield, and Block Chance. (Weapon) Rathpith Globe - greatly improves your Spell Damage and Critical Strike Chance. It also grants a bit of maximum Life, Energy Shield, and Block Chance. |
|
| (10-15)% Chance to Block Spell Damage (120-160)% increased Energy Shield 10% increased maximum Life Sacrifice 10% of your Life when you Use or Trigger a Spell Skill 5% increased Critical Strike Chance for Spells per 100 Player Maximum Life 5% increased Spell Damage per 100 Player Maximum Life |
|
 (Body Armour) The Ivory Tower - with proper setup it grants you insane amounts of Energy Shield, unmatched by any other Armour in the Game. It won't protect you from Chaos Damage, since you will have no Mana at all. (Body Armour) The Ivory Tower - with proper setup it grants you insane amounts of Energy Shield, unmatched by any other Armour in the Game. It won't protect you from Chaos Damage, since you will have no Mana at all. |
|
| +(40-70) to Intelligence +30 to maximum Energy Shield per 100 Reserved Life +(80-100) to maximum Mana Regenerate 2% of Energy Shield per second Chaos Damage is taken from Mana before Life |
|
 (Boots) Rare Boots - here you should look for Movement Speed, maximum Life, Spell Suppression, Chaos or Elemental Resistances, Attributes, or Energy Shield. (Boots) Rare Boots - here you should look for Movement Speed, maximum Life, Spell Suppression, Chaos or Elemental Resistances, Attributes, or Energy Shield. |
|
| Min. requirements: 25% Movement Speed +60 to maximum Life 10% chance to Suppress Spell Damage Optional affixes: %increased Effect of Non-Damaging Ailments Elemental and Chaos Resistances Attributes % chance to Avoid Elemental Ailments/Bleeding/being Stunned |
|
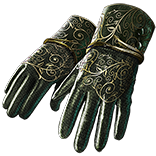 (Gloves) Shaper's Touch - those Gloves greatly scale your Energy Shield and Evasion Rating with the Attributes you stack anyway. It also grants a decent amount of maximum Life. They are quite common, so you should aim for Corrupted Implicit, such as an additional Frenzy Charge or Curse on Hit. (Gloves) Shaper's Touch - those Gloves greatly scale your Energy Shield and Evasion Rating with the Attributes you stack anyway. It also grants a decent amount of maximum Life. They are quite common, so you should aim for Corrupted Implicit, such as an additional Frenzy Charge or Curse on Hit. |
|
| (80-120)% increased Armour and Energy Shield +4 Accuracy Rating per 2 Intelligence +1 Life per 4 Dexterity +1 Mana per 4 Strength 1% increased Energy Shield per 10 Strength 2% increased Evasion Rating per 10 Intelligence 2% increased Melee Physical Damage per 10 Dexterity |
|
 (Belt) Cyclopean Coil - it greatly improves your Attributes and provides useful bonuses based on them. You should use the Intrinsic Catalyst to improve the Attribute modifiers even more. (Belt) Cyclopean Coil - it greatly improves your Attributes and provides useful bonuses based on them. You should use the Intrinsic Catalyst to improve the Attribute modifiers even more. |
|
| +(25-40) to maximum Life +(60-80) to maximum Life (5-15)% increased Attributes Cannot be Frozen if Dexterity is higher than Intelligence Cannot be Ignited if Strength is higher than Dexterity Cannot be Shocked if Intelligence is higher than Strength 1% increased Damage per 5 of your lowest Attribute |
|
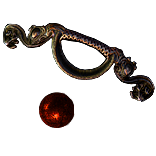
 (Amulet) Astramentis - at first you should use this Amulet to get tons of Attributes, including Dexterity. You should replace it fairly quickly, so don't spend too much on it. (Amulet) Astramentis - at first you should use this Amulet to get tons of Attributes, including Dexterity. You should replace it fairly quickly, so don't spend too much on it. |
|
| +(10-16) to all Attributes +(80-100) to all Attributes -4 Physical Damage taken from Attack Hits |
|
 (Amulet) Eyes of the Greatwolf - later you should replace your amulet with this Unique talisman. it can grant you up to 32% increased Attributes, but even the lower rolls are worth it, especially if you match it with other useful modifiers such as Global Defenses, Crit Multiplier, or Physical Damage Reduction. (Amulet) Eyes of the Greatwolf - later you should replace your amulet with this Unique talisman. it can grant you up to 32% increased Attributes, but even the lower rolls are worth it, especially if you match it with other useful modifiers such as Global Defenses, Crit Multiplier, or Physical Damage Reduction. |
|
| <Two random talisman implicit modifiers> Implicit Modifier magnitudes are doubled Recommended modifiers: (12-16)% increased Attributes (15-25)% increased Global Defences +(24-36)% to Global Critical Strike Multiplier (8-12)% increased maximum Life (4-6)% additional Physical Damage Reduction |
|
 (Ring) Rare Ring - on your Rare Rings you can get a lot of Attributes, but also fix your remaining Resistances. They should also provide maximum Life. You can get a bit of Cast Speed to make your gameplay smoother, but it doesn't affect your DPS. (Ring) Rare Ring - on your Rare Rings you can get a lot of Attributes, but also fix your remaining Resistances. They should also provide maximum Life. You can get a bit of Cast Speed to make your gameplay smoother, but it doesn't affect your DPS. |
|
| Min. requirements: 50 to Maximum Life Optional affixes: Elemental and Chaos Resistance Attributes Cast Speed Energy Shield Critical Strike Multiplier |
|
 (Jewel) Brutal Restraint - you will need the Traitor Keystone obtainable through this Jewel to sustain your Flasks, which are necessary to deal with Chaos Damage. It also provides a bit of Dexterity and 2 potentially useful bonuses depending on the randomized variant you get. (Jewel) Brutal Restraint - you will need the Traitor Keystone obtainable through this Jewel to sustain your Flasks, which are necessary to deal with Chaos Damage. It also provides a bit of Dexterity and 2 potentially useful bonuses depending on the randomized variant you get. |
|
| Denoted service of (500-8000) dekhara in the akhara of Balbala Passives in radius are Conquered by the Maraketh Historic |
|
 (Jewel) Abyss Jewel - you should use your Abyss Jewel as a source of Corrupted Blood Immunity. If you have it elsewhere, try to get a lot of maximum Life, Energy Shield, lacking Resistances, or Critical Strike Multiplier. (Jewel) Abyss Jewel - you should use your Abyss Jewel as a source of Corrupted Blood Immunity. If you have it elsewhere, try to get a lot of maximum Life, Energy Shield, lacking Resistances, or Critical Strike Multiplier. |
|
| Min. requirements: Corrupted Blood cannot be inflicted on you Optional affixes: Maximum Life Global Critical Strike Multiplier Elemental and Chaos Resistance Attributes |
|
 (Jewel) Rare Jewels - on your Rare Jewels you should aim for maximum Life and Critical Strike Multiplier. You can also use them to fix your Resistances. (Jewel) Rare Jewels - on your Rare Jewels you should aim for maximum Life and Critical Strike Multiplier. You can also use them to fix your Resistances. |
|
| Recommended affixes: Critical Strike Multiplier with Elemental/Lightning Skills Global Critical Strike Multiplier Critical Strike Multiplier with Spells increased Maximum Life Elemental Resistances Attributes |
|
 (Jewel) Large Cluster Jewel - you can tons of Attributes and maximum Life from a Cluster Jewel with an increased effect of small Passives. A perfect Cluster will be very expensive, but you can upgrade it gradually as your budget increases, starting with just a basic one. The increased effect modifier rounds numbers down, so make sure it is worth the investment. (Jewel) Large Cluster Jewel - you can tons of Attributes and maximum Life from a Cluster Jewel with an increased effect of small Passives. A perfect Cluster will be very expensive, but you can upgrade it gradually as your budget increases, starting with just a basic one. The increased effect modifier rounds numbers down, so make sure it is worth the investment. |
|
| Recommended affixes: Added Small Passive Skills have (25-35)% increased Effect Added Small Passive Skills also grant: +# to All Attributes Added Small Passive Skills also grant: +# to Intelligence/Strength Added Small Passive Skills also grant: +# to Maximum Life |
|
 (Jewel) Split Personality - each of these Jewels can grant you around 110 of each Attribute when placed far away from the Templar's starting location. Ideally, they should grant both Intelligence and Strength, but it will be very expensive. (Jewel) Split Personality - each of these Jewels can grant you around 110 of each Attribute when placed far away from the Templar's starting location. Ideally, they should grant both Intelligence and Strength, but it will be very expensive. |
|
| This Jewel's Socket has 25% increased effect per Allocated Passive Skill between it and your Class' starting location <Two random modifiers> +5 to Intelligence +5 to maximum Life +5 to Strength |
|
 (Jewel) The Adorned - this Jewel can greatly improve the effect of your Magic Jewels. It makes your Magic Jewels much stronger than regular Rare Jewels even on a low budget, and can be scaled indefinitely high. (Jewel) The Adorned - this Jewel can greatly improve the effect of your Magic Jewels. It makes your Magic Jewels much stronger than regular Rare Jewels even on a low budget, and can be scaled indefinitely high. |
|
| (50-150)% increased Effect of Jewel Socket Passive Skills containing Corrupted Magic Jewels | |
| (Jewel) Magic Corrupted Jewels - they can easily outperform Rare Jewels due to doubled maximum Life scaling while providing a similar amount of Critical Strike Multiplier. On a higher budget, you should look for useful Syntheis Impliticts, but it is not required to make it worth it. |
|
| Recommended affixes: increased maximum Life Critical Strike Multiplier with Elemental/Lightning Skills Critical Strike Multiplier with Spells Global Critical Strike Multiplier |
|
 (Jewel) Watcher's Eye - it increases your maximum Life and Energy Shield, and provides very valuable bonuses depending on your Aura setup. You can adjust your offensive Aura to the modifiers you get from this Jewel. (Jewel) Watcher's Eye - it increases your maximum Life and Energy Shield, and provides very valuable bonuses depending on your Aura setup. You can adjust your offensive Aura to the modifiers you get from this Jewel. |
|
| (4-6)% increased maximum Energy Shield (4-6)% increased maximum Life (4-6)% increased maximum Mana <Two or Three random aura modifiers> Recommended modifiers: +(12-15)% chance to Suppress Spell Damage while affected by Grace (5-8)% additional Physical Damage Reduction while affected by Determination You take (60-40)% reduced Extra Damage from Critical Strikes while affected by Determination Damage Penetrates (10-15)% Lightning Resistance while affected by Wrath |
|
 (Flask) Coruscating Elixir - thanks to this Flask Enemy's Chaos Damage won't bypass your Energy Shield, which would be lethal as you Reserve most of your Life with Auras. It also greatly improves your Fire Resistance. (Flask) Coruscating Elixir - thanks to this Flask Enemy's Chaos Damage won't bypass your Energy Shield, which would be lethal as you Reserve most of your Life with Auras. It also greatly improves your Fire Resistance. |
|
| +50% to Fire Resistance 20% less Fire Damage taken Chaos Damage taken does not bypass Energy Shield during effect Removes all but one Life on use Removed life is Regenerated as Energy Shield over 2 seconds 25% increased Duration |
|
|
Due to the Traitor Keystone you should use only 3 Flasks to make them permanently active even without killing Enemies.
|
|
  |
|
|
If you have any other build requests please leave that in the comments below. We are always open to suggestions and constructive feedback.
Pictures used in this article are the intellectual property of Grinding Gear Games.
