Arc Ignite Elementalist
A very unusual approach to achieve powerful Ignite with Arc Spell, which remains one of the best clearing abilities in the gameArc Ignite
Elementalist Build
Created for Patch 3.21
The Best Crafty Guides by Odealo
| Guide notes |
| May 27, 2023 -Build created |
| Build Overview | |||
| Tags: [CASTER] [ELEMENTAL] [LIFE] [DOT] | |||
|
Budget: Defenses: |
|
Boss DPS: AoE: |
|
Arc is a wonderful clearing ability thanks to its Chains and automatic targeting. Additionally, it has a Vaal variant that can easily cover more Enemies than you can see on your screen. However, it suffers quite a bit when it comes to Single Target Damage, as it has rather low Base Damage values. Thanks to the quite unique Setup we can fix that aspect, however, it limits our possibilities to archetypes that do not rely on Critical Strikes, such as Ignite.
In order to inflict Ignite with non-Fire Damage we need to pick the Elementalist Ascendency. We actually use all 3 Ailment Notables, which allow us to inflict powerful Chills and Shocks. Thanks to the Affliction Charges and some help on Cluster Jewels, you can guarantee 50% increased Damage Taken and 40% Slower Action Speed on every Enemy you Hit. Elementalist also grants us access to powerful Exposure and Elemental Damage scaling.
The mentioned setup consists of Cadigan's Crown Unique Helmet which grants Battlemage but disables Critical Strikes. We also use a Rare Bow which has tons of Damage over Time Multipliers and Flat Elemental Damage which is added to the Base Damage of Arc through the Battlemage. This allows us to wear Replica Maloney's Mechanism, which triggers socketed Bow Skill every time we Cast a Spell. That way we can easily sustain Frenzy Charges and inflict Combustion on Enemies. Frenzy Charges aren't that bad for this Build, but the Affliction Charges provided by Olesya's Delight are even better, as they provide both Damage and Effect of non-Damaging Ailments.
The defenses of this Build are enough to comfortably clear Maps. You will have plenty of Armour and Evasion Rating, decent Spell Suppression Chance, and very good Life Recovery if you constantly kill Enemies. The powerful Chill is also extremely helpful in avoiding incoming Damage. You can also trade some of your Damage to greatly improve your Defenses further.
At its core it is a very cheap Build, however, reaching its full potential will require some investments.
You can also check our other Path of Exile builds right over here Odealo's Crafty Guides - Full List
1. Gameplay
For regular Mapping using only Arc is enough to kill most Enemies. Vaal Arc grants amazing AoE coverage which will often kill Enemies far away from your sight. To deal with particularly tanky monsters you should use Flame Surge to create Burning Ground and Curse them with Flammability. Thanks to the Divine Blessing you will be also able to use one additional Aura to boost your Damage for a short moment.
|
|
|
|

2. Build's PROS & CONS
| PROS |
|
| CONS |
|
3. Leveling tips
Leveling is very fast and easy, although you should use a Fire Spell to complete the campaign as the Arc does not have enough Damage early on. We recommend our Leveling Guide for Ignite Builds to see more Leveling Tips.
Suggested leveling Gem setups:
| Freezing Pulse setup | |
 |
Fire Trap - throws a Trap that explodes upon contact with the Enemy, dealing Fire Damage and creating Burning Ground. |
 |
Efficacy Support - if you spend enough Mana, you will gain Damage, Cast Speed, and some Mana Regeneration for a short time. Use a low-level Gem to trigger it with every Cast. |
| Combustion Support - increases Fire Damage and lowers Fire Resistances if you inflict Ignite. | |
 |
Trap and Mine Damage Support - greatly increases Damage of linked Traps. |
 |
Controlled Destruction Support - doesn't affect Ignite, but increases the initial Damage of Trap and Burning Ground. |
 |
Swift Affliction Support - improves the Damage over Time but lowers the Duration. |
| Aura setup | |
 |
Determination - grants tons of Armour at the early Levels. |
 |
Clarity - improves your Mana Regeneration so you can freely use your Skills. |
| Utility setup | |
 |
Flame Dash - a very good Travel Skill that you will need to speed up your Leveling. |
 |
Flammability - it's a Curse Skill that lowers the Fire Resistance of affected foes. |
 |
Steelskin - improves your durability temporarily and disables Bleed effects on you. |
Bandits:
Kill all Bandits to get additional 2 Passive Tree Skill Points
Leveling Skill Trees:
41 Points Passive Tree
We recommend this order:
1) Heart and Soul 2) Fire Walker 3) Breath of Flames 4) Acrimony 5) Elemental Focus 6) Blood Siphon 7) Deep Thoughts
Please note that Fire Walker should be respecced once you acquire Cluster Jewels
66 Points Passive Tree
Allocate:
1) Holy Power 2) Purity of Flesh 3) Sovereignty 4) Divine Judgement 5) Devotion
Recommended leveling items:
 Pyre - grants tons of Burning Damage and some Elemental Resistances. Pyre - grants tons of Burning Damage and some Elemental Resistances. |
|
| +(20-30)% to Cold Resistance +(25-35)% to Fire Resistance (60-80)% increased Burning Damage 40% of Cold Damage Converted to Fire Damage 10% increased Light Radius Ignited Enemies Killed by your Hits are destroyed |
|
 Praxis - a good option if you have problems with sustaining Mana. Praxis - a good option if you have problems with sustaining Mana. |
|
| +(20-30) to maximum Mana +(30-60) to maximum Mana Regenerate (3-6) Mana per second -(8-4) to Total Mana Cost of Skills 8% of Damage taken Recouped as Mana |
|
 Rare Wand - you can get an additional Level for all your Fire Gems on each Wand you wield quite early on. Additional bonuses are nice to have, but they are not as impactful. Rare Wand - you can get an additional Level for all your Fire Gems on each Wand you wield quite early on. Additional bonuses are nice to have, but they are not as impactful. |
|
| +1 to Level of all Fire Spell Skill Gems | |
 Tabula Rasa - a six-link setup is all you need to significantly improve your Damage. It also raises your Mana Costs. Tabula Rasa - a six-link setup is all you need to significantly improve your Damage. It also raises your Mana Costs. |
|
| Item has no level requirement and Energy Shield (Hidden) Item has 6 White Sockets and is fully linked (Hidden) |
|
 Goldrim - grants a large amount of Resistance for each Element. Goldrim - grants a large amount of Resistance for each Element. |
|
| +(30-50) to Evasion Rating 10% increased Rarity of Items found +(30-40)% to all Elemental Resistances Reflects 4 Physical Damage to Melee Attackers Level Requirement reduced by 100 (Hidden) |
|
 Perandus Blazon - another Replica Item, and it also grants a ton of flat Elemental Damage for your Spells. Perandus Blazon - another Replica Item, and it also grants a ton of flat Elemental Damage for your Spells. |
|
| (15-25)% increased Stun and Block Recovery +(20-30) to all Attributes (6-8)% increased Quantity of Items found +20% to Fire Resistance 20% increased Flask Effect Duration -2 Physical Damage taken from Attack Hits |
|
 Replica Karui Ward - best Amulet for Leveling purposes as it grants Movement Speed. Area Damage helps a bit, but it is rather not impactful. Replica Karui Ward - best Amulet for Leveling purposes as it grants Movement Speed. Area Damage helps a bit, but it is rather not impactful. |
|
| +(20-30) to Dexterity +(20-30) to Strength +100 to Accuracy Rating 30% increased Area of Effect 10% increased Movement Speed 30% increased Area Damage |
|
 Wanderlust - useful pair of Boots if you don't have any other way to deal with Freezes. It also grants decent Movement Speed and Mana Regeneration. Wanderlust - useful pair of Boots if you don't have any other way to deal with Freezes. It also grants decent Movement Speed and Mana Regeneration. |
|
| +5 to Dexterity +(10-20) to maximum Energy Shield (20-40)% increased Mana Regeneration Rate 20% increased Movement Speed Cannot be Frozen |
|
 Seven-League Step - absolutely best Boots for Leveling, grant tons of Movement Speed. Seven-League Step - absolutely best Boots for Leveling, grant tons of Movement Speed. |
|
| 50% increased Movement Speed Level Requirement reduced by 100 (Hidden) |
|
4. Final Skill Tree, Ascendancy Points, and Pantheon
Final Skill Tree:
105 Points Final Passive Tree (doesn't include Cluster or Unique Jewels)
118 Points Path of Building (PoB) link
Ascendancy points:
Preferably in this order:
- Shaper of Flames
- Shaper of Storms
- Mastermind of Discord
- Heart of Destruction
Pantheon:
Major God: Soul of the Brine King: You cannot be Stunned if you've been Stunned or Blocked a Stunning Hit in the past 2 seconds; 30% increased Stun and Block Recovery
Minor God: Soul of Ralakesh: 25% reduced Physical Damage over Time taken while moving; Moving while Bleeding doesn't cause you to take extra Damage
5. Final Gems links
| [DPS] Arc setup | |
 |
Arc - the main Skill Skill of this Build, it deals more Damage per each remaining Chain left. Getting it to level 21 is quite important as it adds additional Chains. |
 |
Deadly Ailments Support - lowers the Hit portion of your Arc but significantly improves Ignite Damage. |
 |
Unbound Ailments Support - makes your Ignite last much longer and deal more Damage. |
|
Swift Affliction Support - slightly reduces the Duration of your Ignite but makes it deal more Damage. |
 |
Burning Damage Support - it simply improves the Burning Damage you deal with linked Spells. |
 |
Ignite Proliferation Support - improves the Damage of your Ignite and spreads its Damage to nearby Enemies. |
| [UTILITY] Aura setup | |
|
Determination - your main defensive Aura, it adds a decent amount of flat Armour and improves it even further. |
 |
Purity of Elements - this Aura grants lots of Elemental Resistances which makes your Gearing much easier. It also makes you immune to all Elemental Ailments. |
 |
Grace - similar to Determination, it grants you Evasion Rating and allows you to scale it further. It adds more Flat Evasion but multiplies it by less amount. |
 |
Vitality - grants you tons of Life Regeneration which is your main way of recovering Life. |
 |
Defiance Banner - boost both your Armour and Evasion Rating by a small amount, but also reduces the Critical Strikes of nearby Enemies. |
 |
Enlighten Support - an important Support to be able to run all those Auras, it reduces their Mana Reservation. |
| [UTILITY] Divine Blessing setup | |
 |
Malevolence - a very potent Aura to boost your Damage. It improves your DoT and its Duration. |
 |
Divine Blessing Support - turns your permanent Aura into a temporary Buff which you can cast using your Energy Shield. |
 |
Inspiration Support - lowers the upfront Cost of the Blessing, which is quite high by default. |
| [UTILITY] Frenzy setup socket in your Quiver |
|
 |
Frenzy - a simple Bow Attack that grants you Frenzy charges when it Hits the Enemy. Socketing it in your Quiver will make it automatically trigger when you Cast a Spell. |
| Combustion Support - lowers Fire Resistance of Ignited foes. | |
 |
Greater Multiple Projectiles Support - more Projectiles makes it easier to Hit an Enemy. |
| [UTILITY] Flame Surge setup | |
 |
Flame Surge - when this Spell Hits an Ignited Enemy, it creates a Burning Ground that deals 25% of the Ignite Damage per second. |
 |
Faster Casting Support - makes your Flame Surge significantly faster to use. |
| [UTILITY] Other Utility setups | |
 |
Flame Dash - your main Movement Skill, it teleports you in a short distance and leaves a fiery path that deals a solid amount of Damage. |
 |
Summon Stone Golem - grants even more Life Regeneration. It dies fairly often, so you can skip using it if resummoning it bothers you too much. |
|
Flammability - a Curse Spell that significantly lowers the Fire Resistances of your Enemies, thus increasing your Ignite Damage. |
 |
Steelskin - creates an absorbing Shield that also disables Bleed Effects on you. Can be used manually or linked with Cast when Damage Taken Support. |
| [UTILITY] Optional Utility setups | |
 |
Wave of Conviction - if you don't have any automatic way of inflicting Exposure yet, you will have to manually cast this Spell to make use of your enhanced Exposure effect. |
 |
Elemental Weakness - if you have sources of additional Curse on your Gear, you should use this Curse to further lower the Fire Resistances of your Enemies. |
|
|
6. Gear Setup
The Build uses a lot of Unique Items which makes the gearing much easier. You should look for useful Corruptions on the cheaper ones to greatly improve your Damage and survivability. The Bow is quite important to improve your Damage as your whole setup revolves around benefiting from Battlemage the most, although at some point getting more DoT Multipliers is more important than Flat Damage. On your Rare Gear you should focus mostly on defensive aspects such as maximum Life, Spell Suppression, and lacking Attributes and Resistances. Eldrtich Implicits add much power to the Build and can be obtained fairly easily.
|
Stat priorities on items:
|
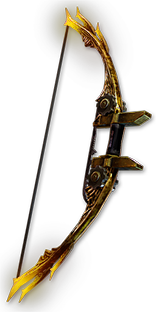 (Weapon) Rare Bow - it should have plenty of Flat Elemental Damage and DoT Multiplier. Attack Speed or Critical Strike Chance are not important, as we don't Attack with this Bow anyway. Solarine Bow is the best base, but it increases the Dexterity requirements significantly. (Weapon) Rare Bow - it should have plenty of Flat Elemental Damage and DoT Multiplier. Attack Speed or Critical Strike Chance are not important, as we don't Attack with this Bow anyway. Solarine Bow is the best base, but it increases the Dexterity requirements significantly. |
|
| Min. requirements: +800 Elemental DPS +20% Damage over Time Multiplier Optional affixes: Fire Damage over Time Multiplier |
|
 (Weapon) Replica Maloney's Mechanism - triggers Socketed Attack when you use a Spell, which allows you to sustain Frenzy Charges and get high uptime on your Combustion Debuff. It also grants a small chance to Blind Enemies that way. (Weapon) Replica Maloney's Mechanism - triggers Socketed Attack when you use a Spell, which allows you to sustain Frenzy Charges and get high uptime on your Combustion Debuff. It also grants a small chance to Blind Enemies that way. |
|
| Has 1 Socket Has 2 Sockets Trigger a Socketed Bow Skill when you Cast a Spell while wielding a Bow, with a 1 second Cooldown (7-12)% increased Attack Speed +(50-70) to maximum Life 5% chance to Blind Enemies on Hit with Attacks |
|
 (Helmet) Cadigan's Crown - another Core item for this build. It grants you Battlemage, which adds your Weapon's Damage to your Spells but disables Critical Strikes. You can look for Arc Enchant or Burning Damage Corruption. (Helmet) Cadigan's Crown - another Core item for this build. It grants you Battlemage, which adds your Weapon's Damage to your Spells but disables Critical Strikes. You can look for Arc Enchant or Burning Damage Corruption. |
|
| Never deal Critical Strikes Battlemage |
|
 (Body Armour) The Covenant - grants tons of Chaos Damage for your Skill but you will have to additionally pay your Mana Costs with your Life, which puts a heavy strain on your sustain. It also adds tons of Energy Shield which is important for your Eldritch Battery. (Body Armour) The Covenant - grants tons of Chaos Damage for your Skill but you will have to additionally pay your Mana Costs with your Life, which puts a heavy strain on your sustain. It also adds tons of Energy Shield which is important for your Eldritch Battery. |
|
| Socketed Gems are Supported by Level 29 Added Chaos Damage Skills gain a Base Life Cost equal to 100% of Base Mana Cost +(20-30) to Intelligence (210-250)% increased Energy Shield 10% increased maximum Life |
|
 (Body Armour) Rare Armour - alternatively you can use a Rare Armour which will make you much more tanky, and you won't lose that much Damage if you get additional Curse here. The Sacrificial Garb is the best base as it adds plenty of Energy Shield and increases the Level of your Vaal Arc. (Body Armour) Rare Armour - alternatively you can use a Rare Armour which will make you much more tanky, and you won't lose that much Damage if you get additional Curse here. The Sacrificial Garb is the best base as it adds plenty of Energy Shield and increases the Level of your Vaal Arc. |
|
| Min. requirements: +80 to maximum Life You can apply an additional Curse Optional affixes: chance to Suppress Spell Damage Elemental Resistances Attributes Life Regeneration |
|
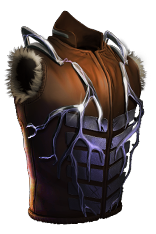 (Body Armour) Lightning Coil - by using this Armour you will lose out a lot of Damage, as you won't be able to use Divine Blessing without the Energy Shield, but this Armour grants tons of Physical Damage mitigation which is the weakest element of our Defense. (Body Armour) Lightning Coil - by using this Armour you will lose out a lot of Damage, as you won't be able to use Divine Blessing without the Energy Shield, but this Armour grants tons of Physical Damage mitigation which is the weakest element of our Defense. |
|
| Adds 1 to (20-30) Lightning Damage to Attacks (90-120)% increased Armour and Evasion +(60-80) to maximum Life -60% to Lightning Resistance 50% of Physical Damage from Hits taken as Lightning Damage |
|
 (Boots) Rare Boots - your Boots should provide you with plenty of Movement Speed, maximum Life, and Resistances or Attributes. You can also get a modifier that would grant you an Onslaught on Kill. Eldritch Implicits will make your Ignite deal Damage faster and improve your Speed. (Boots) Rare Boots - your Boots should provide you with plenty of Movement Speed, maximum Life, and Resistances or Attributes. You can also get a modifier that would grant you an Onslaught on Kill. Eldritch Implicits will make your Ignite deal Damage faster and improve your Speed. |
|
| Min. requirements: +70 to maximum Life 30% increased Movement Speed 5% increased Action Speed (Searing Exarch Implicit) Ignites you inflict deal Damage 7% faster (Eater Implicit) Optional affixes: Chance to gain Onslaught on Kill Chaos Resistance Attributes Resistances |
|
 (Gloves) Rare Gloves - you can get tons of Damage just from Eldritch Implicits on your Gloves, as they can grant you automatic Exposure and some Fire DoT Multiplier. Other than that, look for maximum Life, Spel Suppression, Resistances, or Attributes. You can get a bit of Damage here too, but it is rather insignificant. (Gloves) Rare Gloves - you can get tons of Damage just from Eldritch Implicits on your Gloves, as they can grant you automatic Exposure and some Fire DoT Multiplier. Other than that, look for maximum Life, Spel Suppression, Resistances, or Attributes. You can get a bit of Damage here too, but it is rather insignificant. |
|
| Min. requirements: +70 to maximum Life +10% chance to Suppress Spell Damage +(7-18)% to Fire Damage over Time Multiplier (Searing Exarch Implicit) Inflict Fire Exposure on Hit, applying -13% to Fire Resistance (Eater Implicit) Optional affixes: increased Damage during any Flask Effect Adds # to # Fire Damage against Ignited Enemies Attributes Resistances |
|
 (Belt) Olesya's Delight - turns your Frenzy Charges into Affliction Charges, which grant you DoT Multiplier and increased Effect of your Ailments such as Chill and Shock. Try to get one with additional Resistances through the Corrupted Implicit to ease Gearing. (Belt) Olesya's Delight - turns your Frenzy Charges into Affliction Charges, which grant you DoT Multiplier and increased Effect of your Ailments such as Chill and Shock. Try to get one with additional Resistances through the Corrupted Implicit to ease Gearing. |
|
| +(600-700) to Evasion Rating +(40-60)% to Cold Resistance (8-12)% increased Movement Speed +1 to Maximum Frenzy Charges Modifiers to Minimum Frenzy Charges instead apply to Minimum Affliction Charges Maximum Affliction Charges is equal to Maximum Frenzy Charges Gain Affliction Charges instead of Frenzy Charges |
|
 (Amulet) Rare Amulet - it can grant you tons of Damage. Try to look for DoT Multiplier and maximum Life. An additional Level for your Arc is also useful if you don't have any other way to get it to level 21. (Amulet) Rare Amulet - it can grant you tons of Damage. Try to look for DoT Multiplier and maximum Life. An additional Level for your Arc is also useful if you don't have any other way to get it to level 21. |
|
| Min. requirements: +70 to maximum Life +20% to Damage over Time Multiplier Optional affixes: +20% to Fire Damage over Time Multiplier +1 to Level of All/Lightning Skill Gems Resistances Attributes |
|
| Recommended Anoint: Dirty Technique |
|
 (Ring) Replica Emberwake - it nearly doubles your Damage, but you will have to refresh your Ignite more often. To get the maximum Effect, you should use Elemental Catalysts on it. (Ring) Replica Emberwake - it nearly doubles your Damage, but you will have to refresh your Ignite more often. To get the maximum Effect, you should use Elemental Catalysts on it. |
|
| +(20-30)% to Fire Resistance (30-40)% increased Fire Damage (5-10)% increased Cast Speed 90% reduced Ignite Duration on Enemies 10% chance to Ignite Ignites you inflict deal Damage (35-45)% faster |
|
 (Ring) Polaric Devastation - Igniting an Enemy with this Ring Equipped will cause them to be Covered in Ash, which slows their Movement Speed and increase the Fire Damage they Take. (Ring) Polaric Devastation - Igniting an Enemy with this Ring Equipped will cause them to be Covered in Ash, which slows their Movement Speed and increase the Fire Damage they Take. |
|
| (15-25)% increased Elemental Damage (15-25)% increased Global Critical Strike Chance +(20-40)% to Fire Resistance +(20-40)% to Cold Resistance (10-20)% increased Duration of Ailments on Enemies Left Ring slot: Cover Enemies in Ash for 5 seconds when you Ignite them Right Ring slot: Cover Enemies in Frost for 5 seconds when you Freeze them |
|
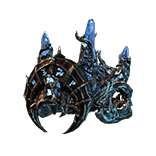
 (Jewel) Rare Jewels - you can get a lot of maximum Life and Damage through your Jewels, but initially, you can fix your Resistances and Attributes with them too. (Jewel) Rare Jewels - you can get a lot of maximum Life and Damage through your Jewels, but initially, you can fix your Resistances and Attributes with them too. |
|
| Min. requirements: increased maximum Life Recommended affixes: Ailments deal Damage faster Burning Damage Resistances DoT Multiplier |
|
 (Jewel) Large Cluster Jewel - your Large Cluster Jewel should grant you at least Prismatic Heart and Sadist Notable. The Disorienting Display and Doryani's Lessons are preferable as the third one, as they will allow you to skip them and save Passive Points. (Jewel) Large Cluster Jewel - your Large Cluster Jewel should grant you at least Prismatic Heart and Sadist Notable. The Disorienting Display and Doryani's Lessons are preferable as the third one, as they will allow you to skip them and save Passive Points. |
|
| Recommended affixes: 1 Added Passive Skill is Disorienting Display 1 Added Passive Skill is Doryani's Lessons 1 Added Passive Skill is Prismatic Heart 1 Added Passive Skill is Sadist |
|
 (Jewel) Medium Cluster Jewel - one of your Medium Cluster Jewels should boost your non-Damaging Ailments to get closer to 50% guaranteed Shock. It will also boost your Damage a bit. Try to get additional modifiers like Strength or Resistances on Small Passives to ease your Gearing. (Jewel) Medium Cluster Jewel - one of your Medium Cluster Jewels should boost your non-Damaging Ailments to get closer to 50% guaranteed Shock. It will also boost your Damage a bit. Try to get additional modifiers like Strength or Resistances on Small Passives to ease your Gearing. |
|
| Recommended affixes: 1 Added Passive Skill is Astonishing Affliction 1 Added Passive Skill is Overshock |
|
| (Jewel) Medium Cluster Jewel - the second Jewel should be focused purely on Damage. The Wasting Affliction and Flow of Life is a very powerful combination that grants you Damage and maximum Life. Again, try to get some added benefit on Small Passives. |
|
| Recommended affixes: 1 Added Passive Skill is Flow of Life 1 Added Passive Skill is Wasting Affliction |
|
  (Jewel) Forbidden Flame&Flesh - to inflict powerful Chills you will need to allocate Shaper of Winter Notable via Forbidden Jewels. It is a very cheap combination but grants tons of Defensive value. (Jewel) Forbidden Flame&Flesh - to inflict powerful Chills you will need to allocate Shaper of Winter Notable via Forbidden Jewels. It is a very cheap combination but grants tons of Defensive value. |
|
| Allocates Shaper of Winter if you have the matching modifiers on Forbidden Flesh/Flame | |
 (Jewel) Watcher's Eye - you will use lots of Auras in this Build, so you can get a lot of useful modifiers through the Watcher's Eye. The most Damage comes from the Malevolence modifiers, but the Defensive power from your other Auras is also useful. (Jewel) Watcher's Eye - you will use lots of Auras in this Build, so you can get a lot of useful modifiers through the Watcher's Eye. The most Damage comes from the Malevolence modifiers, but the Defensive power from your other Auras is also useful. |
|
| (4-6)% increased maximum Energy Shield (4-6)% increased maximum Life (4-6)% increased maximum Mana <Two or Three random aura modifiers> Recommended Aura mods: Damaging Ailments you inflict deal Damage (10-15)% faster while affected by Malevolence |
|
 (Flask) Taste of Hate - a defensive Flask that reduces the Physical Damage you take by converting part of it into Cold Damage. It also grants lots of Cold Resistances and Cold Damage Reduction, but make sure to not rely on it when capping your Resistances. (Flask) Taste of Hate - a defensive Flask that reduces the Physical Damage you take by converting part of it into Cold Damage. It also grants lots of Cold Resistances and Cold Damage Reduction, but make sure to not rely on it when capping your Resistances. |
|
| (10-15)% of Physical Damage from Hits taken as Cold Damage during Effect Gain (10-15)% of Physical Damage as Extra Cold Damage during effect 30% chance to Avoid being Chilled during Effect 30% chance to Avoid being Frozen during Effect |
|
|
Suggested Flasks:
|
|
    |
|
|
If you have any other build requests please leave that in the comments below. We are always open to suggestions and constructive feedback.
Pictures used in this article are the intellectual property of Grinding Gear Games.
