Arakaali's Fang Summoner Necromancer
A very strong and affordable Setup for the Arakaali's Fang Necromancer that can summon up to 40 Spiders at once!Arakaali's Fang Summoner
Necromancer Build
Created for Patch 3.26
The Best Crafty Guides by Odealo
| Guide notes |
| July 4, 2025 - Build created |
| Build overview | |||
| Tags: [MINION] [CHAOS] [LIFE] [DOT] | |||
|
Budget: Defenses: |
|
Boss DPS: AoE: |
|
The Arakaali's Fang Summoner is a well-established and powerful Summoner that utilises the Raise Spider Skill granted by the Unique Dagger as its main source of Damage. By default, you can summon up to 20 Spiders at once, and Support them with 3 Support Gems socketed in the Weapon. You would typically use The Squire Shield to add 3 extra Support Gems to that Setup. Since the Dagger is the only source of this Skill, you can't use modifiers for the Minion Gem Levels to improve your Minions. They are also completely immune to Damage, limited only by their Duration.
Patch 3.26 introduced a new Unique Helmet that massively improves this Setup. The Dark Monarch doubles the Summon limit of one type of Minions, but disables all other types. With the Raise Spiders variant, you will be able to summon 40 Spiders and will be free of the burden of the Animate Guardian and Spectre Setups.
The only problematic part here is that you will summon those Minions upon killing an Enemy, and only if there are enough Corpses nearby. To overcome this, you will have to use the Writhing Jar Flask, which spawns 2 Worms upon use. The Worms are instantly killed by any Hit. The Divine Ire is the best Skill for this purpose; it will rapidly hit all enemies around you, while also creating Corpses with the Cast while Channeling Setup. During Mapping, any enemy finished by the Minion's Poison will count as your kill, easily sustaining your army without any extra effort.
Instead of the Animated Guardian, you will use the Mercenaries of Trarthus to provide many useful Buffs and Quality of Life upgrades. The Cruel Mistress is the best choice here. She can use the Envy Aura that grants flat Chaos Damage for Attacks, which, just like the Raise Spiders, is usually reserved for the particular Unique Items. She will also apply the Despair and Temporal Chains Curses. Lastly, the Squirming Terror Ring will summon Worms every 2 seconds, which you can use to build up your army.
The Necromancer Ascendency is the best choice here. It grants generic Damage bonuses for your Minions, as well as very strong defense in the form of Leech, Damage Reduction, and Offerings affecting you.
You can also check our other Path of Exile builds right over here Odealo's Crafty Guides - Full List
1. Gameplay
Channel Divine Ire and press Writhing Jar Flask to summon Minions. Your Mercenary should be responsible for the Curses, but if you can't find a suitable ally, you will have to automate it with the Arcanist Brand. It will also be used to trigger the Bone and Flesh Offerings. For Movement, use the Shield Charge and Frostblink.
|
|
|
|

2. Build's PROS & CONS
| PROS |
|
| CONS |
|
3. Leveling tips
To equip the Arakaali's Fang Dagger, you will have to reach level 53. Unlocking their full potential takes even more time, as the Dark Monarch Helmet requires level 80. To complete the first stages of the campaign, we recommend using the Summon Raging Spirits, or Blink Arrow of the Bombarding Clones if you have access to Transfigured Gems. You can check out our Leveling Guide using Minions for more tips.
Bandits:
Kill all three bandits to get one additional Passive Skill Point or kill Alira to help with Gearing.
Leveling Skill Trees:
38 Points Passive Tree
Pick up all nearby Minion Damage Notables. Accuracy is also crucial, as you Minions use Attacks.
77 Points Passive Tree
Pick up the remaining Minion Notables. If you use Blink Arrow, you will also need the Dexterity for the Gem and Bow Requirements. If you have enough Energy Shield, pick the Eldritch Battery Keystone to fix Mana sustain.
4. Final Skill Tree, Ascendancy Points, and Pantheon
Final Skill Tree:
96 Points Final Passive Tree (doesn't include Cluster or Unique Jewels)
120 Points Path of Building (PoB) link
Ascendancy points:
Preferably in that order:
- Mindless Aggression
- Bone Barrier
- Commander of Darkness
- Mistress of Sacrifice
Pantheon:
Major God: Soul of Arakaali: 10% reduced Damage taken from Damage Over Time, +40% Chaos Resistance against Damage Over Time
Minor God: Soul of Shakari: You cannot be Poisoned while there are at least 3 Poisons on you; 50% less Duration of Poisons on You
5. Final Gems links
| [DPS] Raise Spider Setup socket in the Arrakali's Fang and the Squire |
|
 |
Raise Spider - this Skill is triggered by killing an Enemy. The Spiders use an Attack that converts all Physical Damage into Chaos Damage and always Poisons on Hit. |
 |
Multistrike Support - swap it for Melee Splash Support during clearing. |
 |
Unbound Ailments Support |
 |
Melee Physical Damage Support |
 |
Minion Damage Support |
 |
Withering Touch Support |
 |
Void Manipulation Support |
| [UTILITY] Aura Setup | |
 |
Malevolence - improves the Poison Damage of your Spiders and prolongs their Duration. |
 |
Tempest Shield - makes you immune to Shock and provides a large amount of Spell Block Chance. |
 |
Precision - improves the Accuracy Rating of your Minions. Try to use the highest level possible for your amount of Mana. |
 |
Arctic Armour - makes you immune to Freeze and lowers incoming Fire and Physical Damage while standing still. |
| [UTILITY] Arcanist Brand Setup | |
 |
Arcanist Brand - automates several Utility Spells into one button press. |
 |
Flesh Offering - improves the Attack and Movement Speed of your Minions. Requires nearby Corpses to be used. |
 |
Bone Offering - a defensive Offering that grants a lot of Block Chance for yourself. Use it only if you have the Leash of Oblation. |
 |
Poacher's Mark - if you have a Mercenary that applies both Hex Curses, you can use this Mark to allow your Spiders to generate Frenzy Charges. If not, use the Despair here. |
| [UTILITY] Divine Ire Setup | |
 |
Divine Ire - a Channeling Spell that continuously deals Damage around you. Use it to kill Worms and summon Spiders. |
 |
Desecrate - creates Corpses necessary for spawning Spiders and using Offering Spells. |
 |
Cast while Channeling |
| [UTILITY] Guard Setup | |
 |
Immortal Call - a Guard Skill that lowers incoming Damage. Adjust the Gem Levels to your preferences. |
 |
Cast when Damage Taken Support - triggers linked Guard Skill upon taking Damage. The Gem Levels dictate its effectiveness. |
| [UTILITY] Movement Setup | |
 |
Frostblink - an instant teleport used to quickly dodge incoming Attacks and cross terrain gaps. |
 |
Shield Charge - a Movement Skill that can be used without a Cooldown. Thanks to the Minion's Attack Speed affecting you, it will be very fast. |
 |
Faster Attacks Support |
|
|
6. Gear Setup
There are plenty of Unique Items that are fundamental for the Build functionality, such as the Arakaali's Fang and The Writhing Jar. Other Gear pieces are quite typical for the Summoner Archetype, although you can skip any investments into Minion Gem Levels, maximum Life, or Resistance, as the Spiders are invulnerable to Damage. For your own defense, you will need to cap Resistance and get as much maximum Life and Spell Suppression as possible. A bit of extra Evasion Rating will help, but it is not the main focus of the Build.
|
Stat priorities on items:
|
 (Helmet) The Dark Monarch - doubles the amount of Raised Spiders, but disables other Minion types. Make sure to pick the proper variant. (Helmet) The Dark Monarch - doubles the amount of Raised Spiders, but disables other Minion types. Make sure to pick the proper variant. |
|
| +(50-100) to maximum Energy Shield +1 to Level of all Minion Skill Gems +(27-37)% to Chaos Resistance 50% reduced Light Radius Maximum number of Raised Spiders is Doubled Cannot have Minions other than Raised Spiders |
|
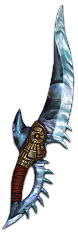 (Weapon) Arakaali's Fang - the only source of Raised Spiders currently available in the game. It is a mandatory Item for this Build, thankfully, it is not very expensive. Gems socketed in this Weapon will affect your Spiders. (Weapon) Arakaali's Fang - the only source of Raised Spiders currently available in the game. It is a mandatory Item for this Build, thankfully, it is not very expensive. Gems socketed in this Weapon will affect your Spiders. |
|
| 100% chance to Trigger Level 1 Raise Spiders on Kill (170-200)% increased Physical Damage Adds (8-13) to (20-30) Physical Damage Adds 1 to 59 Chaos Damage 15% chance to Poison on Hit |
|
 (Off-hand) The Squire - another mandatory Unique Item, it grants 3 extra Support Gems for the Spider Setup. It is not that cheap, but also not overly expensive either. (Off-hand) The Squire - another mandatory Unique Item, it grants 3 extra Support Gems for the Spider Setup. It is not that cheap, but also not overly expensive either. |
|
| Has 3 Sockets All Sockets are White +(5-8)% to Quality of Socketed Support Gems Socketed Support Gems can also Support Skills from your Main Hand (100-150)% increased Armour and Evasion +(3-5)% Chance to Block |
|
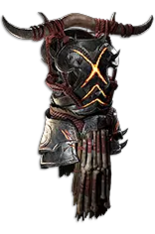
 (Body Armour) Doppelgänger Guise - a very strong defensive Armour that provides a huge amount of Physical Damage mitigation, as well as solid Life Recovery after being Hit. (Body Armour) Doppelgänger Guise - a very strong defensive Armour that provides a huge amount of Physical Damage mitigation, as well as solid Life Recovery after being Hit. |
|
| Grants Level 20 Unhinge Skill (40-60)% more Critical Strike Chance while Insane Enemies Killed by your Hits are destroyed while Insane (40-30)% less Physical and Chaos Damage Taken while Sane Regenerate 10% Life over one second when Hit while Sane |
|
 (Body Armour) Utula's Hunger - very good budget option, it allows you to skip maximum Life modifiers on your other Gear pieces, massively reducing their price while still allowing you to get high amounts of Damage, Chaos Resistance, and Spell Suppression. (Body Armour) Utula's Hunger - very good budget option, it allows you to skip maximum Life modifiers on your other Gear pieces, massively reducing their price while still allowing you to get high amounts of Damage, Chaos Resistance, and Spell Suppression. |
|
| (60-100)% increased Armour Recover (1-3)% of Life on Kill (30-40)% increased Stun and Block Recovery +(700-1000) to maximum Life if there are no Life Modifiers on other Equipped Items |
|
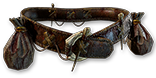 (Belt) Leash of Oblation - with this Belt, you can have both Offerings at the same time, but you will have to recast them more often. (Belt) Leash of Oblation - with this Belt, you can have both Offerings at the same time, but you will have to recast them more often. |
|
| +(25-40) to maximum Life +(15-20) to all Attributes +(50-70) to maximum Life You can have an Offering of each type Offering Skills have 50% reduced Duration |
|
 (Belt) Rare Belt - use a Rare Belt to cover lacking Resistances and get a high amount of maximum Life. Always try to use the Stygian Vise to get the extra Abyss Jewel. (Belt) Rare Belt - use a Rare Belt to cover lacking Resistances and get a high amount of maximum Life. Always try to use the Stygian Vise to get the extra Abyss Jewel. |
|
| Min. requirements: +100 to maximum Life 100% total Elemental and Chaos Resistance Optional affixes: #% increased maximum Life (Hunter Influence) |
|
 (Belt) Rare Abyss Jewels - Abyss Jewels provide a massive amount of Damage. Look for flat Physical or Chaos Damage for your Minions, or increase their Attack and Movement Speed. You should have at least one Jewel with a chance to Blind Enemies on Hit. Unfortunately, your Minions cannot Taunt. (Belt) Rare Abyss Jewels - Abyss Jewels provide a massive amount of Damage. Look for flat Physical or Chaos Damage for your Minions, or increase their Attack and Movement Speed. You should have at least one Jewel with a chance to Blind Enemies on Hit. Unfortunately, your Minions cannot Taunt. |
|
| Min. requirements: +30 maximum Life Optional affixes: Minions deal # additional Chaos/Physical Damage Minions have #% chance to Blind on Hit with Attacks Minions have #% increased Movement Speed |
|
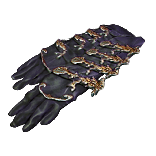
 (Gloves) Rare Gloves - the Gloves should provide you lots of Maximum Life, Resistance, and Spell Suppression, but you can also get plenty of increases to your Minion Damage as well. (Gloves) Rare Gloves - the Gloves should provide you lots of Maximum Life, Resistance, and Spell Suppression, but you can also get plenty of increases to your Minion Damage as well. |
|
| Min. requirements: +100 to Maximum Life +70% to Elemental Resistances +10% chance to Suppress Spell Damage Optional affixes: Minions deal #% increased Damage +# to Dexterity |
|
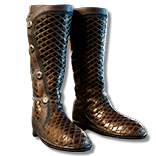 (Boots) Rare Boots - the Boots should provide a lot of Movement Speed and other usual defensive modifiers. They can also help you Avoid various Ailments. (Boots) Rare Boots - the Boots should provide a lot of Movement Speed and other usual defensive modifiers. They can also help you Avoid various Ailments. |
|
| Min. requirements: +100 to Maximum Life +40% to Elemental Resistances +30% increased Movement Speed +10% chance to Suppress Spell Damage Optional affixes: +# to Dexterity #% increased Action Speed |
|
 (Boots) Corpsewalker - with those Boots, you won't need the Desecrate to summon Spiders or cast Offerings. It is a great Quality of Life improvement, but lowers your survivability compared to regular Rare Boots. (Boots) Corpsewalker - with those Boots, you won't need the Desecrate to summon Spiders or cast Offerings. It is a great Quality of Life improvement, but lowers your survivability compared to regular Rare Boots. |
|
| Triggers Level 20 Corpse Walk when Equipped (80-120)% increased Evasion and Energy Shield 25% increased Movement Speed For each nearby corpse, 1% increased Movement Speed For each nearby corpse, Regenerate 8.00 Life per second |
|
 (Amulet) Rare Amulet - at first, getting enough Resistances, Attributes, and Suppression might be hard and expensive. Use the Rare Amulet to cover those basic necessities. (Amulet) Rare Amulet - at first, getting enough Resistances, Attributes, and Suppression might be hard and expensive. Use the Rare Amulet to cover those basic necessities. |
|
| Min. requirements: +100 to Maximum Life +40% to Elemental Resistances +40 to Dexterty Optional affixes: Chaos Resistance Minions have #% increased Movement Speed +1 to minimum Endurance Charge |
|
 (Amulet) Defiance of Destiny - simply the best defensive Amulet you can get in the game. It massively helps against Enemies that Hit often. (Amulet) Defiance of Destiny - simply the best defensive Amulet you can get in the game. It massively helps against Enemies that Hit often. |
|
| (20-30)% increased Mana Regeneration Rate +(60-80) to maximum Life +(10-40)% to Fire Resistance +(10-40)% to Cold Resistance +(10-40)% to Lightning Resistance Gain (10-20)% of Missing Unreserved Life before being Hit by an Enemy |
|
 (Ring) Rare Ring - the Bone Ring can provide tons of Damage for your Minions. Look for increases to their Damage, Attack Speed, and Movement Speed. Defensively, it can provide maximum Life, Resistance, or minimum Endurance Charge. (Ring) Rare Ring - the Bone Ring can provide tons of Damage for your Minions. Look for increases to their Damage, Attack Speed, and Movement Speed. Defensively, it can provide maximum Life, Resistance, or minimum Endurance Charge. |
|
| Min. requirements: +30% to Elemental Resistances +70 to Maximum Life Minions deal 35% increased Damage Optional affixes: Attributes Minions have #% increased Attack and Cast Speed Minions have #% increased Movement Speed +1 to minimum Endurance Charge |
|
 (Jewel) Large Cluster Jewels - look for Cluster Jewels with increased effect of small Notables. They should grant Attack Speed for Minions, and Resistance, Dexterity, or maximum Life for yourself. (Jewel) Large Cluster Jewels - look for Cluster Jewels with increased effect of small Notables. They should grant Attack Speed for Minions, and Resistance, Dexterity, or maximum Life for yourself. |
|
| Recommended affixes: Added Small Passive Skills also grant: Minions have #% increased Attack and Cast Speed Added Small Passive Skills have #% increased Effect Added Small Passive Skills also grant: +#% to all Elemental Resistances Added Small Passive Skills also grant: +# to Dexterity Added Small Passive Skills also grant: +# to maximum Life |
|
 (Jewel) Amanamu's Gaze - the only source of Damage over Time Multiplier for your Minions available on Equipment. You will need 4 other Ghastly Eye Jewels to activate the full bonus. (Jewel) Amanamu's Gaze - the only source of Damage over Time Multiplier for your Minions available on Equipment. You will need 4 other Ghastly Eye Jewels to activate the full bonus. |
|
| +(5-10) to all Attributes Minions have +6% to Damage over Time Multiplier per Ghastly Eye Jewel affecting you, up to a maximum of +30% |
|
 (Jewel) Fortress Covenant - a simple yet effective Jewel that can grant you a lot of Damage. Socket it in the Cluster Jewel Socket to avoid the downside effect. (Jewel) Fortress Covenant - a simple yet effective Jewel that can grant you a lot of Damage. Socket it in the Cluster Jewel Socket to avoid the downside effect. |
|
| Minions deal (35-45)% increased Damage Minions have +(10-12)% Chance to Block Attack Damage Minions have +(10-12)% Chance to Block Spell Damage Notable Passive Skills in Radius are Transformed to instead grant: Minions take 20% increased Damage |
|
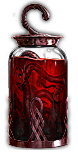 (Flask) The Writhing Jar - activating this Flask creates 2 Worms that can be killed to summon your Minions. Be aware that your other Minions and Mercenaries will try to kill the Worms as well. (Flask) The Writhing Jar - activating this Flask creates 2 Worms that can be killed to summon your Minions. Be aware that your other Minions and Mercenaries will try to kill the Worms as well. |
|
| Instant Recovery (75-65)% reduced Amount Recovered 2 Enemy Writhing Worms escape the Flask when used Writhing Worms are destroyed when Hit (20-10)% reduced Charges per use |
|
|
Suggested Flasks:
|
|
    |
6. Mercenary Setup
There are plenty of Mercenaries suitable for this Build. The default recommendation is the Cruel Mistress, which provides a unique Envy Aura and Curses Enemies with the Despair Skill for maximum Damage. You can also use the Striker to get some personal defense, hire the Bladecaster to provide the Grace Aura and inflict Spider's Webs on Enemies, or team up with the Kineticist to improve your Clear Speed.
| [UTILITY] Mercenary Skills | |
 |
Despair - an offensive Curse that lowers the Chaos Resistance of affected Enemies. It is very impactful for your Damage. If you can't find the Mercenary with this Skill, you should cast it manually. |
 |
Temporal Chains - another very important Curse, it slows down Enemies and makes Poisons last longer on them. It will be applied by a unique pair of Gloves. |
|
Stat priorities on items:
|
|
 (Helmet) Rare Helmet - give your Mercenary a Hunter-influenced Helmet that lowers the Chaos Resistance of nearby Enemies. (Helmet) Rare Helmet - give your Mercenary a Hunter-influenced Helmet that lowers the Chaos Resistance of nearby Enemies. |
|
| Min. requirements: Nearby Enemies have -9% to Chaos Resistance +70 to Maximum Life +60% total Elemental Resistance Optional affixes: Life Regeneration per second Chaos Resistance |
|
 (Helmet) Ylfeban's Trickery - if you can't find the ideal Mercenary with Curses, you can use this Helmet to inflict every type of Curse at random. It is weaker, but more universal. (Helmet) Ylfeban's Trickery - if you can't find the ideal Mercenary with Curses, you can use this Helmet to inflict every type of Curse at random. It is weaker, but more universal. |
|
| Trigger Level 10 Shock Ground when Hit Adds 1 to (60-80) Lightning Damage to Spells and Attacks (130-170)% increased Energy Shield +(25-35)% to Lightning Resistance Curse Enemies which Hit you with a random Hex, ignoring Curse Limit |
|
 (Shield) Victario's Charity - with this Shield your Mercenary can generate Frenzy Charges for your Minions. You might also use the Replica version, which generates Endurance Charges for yourself. (Shield) Victario's Charity - with this Shield your Mercenary can generate Frenzy Charges for your Minions. You might also use the Replica version, which generates Endurance Charges for yourself. |
|
| +8% to all Elemental Resistances +(50-70) to maximum Life +(20-30)% to Lightning Resistance +11% to Chaos Resistance 20% increased Area of Effect of Aura Skills 10% chance to grant a Power Charge to nearby Allies on Kill 5% chance to grant a Frenzy Charge to nearby Allies on Hit |
|
 (Gloves) Asenath's Gentle Touch - your Mercenary will apply the Temporal Chains on any Hit. The explosions can noticeably help with your Clear Speed, especially if paired with the Obliteration Wand. You can also Corrupt it to apply Enfeeble on Hit. (Gloves) Asenath's Gentle Touch - your Mercenary will apply the Temporal Chains on any Hit. The explosions can noticeably help with your Clear Speed, especially if paired with the Obliteration Wand. You can also Corrupt it to apply Enfeeble on Hit. |
|
| +(20-30) to Intelligence +(60-80) to maximum Life +(60-80) to maximum Mana Curse Enemies with Temporal Chains on Hit Non-Aura Curses you inflict are not removed from Dying Enemies Enemies near corpses affected by your Curses are Blinded Enemies Killed near corpses affected by your Curses explode, dealing 3% of their Life as Physical Damage |
|
 (Ring) Anathema - this Ring allows your Mercenary to apply 2 extra Curses without overwriting your own Mark. (Ring) Anathema - this Ring allows your Mercenary to apply 2 extra Curses without overwriting your own Mark. |
|
| +(30-40) to Intelligence (10-15)% increased Cast Speed (10-20)% chance to gain a Power Charge when you Cast a Curse Spell Your Curse Limit is equal to your maximum Power Charges |
|
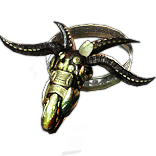
 (Ring) Squirming Terror - this Ring periodically creates Worms which you can kill to summon your Spiders. Equipping two of them will make the summoning even easier, but you would have to use different Items to raise the Curse limit. (Ring) Squirming Terror - this Ring periodically creates Worms which you can kill to summon your Spiders. Equipping two of them will make the summoning even easier, but you would have to use different Items to raise the Curse limit. |
|
| An Enemy Writhing Worm spawns every 2 seconds 20% chance to Trigger Socketed Spell on Kill, with a 0.5 second Cooldown Lose (20-10) Life per Enemy Killed Gain (5-10) Mana per Enemy Killed |
|
 (Amulet) The Eternal Struggle - this Amulet is a mediocre choice for yourself, as you will rarely personally attack Enemies, but the Mercenaries are doing it constantly. They will easily Cull Enemies as soon as they reach 15% of their maximum Life. (Amulet) The Eternal Struggle - this Amulet is a mediocre choice for yourself, as you will rarely personally attack Enemies, but the Mercenaries are doing it constantly. They will easily Cull Enemies as soon as they reach 15% of their maximum Life. |
|
| <<Random Searing Exarch implicit>> <<Random Eater of Worlds implicit>> +(20-50) to Strength +(20-50) to Dexterity +(20-50) to Intelligence (10-15)% increased Global Defences Critical Strikes inflict Malignant Madness if The Eater of Worlds is dominant Kill Enemies that have 15% or lower Life on Hit if The Searing Exarch is dominant |
|
 (Belt) Kaom's Binding - a very good defensive option that lowers the Physical Damage dealt by Enemies. Use it if your Mercenary prefers to engage Enemies in close combat. (Belt) Kaom's Binding - a very good defensive option that lowers the Physical Damage dealt by Enemies. Use it if your Mercenary prefers to engage Enemies in close combat. |
|
| +(25-35) to Strength +(30-40) to Strength +(300-500) to Armour Take no Burning Damage if you've stopped taking Burning Damage Recently Nearby Enemies Convert 25% of their Physical Damage to Fire |
|
|
If you have any other build requests please leave that in the comments below. We are always open to suggestions and constructive feedback.
Pictures used in this article are the intellectual property of Grinding Gear Games.
