![[3.0]Frost Blades Perma-freeze Raider - Odealo's Crafty Guide](https://static.odealo.com/upload/images/article/frost-blades-raider_63b31c5e7bf8b_l.jpg)
[3.0]Frost Blades Perma-freeze Raider - Odealo's Crafty Guide
One of the best Raider builds out there. Perma-freeze, insane farming speed, great aoe damage, and all-content viableFrost Blades
Perma-Freeze Raider build
Updated for Patch 3.20
The Best Crafty Guides by Odealo
| Guide notes |
| January 02, 2023 -Updated for Patch 3.20 |
| Build Overview | |||
| Tags: [RANGED] [ELEMENTAL] [LIFE] | |||
|
Budget: Defenses: |
|
Boss DPS: AoE: |
|
Frost Blades is a Top Tier Melee Attack that can be used as early as level 1. It is a ranged projectile-based Attack with incredible AoE thanks to additional projectiles being released from your initial Hit and covering your entire screen. It is an amazing Skill for leveling, as well as, it allows extremely fast map clearing. At the same time, this build is able to clear all the content on a very reasonable budget. The following setup revolves on using White Wind Unique Dagger, Heatshiver Helmet, and Southbound Gloves allow you to deal tons of Cold and Fire Damage, freezing everything in your path. To Freeze enemies, even more, you can also add Expedition's End Unique Armour - not only it allows you to Freeze enemies with the extra added Fire Damage from Heatshiver, but it will treat those hits when calculating Freeze chance and duration as if they were dealing up to 100% more Damage.
For the Ascendancy, we have selected Raider. It is an extremely fast character with its Avatar of the Slaughter combined with multiple Frenzy Charges, and Avatar of the Veil which applies a particularly powerful Elemental Exposure. For defenses, it uses Armour gained from Evasion Rating and converted from Iron Reflexes, Phasing, 100% Spell Suppression Chance, and has up to 90% chance to avoid all Elemental Ailments. It also Freezes all opponents, which is another defensive layer.
For the full list of our Path of Exile builds you can visit the following article: Odealo's Crafty Guides - Full List
1. Gameplay
This build should be used mainly for extremely fast Maps farming but will do just fine against Bosses. The gameplay mechanics are pretty much the same starting from level 1. You use Frost Blades as your main Ranged Attack that deals with incredible AoE damage. Frost Blades combined with Herald's of Ice explosions (optional feature) will clear entire screens of monsters within seconds. On the other hand, your defenses rely on Spell Suppression and Evasion rolls, which should allow you to use Abyssus Helmet for maximum DPS. This build is also insanely fast with insane Movement Speed bonuses from Raider's Ascendancy.
|
Full gameplay video: |
|
|

2. Build's PROS & CONS
| PROS |
|
| CONS |
|
3. Leveling tips
This build uses Frost Blades right from the start. It offers very high farming speed and allows you to quickly progress through the campaign. Also, by using Claws, you get an easy way to recover your Life - by Life gain on Hit implicit modifiers which can be found on them. For your equipment, you should prioritize high Physical DPS Claws, added Physical Damage to Attacks, and Life/Elemental Resistances on your armor parts and jewelry.
Suggested leveling gem setups:
| Frost Blades | |
 |
Frost Blades - your main DPS Attack which releases additional projectiles from your initial Hit |
 |
Melee Physical Damage Support - increases your Frost Blades damage |
 |
Added Cold Damage Support - adds flat Cold Damage to your Attacks |
 |
Multistrike Support - mandatory support Gem for the Frost Blade setup |
| Utility gems | |
 |
Herald of Ice - grants added Cold Damage and causes AoE explosions on killing Frozen enemies |
 |
Whirling Blades - your primary Mobility Skill |
 |
Ancestral Protector - Totem Spell which increases your Attack Speed |
 |
Summon Ice Golem - the recommended Golem for this build which increases your Crit. Chance and Accuracy Rating |
Bandits:
Both killing all the Bandits for two additional Skill Points and helping Alira for Mana Regeneration, Critical Damage Multiplier, and Elemental Resistances are viable options
Leveling Skill Trees:
34 Points Skill Tree
Priorities: 1) Finesse 2) Winter Spirit 3) Command of Elements 4) Herbalism 5) Claws of the Magpie
62 Points Skill Tree
Priorities: 1) Blood Drinker 2) Assassination 3) Depth Perception 4) Point Blank
Recommended leveling items:
 Last Resort - amazing starting weapon, will grant a lot of DPS until you reach a higher level to swap for better DPS weapons Last Resort - amazing starting weapon, will grant a lot of DPS until you reach a higher level to swap for better DPS weapons |
|
| +3 Life gained for each Enemy hit by Attacks 25% increased Attack Speed when on Low Life (80-100)% increased Physical Damage Adds 2 to 10 Physical Damage 100% increased Claw Physical Damage when on Low Life 100% increased Accuracy Rating when on Low Life |
 Praxis - in order to maintain your Mana this Ring (or even two of them) will be extremely useful. After all, you won't get much Mana/Mana Regeneration from your Passive Skill Tree Praxis - in order to maintain your Mana this Ring (or even two of them) will be extremely useful. After all, you won't get much Mana/Mana Regeneration from your Passive Skill Tree |
|
| +(20-25) to maximum Mana +(30-60) to maximum Mana (3-6) Mana Regenerated per second -(8-4) to Mana Cost of Skills 8% of Damage taken gained as Mana over 4 seconds when Hit |
 Karui Ward - great Damage and Movement Speed boost granted by this Amulet, make it one of the best leveling items for this build Karui Ward - great Damage and Movement Speed boost granted by this Amulet, make it one of the best leveling items for this build |
|
| +(20-30) to Dexterity +(20-30) to Strength +100 to Accuracy Rating 30% increased Projectile Speed 10% increased Movement Speed 30% increased Projectile Damage |
 Tasalio's Sign - if you can manage your Mana without the Praxis Ring, it's recommended to grab at least one of these. Your DPS will skyrocket after equipping Tasalio's Sign Tasalio's Sign - if you can manage your Mana without the Praxis Ring, it's recommended to grab at least one of these. Your DPS will skyrocket after equipping Tasalio's Sign |
|
| +(20-30)% to Cold Resistance Adds (7-10) to (15-20) Cold Damage to Spells and Attacks +(200-300) to Evasion Rating 50% chance to Avoid being Chilled 10% chance to Freeze Adds 40 to 60 Cold Damage against Chilled Enemies |
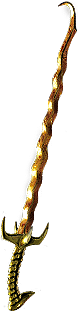 Ewar's Mirage - an amazing weapon for leveling a Frost Blades character. This is not a claw though and you might want to postpone the claw nodes in your Skill Tree until you actually start using Claws Ewar's Mirage - an amazing weapon for leveling a Frost Blades character. This is not a claw though and you might want to postpone the claw nodes in your Skill Tree until you actually start using Claws |
|
| +25% to Global Critical Strike Multiplier (40-55)% increased Elemental Damage with Attack Skills Adds 1 to (45-55) Lightning Damage (16-22)% increased Attack Speed Attacks Chain an additional time when in Main Hand Attacks have an additional Projectile when in Off Hand |
|
 Dawnstrider - If you're using only Ancestral Totem these boots will be perfect for more Attack Speed or Damage. Dawnstrider - If you're using only Ancestral Totem these boots will be perfect for more Attack Speed or Damage. |
|
| +(80-100) to Maximum Life 30% increased Movement Speed 100% increased Effect of Buffs your Ancestor Totems grant while Active Buffs from Active Ancestor Totems Linger for 4 seconds Maximum 1 Buff from an Active Ancestor Totem at a time |
|
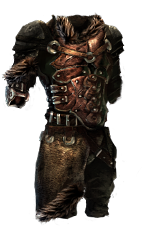 Daresso's Defiance - This Armour is a massive improvement to your DPS, and it grants Endurance Charges. Daresso's Defiance - This Armour is a massive improvement to your DPS, and it grants Endurance Charges. |
|
| (180-220)% increased Armour and Evasion +(60-90) to maximum Life 2% of Physical Attack Damage Leeched as Life You lose all Endurance Charges when Hit You gain an Endurance Charge on Kill You gain Onslaught for 5 seconds per Endurance Charge when Hit 100% increased Onslaught Effect |
4. Final Skill Tree, Ascendancy Points, and Pantheon
Final Skill Tree:
114 Points Final Skill Tree
120 Points Path of Building (PoB) link
Ascendancy points:
Preferably in that order:
- Way of the Poacher
- Avatar of the Slaughter
- Quartz Infusion
- Avatar of the Veil
Pantheon:
Major God: Soul of Lunaris: 1% additional Physical Damage Reduction for each nearby Enemy, up to 8%, 1% increased Movement Speed for each nearby Enemy, up to 8%
Minor God: Soul of Ralakesh: Moving while Bleeding doesn't cause you to take extra Damage; 25% reduced Physical Damage over Time taken while moving
5. Final Gems links
| [DPS] Frost Blades setup | |
|
Frost Blades - Your main DPS attack. It releases additional projectiles from your main Hit, covering nearly the entire screen and obliterating enemies. |
 |
Elemental Damage with Attacks Support - Core Support Gem for Elemental Attack Skills. |
|
Multistrike Support - Makes your Attack repeat two additional times with greatly increased Attack Speed and Damage. |
 |
Ice Bite Support - Increased Damage against Frozen enemies, added Cold Damage, and Cold Damage per Frenzy Charge are all excellent additions. |
 |
Added Cold Damage Support - Adds Flat Cold Damage to your Attacks which is a very important stat. |
 |
Hypothermia Support - Grants an insane damage bonus when you Hit enemies that are Chilled. You can replace it with  Nightblade Support for more Critical Strikes and Elusive buff. Nightblade Support for more Critical Strikes and Elusive buff. |
| [UTILITY] Auras | |
 |
Hatred - The best Aura for this build. It grants a lot of extra Cold Damage and opens up new powerful options on Watcher's Eye Jewel. |
 |
Grace - Adds and Increases Evasion Rating. |
|
Herald of Ice - Adds extra Cold Damage to your Attacks and causes AoE Explosions on killing Frozen enemies. |
 |
Enlighten Support - Increases Mana Reservation Efficiency for linked Skills. |
| [UTILITY] Other Auras | |
 |
Defiance Banner - Increases Armour and Evasion while reducing Critical Strike Chance for nearby foes. |
 |
Precision - Adds Accuracy Rating and Increases Critical Strike Chance. |
| [UTILITY] Mark setup | |
 |
Assassin's Mark - Massively increases Critical Strike Chance and Damage. |
 |
Mark on Hit Support - Rare and Unique enemies will be Marked automatically with the linked Mark. |
| [UTILITY] CwDT setup | |
 |
Cast when Damage Taken Support - Keep this Gem at level 9 in this setup. |
 |
Summon Ice Golem - The best Golem for this build. It increases your Accuracy Rating and Crit. Chance. |
 |
Immortal Call - Will grant damage reduction buff for a short duration. Keep this Gem at levels 1 to 3. You can swap it for  Molten Shell and use it as your movement key, but it requires a decent Armour. Molten Shell and use it as your movement key, but it requires a decent Armour. |
| [UTILITY] Ancestral Warchief | |
 |
Ancestral Warchief - Summon a Totem that grants you more Melee Damage. |
 |
Ancestral Protector - Summon a Totem that grants you more Attack Speed. |
 |
Multiple Totems Support - Allows you to summon both Ancestral Totems at the same time. |
 |
Culling Strike Support - Will make your Totem instantly kill enemies below 10% Life. |
| [MOBILITY] Dash | |
 |
Dash - the recommended Movement Skill you can use in this build. You could replace it with  Whirling Blades for more mobility, but inability t cross ledges. Whirling Blades for more mobility, but inability t cross ledges. |
|
|
5. Gear Setup
This is the most interesting part of every Odealo's Crafty Guide. You will find all the recommended gear with minimum stat requirements for each item. This build, in total, shouldn't cost more than 10-15 Divine Orbs, however, if you want to get all the Influenced gear with expensive affixes, there is basically no upper limit on how much it can cost. In general, all of the equipment can be replaced with Rare gear, as this build offers amazing flexibility in that matter.
Our recommended gear pieces will always:
- Cap your Resistances
- Grant sufficient Life pool for Mapping
- Give you more than enough damage to mid/high tier Map farming
|
Stat priorities on items:
|
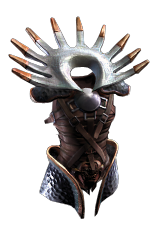
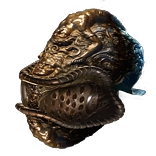 (Helmet) Abyssus - Grants a terrific damage boost. This will also make you vulnerable to high Physical Damage hits, so you should try to avoid any Attacks at all costs. (Helmet) Abyssus - Grants a terrific damage boost. This will also make you vulnerable to high Physical Damage hits, so you should try to avoid any Attacks at all costs. |
|
| +(20-25) to all Attributes Adds 40 to 60 Physical Damage to Attacks +(100-125)% to Melee Critical Strike Multiplier (100-120)% increased Armour (40-50)% increased Physical Damage taken |
|
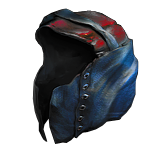 (Helmet) Heatshiver - With Avatar of the Veil and tons of Cold Damage you will Freeze almost any boss in the game, which results in a lot of added Fire Damage. (Helmet) Heatshiver - With Avatar of the Veil and tons of Cold Damage you will Freeze almost any boss in the game, which results in a lot of added Fire Damage. |
|
| (80-100)% increased Evasion Rating 60% increased Mana Regeneration Rate +(20-30)% to Fire Resistance +(20-30)% to Cold Resistance Gain 1% of Cold Damage as Extra Fire Damage per 1% Chill Effect on Enemy Gain 100% of Cold Damage as Extra Fire Damage against Frozen Enemies |
|
 (Helmet) Rare Helmet - a Rare Helmet with high defensive stats which reduces the Cold Resistance of nearby enemies is a solid and well-rounded choice. It's also possible to get a Helmet with extra Crit. Multiplier for some additional DPS too. (Helmet) Rare Helmet - a Rare Helmet with high defensive stats which reduces the Cold Resistance of nearby enemies is a solid and well-rounded choice. It's also possible to get a Helmet with extra Crit. Multiplier for some additional DPS too. |
|
| Min. requirements: 80 maximum Life Nearby Enemies have -9% to Cold Resistance 75% Total Elemental Resistances Optional affixes: Critical Strike Multiplier Attributes |
|
| Helmet enchantment 40% increased Frost Blades damage |
|
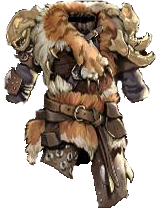 (Body Armour) Farrul's Fur - Combined with the Cat's buff it's one of the best Armours for most of the Attack Builds in the game. (Body Armour) Farrul's Fur - Combined with the Cat's buff it's one of the best Armours for most of the Attack Builds in the game. |
|
| (100-150)% increased Armour and Evasion +(80-100) to maximum Life Aspect of the Cat has no Reservation +2 seconds to Cat's Stealth Duration Gain up to your maximum number of Frenzy and Power Charges when you gain Cat's Stealth You have Phasing while you have Cat's Stealth |
|
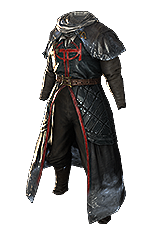 (Body Armour) Expedition's End - Rarely seen Armour, but it is extremely good with Heatshiver and Southbound. All Damage can Freeze, including added Fire Damage from Heatshiver, and it's easier to Freeze Bosses. (Body Armour) Expedition's End - Rarely seen Armour, but it is extremely good with Heatshiver and Southbound. All Damage can Freeze, including added Fire Damage from Heatshiver, and it's easier to Freeze Bosses. |
|
| (100-150)% increased Evasion and Energy Shield (5-10)% increased maximum Life All Damage can Freeze Freeze Chilled Enemies as though dealing (50-100)% more Damage Nearby Enemies are Chilled |
|
 (Body Armour) Rare Body Armour - An Elder piece with high Life, Evasion Rating, and added Crit. Chance to your Attacks is extremely powerful. (Body Armour) Rare Body Armour - An Elder piece with high Life, Evasion Rating, and added Crit. Chance to your Attacks is extremely powerful. |
|
| Min. requirements: 70 to maximum Life 70% Total Elemental Resistances Attacks have +1% to Critical Strike Chance Optional affixes: Chance to Suppress Spell Damage increased effect of Non-Curse Auras from your Skills You can apply an additional Curse Socketed Attacks have -15 to Total Mana Cost |
|
 (Weapon) Rare Gemini Claw - Use a Claw for Life on Hit, and because of multiple Claw nodes near Raider's starting location. Aim for maximum Physical or Cold DPS in your budget. (Weapon) Rare Gemini Claw - Use a Claw for Life on Hit, and because of multiple Claw nodes near Raider's starting location. Aim for maximum Physical or Cold DPS in your budget. |
|
| Min. requirements: 320 Physical/Cold DPS 20% increased Attack Speed Optional affixes: Critical Strike Multiplier Critical Strike Chance Accuracy Rating |
|
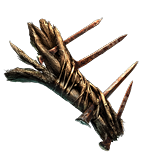
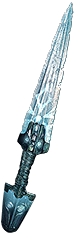
 (Weapon) Touch of Anguish - A budget-friendly and very solid weapon for this build. It offers high DPS and increases your clear speed via extra Chain but will limit your single-target DPS against end-game Bosses because of the relatively low base DPS. (Weapon) Touch of Anguish - A budget-friendly and very solid weapon for this build. It offers high DPS and increases your clear speed via extra Chain but will limit your single-target DPS against end-game Bosses because of the relatively low base DPS. |
|
| +46 Life gained for each Enemy hit by Attacks Adds (40-50) to (130-150) Physical Damage 30% increased Cold Damage (30-40)% increased Critical Strike Chance 20% chance to gain a Frenzy Charge on Killing a Frozen Enemy Skills Chain an additional time while at maximum Frenzy Charges 10% chance to Freeze Critical Strikes do not inherently Freeze |
|
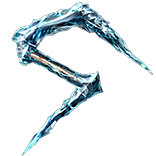
 (Weapon) White Wind - An unusual choice. It's very good but requires an empty off-hand to do any meaningful damage and a lot of Spell Suppression Chance which is obviously hindering. (Weapon) White Wind - An unusual choice. It's very good but requires an empty off-hand to do any meaningful damage and a lot of Spell Suppression Chance which is obviously hindering. |
|
| 30% increased Global Critical Strike Chance Adds (160-190) to (280-320) Cold Damage (10-15)% increased Attack Speed +(1000-1500) to Evasion Rating +(30-40)% chance to Suppress Spell Damage while your Off Hand is empty (100-200)% increased Cold Damage while your Off Hand is empty |
|
 (Weapon Slot) Rare Shield - Mainly for defensive stats (Life/Evasion) but a Shaper Shield can also reduce the amount of Mana Reserved by Socketed Spells, allowing you to use additional Aura. (Weapon Slot) Rare Shield - Mainly for defensive stats (Life/Evasion) but a Shaper Shield can also reduce the amount of Mana Reserved by Socketed Spells, allowing you to use additional Aura. |
|
| Min. requirements: +60 to maximum Life +60% to Elemental Resistances Optional affixes: Maximum Elemental Resistances increased Attack Speed Accuracy Rating Socketed Gems have 30% increased Reservation Efficiency Spell Suppression Chance |
|
 (Belt) Rare Belt - We recommend picking a high Life/Resistances Rare Belt. You can use almost any base, but preferably Leather Belt, Rustic Sash, or Stygian Vise. (Belt) Rare Belt - We recommend picking a high Life/Resistances Rare Belt. You can use almost any base, but preferably Leather Belt, Rustic Sash, or Stygian Vise. |
|
| Min. requirements: 90 maximum Life 75% Total Elemental Resistances 30% increased Elemental Damage with Attack Skills Optional affixes: Chaos Resistance Strength |
|
 (Boots) Rare Boots - Aim for the highest defensive stats and high Movement Speed bonus. (Boots) Rare Boots - Aim for the highest defensive stats and high Movement Speed bonus. |
|
| Min. requirements: 50 maximum Life Chance to gain Elusive on Critical Strike 25% increased Movement Speed Optional affixes: Elemental Resistances Chaos Resistance |
|
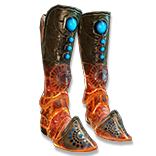
 (Boots) Darkray Vectors - Massive bonuses for each Frenzy Charge active, make Darkray Vectors one of the best budget picks for this build. (Boots) Darkray Vectors - Massive bonuses for each Frenzy Charge active, make Darkray Vectors one of the best budget picks for this build. |
|
| (40-70)% increased Armour and Evasion +(20-40)% to Lightning Resistance 5% increased Movement Speed per Frenzy Charge +1 to Maximum Frenzy Charges 40% reduced Frenzy Charge Duration 25% reduced Light Radius 2% chance to Dodge Attack Hits per Frenzy Charge |
|
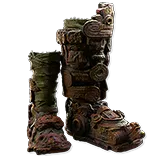
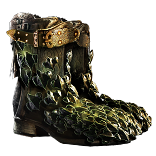
 (Boots) Legacy of Fury - These Boots have decent Armour, Evasion, Movement Speed, and most importantly, these apply a powerful Schorch that reduces all Elemental Resistances by up to around 15% and explodes enemies on death. It's even better with Yoke of Suffering. (Boots) Legacy of Fury - These Boots have decent Armour, Evasion, Movement Speed, and most importantly, these apply a powerful Schorch that reduces all Elemental Resistances by up to around 15% and explodes enemies on death. It's even better with Yoke of Suffering. |
|
| (200-300)% increased Armour and Evasion 30% increased Movement Speed Nearby Enemies are Scorched (30-50)% increased Effect of Scorch (30-40)% chance when you Kill a Scorched Enemy to Burn Each surrounding Enemy for 4 seconds, dealing 8% of the Killed Enemy's Life as Fire Damage per second |
|
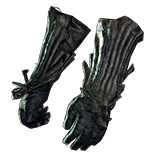
 (Gloves) Rare Gloves - Very solid choice which will help you Cap your Resistances. Also, Gripped Gloves and Spiked Gloves will both provide a decent DPS increase. End-game items should add extra Frenzy Charge via affix or corrupted Implicit modifier. (Gloves) Rare Gloves - Very solid choice which will help you Cap your Resistances. Also, Gripped Gloves and Spiked Gloves will both provide a decent DPS increase. End-game items should add extra Frenzy Charge via affix or corrupted Implicit modifier. |
|
| Min. requirements: 70 maximum Life 60% Total Elemental Resistances Optional affixes: Added Physical/Cold Damage to Attacks +1 to Maximum Frenzy Charges (Corrupted Implicit) |
|
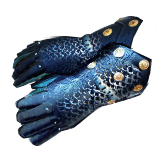 (Gloves) Southbound - It's a pair of Gloves only good if you can Freeze enemies with each or every second Hit. You can apply Ignite with a bit of added Fire Damage to kill the enemies at 1 Life which you cannot Freeze. Critical Strikes inherently have a 100% chance to Ignite and Freeze. (Gloves) Southbound - It's a pair of Gloves only good if you can Freeze enemies with each or every second Hit. You can apply Ignite with a bit of added Fire Damage to kill the enemies at 1 Life which you cannot Freeze. Critical Strikes inherently have a 100% chance to Ignite and Freeze. |
|
| Adds (60-72) to (88-100) Cold Damage to Attacks (12-16)% increased maximum Life +(40-50)% to Cold Resistance 100% increased Freeze Duration on Enemies Your Hits can only Kill Frozen Enemies |
|
 (Gloves) Tombfist - A corrupted pair with extra Frenzy Charge can also be a very reasonable choice. Though if you get Intimidate from other sources (Awakened MPD Gem or Lethal Pride Jewel) it kind of loses its purpose (Gloves) Tombfist - A corrupted pair with extra Frenzy Charge can also be a very reasonable choice. Though if you get Intimidate from other sources (Awakened MPD Gem or Lethal Pride Jewel) it kind of loses its purpose |
|
| Has 2 Abyssal Sockets (4-6)% increased maximum Life With a Murderous Eye Jewel Socketed, Intimidate Enemies for 4 seconds on Hit with Attacks With a Searching Eye Jewel Socketed, Maim Enemies for 4 seconds on Hit with Attacks |
|
 (Amulet) Rare Amulet - Required to get all the Attributes for Item Requirements. Some extra offense or utility mods will be also useful here. (Amulet) Rare Amulet - Required to get all the Attributes for Item Requirements. Some extra offense or utility mods will be also useful here. |
|
| Min. requirements: 50 maximum Life 25% increased Critical Strike Multiplier 30% Elemental Damage with Attacks Optional affixes: Attributes Added Elemental/Physical Damage to Attacks Elemental Resistances Accuracy Rating Hatred has (40–50)% increased Mana Reservation Efficiency Grace has (40–50)% increased Mana Reservation Efficiency |
|
 (Amulet) Yoke of Suffering - An excellent choice if you're using Heatshiver. Not only it grants a lot of Resistances, but also increases the enemies' Damage taken per Ailment. That's Ignite, Chill, Freeze, Shock, Sap, Brittle, Scorch, Bleed, and Poison. (Amulet) Yoke of Suffering - An excellent choice if you're using Heatshiver. Not only it grants a lot of Resistances, but also increases the enemies' Damage taken per Ailment. That's Ignite, Chill, Freeze, Shock, Sap, Brittle, Scorch, Bleed, and Poison. |
|
| +(10-16) to all Attributes +(10-20)% to Fire Resistance +(10-20)% to Cold Resistance +(20-40)% to Lightning Resistance 30% reduced Duration of Ailments on Enemies (5-10)% chance to Shock Enemies take 5% increased Damage for each type of Ailment you have inflicted on them Your Elemental Damage can Shock |
|
 (Rings) Rare Ring - Rings offer the widest variety of extra additions. Make sure to Cap your Resistances, get some extra Life, and any of the following DPS-oriented bonuses. (Rings) Rare Ring - Rings offer the widest variety of extra additions. Make sure to Cap your Resistances, get some extra Life, and any of the following DPS-oriented bonuses. |
|
| Min. requirements: 60 maximum Life Elemental Resistances Optional affixes: increased Elemental Damage with Attacks Added Cold Damage per Frenzy Charge Added Cold Damage against Chilled enemies Increased Critical Strike Multiplier if you have Shattered an enemy recently Attributes |
|
 (Rings) Circle of Fear - It's a Ring that can improve your Herald of ice. It can get you more Cold Resistance, Cold Damage, increased Buff Effect, or increased Mana Reservation Efficiency. (Rings) Circle of Fear - It's a Ring that can improve your Herald of ice. It can get you more Cold Resistance, Cold Damage, increased Buff Effect, or increased Mana Reservation Efficiency. |
|
| <One to three random Synthesis implicit modifiers> +(20-30) to Dexterity Adds (20-25) to (26-35) Cold Damage +(20-30)% to Cold Resistance <Two Random Herald of Ice modifiers> |
|
 (Jewel) Lethal Pride - Adds a lot of Strength and various upgrades for Melee-type characters, so you might find something good. Socket it near Frenetic of Fervour Notables. (Jewel) Lethal Pride - Adds a lot of Strength and various upgrades for Melee-type characters, so you might find something good. Socket it near Frenetic of Fervour Notables. |
|
| (10-15)% increased Cold Damage With at least 40 Dexterity in Radius, Melee Damage dealt by Frost Blades Penetrates 15% Cold Resistance With at least 40 Dexterity in Radius, Frost Blades has 25% increased Projectile Speed |
|
 (Jewel) Intuitive Leap - There are tons of perfectly-suited nodes near Fervour Notable, and if you don't have enough points to pick them all up, you can still allocate the best Notables with Intuitive Leap. (Jewel) Intuitive Leap - There are tons of perfectly-suited nodes near Fervour Notable, and if you don't have enough points to pick them all up, you can still allocate the best Notables with Intuitive Leap. |
|
| Passives in Radius can be Allocated without being connected to your tree | |
 (Jewel) Watcher's Eye - One of the best end-game Jewels. You should get one with flat-added Critical Strike Chance while you are affected by Hatred or other Hatred modifiers. (Jewel) Watcher's Eye - One of the best end-game Jewels. You should get one with flat-added Critical Strike Chance while you are affected by Hatred or other Hatred modifiers. |
|
| (4-6)% increased maximum Energy Shield (4-6)% increased maximum Life (4-6)% increased maximum Mana <Two or Three random aura modifiers> Recommended Aura modifiers: +(1.2-1.8)% to Critical Strike Chance while affected by Hatred Adds (58-70) to (88-104) Cold Damage while affected by Hatred |
|
 (Jewel) Large Cluster Jewel - One Attack Damage Large Cluster Jewels can be a good addition. Martial Prowess is excellent Feed the Fury and Fuel the Fight help with Life and Mana Leech. For Cold Damage Clusters, take Blast-Freeze, Disorienting Display, and Sadist. (Jewel) Large Cluster Jewel - One Attack Damage Large Cluster Jewels can be a good addition. Martial Prowess is excellent Feed the Fury and Fuel the Fight help with Life and Mana Leech. For Cold Damage Clusters, take Blast-Freeze, Disorienting Display, and Sadist. |
|
| Recommended affixes: 1 Added Passive Skill is Feed the Fury 1 Added Passive Skill is Fuel the Fight 1 Added Passive Skill is Martial Prowess 1 Added Passive Skill is Calamitous 1 Added Passive Skill is Blast-Freeze 1 Added Passive Skill is Disorienting Display 1 Added Passive Skill is Sadist 1 Added Passive Skill is Deep Chill |
|
 (Jewel) Medium Cluster Jewel - it's recommended to get one Medium Cluster Jewel with some Critical Damage Notables, or Effect of Non-Damaging Ailments, which is even better if you can Shock via Yoke of Suffering. (Jewel) Medium Cluster Jewel - it's recommended to get one Medium Cluster Jewel with some Critical Damage Notables, or Effect of Non-Damaging Ailments, which is even better if you can Shock via Yoke of Suffering. |
|
| Recommended affixes: 1 Added Passive Skill is Astonishing Affliction 1 Added Passive Skill is Stormrider 1 Added Passive Skill is Inspired Oppression 1 Added Passive Skill is Cold Conduction |
|
 (Jewel) Abyss Jewels - With flat Added Physical Damage, Critical Strike mods, and Maximum Life (Jewel) Abyss Jewels - With flat Added Physical Damage, Critical Strike mods, and Maximum Life |
|
| Recommended affixes: maximum Life added Physical Damage to Attacks/Claw Attacks Critical Strike Multiplier Optional affixes: Chance to grant Unholy Might on Kill |
|
 (Jewel) Rare Jewels - Have the maximum Life bonus on each Jewel equipped, as well as any combination of the recommended stats found below. (Jewel) Rare Jewels - Have the maximum Life bonus on each Jewel equipped, as well as any combination of the recommended stats found below. |
|
| Recommended affixes: increased maximum Life Global/Melee Critical Strike Multiplier Optional affixes: increased Damage with Claws/Projectile/Melee Damage Increased Mana Reservation Efficiency |
|
 (Flask) Taste of Hate - Grants both amazing DPS and defensive bonuses making it one of the best Utility Flasks in the game. (Flask) Taste of Hate - Grants both amazing DPS and defensive bonuses making it one of the best Utility Flasks in the game. |
|
| +50% to Cold Resistance 20% less Cold Damage taken (10-15)% of Physical Damage from Hits taken as Cold Damage during Flask effect Gain (10-15)% of Physical Damage as Extra Cold Damage during effect 30% chance to Avoid being Chilled during Flask effect 30% chance to Avoid being Frozen during Flask effect |
|
 (Flask) Atziri's Promise - A great inexpensive flask. It's one of the most popular flasks - grants additional Chaos Damage and Life Leech. (Flask) Atziri's Promise - A great inexpensive flask. It's one of the most popular flasks - grants additional Chaos Damage and Life Leech. |
|
| +35% to Chaos Resistance 2% of Chaos Damage Leeched as Life during Flask effect Gain (5-8)% of Physical Damage as Extra Chaos Damage during effect Gain (5-8)% of Elemental Damage as Extra Chaos Damage during effect |
|
 (Flask) Bottled Faith - Increases Damage Critical Strike Chance. It's expensive but good. (Flask) Bottled Faith - Increases Damage Critical Strike Chance. It's expensive but good. |
|
| 40% increased Damage Creates Consecrated Ground on Use (30-15)% reduced Duration Consecrated Ground created by this Flask has Tripled Radius Consecrated Ground created during Effect applies (7-10)% increased Damage taken to Enemies (100-150)% increased Critical Strike Chance against Enemies on Consecrated Ground during Effect |
|
 (Flask) Starlight Chalice - Starlight Chalice is good only if you have high Evasion so that Ward won't be instantly broken, and if you can Shock and Scorch so that not only the effect of Chill and Freeze but Shock and Scorch will be improved too. (Flask) Starlight Chalice - Starlight Chalice is good only if you have high Evasion so that Ward won't be instantly broken, and if you can Shock and Scorch so that not only the effect of Chill and Freeze but Shock and Scorch will be improved too. |
|
| +200 to Ward Restores Ward on use (20-30)% increased Charge Recovery Inflict Fire, Cold and Lightning Exposure on nearby Enemies when used (20-30)% increased Effect of Non-Damaging Ailments you inflict during Effect |
|
Other suggested Flasks:
|
|
  |
|
|
We will appreciate all suggestions regarding this build. Also if you have a request for a future guide please leave it in the comments below.
Pictures used in this article are the intellectual property of Grinding Gear Games.
