
Wintertide Brand Elementalist
A very strong Setup for the Elementalist that uses Windertide Brand and Cold Snap to engulf Enemies in deadly iceWintertide Brand
Elementalist Build
Updated for Patch 3.28
The Best Crafty Guides by Odealo
| Guide notes |
| March 1, 2026 - Adjusted the Build for the new Gem system to improve the DPS |
| Build overview | |||
| Tags: [ES] [CASTER] [ELEMENTAL] [DOT] | |||
|
Budget: Defenses: |
|
Boss DPS: AoE: |
|
In the 3.26 update the Cold Damage over Time Archetype received a series of buffs to its effectiveness. The base Damage of all Skills was increased, and plenty of new Passives and Masteries were introduced. The Golem Notable of the Elementalist Ascendency is also a substantial improvement for most Caster Spells in the game, especially on the lower side of the budget.
The Wintertide Brand is by many considered the best Cold DoT Skill, especially after the unfortunate changes to the Vortex. This Brand has two components: it firstly attaches to Enemies, continuously inflicting a stacking Cold DoT Debuff, which increases in power over time. Upon removal, it inflicts all nearby Enemies with another DoT Debuff based on the accumulated stages. You can have up to 3 Brands attached to a single Enemy.
The unique aspect of Cold Dots is that multiple Skills can deal Damage at the same time. In this case, you will also want to use Cold Snap, which deals less Damage overall, but in a wider Area, doesn't require ramp-up, and can inflict Bonechill to increase all Cold Damage taken by Enemies from all sources.
The defensive aspect is covered by a high amount of Energy Shield, paired with a bit of Evasion Rating and Block. You will reserve your Life to use one additional Aura, and deal 30% Damage thanks to the Pain Attunement Keystone. You can also opt for the Chaos Innoculation Keystone instead, which will achieve higher defense but lower Damage.
You can also check our other Path of Exile builds right over here Odealo's Crafty Guides - Full List
1. Gameplay
Cast Cold Snap and Wintertide Brands to defeat Enemies. You can use Vaal Cold Snap to improve the Clear Speed even more. Your Curses should be applied manually via Skitterbots.
|
|
|
|

2. Build's PROS & CONS
| PROS |
|
| CONS |
|
3. Leveling tips
The biggest advantage of Cold Dots is the ease of leveling. This Archetype starts very strong, but falls behind other DoTs types due to limited scaling potential. The campaign is very easy to complete, although you should adjust the Passive Tree to focus on Life instead of Energy Shield.
Bandits:
Kill all three bandits to get one additional Passive Skill Point or kill Alira to help with Gearing.
Leveling Skill Trees:
40 Points Passive Tree
Travel through Spell and Cold Damage Notables to the top of the Passive Tree. Take the Golem Notable after unlocking the first Ascendency.
72 Points Passive Tree
Head towards the Runebinder Keystone. Grab nearby Damage, Brand, and Life Notables.
4. Final Skill Tree, Ascendancy Points, and Pantheon
Final Skill Tree:
109 Points Final Passive Tree (doesn't include Cluster or Unique Jewels)
120 Points Path of Building (PoB) link
Ascendancy points:
Preferably in that order:
- Liege of the Primordial
- Mastermind of Discord
- Heart of Destruction
- Shaper of Winter
Pantheon:
Major God: Soul of Arakaali: 10% reduced Damage taken from Damage Over Time, Debuffs on you expire 20% faster
Minor God: Soul of Ralakesh: 25% reduced Physical Damage over Time taken while moving, Moving while Bleeding doesn't cause you to take extra Damage
5. Final Gems links
| [DPS] Wintertide Brand Setup | |
 |
Wintertide Brand - your main DoT, it creates a Brand that attaches to Enemies and inflicts them with Cold Debuff. |
 |
Elemental Focus Support - the Chill will be inflicted by Cold Snap, so you can use this Support to massively improve your Damage instead. |
 |
Controlled Destruction Support |
 |
Swift Affliction Support |
 |
Arcane Surge Support |
 |
Hypothermia Support |
| [DPS] Cold Snap Setup | |
 |
Cold Snap - a secondary DoT Skill, it deals decent Damage and inflicts Bonechill Debuff. If possible, use Vaal Cold Snap to improve Clear Speed. |
| Bonechill Support | |
|
Controlled Destruction Support |
|
Hypothermia Support |
| [UTILITY] Golems Setup | |
 |
Summon Flame Golem - greatly increases your Damage and Area of Effect. |
 |
Summon Stone Golem - improves your Armour and Energy Shield. It also provides a decent amount of Life Regeneration.. |
 |
Summon Lightning Golem - the Cast Speed granted by this Golem is very useful to ensure your Brand can reach the maximum amount of stacks. |
 |
Summon Chaos Golem - provides a lot of Damage over Time Multiplier and Chaos Resistance. |
| [UTILITY] Aura Setup | |
 |
Zealotry - an offensive Aura that improves your Damage with Spells. |
 |
Purity of Elements - grants immunity to all Elemental Ailments, and provides a large amount of Elemental Resistance. You can also use Grace for more Evasion Rating instead. |
 |
Skitterbots - in this Setup, the Skitterbots will inflict Shock, Scorch, and Frostbite Curse on Enemies and yourself. |
 |
Unbound Ailments Support |
| [UTILITY] Aura Setup | |
 |
Malevolence - another offensive Aura, it improves your Damage with DoTs and improves their Duration. |
 |
Arrogance Support |
| [UTILITY] Guard Setup | |
 |
Immortal Call - this Guard Skill will consume your Endurance Charges, so you might want to replace it with Steelskin instead. It depends on your preferences. |
 |
Cast when Damage Taken Support - triggers linked Spells upon taking Damage. Immortal Call should be used with low Gem levels, and Steelskin with high Gem levels. |
| [UTILITY] Curse Setup | |
 |
Frostbite - lowers the Cold Resistance of affected targets. It will be applied via Skitterbots, but it will also affect you due to the Unique Belt. |
 |
Elemental Weakness - once you Anoint the Whispers of Doom Notable, you will be able to use a second Curse to improve your Damage even more. |
| [UTILITY] Movement Setup | |
 |
Shield Charge - a fast Charge towards the targeted location. It has no Cooldown, and its Speed depends on your Attack and Movement Speed. |
 |
Faster Attacks Support |
|
|
6. Gear Setup
The Shavrone's Wrappings are required to opt for the Low-Life Setup. The Profane Proxy and Arkhon's Tools greatly boost your Skitterbots, but come with a downside. To boost your Damage, you should aim for Gem Levels, increases to Cold Spell Damage, Damage over Time Multiplier, and Cast Speed. For Defences, you will want as much Energy Shield as possible, and cap all your Resistance. You will also need some Strength and Dexterity for Gem Requirements.
|
Stat priorities on items:
|
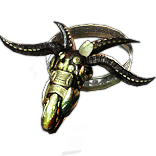 (Helmet) Rare Helmet - the Helmet grants you the biggest amount of Energy Shield, so make sure you have lots of it here. It should also grant you some Resistances or Attributes. (Helmet) Rare Helmet - the Helmet grants you the biggest amount of Energy Shield, so make sure you have lots of it here. It should also grant you some Resistances or Attributes. |
|
| Min. requirements: +350 to Energy Shield 30% total Elemental Resistance Optional affixes: #% of Physical Damage from Hits taken as Elemental Damage (Eater Influence) #% increased Area of Effect (Exarch Influence) Chaos Resistance |
|
 (Helmet) Rime Gaze - provides a massive amount of Damage, but defensive modifiers are quite limited. Great option for a start. (Helmet) Rime Gaze - provides a massive amount of Damage, but defensive modifiers are quite limited. Great option for a start. |
|
| Socketed Gems are Supported by Level 20 Concentrated Effect +50% to Cold Damage over Time Multiplier 50% increased Energy Shield 50% reduced Energy Shield Recharge Rate +(25-75) to maximum Mana |
|
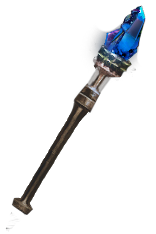 (Weapon) Rare Weapon - look for a combination of Gem Levels, Cold Spell Damage, and Damage over Time Multiplier. Cast Speed is also important to reach maximum stages faster. (Weapon) Rare Weapon - look for a combination of Gem Levels, Cold Spell Damage, and Damage over Time Multiplier. Cast Speed is also important to reach maximum stages faster. |
|
| Min. requirements: 80% increased Elemental/Cold/Spell Damage +1 to Level of all Cold Spell Skill Gems +20% to Cold Damage over Time Multiplier Optional affixes: +#% to Damage over Time Multiplier +1 to Level of all Spell Skill Gems |
|
 (Off-hand) Rare Shield - the Shield can provide a bit of Spell Damage or Gem Levels, but its primary role is defense. Look for high ES, Block Chance, or lacking Resistance. (Off-hand) Rare Shield - the Shield can provide a bit of Spell Damage or Gem Levels, but its primary role is defense. Look for high ES, Block Chance, or lacking Resistance. |
|
| Min. requirements: +200 to Energy Shield Optional affixes: #% increased Chance to Block #% increased Spell Damage +1 to Level of all Cold Spell Skill Gems % total Elemental Resistance |
|
 (Body Armour) Shavronne's Wrappings - this Armour blocks bypassing Energy Shield, which allows you to Reserve Life without risk of dying to a minuscule amount of Chaos Damage. (Body Armour) Shavronne's Wrappings - this Armour blocks bypassing Energy Shield, which allows you to Reserve Life without risk of dying to a minuscule amount of Chaos Damage. |
|
| (3-10)% increased Spell Damage (100-150)% increased Energy Shield 10% faster start of Energy Shield Recharge +(30-40)% to Lightning Resistance Reflects 1 to 250 Lightning Damage to Melee Attackers Chaos Damage taken does not bypass Energy Shield |
|
 (Body Armour) Rare Armour - you can opt for the Chaos Innoculation Keystone instead, which will massively boost your defence a the cost of Damage output, or use the Coruscating Elixir, which requires additional Flask Charge investments. (Body Armour) Rare Armour - you can opt for the Chaos Innoculation Keystone instead, which will massively boost your defence a the cost of Damage output, or use the Coruscating Elixir, which requires additional Flask Charge investments. |
|
| Min. requirements: +900 to Energy Shield Optional affixes: Resistance #% of Physical Damage from Hits taken as Chaos Damage (Eater Influence) |
|
 (Belt) The Arkhon's Tools - with this Belt you will have an additional Skitterbot that applies Scorch, and all Ailments inflicted that way will be stronger. It also boosts your Reservation Efficiency. (Belt) The Arkhon's Tools - with this Belt you will have an additional Skitterbot that applies Scorch, and all Ailments inflicted that way will be stronger. It also boosts your Reservation Efficiency. |
|
| (15-25)% increased Stun and Block Recovery +(20-30) to Dexterity and Intelligence (10-20)% increased Mana Reservation Efficiency of Skills (15-25)% increased Trap and Mine Throwing Speed Summon Skitterbots also summons a Scorching Skitterbot Summoned Skitterbots' Auras affect you as well as Enemies (50-75)% increased Effect of Non-Damaging Ailments inflicted by Summoned Skitterbots |
|
 (Gloves) Rare Gloves - a simple defensive piece, look for high Energy Shield and Resistances. Eldritch Implicits are very important here; they can grant you a DoT Multiplier and apply Cold Exposure on Hit. (Gloves) Rare Gloves - a simple defensive piece, look for high Energy Shield and Resistances. Eldritch Implicits are very important here; they can grant you a DoT Multiplier and apply Cold Exposure on Hit. |
|
| Min. requirements: +200 to Energy Shield 70% total Elemental Resistance Optional affixes: Chaos Resistance |
|
 (Boots) Rare Boots - your Boots provide the least amount of Energy Shield, as you will have to sacrifice one Prefix to obtain Movement Speed. They can also help you avoid Bleeding. (Boots) Rare Boots - your Boots provide the least amount of Energy Shield, as you will have to sacrifice one Prefix to obtain Movement Speed. They can also help you avoid Bleeding. |
|
| Min. requirements: +100 to Energy Shield +40% to Elemental Resistances +30% increased Movement Speed Optional affixes: Chaos Resistance 5% increased Action Speed (Exarch Influence) (8-12)% chance to gain Onslaught for 4 seconds on Kill |
|
 (Amulet) Replica Dragonfang's Flight - this Amulet greatly increases your Damage through Gem Levels for the Wintertide Brand, but also improves your Reservation Efficiency, which will be needed to Reserve Life. (Amulet) Replica Dragonfang's Flight - this Amulet greatly increases your Damage through Gem Levels for the Wintertide Brand, but also improves your Reservation Efficiency, which will be needed to Reserve Life. |
|
| +(10-16) to all Attributes +3 to Level of all <Random Skill> Gems +(5-10)% to all Elemental Resistances (5-10)% increased Reservation Efficiency of Skills Items and Gems have (10-5)% reduced Attribute Requirements |
|
 (Ring) Profane Proxy - with this Ring, your Skitterbots will no longer apply Chill. Instead, they will Curse Enemies with a Hex of your choice. Due to the Unique Belt, the Curse will also affect you. (Ring) Profane Proxy - with this Ring, your Skitterbots will no longer apply Chill. Instead, they will Curse Enemies with a Hex of your choice. Due to the Unique Belt, the Curse will also affect you. |
|
| Has 1 Socket +3 to Level of Socketed Curse Gems +(20-30)% to Cold Resistance +(20-30)% to Lightning Resistance Left Ring Slot: Your Chilling Skitterbot's Aura applies Socketed Hex Curse instead Right Ring Slot: Your Shocking Skitterbot's Aura applies Socketed Hex Curse instead |
|
 (Ring) Rare Ring - a Rare Ring should provide tons of Resistances and Attributes. It can also improve your Mana Regeneration Rate or grant one minimum Frenzy Charge. (Ring) Rare Ring - a Rare Ring should provide tons of Resistances and Attributes. It can also improve your Mana Regeneration Rate or grant one minimum Frenzy Charge. |
|
| Min. requirements: +40 to Strength +40 to Dexterity +40% total Elemental Resistance Optional affixes: Chaos Resistance +1 to minimum Frenzy Charge |
|
 (Jewel) Rare Jewels - the options are quite limited here; you will want a bonus to Energy Shield and Cold Damage over Time Multiplier. Try to get an Immunity to Corrupted Blood via Corrupted implicit. (Jewel) Rare Jewels - the options are quite limited here; you will want a bonus to Energy Shield and Cold Damage over Time Multiplier. Try to get an Immunity to Corrupted Blood via Corrupted implicit. |
|
| Min. requirements: 7% increased maximum Energy Shield +7% to Cold Damage over Time Multiplier Optional affixes: Resistance Attribute Corrupted Blood cannot be inflicted on you |
|
 (Jewel) Large Cluster Jewels - use a combination of Deep Chill and Prismatic Heart to improve your Damage, Elemental Resistances, and make your Chill more powerful. Try to get the Widespread Destruction as the third Notable to save Passive Points. (Jewel) Large Cluster Jewels - use a combination of Deep Chill and Prismatic Heart to improve your Damage, Elemental Resistances, and make your Chill more powerful. Try to get the Widespread Destruction as the third Notable to save Passive Points. |
|
| Min. requirements: 1 Added Passive Skill is Deep Chill 1 Added Passive Skill is Widespread Destruction 1 Added Passive Skill is Prismatic Heart |
|
 (Jewel) The Light of Meaning - this Jewel can greatly improve your Cold Damage when socketed in the radius of the multiple allocated Passives. This Jewel has multiple variants; the Cold version is one of the cheapest ones. (Jewel) The Light of Meaning - this Jewel can greatly improve your Cold Damage when socketed in the radius of the multiple allocated Passives. This Jewel has multiple variants; the Cold version is one of the cheapest ones. |
|
| Passive Skills in Radius also grant 6% increased Cold Damage | |
 (Jewel) Immutable Force - you can use this Jewel to completely skip any worries about getting Stun. The Rare Jewels are not very valuable for this Build anyway. (Jewel) Immutable Force - you can use this Jewel to completely skip any worries about getting Stun. The Rare Jewels are not very valuable for this Build anyway. |
|
| (500-1000)% increased Stun and Block Recovery | |
 (Jewel) Watcher's Eye - you can obtain a lot of Damage over Time Multiplier from this Jewel, as long as you use the Malovelence Aura. You can pair it with useful defensive modifiers for Grace or Purity of Elements. (Jewel) Watcher's Eye - you can obtain a lot of Damage over Time Multiplier from this Jewel, as long as you use the Malovelence Aura. You can pair it with useful defensive modifiers for Grace or Purity of Elements. |
|
| Recommended modifiers: +(18-22)% to Damage over Time Multiplier while affected by Malevolence +(5-8)% chance to Evade Attack Hits while affected by Grace +(30-50)% to Chaos Resistance while affected by Purity of Elements |
|
  (Jewel) Forbidden Flame&Flesh - thanks to this cheap Set of Jewels, you can borrow the Frigid Wake Notable from the Occultist Ascendency. It improves your Cold Damage and weakens nearby Enemies. (Jewel) Forbidden Flame&Flesh - thanks to this cheap Set of Jewels, you can borrow the Frigid Wake Notable from the Occultist Ascendency. It improves your Cold Damage and weakens nearby Enemies. |
|
| Allocates <Random Ascendancy Notable> if you have the matching modifier on Forbidden Flesh | |
 (Flask) Oriath's End - thanks to the Golem bonuses, this Flask will be very deadly and will help you clear up packs of monsters. Do not use it for capping Resistances, it is not reliable. (Flask) Oriath's End - thanks to the Golem bonuses, this Flask will be very deadly and will help you clear up packs of monsters. Do not use it for capping Resistances, it is not reliable. |
|
| (20-40)% increased Charge Recovery Enemies you Kill during Effect have a (20-30)% chance to Explode, dealing a tenth of their maximum Life as Damage of a Random Element |
|
 (Flask) Overflowing Chalice - with this Flask, all your other Flasks will have a better uptime, but it won't be enough to sustain them without killing Enemies. (Flask) Overflowing Chalice - with this Flask, all your other Flasks will have a better uptime, but it won't be enough to sustain them without killing Enemies. |
|
| Creates Consecrated Ground on Use (40-60)% increased Charge Recovery Gains no Charges during Effect of any Overflowing Chalice Flask (50-100)% increased Charges gained by Other Flasks during Effect |
|
|
Suggested Flasks:
|
|
   |
|
|
If you have any other build requests please leave that in the comments below. We are always open to suggestions and constructive feedback.
Pictures used in this article are the intellectual property of Grinding Gear Games.
