Wild Strike of Extremes Trickster Build
A simple Wild Strike of Extremes build for a Trickster which benefits from inverting monsters' ResistancesWild Strike of Extremes
Trickster Build
Updated for Patch 3.23
The Best Crafty Guides by Odealo
| Guide notes |
| January 29, 2024 -Build created |
| Build Overview | |||
| Tags: [RANGED] [ELEMENTAL] [HYBRID] | |||
|
Budget: Defenses: |
|
Boss DPS: AoE: |
|
Wild Strike of Extremes is an Attack that treats enemies' Elemental Resistances as if they are inverted. In turn, it costs Life, Mana, and Energy Shield instead of Mana only. With a lot of Support Gems attached, it may be hard to sustain this resource drain. Trickster with its proficiency in ES Leech from Soul Drinker, combined with Life and Mana Leech passives is the best candidate to benefit fully from this Skill. Combine the Leech Mastery with Claw Mastery for 20% of all Leech to be applied instantly, and use Multistrike Support to attack multiple times per skill use to easily sustain the high skill cost. If your ES Leech is particularly good, you may even consider Replica Covenant Body Armour for a big damage boost, but higher ES Cost. Most players, however, tend to go for a regular Mixed Elemental Damage build. Specializing in Critical Strikes is the most efficient way to enhance your damage once the Resistance Penetration is not needed. Inverting the Resistances is an immensely powerful damage boon, as the usual 50% you can find on most of the pinnacle bosses is often higher due to Map modifiers. Shrine modifiers, Endurance Charges, and other buffs that are quite common will actually improve your damage instead of reducing it, as most Raikata's Dance players can attest to. We don't go out of our way to increase nearby enemies' Resistances, there are just not a lot of ways to do that in a controlled and efficient manner.
Trickster is the best pick for this build, mostly due to the Soul Drinker for ES Leech and increased Attack Speed, but also the Polymath that recovers tons of your Mana, Life, and ES on kill instantly. With high Evasion, Maximum Life, Maximum ES, capped Spell Suppression, and Ghost Dance it creates a fairly tanky build that only lacks Armour and Physical Damage mitigation. The combined Life and ES pool is substantial, especially with items that add Life as Energy Shield, which makes Corrupted Soul Keystone a good addition. That would also increase the ES Leech Rate. The price of this build is highly variable as it can consist exclusively of Rare Items.
You can also check our other Path of Exile builds right over here Odealo's Crafty Guides - Full List
1. Gameplay
The build is similar to any other Melee Strike/Projectile build. Use Wild Strike to deal with all the enemies. During boss fights, deploy Ancestral Totem for more DPS. Assassin's Mark will be triggered automatically on hit. For Guard Spell, use Steelskin, and set it as your movement key. To move faster use Whirling Blades. Your Auras are Grace, Precision, Hatred or Wrath, Defiance Banner, and low-level Clarity or Vitality. You can also use Blood Rage, but with the high life drain from Wild Strike, it may lower your survivability too much.
|
|
|
|

2. Build's PROS & CONS
| PROS |
|
| CONS |
|
3. Leveling tips
Starting imminently as a Wild Strik of Extremes build has some issues, mostly related to the Life, Mana, and ES cost of the Skills as can be too overwhelming at the start, especially with Tabula Rasa. We recommend starting as a Frost Blades Trickster Build. It's much more popular, better in terms of damage, and easier to build. You can switch to the Wild Strik of Extremes after allocating Soul Drinker, around level 70 or higher.
Bandits:
you should kill all three Bandits for two additional Skill Points
4. Final Skill Tree, Ascendancy Points, and Pantheon
Final Skill Tree:
112 Points Final Skill Tree (doesn't include Unique or Cluster Jewels)
123 Points Path of Building (PoB) link
Ascendancy points:
Preferably in that order:
- Polymath
- Escape Artist
- Soul Drinker
- One Step Ahead
Pantheon:
Major God: Soul of the Brine King: You cannot be Stunned if you've been Stunned or Blocked a Stunning Hit in the past 2 seconds
Minor God: Soul of Abberath: 60% less Duration of Ignite on You
5. Final Gems links
| [DPS] Wild Strike of Extremes setup | |
 |
Wild Strike of Extremes - An Attack that fires Projectiles of random Element. It costs Life, Mana, and Energy Shield, but deals high damage that treats Enemies' Resistances as if they were inverted. |
 |
Multistrike Support - Your Attack is repeated with greater Attack Speed, but less damage. |
 |
Elemental Damage with Attacks Support - More Elemental Damage with Attacks. |
 |
Inspiration Support - Lowers Mana Cost, increases Critical Strike Chance, and Elemental Damage of Wild Strike. |
 |
Nightblade Support - Use it for more Critical Strike Chance, Crit Multiplier, and the powerful Elusive buff on Crit. |
 |
Elemental Focus Support - Grants more Elemental Damage, but disables Elemental Ailments like Shock or Freeze. It's the best option DPS-wide, especially with Replica Covenant. In other cases, replace it with  Trinity Suppoty. Trinity Suppoty. |
| [UTILITY] Auras setup | |
 |
Hatred - More Cold Damage, and extra Cold Damage sourced from Physical Damage. It's good with Replica Covenant and a Physical/Cold weapon. In any other case, use  Wrath instead for added Lightning Damage. Wrath instead for added Lightning Damage. |
 |
Grace - Adds and increases Evasion Rating, your main Defensive layer. |
 |
Defiance Banner - Increases Armour and Evasion, but also reduces nearby enemies' Chance to deal Critical Strike. |
 |
Enlighten Support - Linked Spells Reserve less Mana. |
| [UTILITY] Ancestral Totems setup | |
 |
Ancestral Protector - Use this Totem for more Attack Speed. |
 |
Ancestral Warchief - Ancestral Warchief grants more Melee Damage. |
 |
Multiple Totems Support - You can summon both linked Totems at the same time. |
 |
Lifetap Support - You have a low Mana Regeneration Rate, so it's best to use Lifetap on most of your Skill setups and leave all your Mana for Wild Strike. |
| [UTILITY] Assassin's Mark setup | |
 |
Assassin's Mark - Marked enemy is more likely to receive Critical Strike, and takes more damage from such Strikes. |
 |
Enhance Support - Improves the Quality of Assassin's Mark. |
|
Lifetap Support |
 |
Mark on Hit Support - Mark is applied automatically on Hit against Rare and Unique enemies. |
| [MOBILITY] Whirling Blades setup | |
 |
Whirling Blades - A movement Dash-type Attack to move faster. |
 |
Faster Attacks Support - You can use Whirling Blades even faster. |
|
Lifetap Support |
| [UTILITY] Various Gems | |
 |
Steelskin - Reduces incoming Damage until it can take no more, or until it expires. |
 |
Precision - Increases Critical Strike Chance and adds Accuracy. Level it up only to the point where both of these stats are capped at 100%. |
 |
Clarity - Having some passive Mana Regeneration is great, as almost all of your Mana Recovery comes from Leech only. Keep it at a very low level. |
|
|
6. Gear Setup
It's a Crit Attack Build, so the most important damaging stats are Critical Strike Chance and Critical Multiplier with enough Accuracy to always hit your target. Elemental Penetration or reducing enemies' Resistances is undesirable. Instead, look for increased or added Elemental Damage to Attacks. The most important gear piece in this matter is of course your weapon. The Wild Strike of Extremes takes the base Physical Damage you have and Converts it to a random Element, but keeps your added Elemental Damage, so you may always deal all three types of Elemental Damage with each Hit. If you've decided to equip Replica Covenant, you will need to make some major adjustments to the build, as the Cold Damage might be too high to create Resonance via Trinity Support. It's the best Body Armour so we recommend accommodating it into your build. Leech of all kinds will be provided by passives and it's hard to increase your actual Recovery from Leech beyond that, so additional Leech from items is not needed. To enhance your Recovery, Life/Mana/ES gained on Hit, or passive Regeneration of Life/Mana can be added. Alternatively, simply get more Maximum Life and Maximum Energy Shield to Leech these quicker, as the limit on how much you can Leech per instance is tied to the percentage of these stats, while the cost of Skills remains a flat, fixed number. Almost all the Strength and Intelligence can be gained from merely Lethal Pride and Atziri's Reflection. There are a lot of other Unique items that will suit this build as a cheap alternative, or the proper end-game piece to keep. Your main defensive layers are Spell Suppression and Evaion, aided by instant Leech on Hit, making you exceptionally vulnerable to sporadical savage hits, especially if they're of Physical type. To improve your survivability, invest in Armour, Physical Damage Reduction, or get the Progenesis Flask.
Our recommended items will:
- Cap your resistances at 75%
- Provide you with enough DPS and Life to start mapping
|
Stat priorities on items:
|
 (Helmet) Rare Helmet - A Blizzard Crown is the best choice with its added Cold Damage. Look for Maximum Life, Evasion, Energy Shield, Resistances, Spell Suppression, and some of the rare Influence mods, such as increased Elemental Damage or Maximum Power Charge if it's a Warlord Item. (Helmet) Rare Helmet - A Blizzard Crown is the best choice with its added Cold Damage. Look for Maximum Life, Evasion, Energy Shield, Resistances, Spell Suppression, and some of the rare Influence mods, such as increased Elemental Damage or Maximum Power Charge if it's a Warlord Item. |
|
| Min. requirements: +80 to Maximum Life 40% Total Elemental Resistances Spell Suppression Chance Optional affixes: Nearby enemies take increased Elemental Damage (Shaper's Suffix) increased Elemental Damage (Warlord's Prefix) +1 to Maximum Power Charges (Warlord's Prefix) Global Critical Strike Multiplier Mana Reservation Efficiency Attributes |
|
 (Weapon) Rare Claw - There are two options for a Claw. Either a copy with a lot of Added flat Elemental Damage of various types or one with Physical and Cold Damage only. The Cold/Physical Claw is to be used with Replica Covenant to specialize in Cold Damage further. Either way, for Suffixes, seek Attack Speed, Critical Strike mods, and Accuracy. (Weapon) Rare Claw - There are two options for a Claw. Either a copy with a lot of Added flat Elemental Damage of various types or one with Physical and Cold Damage only. The Cold/Physical Claw is to be used with Replica Covenant to specialize in Cold Damage further. Either way, for Suffixes, seek Attack Speed, Critical Strike mods, and Accuracy. |
|
| Min. requirements: 700 Elemental DPS 600 Physical + Cold DPS Critical Strike Chance or Multiplier Attack Speed Optional affixes: Accuracy Rating Chance to Blind on Hit |
|
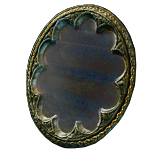 (Off-hand) Atziri's Reflection - This is one of the best Shields on account of its Curse "immunity", increased Effect of Curses, Elemental Resistances, Evasion, ES, and a lot of Intelligence. It only lacks Maximum Life and Spell Suppression. (Off-hand) Atziri's Reflection - This is one of the best Shields on account of its Curse "immunity", increased Effect of Curses, Elemental Resistances, Evasion, ES, and a lot of Intelligence. It only lacks Maximum Life and Spell Suppression. |
|
| 6% increased Movement Speed +(40-60) to Intelligence (180-200)% increased Evasion Rating +(180-200) to maximum Energy Shield +(20-30)% to all Elemental Resistances Hex Reflection Unaffected by Curses (15-20)% increased Effect of your Curses |
|
 (Off-hand) Rare Shield - Look for Maximum Life, Spell Suppression. Resistances, and Added Elemental Damage. Attack Speed, Attributes, Resistances, and basic defences are too useful. (Off-hand) Rare Shield - Look for Maximum Life, Spell Suppression. Resistances, and Added Elemental Damage. Attack Speed, Attributes, Resistances, and basic defences are too useful. |
|
| Min. requirements: +40% to Elemental Resistances +80 to maximum Life Optional affixes: Attributes Attack Speed Socketed Gems have #% increased Reservation Efficiency Spell Suppression Chance Add # Elemental Damage |
|
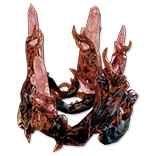
 (Body Armour) Replica Covenant - It adds a lot of Cold Damage, but the introduced ES Cost is such a big problem that it will be hard to get enough ES Recovery to Attack. You will need to get more Maximum Energy Shield, or improve your Total Maximum Energy Shield Recovery per second from Leech to break even. The Cold Damage is also so high that it may disable the Resonances from Trinity Support, so you can either replace that Gem or get Added Fire and Lightning Damage from other sources. It's a very powerful armour. (Body Armour) Replica Covenant - It adds a lot of Cold Damage, but the introduced ES Cost is such a big problem that it will be hard to get enough ES Recovery to Attack. You will need to get more Maximum Energy Shield, or improve your Total Maximum Energy Shield Recovery per second from Leech to break even. The Cold Damage is also so high that it may disable the Resonances from Trinity Support, so you can either replace that Gem or get Added Fire and Lightning Damage from other sources. It's a very powerful armour. |
|
| Socketed Gems are Supported by Level 29 Added Cold Damage +(20-30) to Intelligence (210-250)% increased Energy Shield 10% increased maximum Life Skills gain a Base Energy Shield Cost equal to 200% of Base Mana Cost |
|
 (Body Armour) Rare Body Armour - Look for the most basic Maximum Life, Resistances, Evasion, and Energy Shield. For the Eldritch mods, seek ones that will increase the effect of your Auras. (Body Armour) Rare Body Armour - Look for the most basic Maximum Life, Resistances, Evasion, and Energy Shield. For the Eldritch mods, seek ones that will increase the effect of your Auras. |
|
| Min. requirements: +90 to maximum Life +40% to Elemental Resistances 17% Chance to Suppress Spell Damage Optional affixes: +#% to Spell Critical Strike Chance increased maximum Life High Evasion Rating |
|
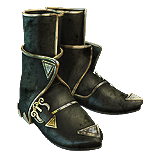
 (Boots) Ralakesh's Impatience - You can generate Power Charges with Assassin's Mark or Frenzy Charges with Mark Mastery, but these Boots are more reliable, and they grant you Endurance Charges for Physical Damage Reduction with Elemental Resistances, which may be good enough. (Boots) Ralakesh's Impatience - You can generate Power Charges with Assassin's Mark or Frenzy Charges with Mark Mastery, but these Boots are more reliable, and they grant you Endurance Charges for Physical Damage Reduction with Elemental Resistances, which may be good enough. |
|
| +(15-25)% to Cold Resistance +(15-25)% to Chaos Resistance 30% increased Movement Speed Count as having maximum number of Endurance Charges Count as having maximum number of Frenzy Charges Count as having maximum number of Power Charges |
|
 (Boots) Rare Boots - On your Boots, get Maximum Life, Elemental Resistances, Movement Speed, and Spell Suppression Chance. There are multiple valuable Eldritch implicit modifiers to choose from. (Boots) Rare Boots - On your Boots, get Maximum Life, Elemental Resistances, Movement Speed, and Spell Suppression Chance. There are multiple valuable Eldritch implicit modifiers to choose from. |
|
| Min. requirements: 25% Movement Speed +60 to Maximum Life 40% Total Elemental Resistances Optional affixes: Attributes Spell Suppression Chance |
|
 (Gloves) Abhorrent Interrogation - These Gloves are excellent for a selected group of hit-based Elemental Damage builds that don't Penetrate or Ignore Elemental Resistances. There's not much of them, but this one fits this category. It causes enemies to take up to 60% increased Elemental Damage if you can Attack (or Hit the enemy with Projectiles) fast enough. (Gloves) Abhorrent Interrogation - These Gloves are excellent for a selected group of hit-based Elemental Damage builds that don't Penetrate or Ignore Elemental Resistances. There's not much of them, but this one fits this category. It causes enemies to take up to 60% increased Elemental Damage if you can Attack (or Hit the enemy with Projectiles) fast enough. |
|
| (100-150)% increased Evasion and Energy Shield (5-7)% increased Attack and Cast Speed (20-25)% chance to inflict Withered for 2 seconds on Hit Enemies take 4% increased Elemental Damage from your Hits for each Withered you have inflicted on them Your Hits cannot Penetrate or ignore Elemental Resistances |
|
 (Gloves) Rare Gloves - We recommend getting extra Accuracy and Attack Speed here. Spell Suppression, Added Elemental Damage to Attacks, and Energy Shield can be found here as well. Don't forget about Maximum Life and Resistances. For Eldritch mods, get extra targeting for Strike Skills, Attack Speed, increased Effect of Marks, or Spell Suppression. (Gloves) Rare Gloves - We recommend getting extra Accuracy and Attack Speed here. Spell Suppression, Added Elemental Damage to Attacks, and Energy Shield can be found here as well. Don't forget about Maximum Life and Resistances. For Eldritch mods, get extra targeting for Strike Skills, Attack Speed, increased Effect of Marks, or Spell Suppression. |
|
| Min. requirements: +50 to maximum Life +40% to Elemental Resistances Adds Elemental Damage to Attacks increased Attack Speed Optional affixes: Accuracy increased Attack Speed Energy Shield Chance to Suppress Spell Damage |
|
 (Belt) Prismweave - It's more often seen in crude and underdeveloped builds, but the increased and flat Elemental Damage are especially important in this build. (Belt) Prismweave - It's more often seen in crude and underdeveloped builds, but the increased and flat Elemental Damage are especially important in this build. |
|
| (12-24)% increased Global Physical Damage Adds (14-16) to (30-32) Fire Damage to Attacks Adds (10-12) to (24-28) Cold Damage to Attacks Adds 1 to (60-68) Lightning Damage to Attacks +(6-15)% to all Elemental Resistances 30% increased Elemental Damage with Attack Skills during any Flask Effect |
|
 (Belt) Replica Soul Tether - It grants a lot of Energy Shield, given you already have a lot of Life. It will result in faster ES Leech so sustaining the ES cost of Wild Strike will be much easier. It's especially recommended with Replica Covenant. (Belt) Replica Soul Tether - It grants a lot of Energy Shield, given you already have a lot of Life. It will result in faster ES Leech so sustaining the ES cost of Wild Strike will be much easier. It's especially recommended with Replica Covenant. |
|
| (15-25)% increased Stun and Block Recovery +(20-40) to Strength Gain (4-6)% of Maximum Life as Extra Maximum Energy Shield Corrupted Soul |
|
 (Belt) The Burden of Truth - It doesn't grant you as much Energy Shield as Replica Soul Tether but causes your Life Flask to Recover your ES as well as Life, which is immensely helpful if you struggle with Leeching it back fast enough. (Belt) The Burden of Truth - It doesn't grant you as much Energy Shield as Replica Soul Tether but causes your Life Flask to Recover your ES as well as Life, which is immensely helpful if you struggle with Leeching it back fast enough. |
|
| +(60-80) to maximum Energy Shield (30-40)% increased Life Recovery from Flasks 33% of Chaos Damage taken does not bypass Energy Shield 33% of Non-Chaos Damage taken bypasses Energy Shield Gain (5-10)% of Maximum Life as Extra Maximum Energy Shield Supreme Decadence |
|
 (Belt) Rare Belt - Here you shall gather Maximum Life, Resistances, and increased Elemental Damage with Attacks. There's not much else. (Belt) Rare Belt - Here you shall gather Maximum Life, Resistances, and increased Elemental Damage with Attacks. There's not much else. |
|
| Min. requirements: +90 to Maximum Life 90% Total Elemental Resistances 40% increased Elemental Damage with Attack Skills Optional affixes: increased Maximum Life (Hunter's Prefix) Attributes Energy Shield |
|
 (Amulet) Aul's Uprising - You can benefit from a lot of Auras that Aul's Uprising can get you for free, such as Grace, Wrath, Discipline, or Hatred. You also need a lot of Mana to spend on your Attacks, making this option that much more valuable. (Amulet) Aul's Uprising - You can benefit from a lot of Auras that Aul's Uprising can get you for free, such as Grace, Wrath, Discipline, or Hatred. You also need a lot of Mana to spend on your Attacks, making this option that much more valuable. |
|
| +(10-16) to all Attributes +(20-30) to Intelligence (15-20)% increased maximum Energy Shield +(50-70) to maximum Life Hits against Nearby Enemies have 50% increased Critical Strike Chance <Random Intelligence aura> has no Reservation |
|
 (Amulet) Yoke of Suffering - If you haven't used Elemental Focus in your WIld Strike setup, you can equip Yoke of Suffering and cause enemies to take increased Damage. It grants quite a lot of Elemental Resistances too. (Amulet) Yoke of Suffering - If you haven't used Elemental Focus in your WIld Strike setup, you can equip Yoke of Suffering and cause enemies to take increased Damage. It grants quite a lot of Elemental Resistances too. |
|
| +(10-16) to all Attributes +(10-20)% to Fire Resistance +(10-20)% to Cold Resistance +(20-40)% to Lightning Resistance 30% reduced Duration of Ailments on Enemies (5-10)% chance to Shock Enemies take 5% increased Damage for each type of Ailment you have inflicted on them Your Elemental Damage can Shock |
|
 (Amulet) Rare Amulet - Here you can get a lot of Maximum Life, Resistances, Attributes, some Critical Strike modifiers, increased Elemental Damage, or added Elemental Damage. (Amulet) Rare Amulet - Here you can get a lot of Maximum Life, Resistances, Attributes, some Critical Strike modifiers, increased Elemental Damage, or added Elemental Damage. |
|
| Min. requirements: +50 to maximum Life 30% increased Global Critical Strike Chance 30% increased Elemental Damage with Attack Skills Optional affixes: Elemental Resistances Global Critical Strike Multiplier Adds Elemental Damage to Attacks Attributes |
|
| Recommended Anointments: Lethality Sovereignty |
|
 (Ring) The Taming - The Taming is great if you're not using Elemental Focus Gem, as you have to apply Elemental Ailments to benefit from the increased Damage bonus. This Ring grants tons of damage so definitely consider it. (Ring) The Taming - The Taming is great if you're not using Elemental Focus Gem, as you have to apply Elemental Ailments to benefit from the increased Damage bonus. This Ring grants tons of damage so definitely consider it. |
|
| +(8-10)% to all Elemental Resistances 20% increased Damage with Hits and Ailments per Freeze, Shock or Ignite on Enemy +(20-30)% to all Elemental Resistances 30% increased Elemental Damage 10% chance to Freeze, Shock and Ignite 30% increased Elemental Damage with Attack Skills |
|
 (Ring) Mark of the Elder - This Ring adds a lot of Cold Damage, increases your Life, Energy Shield, and Attack Damage if your other Ring has Shaper's Influence. It's another great pick, heavily recommended. (Ring) Mark of the Elder - This Ring adds a lot of Cold Damage, increases your Life, Energy Shield, and Attack Damage if your other Ring has Shaper's Influence. It's another great pick, heavily recommended. |
|
| Adds (3-4) to (10-14) Physical Damage to Attacks 20% chance to Trigger Level 20 Tentacle Whip on Kill Adds (26-32) to (42-48) Cold Damage to Attacks (6-10)% increased maximum Energy Shield (6-10)% increased maximum Life (60-80)% increased Attack Damage if your other Ring is a Shaper Item Cannot be Stunned by Attacks if your other Ring is an Elder Item |
|
 (Ring) Nimis - Nimis causes your Wild Strike Projectile to return to you, which increases your Damage and causes you to Leech more resources from enemies, even after you stop Hitting them. It's great especially with Abhorrent Interrogation to apply more Withered Stacks. (Ring) Nimis - Nimis causes your Wild Strike Projectile to return to you, which increases your Damage and causes you to Leech more resources from enemies, even after you stop Hitting them. It's great especially with Abhorrent Interrogation to apply more Withered Stacks. |
|
| +(20-30)% to Lightning Resistance +(30-50) to Dexterity (25-35)% increased Projectile Damage Projectiles Return to you Projectiles are fired in random directions |
|
 (Ring) Rare Ring - It's abundant in useful modifiers, such as increased Elemental Damage, added Elemental Damage, Attack Speed, Accuracy, Critical Strike mods, Resistances, Attributes, and of course Maximum Life. (Ring) Rare Ring - It's abundant in useful modifiers, such as increased Elemental Damage, added Elemental Damage, Attack Speed, Accuracy, Critical Strike mods, Resistances, Attributes, and of course Maximum Life. |
|
| Min. requirements: +50 to maximum Life 30% increased Elemental Damage with Attack Skills Optional affixes: Elemental Resistances increased Attack Speed Accuracy increased Global Critical Strike Chance Global Critical Strike Multiplier Adds Elemental Damage to Attacks |
|
 (Jewel) Rare Jewels - Critical Stike modifiers are the most potent damage sources you can get from Jewels but do look for the missing stats here too, like Resistances. (Jewel) Rare Jewels - Critical Stike modifiers are the most potent damage sources you can get from Jewels but do look for the missing stats here too, like Resistances. |
|
| Recommended affixes: Attributes Resistances increased Maximum Energy Shield increased Maximum Life Critical Strike modifiers Mana Reservation Efficiency increased Attack Speed |
|
 (Jewel) Lethal Pride - You have a lot of points allocated around the socket near Fervour notable. You also need a lot of Strength. Socket this Jewel there not only to gain this Attribute but also plenty of notable upgrades, such as chance to deal Double Damage, increased Melee Damage, or Critical Strike mods. (Jewel) Lethal Pride - You have a lot of points allocated around the socket near Fervour notable. You also need a lot of Strength. Socket this Jewel there not only to gain this Attribute but also plenty of notable upgrades, such as chance to deal Double Damage, increased Melee Damage, or Critical Strike mods. |
|
| Commanded leadership over (10000-18000) warriors under (Akoya-Kaom-Rakiata) Passives in radius are Conquered by the Karui Historic |
|
 (Jewel) Watcher's Eye - You're using Grace, Precision, Clarity, and Hatred or Wrath. Look for Precision's Critical Strike Multiplier or Attack Speed, Grace's Chance to Blind, Evade, or Suppress. Crit Chance, Added Damage, or Physical Damage as Extra Cold or Lightning Damage can be gained from the Hatred or Wrath mod pool. (Jewel) Watcher's Eye - You're using Grace, Precision, Clarity, and Hatred or Wrath. Look for Precision's Critical Strike Multiplier or Attack Speed, Grace's Chance to Blind, Evade, or Suppress. Crit Chance, Added Damage, or Physical Damage as Extra Cold or Lightning Damage can be gained from the Hatred or Wrath mod pool. |
|
| (4-6)% increased maximum Energy Shield (4-6)% increased maximum Life (4-6)% increased maximum Mana <Two or Three random aura modifiers> |
|
 (Jewel) Large Cluster Jewel - You're constantly Leeching as your Wild Strike consumes a lot of resources, that's why Fuel the Fight and Feed the Fury are especially good. Martial Prowess is an excellent addition too. We have used only one such Jewel. (Jewel) Large Cluster Jewel - You're constantly Leeching as your Wild Strike consumes a lot of resources, that's why Fuel the Fight and Feed the Fury are especially good. Martial Prowess is an excellent addition too. We have used only one such Jewel. |
|
| Recommended affixes: 1 Added Passive Skill is Fuel the Fight 1 Added Passive Skill is Feed the Fury 1 Added Passive Skill is Martial Prowess 1 Added Passive Skill is Prodigious Defence 1 Added Passive Skill is Calamitious |
|
 (Jewel) Medium Cluster Jewel - Go for Basics of Pain and Pressure Points for Critical Strike Chance and Damage. (Jewel) Medium Cluster Jewel - Go for Basics of Pain and Pressure Points for Critical Strike Chance and Damage. |
|
| Recommended affixes: 1 Added Passive Skill is Basics of Pain 1 Added Passive Skill is Pressure Points |
|
 (Flask) Bottled Faith - Increases your Critical Strike Chance, and causes your opponent to take increased damage. (Flask) Bottled Faith - Increases your Critical Strike Chance, and causes your opponent to take increased damage. |
|
| 40% increased Damage Creates Consecrated Ground on Use (30-15)% reduced Duration Consecrated Ground created by this Flask has Tripled Radius Consecrated Ground created during Effect applies (7-10)% increased Damage taken to Enemies (100-150)% increased Critical Strike Chance against Enemies on Consecrated Ground during Effect |
|
 (Flask) Progenesis - With a rapid Life and ES Recovery from instant Life Leech and Polymath passive, Progenesis is very good. It causes a portion of incoming Hit Damage to be taken as DoT. (Flask) Progenesis - With a rapid Life and ES Recovery from instant Life Leech and Polymath passive, Progenesis is very good. It causes a portion of incoming Hit Damage to be taken as DoT. |
|
| +35% to Chaos Resistance (20-10)% reduced Charges per use (-35-35)% increased Duration When Hit during effect, 25% of Life loss from Damage taken occurs over 4 seconds instead |
|
|
Other suggested Flasks:
|
|
    |
|
|
If you have any other build requests please leave that in the comments below. We are always open to suggestions and constructive feedback.
Pictures used in this article are the intellectual property of Grinding Gear Games.
