
Wave of Conviction of Trarthus Elementalist
Very comfortable and easy to play Setup for the new Wave of Conviction of Trarthus triggered by Channeling the CycloneWave of Conviction of Trarthus
Elementalist Build
Created for Patch 3.26
The Best Crafty Guides by Odealo
| Guide notes |
| July 23, 2025 - Build created |
| Build overview | |||
| Tags: [HYBRID] [TRIGGER] [ELEMENTAL] [CRITICAL] | |||
|
Budget: Defenses: |
|
Boss DPS: AoE: |
|
The newly introduced Wave of Conviction of Trarthus is a fairly outstanding Spell Skill. Upon use, it releases an expanding wave that comes back to you upon reaching its limits, dealing its Damage twice along the way. The maximum travel distance is affected by both Area of Effect and Skill Effect Duration modifiers. Additionally, you can have only one Wave at the same time - subsequent uses will overwrite the old Waves, wasting their potential Damage.
Instead of carefully balancing your Cast Speed and Duration, you can simply use Cast while Channeling Support Gem, which triggers linked Spells every 0.3 second, and the Less Duration Support to bring down the Wave's Duration below that amount. The easiest and most comfortable Channeling Skill to use is the Cyclone. This way, you will have a perfect balance of solid Damage output and minimal effort required to play.
Unlike the original version, this Skill Converts 50% of its Damage to Fire Damage, which you should push to 100% with Items and Passives. You could use Scorch, Exposure, and Elemental Curses to bring Fire Resistances of your Enemies down to reasonable amounts, or simply hire a Fallen Reverend Mercenary with Doryani's Prototype Armour. This way, you can lower Lightning Resistances of Enemies down to -200%, and use The Admiral Armour by yourself to use that value against your Fire Damage. He will also share a free Zealotry Aura with you, and wear Xoph's Heart Amulet to Cover Enemies in Ash.
The Elementalist Ascendency is the best choice here. The empowered army of Golems grants you tons of Damage, Defense, and Recovery for both Life and Mana. You will also be able to inflict powerful Shock, increasing Damage Taken by Enemies, and Chill, which slows them down and lowers their Damage. The last Ascendency Notable is highly customizable. You can pick the Bringer of Ruin for stronger and cheaper Herald Skills, or opt for more defense: Shaper of Flames to lower the Physical Damage dealt by Enemies, or Bastion of Elements for Elemental Shield.
You can also check our other Path of Exile builds right over here Odealo's Crafty Guides - Full List
1. Gameplay
Simply keep Channeling the Cyclone endlessly to deal Damage in a large area around you. You can use Frostblink for extra mobility without interrupting Channeling. Against Bosses or tougher Enemies, use Frost Shield for extra defense and Critical Strike Chance.
|
|
|
|

2. Build's PROS & CONS
| PROS |
|
| CONS |
|
3. Leveling tips
The Wave of Conviction of Trarthus can be used since level 16, although you will have to obtain the Gem through Trade, as it is obtainable only in the Endgame Mapping content. At first, balancing Cast Speed and Duration is not an issue as you will have limited options to improve Cast Speed anyway. You can switch to Channeling Setup as soon as you unlock the required Support Gem in Act 4.
Bandits:
Kill all three bandits to get one additional Passive Skill Point or kill Alira to help with Gearing.
Leveling Skill Trees:
35 Points Passive Tree
Get the Fire Mastery for Fire Conversion. Pick up nearby Life and Damage Notables on the way there, and head towards Golem Notable as you complete the first Trial.
71 Points Passive Tree
For leveling purposes, pick up the Divine Judgement Notable. If you have Light of Meaning Jewel already, you can travel towards Scion starting Area instead.
4. Final Skill Tree, Ascendancy Points, and Pantheon
Final Skill Tree:
121 Points Final Passive Tree (doesn't include Cluster or Unique Jewels)
121 Points Path of Building (PoB) link
Mercenary Setup Path of Building (PoB) link
Ascendancy points:
Preferably in that order:
- Liege of the Primordial
- Shaper of Storms
- Shaper of Winter
- Bastion of Elements/Bringer of Ruin/Shaper of Flames
Pantheon:
Major God: Soul of the Brine King: 100% chance to Avoid being Frozen, 50% reduced Effect of Chill on you
Minor God: Soul of Ralakesh: 25% reduced Physical Damage over Time taken while moving, Moving while Bleeding doesn't cause you to take extra Damage
5. Final Gems links
| [DPS] Wave of Conviction of Trarthus Setup | |
 |
Wave of Conviction of Trarthus - releases a Wave in Nova around you, which travels back after reaching maximum distance. You can have only one Wave at the same time. |
 |
Cyclone - a Channeling Skill that allows you to Move while dealing Damage. |
 |
Cast while Channeling Support - try to get the Awakened version quickly to ignore Stuns. |
 |
Less Duration Support |
 |
Arcane Surge Support |
 |
Added Fire Damage Support |
| [UTILITY] Golems Setup | |
 |
Summon Flame Golem - massively improves your Damage and Area of Effect. |
 |
Summon Stone Golem - offers a large amount of Life Regeneration and increases your Defences, which means Energy Shield and Evasion. |
 |
Summon Lightning Golem - the Attack or Cast Speed bonus is wasted here, but you need the Mana Regeneration. |
 |
Summon Stone Golem of Safeguarding - provides extra protection against Melee Hits. |
| [UTILITY] Aura Setup | |
 |
Herald of Ash - grants extra Fire Damage. The Burning Effect is negligible. |
 |
Tempest Shield - grants Spell Block Chance and makes you immune to Shock. |
 |
Herald of Purity - improves your Physical Damage. You Convert it to Fire Damage, but the bonus still applies. |
 |
Grace - a defensive Aura that grants a lot of Evasion Rating. |
 |
Clarity - improves your Mana Regeneration. Adjust the Gem Level to your Unreserved Mana pool. |
 |
Enlighten Support |
| [UTILITY] Guard Setup | |
 |
Immortal Call - the only effective Guard Skill for this Build, as you won't need a lot of Strength to make it effective. Keep it on low level to trigger it more often. |
 |
Frost Shield - a separate Guard Skill, it lowers the Damage you take from outside and massively boosts your Critical Strike Chance. Cast it manually when needed. |
 |
Cast when Damage Taken Support - triggers linked Spells upon taking Damage. Keep it on low level as well. |
| [UTILITY] Curse Setup | |
 |
Assassin's Mark - improves your Critical Strike Chance and Damage, and allows you to generate Power Charges against Bosses. |
 |
Mark on Hit Support |
| [UTILITY] Movement Setup | |
 |
Frostblink - an instant Teleport Skill that can be used without interrupting the Cyclone. |
 |
Unbound Ailments - you might ned this Support to apply more powerful Shocks. |
|
|
6. Gear Setup
There are no mandatory Unique Items necessary for the Build Functionality. The Admiral and Doryani's Prototype is a combo Setup available only in the Mercenary League. The Stampede boots are useful for steady Movement Speed while Chaneling the Cyclone, although Rare Boots can make you even faster at higher investments. To improve your Damage, you should focus on Gem Levels, Critical Strikes, and increases to Elemental Damage. The Build makes use of most Defensive options in the game: maximum Life, Energy Shield, Suppression, Evasion, and Block.
|
Stat priorities on items:
|
 (Helmet) Rare Helmet - the Helmet grants you the most Energy Shield. It should also grant you maximum Life and Resistances. Use Crafting Bench to add Evasion Rating, which will enable the Mastery for 15% Spell Suppression Chance. (Helmet) Rare Helmet - the Helmet grants you the most Energy Shield. It should also grant you maximum Life and Resistances. Use Crafting Bench to add Evasion Rating, which will enable the Mastery for 15% Spell Suppression Chance. |
|
| Min. requirements: +250 to Energy Shield +100 to maximum Life 60% total Elemental Resistance +100 to Evasion Rating (Crafting Bench) Optional affixes: #% of Physical Damage from Hits taken as Elemental Damage (Eater Influence) #% increased Area of Effect (Exarch Influence) Chaos Resistance |
|
 (Weapon) Rare Dagger/Sceptre - you can use any non-Wand Caster Weapon, as you still need to use Cyclone. Aim for Gem Levels, Critical Strikes for Spells, and increases to Fire or Spell Damage. (Weapon) Rare Dagger/Sceptre - you can use any non-Wand Caster Weapon, as you still need to use Cyclone. Aim for Gem Levels, Critical Strikes for Spells, and increases to Fire or Spell Damage. |
|
| Min. requirements: 80% increased Spell Damage 80% increased Spell Critical Strike Chance +30% to Global Critical Strike Multiplier +1 to Level of all Physical/Fire Spell Skill Gems Optional affixes: +#% to Global Critical Strike Multiplier +1 to Level of all Spell Skill Gems |
|
 (Weapon) Divinarius - a very good and straightforward option. It improves your Damage against Bosses while increasing AoE and stabilizing Critical Strike Chance for Clearing. (Weapon) Divinarius - a very good and straightforward option. It improves your Damage against Bosses while increasing AoE and stabilizing Critical Strike Chance for Clearing. |
|
| (150-200)% increased Spell Damage Gain (100-200) Life per Enemy Killed Gain (50-100) Mana per Enemy Killed 30% increased Area of Effect (200-250)% increased Critical Strike Chance for Spells if you've Killed Recently +(60-100)% to Critical Strike Multiplier for Spells if you haven't Killed Recently |
|
 (Off-hand) Rare Shield - look for Damage modifiers similar to your Weapon, but it can also provide Energy Shield, Life, Block Chance, or Spell Suppression. (Off-hand) Rare Shield - look for Damage modifiers similar to your Weapon, but it can also provide Energy Shield, Life, Block Chance, or Spell Suppression. |
|
| Min. requirements: +100 to Energy Shield or maximum Life +1 to Level of all Fire/Physical Spell Skill Gems 80% increased Spell Critical Strike Chance Optional affixes: #% increased Chance to Block % total Elemental Resistance +#% chance to Suppress Spell Damage |
|
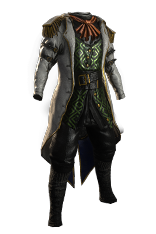 (Body Armour) The Admiral - this Armour allows you to take advantage of the Doryani's Prototype Setup on your Mercenary even on non-Lightning Builds. (Body Armour) The Admiral - this Armour allows you to take advantage of the Doryani's Prototype Setup on your Mercenary even on non-Lightning Builds. |
|
| +(30-40) to Intelligence (120-200)% increased Evasion and Energy Shield +(10-20)% to all Elemental Resistances (10-25)% chance to Freeze, Shock and Ignite Elemental Damage you Deal with Hits is Resisted by lowest Elemental Resistance instead |
|
 (Belt) Rare Belt - look for maximum Life, Strength, and lacking Resistances. It should always be a Stygian Vise base. (Belt) Rare Belt - look for maximum Life, Strength, and lacking Resistances. It should always be a Stygian Vise base. |
|
| Min. requirements: +100 to maximum Life +40 to Strength 60% total Elemental Resistance Optional affixes: #% increased Damage #% increased Flask Charges gained |
|
 (Jewel) Rare Abyss Jewels - aim for maximum Life and Critical Strike Multiplier. You can fix any remaining Attribute or Resistance requirements here. (Jewel) Rare Abyss Jewels - aim for maximum Life and Critical Strike Multiplier. You can fix any remaining Attribute or Resistance requirements here. |
|
| Min. requirements: +30 to maximum Life +10% to Global Critical Strike Multiplier Optional affixes: Attributes Resistance |
|
 (Gloves) Rare Gloves - here you will need the last 10% of Fire Conversion to fully benefit from all the Fire Damage investments. Other than that, it is a defensive piece that grants Life, Resistances, and Leech. (Gloves) Rare Gloves - here you will need the last 10% of Fire Conversion to fully benefit from all the Fire Damage investments. Other than that, it is a defensive piece that grants Life, Resistances, and Leech. |
|
| Min. requirements: +100 to maximum Life (20-25)% of Physical Damage Converted to Fire Damage 70% total Elemental Resistance Optional affixes: 15% chance to Unnerve Enemies for 4 seconds on Hit (Exarch Influence) 0.2% of Fire Damage Leeched as Life (Eater Influence) Chaos Resistance +#% chance to Suppress Spell Damage |
|
 (Boots) The Stampede - with those Boots your Movement Speed will always be the same, even during Channeling the Cyclone. It also provides a decent boost to Mana Regeneration, which is very helpful. (Boots) The Stampede - with those Boots your Movement Speed will always be the same, even during Channeling the Cyclone. It also provides a decent boost to Mana Regeneration, which is very helpful. |
|
| (100-150)% increased Evasion and Energy Shield (30-40)% increased Stun and Block Recovery (50-80)% increased Cooldown Recovery Rate of Travel Skills (30-40)% increased Mana Regeneration Rate while moving Your Movement Speed is 150% of its base value |
|
 (Boots) Rare Boots - a pair of Rare Boots provides much more defense and Resistance, but to match the Speed of The Stampede Boots you will need Quicksilver Flask and good mobility modifiers. (Boots) Rare Boots - a pair of Rare Boots provides much more defense and Resistance, but to match the Speed of The Stampede Boots you will need Quicksilver Flask and good mobility modifiers. |
|
| Min. requirements: +100 to maximum Life +40% to Elemental Resistances +30% increased Movement Speed Optional affixes: Chaos Resistance 5% increased Action Speed (Exarch Influence) You have Tailwind if you have dealt a Critical Strike Recently (Hunter Influence) #% increased Effect of Non-Damaging Ailments (8-12)% chance to gain Onslaught for 4 seconds on Kill |
|
 (Amulet) Replica Dragonfang's Flight - greatly boosts Gem Levels of a chosen Skill, and lessens the Attribute Requirement on your Items. Reservation Efficiency is also useful. (Amulet) Replica Dragonfang's Flight - greatly boosts Gem Levels of a chosen Skill, and lessens the Attribute Requirement on your Items. Reservation Efficiency is also useful. |
|
| +(10-16) to all Attributes +3 to Level of all <Random Skill> Gems +(5-10)% to all Elemental Resistances (5-10)% increased Reservation Efficiency of Skills Items and Gems have (10-5)% reduced Attribute Requirements |
|
 (Ring) Rare Ring - your Rings should provide Life, Resistances, Attributes, and Minimum Frenzy or Endurance Charge. The easiest way is to use Essence of Scorn on a Ring with Fractured Suffix. (Ring) Rare Ring - your Rings should provide Life, Resistances, Attributes, and Minimum Frenzy or Endurance Charge. The easiest way is to use Essence of Scorn on a Ring with Fractured Suffix. |
|
| Min. requirements: +80 to maximum Life +50 to Dexterity +20% to Global Critical Strike Multiplier (Essence of Scorn) Optional affixes: Chaos and Elemental Resistance +1 to minimum Endurance Charge |
|
 (Jewel) Rare Jewels - look for Life and Critical Strike Multiplier. It can also provide a bit of lacking Resistances or Attributes, or make you immune to Corrupted Blood. (Jewel) Rare Jewels - look for Life and Critical Strike Multiplier. It can also provide a bit of lacking Resistances or Attributes, or make you immune to Corrupted Blood. |
|
| Min. requirements: 7% increased maximum Life Optional affixes: +#% to Critical Strike Multiplier for Spell Damage +#% to Global Critical Strike Multiplier +#% to Critical Strike Multiplier with Fire Skills +#% to Critical Strike Multiplier with Elemental Skills Resistance Attribute Corrupted Blood cannot be inflicted on you |
|
 (Jewel) The Light of Meaning - this Jewel provides over 200% increased Fire Damage while picking mostly defensive Notables in the Scion Area. Make sure to pick the correct Damage type. (Jewel) The Light of Meaning - this Jewel provides over 200% increased Fire Damage while picking mostly defensive Notables in the Scion Area. Make sure to pick the correct Damage type. |
|
| Passive Skills in Radius also grant 6% increased Fire Damage | |
 (Jewel) Unnatural Instinct - this Jewel makes the Light of Meaning even more effective while also improving your AoE. (Jewel) Unnatural Instinct - this Jewel makes the Light of Meaning even more effective while also improving your AoE. |
|
| Allocated Small Passive Skills in Radius grant nothing Grants all bonuses of Unallocated Small Passive Skills in Radius |
|
 (Jewel) Watcher's Eye - a usual addition to every Build that uses multiple Auras. You will use Zealotry, Grace, and Clarity. (Jewel) Watcher's Eye - a usual addition to every Build that uses multiple Auras. You will use Zealotry, Grace, and Clarity. |
|
| Recommended modifiers: (100-120)% increased Critical Strike Chance against Enemies on Consecrated Ground while affected by Zealotry +(5-8)% chance to Evade Attack Hits while affected by Grace +(12-15)% chance to Suppress Spell Damage while affected by Grace (10-15)% increased Mana Recovery Rate while affected by Clarity Non-Channelling Skills have -(10-5) to Total Mana Cost while affected by Clarity |
|
  (Jewel) Forbidden Flame&Flesh - with this Jewel Set you can get Bringer of Ruin Notable for a very cheap price. However, Jewel Sockets are very limited here; you would have to give up on the Rare Jewel and Watcher's Eye. (Jewel) Forbidden Flame&Flesh - with this Jewel Set you can get Bringer of Ruin Notable for a very cheap price. However, Jewel Sockets are very limited here; you would have to give up on the Rare Jewel and Watcher's Eye. |
|
| Allocates <Random Ascendancy Notable> if you have the matching modifier on Forbidden Flesh | |
 (Flask) Oriath's End - this Flask greatly boosts your Clear Speed. Thanks to the generic Golem bonuses, the explosions will be very deadly. (Flask) Oriath's End - this Flask greatly boosts your Clear Speed. Thanks to the generic Golem bonuses, the explosions will be very deadly. |
|
| (20-40)% increased Charge Recovery Enemies you Kill during Effect have a (20-30)% chance to Explode, dealing a tenth of their maximum Life as Damage of a Random Element |
|
 (Flask) Bottled Faith - on the other hand, this Flask is used to massively improve your Damage against Bosses. The bonuses are only affecting Enemies on the Consecrated Ground. (Flask) Bottled Faith - on the other hand, this Flask is used to massively improve your Damage against Bosses. The bonuses are only affecting Enemies on the Consecrated Ground. |
|
| Creates Consecrated Ground on Use (30-15)% reduced Duration Consecrated Ground created by this Flask has Tripled Radius Consecrated Ground created during Effect applies (7-10)% increased Damage taken to Enemies (100-150)% increased Critical Strike Chance against Enemies on Consecrated Ground during Effect |
|
|
Suggested Flasks:
|
|
   |
6. Mercenary Setup
The addition of Mercenaries allows you to greatly boost your Damage and invest heavily into Defences instead. The best Mercenary to hire is the Fallen Reverend, which offers the Zealotry Aura. He can also wear the usual Doryani's Prototype Setup without worrying about Attribute Requirements.
|
Stat priorities on items:
|
|
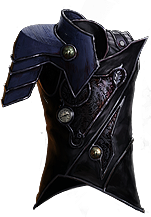 (Body Armour) Doryani's Prototype - affects the Lightning Resistance of your Enemies, which will be used against your Fire Damage thanks to wearing The Admiral Armour by yourself. (Body Armour) Doryani's Prototype - affects the Lightning Resistance of your Enemies, which will be used against your Fire Damage thanks to wearing The Admiral Armour by yourself. |
|
| (150-200)% increased Armour and Energy Shield +(60-90) to maximum Life Deal no Non-Lightning Damage Armour also applies to Lightning Damage taken from Hits Lightning Resistance does not affect Lightning Damage taken Nearby Enemies have Lightning Resistance equal to yours |
|
 (Amulet) Xoph's Heart - with this Amulet your Mercenary will Cover Enemies in Ash, increasing their Fire Damage Taken and slowing their Movement Speed. (Amulet) Xoph's Heart - with this Amulet your Mercenary will Cover Enemies in Ash, increasing their Fire Damage Taken and slowing their Movement Speed. |
|
| +(20-30) to Strength +(20-30) to Strength 25% increased Fire Damage +(25-35) to maximum Life +(20-40)% to Fire Resistance Nearby Enemies are Covered in Ash |
|
 (Ring) Rare Ring - to benefit from Doryani's Prototype you should use special Mirrored Jewelry that massively lowers the Lightning Resistance of the wearer instead. (Ring) Rare Ring - to benefit from Doryani's Prototype you should use special Mirrored Jewelry that massively lowers the Lightning Resistance of the wearer instead. |
|
| Min. requirements: -50% to Lightning Resistance Optional affixes: Fire, Cold, and Chaos Resistance Maximum Life |
|
|
If you have any other build requests please leave that in the comments below. We are always open to suggestions and constructive feedback.
Pictures used in this article are the intellectual property of Grinding Gear Games.
