Voltaxic Rift's Storm Rain Deadeye Build
Deadeye build that uses Lightning Bow Attacks to deal massive amounts of Chaos DamageStorm Rain and Lightning Arrow
Deadeye Build
Updated for Patch 3.20
The Best Crafty Guides by Odealo
| Guide notes |
| January 8, 2022 -Build created August 26, 2022 -Updated for Patch 3.19 -Included the cheaper version with no Chaos conversion December 12, 2022 -Updated for Patch 3.20 |
| Build overview | |||
| Tags: [RANGED] [ELEMENTAL] [LIFE] | |||
|
Budget: Defenses: |
|
Boss DPS: AoE: |
|
Storm Rain and Lightning Arrow are very similar Attacks - with both you use a Bow to fire Lighting Projectiles. Lightning Arrow is a pretty basic Attack that deals Converted from Physical Lightning Damage and can Hit enemies nearby its target. The effect of the Shock it causes is significantly improved and constant making your damage 300% more effective. Storm Rain, on the other hand, sticks your arrows in the ground so that they can deal damage constantly - similarly to Toxic Rain, but of course with noticeable differences. These arrows deal Lightning Hit Damage with constantly repeating beams between them and other arrows. That's why you want many of these arrows to be active at once. You can achieve it with a lot of Attack Speed and by using Ballista Totems.
The build can be played as a starter - that is its default version. You only need to be sure to deal a lot of Elemental Damage of at least two types via a good Bow with tons of added Damage. Converting the remaining Damage to Lightning is not important in this case. Windripper is an excellent cheap Weapon to equip, but eventually, you will need to switch to a better one. The cheap version benefits from multiple bonuses for added Elemental Damage which you can find on a Bow, Quiver, Jewelry, and Gloves, you should try to gain some of each type so that your Trinity Support Gem will Resonate. Added Elemental Damage is easy to get from cheap Uniques. This guide will cover this cheap version, but also the very expensive Chaos Damage version that mixes Voltaxic Rift and The Eternity Shroud for full Chaos Conversion and Chaos Resistance Penetration. The Eternity Shroud makes you gain Elemental Damage as Chaos Damage at a rate of 5% per Equipped Shaper-influenced item. When all your Items are Shaped you ignore Chaos Resistance completely. With all 10 such gear pieces, you deal 50% of your Total Damage (which is entirely Elemental or Chaos by now) as Chaos Damage. It's obviously absurdly expensive to have all your items (even the unique ones) Shaper-influenced.
It's not a very tanky build but it has still a decent survival rate as you can kill all the bosses in seconds - the exceptions are bosses that can quickly dash from place to place like Sirus, requiring you to start placing Ballista Totems all over again to stack Storm Rain at a new place. You can get 3 to 5k of Maximum Life with moderate Evasion and Spell Suppression Chance. The build is expensive because to reach its full potential all your items have to be Shaped - even the Unique ones. The price of such items can get very high.
You can also check our other Path of Exile builds right over here Odealo's Crafty Guides - Full List
1. Gameplay
Use Lightning Arrow with Mirage Archer Support to deal with the enemies encountered through the map. Use Dash for mobility, Blood Rage to enhance your performance, and Steelskin as your Guard Spell. For Mana-Reserving Spells, it is recommended to use Wrath, Precision, and Herald of Thunder. Your Asenath's Mark should automatically cast Hydrosphere, Creeping Frost, and Sniper's or Assassin's Mark. During Boss fights use Storm Rain with Ballista Totems for extra damage.
|
Full gameplay video:
This video was recorded on a level 95 Deadeye in the more "budget-oriented" variant without Chaos Damage conversion |
|
|

2. Build's PROS & CONS
| PROS |
|
| CONS |
|
3. Leveling tips
Start with Lightning Arrow, it's available at level 12. It will convert half of your Physical Damage to Lightning. From this point on you can use this Skill alone to reach Red maps. Use gear that improves your Physical and Lightning Damage, Attack Speed, Accuracy Rating, and Critical Strike Chance. Remember to have your Resistances and Maximum Life relatively high at all times. You can use Essences of Spite on Bow, Essence of Torment on Gloves, Jewelry, Quiver, or Essence of Wrath on various other items.
Suggested leveling Gem setups:
| Lightning Arrow setup | |
 |
Lightning Arrow - An Attack you can use with Bows, with a few more projectiles it has a decent clear speed as it targets nearby enemies too. |
 |
Volley Support - Fires two additional arrows, one on each side of your main Projectile. |
 |
Mirage Archer Support - Summons a Mirage Archer to attack alongside you. |
 |
Added Cold Damage Support - Adds Cold Damage to Attacks for more Damage. |
 |
Inspiration Support - You deal more Elemental Damage and your Crit Chance is increased while the Mana Cost of linked Skills is reduced. |
| Aura setup | |
 |
Precision - Keep it at a low level so it won't affect your Mana Pool too much, it increases your Crit Chance. |
 |
Herald of Ice - Adds flat Cold Damage to your Attacks and shatters enemies for a much better clear speed. |
| Curse and Mobility setup | |
 |
Sniper's Mark - Use it to deal more Projectile Damage against marked opponents. Link it with  Mark on Hit Support. Mark on Hit Support. |
 |
Dash - A basic Movement Skill. |
Bandits:
Two Additional Passive Skill Points seem like the best option for this build
Leveling Skill Trees:
35 Points Skill Tree
Look for Projectile Damage, Elemental Damage, Maximum Life, and Bow Damage.
68 Points Skill Tree
Get more Life, Elemental, and Projectile Damage, Accuracy Rating, and a source for Mana and Life leech. If you have Lioneye's Fall, go for Claws of the Magpie and Backstabbing immediately.
Recommended leveling items:
 Quill Rain - One of the best Unique Bows for leveling. Quill Rain - One of the best Unique Bows for leveling. |
|
| +(10-20) to Dexterity 100% increased Physical Damage 100% increased Attack Speed +2 Mana gained for each Enemy hit by Attacks (50-100)% increased Projectile Speed +(25-50) to Accuracy Rating 30% less Damage |
|
 The Tempest - A Bow that deals exclusively Lightning Damage making it good under certain circumstances. The Tempest - A Bow that deals exclusively Lightning Damage making it good under certain circumstances. |
|
| No Physical Damage 100% increased Lightning Damage Adds 1 to 85 Lightning Damage (36-50)% increased Attack Speed |
|
 Windripper - Adds a lot of Cold and Lightning Damage, increases Elemental Damage, Attack Speed, and Critical Strike Chance. Very good Bow. Windripper - Adds a lot of Cold and Lightning Damage, increases Elemental Damage, Attack Speed, and Critical Strike Chance. Very good Bow. |
|
| (20-24)% increased Elemental Damage with Attack Skills Adds (48-60) to (72-90) Cold Damage Adds 1 to (120-150) Lightning Damage (10-15)% increased Attack Speed (30-40)% increased Critical Strike Chance 15% increased Quantity of Items Dropped by Slain Frozen Enemies 30% increased Rarity of Items Dropped by Slain Shocked Enemies |
|
 Praxis - You will run out of Mana pretty quickly, use this Ring to prevent it. Praxis - You will run out of Mana pretty quickly, use this Ring to prevent it. |
|
| +(20-30) to maximum Mana +(30-60) to maximum Mana Regenerate (3-6) Mana per second -(8-4) to Total Mana Cost of Skills 8% of Damage taken Recouped as Mana |
|
 Goldrim - One of the best unique leveling helmets, it gives a lot of Elemental Resistances. Goldrim - One of the best unique leveling helmets, it gives a lot of Elemental Resistances. |
|
| +(30-50) to Evasion Rating 10% increased Rarity of Items found +(30-40)% to all Elemental Resistances Reflects 4 Physical Damage to Melee Attackers Level Requirement reduced by 100 (Hidden) |
 Tabula Rasa - A Body Armour that allows you to connect any six Gems. Tabula Rasa - A Body Armour that allows you to connect any six Gems. |
|
| Item has no level requirement and Energy Shield (Hidden) Item has 6 White Sockets and is fully linked (Hidden) |
|
 Thunderfist - You can create a quite good 5-link setup with these Gloves, and use them for Storm Rain. Thunderfist - You can create a quite good 5-link setup with these Gloves, and use them for Storm Rain. |
|
| Socketed Gems are Supported by Level 30 Added Lightning Damage 100% increased Effect of Lightning Ailments 10% increased Attack Speed (150-200)% increased Evasion and Energy Shield |
|
4. Final Skill Tree, Ascendancy Points, and Pantheon
Final Skill Tree:
118 Points Final Skill Tree (doesn't include Cluster Jewels)
122 Points Path of Building (PoB) link
Ascendancy points:
Preferably in that order:
- Ricochet
- Endless Munitions
- Gathering Winds
- Focal Point
Pantheon:
Major God: Soul of Lunaris: 1% additional Physical Damage Reduction for each nearby Enemy, up to 8%; 1% increased Movement Speed for each
nearby Enemy, up to 8%
Minor God: Soul of Shakari for You cannot be Poisoned while there are at least 3 Poisons on you; 50% less Duration of Poisons on You and additional Chaos Damage mitigation
5. Final Gems links
| [DPS] Lightning Arrow setup | |
|
Lightning Arrow - Lightning Arrow strikes a group of enemies with Lightning and it's used for clearing maps and for boss fights. |
|
Mirage Archer Support - Mirage Archer follows you and repeats the Linked Attacks with less Damage and Frequency. |
 |
Elemental Damage with Attacks Support - increases your Elemental Damage with Attack Skills. |
|
Inspiration Support - reduces your Mana Cost of Skill, increases Critical Strike Chance, and Elemental Damage of the Skill if you're constantly using it. |
 |
Greater Multiple Projectiles Support - makes you fire more Projectiles for a much faster mapping. |
 |
Trinity Support - Trinity creates Resonance greatly increasing your total DPS, but it only works if you can consistently deal damage of various Elements alternately. If you can't create Resonance, or if you're running the Voltaxic variant, use  Added Lightning Damage Support. Added Lightning Damage Support. |
| [DPS] Storm Rain setup | |
 |
Storm Rain - It fires an Arrow that lands on the ground and constantly deal damage with up to 4 Lightning Beams that can occur every 0.4 seconds between any two Arrows. The quantity of these projectiles is very impactful. |
 |
Concentrated Effect Support - You will need this additional damage much more than AoE. Less Aoe in fact means less projectile spread and more damage. |
 |
Withering Touch Support - Hits with Linked Skills will apply Withered Debuff that can stack up to 20 increasing Chaos Damage received. If you're using the cheaper variant, go for the Elemental Damage with Attacks Support instead. |
 |
Ballista Totem Support - Storm Rain won't be fired by you but by your Ballista Totems, up to four of them can be active. |
 |
Focused Ballista Support - grants your Totems More Attack Speed, increased Totem Placement Speed, and the ability to fire only when you use another Projectile Attack. |
|
Added Lightning Damage Support - It can be replaced with Inspiration Support if you struggle with Mana Recovery, or with  Hypothermia Support if you can easily Chill with your Hits. Hypothermia Support if you can easily Chill with your Hits. |
| [UTILITY] various Spells (socketed in Asenath's Chant if you have it) |
|
|
Sniper's Mark - It increases Projectile Damage and makes them Split after Hitting Cursed Enemy. If you don't have Asenath's Chant just link it with Mark on Hit Support. |
 |
Hydrosphere - A Sphere that you can Hit. Your Arrow Chains off of it while the Hydrosphere will apply Drenched Debuf applying Exposure and dealing Cold Damage. |
 |
Innervate Support - grants you an Innervate Buff that adds Lightning Damage to your Attacks. Requires you to have a Voltaxic Rift - your Chaos Damage has to cause Shock. |
| [UTILITY] Mana Reservation setup | |
|
Precision - An Aura for More Accuracy and Critical Strike Chance. |
 |
Determination - You should use it for an additional and increased Amour. |
 |
Grace - The best-suited defensive Aura for more and increased Evasion. |
 |
Enlighten Support - Lowers the Reservation Cost of linked Spells. |
| [UTILITY] Blood Rage setup | |
 |
Blood Rage - it deals damage over time to your character but gives you in return more Attack Speed, Life Leech, and Frenzy Charges on Kill |
 |
Enhance Support - Doubles the Attack Speed bonus from Quality for Blood Rage |
| [MOBILITY] Dash | |
 |
Dash - A basic Mobility Skill that can be often replaced with similar ones. |
| [UTILITY] Steelskin | |
 |
Steelskin - Guard Spells that make you immune to Bleeding and more durable against Hits for a short duration. |
| [UTILITY] Vaal Haste | |
 |
Vaal Haste - Use only the Vaal part of the Haste Aura for a temporary bonus to your Attack and Movement Speed. |
|
|
6. Gear Setup
It is required to have a Voltaxic Rift Unique Bow and The Eternity Shroud Unique Body Armour - it's the foundation of the Chaos variant of this Build. Other Unique Items are recommended to be only the Shaper-influenced ones. All your Items have to be shaped or else you won't ignore all the Chaos Resistance which is a big deal. It makes it a very expensive build. According to the flow of damage conversion, you should prioritize Lighting Damage over Cold Damage, and Cold Damage over Chaos Damage. Your base Physical Damage is not that high so you can afford to overlook it. Seek increased Elemental Damage, especially for Attacks as it will increase both - Cold and Lightning Damage. You won't need any Chaos Damage Penetration. Try to get close to the 100% Critical Strike Chance. As for Attributes, it can be difficult to get 155 Intelligence, you can resort to allocating it on Passive Skill Tree if necessary.
If you're playing the cheaper version with no Chaos Damage in it, ignore the Voltaxic Rift and The Eternity Shroud, focusing only on the general Elemental Damage. The last conversion step won't take place and so you will not be required to have all of your items Shaper-influenced. It reduces the overall price significantly.
Our recommended items will:
- Cap your resistances at 75%
- Provide you with enough DPS and Life to start mapping
|
Stat priorities on items:
|
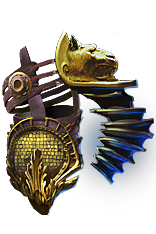
 (Helmet) Asenath's Mark - It's not irreplaceable but insanely convenient, it provides you with mostly offensive mods and the ability to constantly cast linked Spells automatically. You can socket there a Spell with Power Charge on Critical Support Gem to generate Power Charges. (Helmet) Asenath's Mark - It's not irreplaceable but insanely convenient, it provides you with mostly offensive mods and the ability to constantly cast linked Spells automatically. You can socket there a Spell with Power Charge on Critical Support Gem to generate Power Charges. |
|
| Trigger a Socketed Spell when you Attack with a Bow, with a 0.3 second Cooldown (10-15)% increased Attack Speed +(30-50) to maximum Energy Shield 30% increased Mana Regeneration Rate (30-60)% increased Spell Damage |
|
| Helmet enchantments: Lightning Arrow enchantments Storm Rain enchantments |
|
 (Weapon) Voltaxic Rift - Voltaxic Rift has a high Lightning base Damage and low Physical one, so you don't have to worry about Physical to Lighting Conversion that much. It converts Lighting Damage to Chaos and allows you to Shock enemies with great efficiency. (Weapon) Voltaxic Rift - Voltaxic Rift has a high Lightning base Damage and low Physical one, so you don't have to worry about Physical to Lighting Conversion that much. It converts Lighting Damage to Chaos and allows you to Shock enemies with great efficiency. |
|
| Adds 1 to (600-750) Lightning Damage (10-15)% increased Attack Speed 100% of Lightning Damage Converted to Chaos Damage Your Chaos Damage can Shock Hits with this Weapon Shock Enemies as though dealing 300% more Damage +40% to Maximum Effect of Shock |
|
 (Weapon) Rare Bow - The budget version of the build requires a more expensive weapon which might be counterintuitive, that's because Rare Bows with a lot of added Elemental Damage are generally in high demand ad suit a lot of builds. (Weapon) Rare Bow - The budget version of the build requires a more expensive weapon which might be counterintuitive, that's because Rare Bows with a lot of added Elemental Damage are generally in high demand ad suit a lot of builds. |
|
| Min. requirements: added Elemental Damage of all types 15% increased Attack Speed Optional affixes: Accuracy Rating increased Critical Strike Chance increased Critical Strike Multiplier |
|
 (Weapon) Rare Quiver - Use Spike-Point Quiver for Crit Chance or Altilerry Quiver for faster Totem placement Speed. Get Life, Resistance, and increased Elemental Damage with Attacks. (Weapon) Rare Quiver - Use Spike-Point Quiver for Crit Chance or Altilerry Quiver for faster Totem placement Speed. Get Life, Resistance, and increased Elemental Damage with Attacks. |
|
| Min. requirements: +60 to maximum Life +30% to Elemental Resistances 30% increased Elemental Damage with Attack Skills Optional affixes: Bow Attacks fire an additional Arrow increased Critical Strike Chance with Bows Critical Strike Multiplier with Bows increased Attack Speed |
|
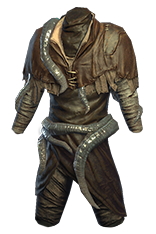 (Body Armour) The Eternity Shroud - Adds Chaos Damage based on your Elemental Damage depending on how many Shaper Items you have. If all Equipped Items are Shaped, which they should be, your Hits will ignore Chaos Resistance. The Glimpse of Eternity slows down Enemies around you after you receive a Hit. It's guaranteed to be Shaper-influenced. Obligatory for the Voltaxic variant. (Body Armour) The Eternity Shroud - Adds Chaos Damage based on your Elemental Damage depending on how many Shaper Items you have. If all Equipped Items are Shaped, which they should be, your Hits will ignore Chaos Resistance. The Glimpse of Eternity slows down Enemies around you after you receive a Hit. It's guaranteed to be Shaper-influenced. Obligatory for the Voltaxic variant. |
|
| Trigger Level 20 Glimpse of Eternity when Hit (100-150)% increased Evasion and Energy Shield +(70-100) to maximum Life +(17-23)% to Chaos Resistance Gain (3-5)% of Elemental Damage as Extra Chaos Damage per Shaper Item Equipped Hits ignore Enemy Monster Chaos Resistance if all Equipped Items are Shaper Items |
|
 (Body Armour) Hyrri's Ire - It's generally better than a cheap Rare Body Armour when you're going for the Elemental variant of the build. It grants a lot of Evasion and grants tons of added Cold Damage. It's also a lot of Spell Suppression. (Body Armour) Hyrri's Ire - It's generally better than a cheap Rare Body Armour when you're going for the Elemental variant of the build. It grants a lot of Evasion and grants tons of added Cold Damage. It's also a lot of Spell Suppression. |
|
| +(40-50) to Dexterity (140-220)% increased Evasion Rating 25% increased Chill Duration on Enemies (105-145) to (160-200) Added Cold Damage with Bow Attacks +30% chance to Suppress Spell Damage |
|
 (Boots) Rare Boots - Get a pair with Maximum Life, Elemental Resistances, and increased Movement Speed. You don't have to look for the Tailwind mod since it's provided by your Gathering Winds Keystone. (Boots) Rare Boots - Get a pair with Maximum Life, Elemental Resistances, and increased Movement Speed. You don't have to look for the Tailwind mod since it's provided by your Gathering Winds Keystone. |
|
| Min. requirements: +40 to maximum Life +40% to Elemental Resistances 30% increased Movement Speed Optional affixes: chance to gain Elusive on Critical Strike chance to gain Onslaught for 4 seconds on Kill Cannot be Frozen (crafted) |
|
 (Gloves) Rare Gloves - Life, Resistances, Spell Suppression, added Damage, and Accuracy Rating are all present as possible Gloves modifiers. (Gloves) Rare Gloves - Life, Resistances, Spell Suppression, added Damage, and Accuracy Rating are all present as possible Gloves modifiers. |
|
| Min. requirements: 70 Maximum Life +70% to Elemental Resistances Optional affixes: Chaos Resistance increased Projectile Damage increased Critical Strike Chance Accuracy Rating |
|
 (Belt) Rare Belt - Increased Elemental Damage with Attacks, Maximum Life, and Elemental Resistances are the mods to look for. (Belt) Rare Belt - Increased Elemental Damage with Attacks, Maximum Life, and Elemental Resistances are the mods to look for. |
|
| Min. requirements: 70 Maximum Life +80% to Elemental Resistances 35% increased Elemental Damage with Attack Skills (crafted) Optional affixes: increased Elemental Damage increased Damage increased maximum Life |
|
 (Amulet) Rare Amulet - You should be interested in increased Crit. Chance and Multiplier, Added Lighting or Cold Damage, reduced Mana Cost of Skills, increased Elemental Damage with Attacks, and of course, Life and Resistances. (Amulet) Rare Amulet - You should be interested in increased Crit. Chance and Multiplier, Added Lighting or Cold Damage, reduced Mana Cost of Skills, increased Elemental Damage with Attacks, and of course, Life and Resistances. |
|
| Min. requirements: +50 to maximum Life +60% to Elemental Resistances Optional affixes: Adds Cold or Lightning Damage to Attacks increased Elemental Damage with Attack Skills increased Global Critical Strike Chance Intelligence Non-Channelling Skills have -7 to Total Mana Cost (crafted) |
|
| Recommended Anointments: Discipline and Training Divine Judgement |
|
 (Ring) Rare Ring - If you don't have Asenath's Chant yet you should get a Ring with Curse on Hit, later to be replaced with one granting more useful stats such as increased Elemental damage, Life, or Resistances. (Ring) Rare Ring - If you don't have Asenath's Chant yet you should get a Ring with Curse on Hit, later to be replaced with one granting more useful stats such as increased Elemental damage, Life, or Resistances. |
|
| Min. requirements: 50 Maximum Life +60% to Elemental Resistances Optional affixes: increased Elemental Damage with Attacks Accuracy Rating increased Attack Speed Intelligence Non-channeling Skills have -7 to Total Mana Cost (crafted) Adds Cold or Lightning Damage to Attacks |
|
 (Ring) Mark of the Elder - A massive boost to your Cold Damage. You will need your other ring to be Shaper-influenced, but it's worth the trouble. It increases your Maximum Life, Maximum ES and spawns Tentacles for even more DPS. Use it if you're dealing Elemental Damage. (Ring) Mark of the Elder - A massive boost to your Cold Damage. You will need your other ring to be Shaper-influenced, but it's worth the trouble. It increases your Maximum Life, Maximum ES and spawns Tentacles for even more DPS. Use it if you're dealing Elemental Damage. |
|
| Adds (3-4) to (10-14) Physical Damage to Attacks 20% chance to Trigger Level 20 Tentacle Whip on Kill Adds (26-32) to (42-48) Cold Damage to Attacks (6-10)% increased maximum Energy Shield (6-10)% increased maximum Life (60-80)% increased Attack Damage if your other Ring is a Shaper Item Cannot be Stunned by Attacks if your other Ring is an Elder Item |
|
 (Ring) The Taming - This Ring is especially good if you're going for the Elemental Damage variant and are able to apply Shock, Freeze, and Ignite, meaning you're dealing damage of all three Elemental Types. (Ring) The Taming - This Ring is especially good if you're going for the Elemental Damage variant and are able to apply Shock, Freeze, and Ignite, meaning you're dealing damage of all three Elemental Types. |
|
| +(8-10)% to all Elemental Resistances 20% increased Damage with Hits and Ailments per Freeze, Shock or Ignite on Enemy +(20-30)% to all Elemental Resistances 30% increased Elemental Damage 10% chance to Freeze, Shock and Ignite 30% increased Elemental Damage with Attack Skills |
|
 (Ring) Call of the Brotherhood - It's another layer of damage conversion that boosts your damage, it also increases your Lightning Damage, grants you Intelligence, Mana Regeneration, and Resistances. (Ring) Call of the Brotherhood - It's another layer of damage conversion that boosts your damage, it also increases your Lightning Damage, grants you Intelligence, Mana Regeneration, and Resistances. |
|
| +(12-16)% to Cold and Lightning Resistances +(15-25) to Intelligence (15-25)% increased Lightning Damage (30-40)% increased Mana Regeneration Rate 40% of Lightning Damage Converted to Cold Damage Your spells have 100% chance to Shock against Frozen Enemies |
|
 (Jewel) Rare Jewels - Look for Affixes with Maximum Life, Elemental Resistances, Attributes, or Bow-specific affixes. (Jewel) Rare Jewels - Look for Affixes with Maximum Life, Elemental Resistances, Attributes, or Bow-specific affixes. |
|
|
Recommended affixes: |
|
 (Jewel) Lethal Pride - Put it next to Fervour Notable for the most optimized result - it grants you 2 or 4 Strength per small node and the Notable Passives can additionally get you more unique mods such as the chance to deal Double Damage. (Jewel) Lethal Pride - Put it next to Fervour Notable for the most optimized result - it grants you 2 or 4 Strength per small node and the Notable Passives can additionally get you more unique mods such as the chance to deal Double Damage. |
|
| Commanded leadership over (10000-18000) warriors under Akoya Passives in radius are Conquered by the Karui Historic |
|
 (Jewel) Lioneye's Fall - It's a very popular Jewels among Deadeyes, put it near Infused Notable to make it affect half of the Claw Cluster and half of the Dagger Cluster, you can even allocate the suitable Masteries. (Jewel) Lioneye's Fall - It's a very popular Jewels among Deadeyes, put it near Infused Notable to make it affect half of the Claw Cluster and half of the Dagger Cluster, you can even allocate the suitable Masteries. |
|
| Melee and Melee Weapon Type modifiers in Radius are Transformed to Bow Modifiers | |
 (Jewel) Watcher's Eye - One of the most expensive, but impactful Jewels. Precision mods can give you Increased Attack Damage, Attack Speed, or Crit. Strike Multiplier. Other Auras you're using are Grace and Determination. You can also use level one Vitality and have Life Gained with each Hit for rapid Life Regeneration. (Jewel) Watcher's Eye - One of the most expensive, but impactful Jewels. Precision mods can give you Increased Attack Damage, Attack Speed, or Crit. Strike Multiplier. Other Auras you're using are Grace and Determination. You can also use level one Vitality and have Life Gained with each Hit for rapid Life Regeneration. |
|
| (4-6)% increased maximum Energy Shield (4-6)% increased maximum Life (4-6)% increased maximum Mana <Two or Three random aura modifiers> |
|
 (Jewel) Large Cluster Jewels - These Jewels are completely optional, however, you can add them to the build for more damage, and Jewel Sockets. (Jewel) Large Cluster Jewels - These Jewels are completely optional, however, you can add them to the build for more damage, and Jewel Sockets. |
|
| Recommended affixes: 1 Added Passive Skill is Disorienting Display 1 Added Passive Skill is Snowstorm 1 Added Passive Skill is Stormrider 1 Added Passive Skill is Wicked Pall 1 Added Passive Skill is Sadist |
|
 (Jewel) Medium Cluster Jewels - Pressure Points and Quick Gateway are the best options to increase your DPS. (Jewel) Medium Cluster Jewels - Pressure Points and Quick Gateway are the best options to increase your DPS. |
|
| Recommended affixes: 1 Added Passive Skill is Pressure Points 1 Added Passive Skill is Quick Getaway |
|
| 40% increased Damage Creates Consecrated Ground on Use (20-40)% increased Duration Consecrated Ground created by this Flask has Tripled Radius Consecrated Ground created during Effect applies (7-10)% increased Damage taken to Enemies (100-150)% increased Critical Strike Chance against Enemies on Consecrated Ground during Flask effect |
|
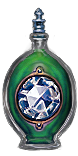
 (Flask) Atziri's Promise - Adds more Chaos Damage based on your Elemental Damage, it also increases your Chaos Resistances and Life Leech. (Flask) Atziri's Promise - Adds more Chaos Damage based on your Elemental Damage, it also increases your Chaos Resistances and Life Leech. |
|
| +35% to Chaos Resistance 2% of Chaos Damage Leeched as Life during Flask effect Gain (5-8)% of Physical Damage as Extra Chaos Damage during effect Gain (5-8)% of Elemental Damage as Extra Chaos Damage during effect |
|
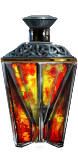 (Flask) Dying Sun - You fire two more Projectiles while taking less Fire Damage. (Flask) Dying Sun - You fire two more Projectiles while taking less Fire Damage. |
|
| +50% to Fire Resistance 20% less Fire Damage taken (125-150)% increased Charges per use (60-40)% less Duration (10-20)% increased Area of Effect during Flask Effect Skills fire 2 additional Projectiles during Flask Effect |
|
|
Other suggested Flasks:
|
|
   |
|
|
If you have any other build requests please leave that in the comments below. We are always open to suggestions and constructive feedback.
Pictures used in this article are the intellectual property of Grinding Gear Games.
