
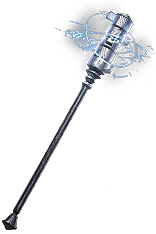
Volatile Dead Inquisitor
An unusual setup for a popular and very powerful Spell that manually uses Volatile Dead to spawn hordes of homing explosive ballsVolatile Dead
Inquisitor Build
Created for Patch 3.22
The Best Crafty Guides by Odealo
| Guide notes |
| August 30, 2023 -Build created |
| Build Overview | |||
| Tags: [CASTER] [ELEMENTAL] [LIFE] [CRIT] | |||
|
Budget: Defenses: |
|
Boss DPS: AoE: |
|
Volatile Dead is one of the combo Spells that requires lots of Corpses to be used, as it consumes them to create fiery orbs that seek out your Enemies in order to explode, dealing heavy AoE Damage. Most players tend to automatize this process, which heavily lowers the Damage output for the sake of convenience. In this setup, we decided to use the Unleash Support instead and back it up with decent amounts of Cast Speed. The Desecrate can summon up to 10 Corpses, while the Volatile Dead consumes only 3 at once, so having additional repeats from Unleash allows you to consume all summoned Corpses. Alternating between those two Skills gives you enough time to regain most Unleash Seals each time. By having a little bit extra work to do, we are able to scale the Damage and survivability to a much greater extent compared to automated Builds with a similar budget. Remember that orbs seek out Enemies, so you don't have to summon extra Corpses during Mapping that often anyway.
The Inquisitor Ascendency is just a perfect pick for such a Build. Your Critical Strikes will ignore the Monster's Elemental Resistances, and you will have an easier time reaching the 100% Crit Chance. It also grants you tons of Life and Energy Shield Regeneration, which can be used to sustain the Righteous Fire Buff for a massive Damage boost, as the Build is decently tanky. You will have plenty of Attack and Spell Block, Life and Energy Shield Leech, Petrified Blood, and easy access to sources of Physical Damage taken as Elemental on your Gear.
You can also check our other Path of Exile builds right over here Odealo's Crafty Guides - Full List
1. Gameplay
You will constantly weave Desecrate and Volatile Dead. You don't have to aim as the orbs will automatically target nearby Enemies, which makes Clearing much smoother, however, creating Corpses directly on top of your Enemy adds a bit of Damage from the Corpse explosion, and reduces the flight time of your orbs. Inquisitor ignores Resistances so we use Assassin's Mark instead of Resistance Curse. To improve your mobility use Flame Dash, and if you are in danger use Molten Shell and Frost Shield.
|
|
|
|

2. Build's PROS & CONS
| PROS |
|
| CONS |
|
3. Leveling tips
It is a very easy and enjoyable Build to level up with as a generic Fire Spell Caster. Using Spell Combos like this one is much less pleasant without access to Unleash Support or high amounts of Cast Speed, so we recommend using Spells such as Rolling Magma instead. You can start scaling Critical Strikes fairly early, but you should avoid Block and Staff-only Passives at first.
Suggested leveling Gem setups:
| Rolling Magma setup | |
 |
Rolling Magma - fires a bouncing Projectile that deals Fire Damage. With proper positioning, it can hit the same target twice. |
 |
Arcane Surge Support - spending Mana grants you a Buff that increases your Spell Damage, Cast Speed, and Mana Regeneration. |
 |
Faster Casting Support - speeds up your Cast time. You can replace it with Unleash or Spell Echo at level 38. |
 |
Elemental Focus Support - disables inflicting Elemental Ailments but grants you a high amount of Spell Damage instead. |
 |
Increase Critical Strikes Support - greatly increases your Critical Strike Chance with your Spells. |
 |
Increase Critical Damage Support - adds a lot of Multiplier for your Critical Strikes. |
| Aura setup | |
 |
Herald of Ash - increases your Spell Damage with Fire Spells. |
 |
Vitality - grants you tons of Life Regeneration. It is especially useful to deal with Traps in Lord's Labirynth. |
 |
Clarity - provides you with Mana Regeneration. Keep it at a low level so it doesn't reserve too much Mana. |
| Utility setup | |
 |
Flame Dash - a simple Blink Spell that teleports you in a short distance. |
 |
Elemental Weakness - lowers Elemental Resistances of affected Foes. Useful at lower levels. |
 |
Steelskin - grants you an absorbing Shield and disables Bleeding effects. |
Bandits:
Kill all Bandits to get additional 2 Passive Tree Skill Points
Leveling Skill Trees:
33 Points Passive Tree
We recommend this order:
1) Light of Divinity 2) Devotion 3) Divine Judgement (Refund at end-game) 4) Arcane Capacitor 5) Purity of Flesh 6) Arcane Potency
67 Points Passive Tree
Allocate:
1) Disciple of the Forbidden 2) Instability 3) Overcharge 4) Cruel Preparations 5) Doom Cast 6) Written in Blood 7) Sovereignty 8) Influence
Recommended leveling items:
 Le Heup of All - improves your Damage and grants you useful Attributes and Resistances. Le Heup of All - improves your Damage and grants you useful Attributes and Resistances. |
|
| Adds 1 to 4 Physical Damage to Attacks +(10-30) to all Attributes (10-30)% increased Damage (10-30)% increased Rarity of Items found +(10-30)% to all Elemental Resistances |
|
 Replica Tasalio's Sign - adds insane amounts of Cold Damage. If you use this Ring replace the Elemental Focus for the Hypothermia Support in your main setup. Replica Tasalio's Sign - adds insane amounts of Cold Damage. If you use this Ring replace the Elemental Focus for the Hypothermia Support in your main setup. |
|
| Adds (15-20) to (25-35) Cold Damage to Spells and Attacks +(200-300) to Evasion Rating Your Cold Damage cannot Freeze Immune to Chill Adds 60 to 80 Cold Damage against Chilled Enemies |
|
 Axiom Perpetuum - wielding two of those Sceptres will make scaling Critical Strikes much easier. Axiom Perpetuum - wielding two of those Sceptres will make scaling Critical Strikes much easier. |
|
| 12% increased Elemental Damage Adds (2-3) to (5-6) Fire Damage to Spells Adds (2-3) to (5-6) Cold Damage to Spells Adds 1 to (10-12) Lightning Damage to Spells (4-6)% increased Cast Speed (100-140)% increased Critical Strike Chance for Spells |
|
 Tabula Rasa - greatly improves your Damage during the campaign thanks to the six-link setup. Tabula Rasa - greatly improves your Damage during the campaign thanks to the six-link setup. |
|
| Item has no level requirement and Energy Shield (Hidden) Item has 6 White Sockets and is fully linked (Hidden) |
|
 Goldrim - a very famous leveling Helmet, it grants you tons of Resistances which is your main concern during the campaign. Goldrim - a very famous leveling Helmet, it grants you tons of Resistances which is your main concern during the campaign. |
|
| +(30-50) to Evasion Rating 10% increased Rarity of Items found +(30-40)% to all Elemental Resistances Reflects 4 Physical Damage to Melee Attackers Level Requirement reduced by 100 (Hidden) |
|
 Perandus Blazon - it grants you plenty of Attributes and makes all your Flasks last longer. Perandus Blazon - it grants you plenty of Attributes and makes all your Flasks last longer. |
|
| (15-25)% increased Stun and Block Recovery +(20-30) to all Attributes (6-8)% increased Quantity of Items found +20% to Fire Resistance 20% increased Flask Effect Duration -2 Physical Damage taken from Attack Hits |
|
 Astramentis - It can be used if you lack Attributes. It will also raise your Critical Strike Chance if you allocated Righteous Providence already. Astramentis - It can be used if you lack Attributes. It will also raise your Critical Strike Chance if you allocated Righteous Providence already. |
|
| +(10-16) to all Attributes +(80-100) to all Attributes -4 Physical Damage taken from Attack Hits |
|
 Seven-League Step - the best leveling Item in the game, the faster you move, the faster you will finish the Campaign. Seven-League Step - the best leveling Item in the game, the faster you move, the faster you will finish the Campaign. |
|
| 50% increased Movement Speed Level Requirement reduced by 100 (Hidden) |
|
4. Final Skill Tree, Ascendancy Points, and Pantheon
Final Skill Tree:
89 Points Final Passive Tree (doesn't include Cluster or Unique Jewels)
120 Points Path of Building (PoB) link
Ascendancy points:
Preferably in this order:
- Righteous Providence
- Inevitable Judgement
- Sanctuary
- Pious Patch
Pantheon:
Major God: Soul of the Brine King: You cannot be Stunned if you've been Stunned or Blocked a Stunning Hit in the past 2 seconds; 30% increased Stun and Block Recovery
Minor God: Soul of Ralakesh: 25% reduced Physical Damage over Time taken while moving; Moving while Bleeding doesn't cause you to take extra Damage
5. Final Gems links
| [DPS] Volatile Dead setup | |
 |
Volatile Dead - consumes Corpses to summon fiery orbs that seek out enemies to explode into. Use the Divergent Quality to increase the Movement Speed of the orbs a bit. |
 |
Unleash Support - stores Seals over time to reoccur linked Spell when you use it. You can get up to 4 additional Casts if you use the Awakened Version. |
 |
Inspiration Support - Increases Elemental Damage and Critical Strike Chance. It also lowers the Mana Cost. |
 |
Concentrated Effect Support - lowers the Area of Effect, but greatly increases Area Damage. The loss of AoE is barely noticeable here. |
|
Elemental Focus Support - greatly improves the Spell Damage at the cost of disabling Elemental Ailments. Ignite wouldn't be any useful in this Build anyway. |
|
Increased Critical Damage Support - grants lots of Critical Strike Multiplier. You can swap it with Increased Critical Strikes Support if your Crit Chance is still lacking. |
| [UTILITY] Aura setup | |
 |
Zealotry - This Aura grants you plenty of Spell Damage and Critical Strike Chance for Spells. It also has a small chance to create Consecrated Ground when you land Critical Strike. |
 |
Petrified Blood - splits incoming Damage into Damage over Time effect, which makes it easier to survive. It also grants you Low Life status which you can use to improve Damage via Pain Attunement Keystone. |
 |
Anger - this Aura adds a high amount of flat Fire Damage for your Spells. Watcher's Eye modifiers for this Aura are particularly strong. |
|
Herald of Ash - grants a lot of Fire Spell Damage and causes small explosions when you kill the Enemy. |
 |
Enlighten Support - This Support Gem lowers the amount of Mana Reserved by linked Auras. |
| [UTILITY] Arrogance setup | |
|
Vitality - provides you with a high amount of Life Regeneration. It Reserves a flat amount of Mana depending on its level. |
|
Clarity - very similar to the previous Aura, but it grants Mana Regeneration instead. |
 |
Precision - it slightly raises your Critical Strike Chance and allows you to use useful Watcher's Eye modifiers. |
 |
Arrogance Support - causes linked Auras to Reserve your Life instead of Mana, and increases their Effect. With Petrified Blood, you can Reserve up to 50% of your Life without any loss. |
| [UTILITY] Desecrate setup | |
 |
Desecrate - creates Corpses which you can use to summon Volatile Orbs. |
 |
Spell Cascade Support - repeats the Cast of the AoE spell twice with a slight delay. |
|
Faster Casting Support - improves your Cast Speed. |
| [UTILITY] Other Utility setups | |
 |
Righteous Fire - applies a Burning effect to you and greatly increases your Spell Damage. Inquisitor Ascendency makes it much easier to sustain. |
 |
Assassin's Mark - your main Curse Spell to use. It increases your Critical Strike Chances and Damage against a single Enemy. |
 |
Flame Dash - a very potent Moblity Spell, it teleports you in a short distance and can store 3 uses. |
 |
Molten Shell - a Guard Spell that grants you a bit of Armour Rating and forms a protective barrier during its Duration. |
 |
Frost Shield - creates an icy bubble that drains a small amount of your Energy Shield to power up. Standing inside will reduce the Damage you take from the outside. |
|
|
6. Gear Setup
There are a few Unique Items worth having, but the majority of your Gear should consist of Rare Items. There you should look for modifiers such as Spell Damage, additional Gem Levels, Critical Strike Damage, and Cast Speed. For defense, you will obviously want to stack maximum Life and cap your Resistances, but you should also look for Life Regeneration and sources of Physical Damage taken as Elemental. Additional utility in the form of Onslaught on Kill or Frenzy Charge generation is nice to have, but not mandatory. The Passive Tree provides almost no Dexterity, so you will have to get enough of it on your Items.
|
Stat priorities on items:
|
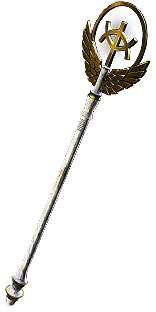 (Weapon) Martyr of Innocence - This inconspicuous Staff grants great amounts of Damage, improves your Block Chance and is very cheap. Unfortunately, the Burning effect from the Righteous Fire is not the same as being Ignited for the sake of the Freeze Immunity modifier. (Weapon) Martyr of Innocence - This inconspicuous Staff grants great amounts of Damage, improves your Block Chance and is very cheap. Unfortunately, the Burning effect from the Righteous Fire is not the same as being Ignited for the sake of the Freeze Immunity modifier. |
|
| Grants Level 15 Vengeance Skill +(12-16)% Chance to Block Attack Damage while wielding a Staff 100% increased Fire Damage Adds (315-360) to (450-540) Fire Damage Battlemage Damage Penetrates 15% of Fire Resistance if you have Blocked Recently Immune to Freeze and Chill while Ignited |
|
|
|
|
| Min. requirements: +60 to maximum Life Mana Reservation Efficiency Optional affixes: Elemental Resistances % increased Life Regeneration rate Attributes % of Physical Damage from Hits taken as Fire Damage |
|
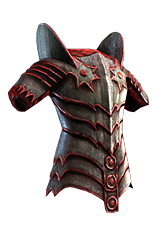 (Body Armour) Rare Armour - Here you can have tons of options with various Influence modifiers, but we recommend simply getting Frenzy Charge generation, improved Critical Strike Chance for Spells, Physical taken as Elemental, and some Resistances. (Body Armour) Rare Armour - Here you can have tons of options with various Influence modifiers, but we recommend simply getting Frenzy Charge generation, improved Critical Strike Chance for Spells, Physical taken as Elemental, and some Resistances. |
|
| Optional affixes: Resistances % of Physical Damage from Hits taken as Elemental Damage Spells have +#% to Critical Strike Chance increased Mana Reservation Efficiency You can apply an additional Curse chance to gain a Frenzy Charge on Hit You gain Onslaught for 6 seconds when Hit |
|
 (Boots) Rare Boots - those can be kept rather simple - look for high maximum Life and Movement Speed and fill it up with Resistances or Attributes. You can also get Onslaught on Kill to improve your Clear Speed. (Boots) Rare Boots - those can be kept rather simple - look for high maximum Life and Movement Speed and fill it up with Resistances or Attributes. You can also get Onslaught on Kill to improve your Clear Speed. |
|
| Min. requirements: +70 to maximum Life 30% increased Movement Speed 5% increased Action Speed (Searing Exarch Implicit) Optional affixes: Chance to gain Onslaught on Kill Chaos Resistance Attributes % chance to Avoid Elemental Ailments |
|
 (Gloves) Rare Gloves - on your Gloves you should aim for maximum Life and Resistances, but you can get various Damage bonuses too. Eldritch Implicits are very valuable too, and quite easy to roll on any pair. (Gloves) Rare Gloves - on your Gloves you should aim for maximum Life and Resistances, but you can get various Damage bonuses too. Eldritch Implicits are very valuable too, and quite easy to roll on any pair. |
|
|
Min. requirements: |
|
 (Belt) Rare Belt - your Belt should always be on a Stygian Vise base so you can fit in an additional Abyss Jewel. For its Rare modifiers, look for maximum Life, Resistances, Life Regeneration, and various Flask modifiers. (Belt) Rare Belt - your Belt should always be on a Stygian Vise base so you can fit in an additional Abyss Jewel. For its Rare modifiers, look for maximum Life, Resistances, Life Regeneration, and various Flask modifiers. |
|
| Min. requirements: +70 to maximum Life +80% to Elemental Resistance Optional affixes: Attributes % increased Life Life Regeneration Flask and Flask Charges modifiers |
|
 (Amulet) Replica Dragonfang's Flight - it is a great addition to the Build, as it provides an amazing amount of Gem Levels and Reservation for your Aura Skills. For unpopular Skills such as Volatile Dead, it is rather cheap to obtain. (Amulet) Replica Dragonfang's Flight - it is a great addition to the Build, as it provides an amazing amount of Gem Levels and Reservation for your Aura Skills. For unpopular Skills such as Volatile Dead, it is rather cheap to obtain. |
|
| +3 to Level of Volatile Dead Gem +(10-15)% to all Elemental Resistances (10-15)% increased Reservation Efficiency of Skills Items and Gems have (15-10)% reduced Attribute Requirements |
|
| Recommended Anoint: Infused |
|
 (Ring) Circle of Anguish - this Ring provides you with insane amounts of Damage as long as you are affected by Herald of Ash, which you should be anyway. Synthesis Implicits can be quite useful, but it will be expensive to get such ones. (Ring) Circle of Anguish - this Ring provides you with insane amounts of Damage as long as you are affected by Herald of Ash, which you should be anyway. Synthesis Implicits can be quite useful, but it will be expensive to get such ones. |
|
| <One to three random Synthesis implicit modifiers> +(20-30) to Strength Adds (20-25) to (26-35) Fire Damage +(20-30)% to Fire Resistance Herald of Ash has (40-60)% increased Buff Effect (40-60)% increased Fire Damage while affected by Herald of Ash |
|
 (Ring) Rare Ring - you can also use a Rare Ring with bonuses to maximum Life, Resistances, Cast Speed, or Critical Strike Multiplier. It can also increase your Fire Damage a bit or reduce Mana Costs. (Ring) Rare Ring - you can also use a Rare Ring with bonuses to maximum Life, Resistances, Cast Speed, or Critical Strike Multiplier. It can also increase your Fire Damage a bit or reduce Mana Costs. |
|
| Min. requirements: +60 to maximum Life +50% to Elemental Resistance Optional affixes: Attributes increased Fire/Elemental damage Critical Strike Multiplier % increased Cast Speed Non-Channelling Skills have -(7-6) to Total Mana Cost |
|
 (Jewel) Rare Jewels - on your Jewels, you can fix your Attributes and Resistances, but you should focus mainly on getting maximum Life and as much Critical Strike Multiplier as you can find. (Jewel) Rare Jewels - on your Jewels, you can fix your Attributes and Resistances, but you should focus mainly on getting maximum Life and as much Critical Strike Multiplier as you can find. |
|
| Min. requirements: increased maximum Life Recommended affixes: Resistances % to Critical Strike Multiplier with Fire/Elemental Skills % to Global Critical Strike Multiplier % to Critical Strike Multiplier for Spell Damage |
|
 (Jewel) Rare Abyss Jewel - on the Abyss Jewel socketed in your Belt you should get maximum Life and Critical Strike Multiplier. Then try to look for flat Fire Damage for Spells, some Regeneration, or a chance to gain Phasing on Kill. (Jewel) Rare Abyss Jewel - on the Abyss Jewel socketed in your Belt you should get maximum Life and Critical Strike Multiplier. Then try to look for flat Fire Damage for Spells, some Regeneration, or a chance to gain Phasing on Kill. |
|
| Min. requirements: +30 to maximum Life Recommended affixes: % to Global Critical Strike Multiplier Resistances Attributes Adds # to # Fire Damage to Spells Regenerate # Mana per second |
|
 (Jewel) Large Cluster Jewel - the Seal Mender Notable is the only way to speed up Seal frequency generation. It should also come with 2 other useful Notables, which there are plenty of. (Jewel) Large Cluster Jewel - the Seal Mender Notable is the only way to speed up Seal frequency generation. It should also come with 2 other useful Notables, which there are plenty of. |
|
| Recommended affixes: 1 Added Passive Skill is Conjured Wall 1 Added Passive Skill is Essence Rush 1 Added Passive Skill is Seal Mender 1 Added Passive Skill is Arcane Heroism 1 Added Passive Skill is Practiced Caster 1 Added Passive Skill is Sap Psyche |
|
  (Jewel) Forbidden Flame&Flesh - as a Templar, you can borrow a lot of powerful Ascendency Notables. The most significant one is the Arcane Blessing for additional Spell Damage, but the special Searing Purity is also good. (Jewel) Forbidden Flame&Flesh - as a Templar, you can borrow a lot of powerful Ascendency Notables. The most significant one is the Arcane Blessing for additional Spell Damage, but the special Searing Purity is also good. |
|
| Allocates <Ascendency Notable> if you have the matching modifiers on Forbidden Flesh/Flame Recommended Notables: Arcane Blessing Searing Purity |
|
 (Jewel) Watcher's Eye - there are plenty of Aura modifiers you can use. For offense, we recommend getting something related to Anger and Zealotry. The Vitality modifiers usually offer immense defensive power. (Jewel) Watcher's Eye - there are plenty of Aura modifiers you can use. For offense, we recommend getting something related to Anger and Zealotry. The Vitality modifiers usually offer immense defensive power. |
|
| (4-6)% increased maximum Energy Shield (4-6)% increased maximum Life (4-6)% increased maximum Mana <Two or Three random aura modifiers> Recommended Aura mods: +(30-50)% to Critical Strike Multiplier while affected by Anger +(20-30)% to Critical Strike Multiplier while affected by Precision (10-15)% increased Life Recovery Rate while affected by Vitality Consecrated Ground you create while affected by Zealotry causes enemies to take (8-10)% increased Damage |
|
 (Jewel) Militant Faith - socketing this Jewel near Keystone will transfer it into the Inner Conviction Keystone, which makes your Power Charges much stronger. You can still have Frenzy Charges if you use sources of Minimum Frenzy Charges. (Jewel) Militant Faith - socketing this Jewel near Keystone will transfer it into the Inner Conviction Keystone, which makes your Power Charges much stronger. You can still have Frenzy Charges if you use sources of Minimum Frenzy Charges. |
|
| Carved to glorify (2000-10000) new faithful converted by High Templar Dominus Passives in radius are Conquered by the Templars Historic |
|
 (Flask) Bottled Faith - a very powerful Flask for most Builds, especially the ones that use Critical Strikes. It creates a very large Consecrated Ground upon use and improves your Damage against targets standing inside of it. (Flask) Bottled Faith - a very powerful Flask for most Builds, especially the ones that use Critical Strikes. It creates a very large Consecrated Ground upon use and improves your Damage against targets standing inside of it. |
|
| Creates Consecrated Ground on Use (30-15)% reduced Duration Consecrated Ground created by this Flask has Tripled Radius Consecrated Ground created during Effect applies (7-10)% increased Damage taken to Enemies (100-150)% increased Critical Strike Chance against Enemies on Consecrated Ground during Effect |
|
 (Flask) Taste of Hate - your Staff provides a bit of Physical Damage for your Spells, so you can get a bit of Extra Cold Damage from this Flask, however, it is used mainly for its powerful defensive modifier to gain more protection against Physical Damage. (Flask) Taste of Hate - your Staff provides a bit of Physical Damage for your Spells, so you can get a bit of Extra Cold Damage from this Flask, however, it is used mainly for its powerful defensive modifier to gain more protection against Physical Damage. |
|
| (10-15)% of Physical Damage from Hits taken as Cold Damage during Effect Gain (10-15)% of Physical Damage as Extra Cold Damage during effect 30% chance to Avoid being Chilled during Effect 30% chance to Avoid being Frozen during Effect |
|
|
Suggested Flasks:
|
|
   |
 (Helmet) Rare Helmet - the Helmet is a very important piece for this Build. Here you can get lots of Mana Reservation Efficiency and Physical Damage mitigation. You can easily craft it using Essence of Loathing on a Fractured base.
 |
|
If you have any other build requests please leave that in the comments below. We are always open to suggestions and constructive feedback.
Pictures used in this article are the intellectual property of Grinding Gear Games.
