
Viper Strike Transcendence Pathfinder Build
Very tanky Pathfinder Build that utilizes very unique defensive mechanics and offers high sustainable DPS Viper Strike
Pathfinder build
Updated for Patch 3.20
The Best Crafty Guides by Odealo
| Guide notes | |||
| March 07, 2023 -Build created |
|||
| Build overview | |||
| Tags: [MELEE] [POISON] [LIFE] | |||
|
Budget: Defenses: |
|
Boss DPS: AoE: |
|
Viper Strike is one of the most powerful (but rarely used) Poison Attacks. It's a Melee Strike Skill which may discourage a lot of players, but its damage, and some unique properties make up for it in raw DPS output. Its Poison Duration is not affected by the default value as is the case with every other type of Poison, but it rather has a separate base duration of four seconds that is affected by Skill Effect Duration modifiers such as Exceptional Performance. Another quirk of Viper Strike is the usage of both weapons at once - there are around five skills that merge the combined damage of both weapons if dual wielding (instead of using them alternately), so we will use it here too to cause exceptionally long-lasting and strong Poisons with just a single strike. Combine it with Temporal Chains cast as Aura so that a single Poison instance can last around 20 or maybe close to 30 seconds dealing millions of DPS each. Attacking 6 or 7 times a second with such a setup will melt any boss, but a hit-and-run tactic may be useful too, especially for Melee builds as these usually struggle the most during fights with, for example, highly mobile Maven or Sirus.
The defensive capabilities of this build can be expanded on too, as it requires no Uniques to function. It's possible to implement some well-performing combinations of Unique items to make up for its Melee nature. You can of course use exclusively rare items with solid stats like Maximum Life, Evasion, and Spell Suppression - that will work. To make full use of a Melee Poison build you need to be tanky to stand your ground and keep attacking. In this case, we've used Loreweave combined with Transcendence Keystone to then gain some additional Physical Damage mitigation from Endurance Charges and Chaos Golem. It's possible to invest in other types of Physical Damage mitigation sources or redirect it to be taken as Elemental or even Chaos Damage. It's easy to cap. The build has very high Evasion, Ghost Dance, some Energy Shield, and capped Spell Suppression Chance. Another, more damage-oriented option is to select The Covenant for a chest piece for a very powerful 7th Support Gem.
You can also check our other Path of Exile builds at Odealo's Crafty Guides - Full List
1. Gameplay
This is a typical Melee build that thanks to its tankiness allow you to jump in the middle of monster packs and kill them with a few Attacks due to the very high Poison DoT. This is a very durable build because of the aforementioned mechanics utilized, which will allow you to face-tank the majority of Bosses in the game. Thanks to Viper Strike's Poison duration, it's also one of the best Skills in terms of stacking Poison on Bosses. Taking down Sirius, Cortex, and Uber Elder is possible without excessive investments in gear. You are also going to cast Ancestral Protectors for high Attack Speed bonuses and extra Wither charges they can generate with Withering Touch Support. By using Multiple Totems Support you will be able to use up to three Totems to stack Withered quicker. Other than that we recommend using the Withering Step on your left mouse button for the Elusive buff and applying extra Withered stacks to enemies.
|
|
|
|
2. Build's PROS & CONS
| PROS |
|
| CONS |
|
3. Leveling tips
Leveling up with Poison/Ranger is easy. You have access to most of the Poison Multiplier and Claw Damage nodes right at the start. With Chaos Attacks and their high, added Chaos Damage, you can easily level up without having to constantly upgrade your Weapons. However, it's not the best idea to level up using Viper Strike - simply because it has limited range and without extra Gems/Items it will only hit a limited number of targets. It's best to level up with Cobra Lash - it's a Projectile/Poison Attack that offers the extra Chain which will help you progress through the campaign at a much faster rate. You can socket your Viper Strike on your Weapon Swap to level up the Gem while you play, and respect later on when you have most of the gear ready. Below you will find the recommended Skill setups for lower levels, as well as, several extremely useful Uniques.
Suggested leveling Gem setups:
| Cobra Lash setup | |
 |
Cobra Lash - An amazing leveling Chaos/Poison Skill that offers extra Chain, increasing your clear speed by a lot. |
 |
Lesser Multiple Projectiles Support - Increases the number of your Cobra Lash's projectiles. |
 |
Chance to Poison Support - Adds extra Chaos Damage to Attacks and increases your Chance to Poison on Hit. |
 |
Void Manipulation Support - Increases Chaos Damage dealt with by supported skills. |
 |
Vicious Projectiles Support - Increases Chaos and Physical Damage, but lowers Attack Speed. |
| Utility Gems | |
 |
Herald of Agony - Herald Skill which increases your Chance to Poison and Poison Damage. |
 |
Malevolence - The best Aura for this build which greatly increases your Damage over Time. |
 |
Whirling Blades - The recommended Movement Skill for this build that boosts your mobility and doesn't share cooldowns with Withered Step. |
 |
Withering Step - Grants you the Elusive buff and applies Withered to enemies, increasing Chaos Damage they take. |
 |
Despair - The best Curse for this build. Later on, it's applied by Witchfire Brew, but during the campaign, you may want to cast the Curse manually against Bosses for extra damage. |
Bandits:
We recommend killing all the Bandits for two additional Passive Points
Leveling Skill Trees:
35 Points Skill Tree
Start with some Maximum Life, Poison Damage or Chance to Poison, and Chas Damage over Time
70 Points Skill Tree
Allocate Charisma, some Claw Nodes, Attack Speed, Accuracy, more Chaos Damage, and more Maximum Life
Recommended leveling items:
 Le Heup of All - One of the best leveling Rings for this build. At least one of these is recommended so that you don't have to worry about Attributes and Resistances. Le Heup of All - One of the best leveling Rings for this build. At least one of these is recommended so that you don't have to worry about Attributes and Resistances. |
|
| Adds 1 to 4 Physical Damage to Attacks +(10-30) to all Attributes (10-30)% increased Damage (10-30)% increased Rarity of Items found +(10-30)% to all Elemental Resistances |
|
 Mortem Morsu - A very powerful Unique Claw that is available early on in the campaign. It has high base DPS and. Mortem Morsu - A very powerful Unique Claw that is available early on in the campaign. It has high base DPS and. |
|
| +20 Life gained for each Enemy hit by Attacks (75-100)% increased Physical Damage 20% increased Attack Speed 25% increased Critical Strike Chance +40% to Global Critical Strike Multiplier (10-20)% of Physical Damage Converted to Chaos Damage 25% reduced Enemy Stun Threshold with this Weapon 60% chance to Poison on Hit |
|
 The Wasp Nest - Excellent Claw that may serve you up to level 80 or 90. It has all the necessary stats in substantial quantities. The Wasp Nest - Excellent Claw that may serve you up to level 80 or 90. It has all the necessary stats in substantial quantities. |
|
| Grants 40 Life per Enemy Hit (150-170)% increased Physical Damage (20-25)% increased Attack Speed (20-25)% increased Critical Strike Chance +(330-350) to Accuracy Rating 20% chance to Poison on Hit Attacks with this Weapon deal 80 to 120 added Chaos Damage against Enemies affected by at least 5 Poisons |
|
|
|
|
| +(30-50) to Evasion Rating 10% increased Rarity of Items found +(30-40)% to all Elemental Resistances Reflects 4 Physical Damage to Melee Attackers Level Requirement reduced by 100 (Hidden) |
|
|
|
|
| +(20-30) to Dexterity +(20-30) to Strength +100 to Accuracy Rating 30% increased Projectile Speed 10% increased Movement Speed 30% increased Projectile Damage |
|
 Mark of Submission - You could put your Despair Curse Here for much more Damage. Mark of Submission - You could put your Despair Curse Here for much more Damage. |
|
| Has 1 Socket Curse Enemies with Socketed Hex Curse Gem on Hit |
|
 Dendrobate - With 300 Dexterity ad 150 Intelligence, it's quite a good Armour even as a five-link. Dendrobate - With 300 Dexterity ad 150 Intelligence, it's quite a good Armour even as a five-link. |
|
| Socketed Gems are Supported by Level 10 Chance to Poison (130-150)% increased Evasion and Energy Shield +40 to maximum Energy Shield +(15-25)% to all Elemental Resistances (75-100)% increased Damage with Poison if you have at least 300 Dexterity (15-25)% increased Poison Duration if you have at least 150 Intelligence |
|
4. Final Skill Tree, Ascendancy Points, and Pantheon
Final Skill Tree:
107 Points Final Skill Tree (Doesn't include Cluster or Unique Jewels)
122 Points Path of Building (PoB) link
Ascendancy points:
Preferably in that order:
- Nature's Reprisal
- Master Toxicist
- Nature's Boon
- Nature's Adrenaline
Pantheon:
Major God: Soul of Solaris: 6% additional Physical Damage Reduction while there is only one nearby Enemy; 20% chance to take 50% less Area Damage from Hits
Minor God: Soul of Tukohama: While stationary, gain 3% additional Physical Damage Reduction every second, up to a maximum of 9%
5. Final Gems links
| [DPS] Viper Strike setup | |
 |
Viper Strike - The primary Attack in this build. It's one of the best choices if you are looking to take down end-game Bosses because of its Poison duration and solid base DPS. |
 |
Added Chaos Damage Support - Adds flat Chaos Damage to linked Skills. Just like the following Gems, it has an Awakened variant.  Melee Physical Damage Support can be used here instead if you're using The Covenant. Melee Physical Damage Support can be used here instead if you're using The Covenant. |
 |
Multistrike Support - Causes linked Attacks to be repeated in quick succession two additional times with increased damage. The damage penalty does not apply to Poison. It has an Awakened variant. |
 |
Deadly Ailments Support - Increases the Damage from Ailments inflicted by Supported Skills. It has an Awakened variant. |
 |
Unbound Ailments Support - Increases the Damage from Ailments inflicted by Supported Skills. It has an Awakened variant. |
 |
Void Manipulation Support - More Chaos Damage and inability to deal Elemental Damage, which you're not supposed to do anyway. It has an Awakened variant too. |
| [UTILITY] Ancestor Totems setup | |
 |
Ancestral Protector - Summons up to three Ancestor Totems that boost your Attack Speed and apply Withered to enemies. Use Phantasmal Gem. |
 |
Multiple Totems Support - Allows you to summon more Totems from linked Spells, and by using several Totems they will apply their debuff quicker to enemies. |
 |
Withering Touch Support - Will make your Ancestral Protector Totems apply Wither on Hits, increasing Chaos Damage taken by affected enemies. |
 |
Lifetap Support - You can link the Totems to Lifetap so that they don't cost you any Mana. If you have enough Mana, replace it with  Faster Attacks Support. Faster Attacks Support. |
| [MOBILITY] Whirling Blades | |
 |
Whirling Blades - The recommended Movement Skill for this build. It lets you progress faster through areas. |
| [UTILITY] Defiance Banner | |
 |
Defiance Banner - Increases Armour, Evasion, and reduces the Critical Strike Chance of nearby enemies. |
| [UTILITY] Auras | |
 |
Malevolence - The best DPS Aura for DoT builds which greatly increases your damage output and opens up various options on a Watcher's Eye Jewel. |
 |
Grace - Use it for more and increased Evasion Rating. |
 |
Herald of Agony - increases your Chance to Poison enemies, and the damage you deal with it. |
 |
Enlighten Support - Increases Mana Reservation Efficiency for linked Skills. It may not be needed if you're willing to invest in Reservation Efficiency on your gear. |
| [UTILITY] CwDT setup | |
 |
Cast when Damage Taken - It will automatically trigger linked Skills after taking a certain amount of damage. |
 |
Steelskin - A Guard Spell that mitigates incoming Damage and stops Bleeding. |
 |
Summon Chaos Golem - We've used Chaos Golem for its 5% additional Physical Damage Reduction - it's great with Loreweave. |
 |
Lifetap Support |
| [UTILITY] Temporal Chains setup | |
 |
Temporal Chains - One of two Curses used in this build, the other being Despair from Witchfire Brew, it lowers Action Speed and makes Poison expire slower. If you're using Impresence (Chaos, full power) with Temporal Chains and Despair, use both Curse Gems here to have them as Auras. |
 |
Blasphemy Support - You should be able to cast Temporal Chains off-charge with Solstice Vigil as a Blasphemous Aura. |
 |
Arrogance Support - Increases Aura Effect, that is Temporal Chains here. |
| [UTILITY] Withering Step/Blood Rage | |
 |
Withering Step - A mandatory Movement Spell for this build that grants you the Elusive buff and applies extra Withered stacks to nearby enemies. |
 |
Blood Rage - Increases your Attack Speed and makes you generate Frenzy Charges on kills, increasing your damage even further. |
 |
Enhance Support - Increase the Blood Rage's bonus Attack Speed and the effectiveness of the Elusive buff granted by Withering Step. |
|
|
5. Gear Setup
Below you will find the recommended equipment for this build. While technically it's possible to play a standard Viper Strike Pathfinder without any Uniques used, our recommended setup utilizes several specific defensive mechanics, and the following section will focus on it entirely. You can replace any of the Items with random Life/Resistances/Chaos Attack Damage affixes, but if so, it's highly advised not to use Passives like Transcendence or Iron Reflexes which may have a completely opposite result.
Using this opportunity, we would like to invite you to check our POE Currency market where you can buy cheap Orbs including Exalted Orbs, Chaos Orbs, and more, from other players using real money.
|
Stat priorities on items:
|
 (Helmet) Rare Helmet - The best possible option for this build. You can get high defensive stats here, extra Accuracy, and possibly an affix that reduces the Chaos Resistance of nearby enemies. (Helmet) Rare Helmet - The best possible option for this build. You can get high defensive stats here, extra Accuracy, and possibly an affix that reduces the Chaos Resistance of nearby enemies. |
|
| Min. requirements: 80 Maximum Life 300 Accuracy Rating 60% Total Elemental Resistances Optional affixes: Nearby enemies have -#% to Chaos Resistance Spell Suppression Chance Mana Reservation Efficiency #% of Physical Damage from Hits taken as Fire/Cold/Lightning Damage |
|
| Helmet enchantment: 30% increased Viper Strike Duration 40% increased Viper Strike Damage |
|
 (Body Armour) Loreweave - If you have Transcendence Keystone allocated, use this Body Armour for fixed Maximum Elemental Resistances. It's one of the ways to make a character extremely durable. (Body Armour) Loreweave - If you have Transcendence Keystone allocated, use this Body Armour for fixed Maximum Elemental Resistances. It's one of the ways to make a character extremely durable. |
|
| Has 6 Sockets +(8-24) to all Attributes Adds (4-10) to (14-36) Physical Damage to Attacks (20-60)% increased Global Critical Strike Chance +(15-50) to maximum Energy Shield +(20-60) to maximum Life +(20-50) to maximum Mana (6-30)% increased Rarity of Items found (15-50)% increased Elemental Damage Your Maximum Resistances are (76-78)% |
|
 (Body Armour) The Covenant - Extremely powerful Body Armour that adds Level 29 Added Chaos Damage. You need to have a decent Life Regen with it, you may be forced to ditch Blood Rage. (Body Armour) The Covenant - Extremely powerful Body Armour that adds Level 29 Added Chaos Damage. You need to have a decent Life Regen with it, you may be forced to ditch Blood Rage. |
|
| Socketed Gems are Supported by Level 29 Added Chaos Damage Skills gain a Base Life Cost equal to 100% of Base Mana Cost +(20-30) to Intelligence (210-250)% increased Energy Shield 10% increased maximum Life |
|
 (Body Armour) Replica Farrul's Fur - You can use it for Endurance/Frenzy Charges, Cat's buffs, tons of Maximum Life, Armour, Evasion, and Onslaught - it all saves you a lot of trouble, but it's very expensive. (Body Armour) Replica Farrul's Fur - You can use it for Endurance/Frenzy Charges, Cat's buffs, tons of Maximum Life, Armour, Evasion, and Onslaught - it all saves you a lot of trouble, but it's very expensive. |
|
| (100-150)% increased Armour and Evasion +(80-100) to maximum Life +2 seconds to Cat's Agility Duration Aspect of the Cat has no Reservation Gain up to your maximum number of Frenzy and Endurance Charges when you gain Cat's Agility You have Onslaught while you have Cat's Agility |
|
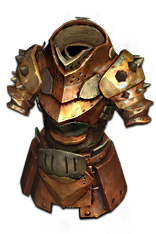 (Body Armour) The Brass Dome - Brass Dome grants you tons of Armour and Maximum Elemental Resistances. Its 4000 Armour mitigates a quarter of Physical Damage. With Determination, it will get you over 10 000 Armour that cuts incoming damage in half. (Body Armour) The Brass Dome - Brass Dome grants you tons of Armour and Maximum Elemental Resistances. Its 4000 Armour mitigates a quarter of Physical Damage. With Determination, it will get you over 10 000 Armour that cuts incoming damage in half. |
|
| (350-400)% increased Armour +(1-5)% to all maximum Elemental Resistances Strength provides no bonus to Maximum Life Take no Extra Damage from Critical Strikes |
|
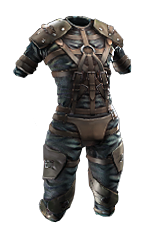 (Body Armour) Rare Body Armour - A well-balanced pick you may use for Maximum Life, Resistances, Spell Suppression, increased Effect of Auras, and ability for Extra Curse such as Punishment. (Body Armour) Rare Body Armour - A well-balanced pick you may use for Maximum Life, Resistances, Spell Suppression, increased Effect of Auras, and ability for Extra Curse such as Punishment. |
|
| Min. requirements: +70 to maximum Life +60% to Elemental and Chaos Resistances 15% Spell Suppression Chance Optional affixes: increased effect of Non-Curse Auras from your Skills You can apply an additional Curse increased Maximum Life |
|
 (Weapon) Rare Claws - Preferably Gemini Claws for Life/Mana Recovery, or Void Fangs for extra Chaos Damage. You want an Elder/Hunter base with increased Chaos Damage over Time Multiplier from Poison Applied, and extra Chaos Damage Added. You will dual-wield those Weapons. (Weapon) Rare Claws - Preferably Gemini Claws for Life/Mana Recovery, or Void Fangs for extra Chaos Damage. You want an Elder/Hunter base with increased Chaos Damage over Time Multiplier from Poison Applied, and extra Chaos Damage Added. You will dual-wield those Weapons. |
|
| Min. requirements: +45% to Damage over Time Multiplier for Poison inflicted with this Weapon Adds Chaos Damage 1.6 Attacks per Second Optional affixes: Damage over Time Multiplier Damage with Poison |
|
 (Boots) Rare Boots - Basically for extra Movement Speed and defensive stats. (Boots) Rare Boots - Basically for extra Movement Speed and defensive stats. |
|
| Min. requirements: +70 to maximum Life +60% to Elemental and Chaos Resistances 25% increased Movement Speed Optional affixes: Attributes Spell Suppression Chance Life Regeneration |
|
 (Boots) Dawnstrider - You're using only one type of Ancestral Totem, use these boots to boost your Attack Speed and have the effect of these Totems Linger. It's a very good option. (Boots) Dawnstrider - You're using only one type of Ancestral Totem, use these boots to boost your Attack Speed and have the effect of these Totems Linger. It's a very good option. |
|
| +(80-100) to maximum Life 30% increased Movement Speed 100% increased Effect of Buffs your Ancestor Totems grant while Active Buffs from Active Ancestor Totems Linger for 4 seconds Maximum 1 Buff from an Active Ancestor Totem at a time |
|
 (Belt) Rare Belt - Preferably a Stygian Vise for an extra Abyssal Socket and high defensive stats, or some Flask modifiers, as you're quite reliant on them for damage. (Belt) Rare Belt - Preferably a Stygian Vise for an extra Abyssal Socket and high defensive stats, or some Flask modifiers, as you're quite reliant on them for damage. |
|
| Min. requirements: 90 Maximum Life 80% Total Elemental Resistances 40 Strength Optional affixes: increased Maximum Life Increased Chaos Damage reduced Flask Charges used increased Flask Charges Gained increased Flask Effect Duration |
|
 (Belt) Replica Soul Tether - If you plan to use Ghost Dance, which requires high Evasion or better yet - Dodge, use this Belt for a much more Energy Shield. (Belt) Replica Soul Tether - If you plan to use Ghost Dance, which requires high Evasion or better yet - Dodge, use this Belt for a much more Energy Shield. |
|
| (15-25)% increased Stun and Block Recovery +(20-40) to Strength Gain (4-6)% of Maximum Life as Extra Maximum Energy Shield Corrupted Soul |
|
 (Amulet) Rare Amulet - You are looking for a Life/Chaos DoT Multi Amulet. There are plenty of other stats you can find here, so just look for stuff that you are missing. (Amulet) Rare Amulet - You are looking for a Life/Chaos DoT Multi Amulet. There are plenty of other stats you can find here, so just look for stuff that you are missing. |
|
| Min. requirements: 50 Maximum LIfe 16% Chaos Damage over Time Multiplier 40 Intelligence Optional affixes: Attributes Accuracy Rating |
|
 (Amulet) Solstice Vigil - Temporal Chains has no Reservation if Cast as an Aura, Maximum Life, and increased Damage are all great modifiers. Shaper's Presence causes effects on you and nearby allies to have a 20% slower Expiration rate, meaning long-lasting Poison. (Amulet) Solstice Vigil - Temporal Chains has no Reservation if Cast as an Aura, Maximum Life, and increased Damage are all great modifiers. Shaper's Presence causes effects on you and nearby allies to have a 20% slower Expiration rate, meaning long-lasting Poison. |
|
| +(10-16) to all Attributes (30-40)% increased Damage +(50-70) to maximum Life Regenerate (8-10) Mana per second Temporal Chains has no Reservation if Cast as an Aura Gain Shaper's Presence for 10 seconds when you kill a Rare or Unique Enemy |
|
 (Amulet) Impresence (Chaos) - It's very similar to Solstice Vigil, but here it's the Despair that can be cast off-charge. It adds some Chaos Damage, increases Damage over Time, and grants Maddening Presence reducing action speed and damage of enemies by 10%. (Amulet) Impresence (Chaos) - It's very similar to Solstice Vigil, but here it's the Despair that can be cast off-charge. It adds some Chaos Damage, increases Damage over Time, and grants Maddening Presence reducing action speed and damage of enemies by 10%. |
|
| +(10-16) to all Attributes (30-40)% increased Damage over Time Adds (17-19) to (23-29) Chaos Damage +(50-70) to maximum Life +(17-23)% to Chaos Resistance Despair has no Reservation if Cast as an Aura Gain Maddening Presence for 10 seconds when you Kill a Rare or Unique Enemy |
|
 (Amulet) Impresence (Chaos, full power) - The only difference between this and regular Impresence is the ability to host another Blasphemous Curse for free, Temporal Chain for instance. It's too expensive for this build in our opinion, Despair can be easily applied with Witchfire Brew. (Amulet) Impresence (Chaos, full power) - The only difference between this and regular Impresence is the ability to host another Blasphemous Curse for free, Temporal Chain for instance. It's too expensive for this build in our opinion, Despair can be easily applied with Witchfire Brew. |
|
| +(10-16) to all Attributes (30-40)% increased Damage over Time Adds (17-19) to (23-29) Chaos Damage +(50-70) to maximum Life +(17-23)% to Chaos Resistance Despair has no Reservation if Cast as an Aura Gain Maddening Presence for 10 seconds when you Kill a Rare or Unique Enemy <Secondary Curse> has no Reservation if Cast as an Aura |
|
| Recommended Anointments: Claws of the Falcon Dirty Techniques |
|
 (Ring) Rare Rings - Aim to fix all your Resistances and Attributes needs here, as well as extra Life, Attacks Speed, and Accuracy. (Ring) Rare Rings - Aim to fix all your Resistances and Attributes needs here, as well as extra Life, Attacks Speed, and Accuracy. |
|
| Min. requirements: 60 maximum Life 90% Total Elemental Resistances Optional affixes: Attributes Non-Channelling Skills have -# to Total Mana Cost Accuracy Rating Curse enemies with Despair on Hit |
|
 (Ring) Circle of Nostalgia - Grants additional bonuses when you are affected by the Herald of Agony. Preferably look for increased Chaos Resistance and Herald's buff effect on this Ring. (Ring) Circle of Nostalgia - Grants additional bonuses when you are affected by the Herald of Agony. Preferably look for increased Chaos Resistance and Herald's buff effect on this Ring. |
|
| <One to three random Synthesis implicit modifiers> +(10-20) to all Attributes Adds (15-20) to (21-30) Chaos Damage +(17-23)% to Chaos Resistance <Two Random Herald of Agony modifiers> |
|
 (Gloves) Rare Gloves - +1 to extra targets from Strike Skills is the most important affix here. Other than that just get extra Life, Resistances, and possibly Chaos DoT multiplier (and all combined make it a VERY expensive Item). (Gloves) Rare Gloves - +1 to extra targets from Strike Skills is the most important affix here. Other than that just get extra Life, Resistances, and possibly Chaos DoT multiplier (and all combined make it a VERY expensive Item). |
|
| Min. requirements: 50 Maximum Life Accuracy Rating Strike Skills target 1-2 additional nearby Enemies (implicit) Optional affixes: Chaos Damage over Time Multiplier Attributes Attack Speed Elemental Resistances |
|
 (Jewels) Abyssal Jewels - You are most likely going to use a Stygian Vise, so you will be able to use an extra Abyss Jewel. It's best to look for one with bonus Life and a chance to gain an Onslaught buff on kill and some Accuracy. (Jewels) Abyssal Jewels - You are most likely going to use a Stygian Vise, so you will be able to use an extra Abyss Jewel. It's best to look for one with bonus Life and a chance to gain an Onslaught buff on kill and some Accuracy. |
|
| Min. requirements: 30 Maximum Life 5% chance to gain Onslaught for 4 seconds on Kill Optional affixes: Evasion Rating Accuracy Damage if you've Killed Recently |
|
 (Jewels) Rare Jewels - On regular Jewels, you want extra Life and Chaos DoT Multiplier. You can also get some Resistances and Attributes here as well. (Jewels) Rare Jewels - On regular Jewels, you want extra Life and Chaos DoT Multiplier. You can also get some Resistances and Attributes here as well. |
|
| Min. requirements: 6% Maximum Life Optional affixes: Attributes Elemental Resistances increased damage with Poison increased Skill Effect Duration increased Attack Speed |
|
 (Jewels) Militant Faith - Required in order to convert one of your Keystones into a Transcendence Keystone, that is if you want to combine it with Loreweave. (Jewels) Militant Faith - Required in order to convert one of your Keystones into a Transcendence Keystone, that is if you want to combine it with Loreweave. |
|
| Carved to glorify (2000-10000) new faithful converted by High Templar (Avarius-Dominus-Maxarius) Passives in radius are Conquered by the Templars Historic <two random mods of devotion> |
|
 (Jewels) Watcher's Eye - One of the best Jewels in the game, which is used by the majority of builds that use any Aura. You want Watcher's Eye with Malevolence modifiers - preferably Damage over Time Multiplier on it. (Jewels) Watcher's Eye - One of the best Jewels in the game, which is used by the majority of builds that use any Aura. You want Watcher's Eye with Malevolence modifiers - preferably Damage over Time Multiplier on it. |
|
| (4-6)% increased maximum Energy Shield (4-6)% increased maximum Life (4-6)% increased maximum Mana <Two or Three random aura modifiers> |
|
 (Jewels) Large Cluster Jewel - Unholy Grace, Unwaveringly Evil, and Wicked Pall are great if you want to get more Damage. Unspeakable Gifts grants a 10% chance to explode enemies on kill. (Jewels) Large Cluster Jewel - Unholy Grace, Unwaveringly Evil, and Wicked Pall are great if you want to get more Damage. Unspeakable Gifts grants a 10% chance to explode enemies on kill. |
|
| Recommended Passives: 1 Added Passive Skill is Unholy Grace 1 Added Passive Skill is Unwaveringly Evil 1 Added Passive Skill is Wicked Pall 1 Added Passive Skill is Unspeakable Gifts |
|
 (Jewels) Medium Cluster Jewel - These offer a wider range of more useful modifiers. You can get more damage, Wither debuff on Hit from Eternal Suffering, or Wasting Affliction to speed up Poisons. (Jewels) Medium Cluster Jewel - These offer a wider range of more useful modifiers. You can get more damage, Wither debuff on Hit from Eternal Suffering, or Wasting Affliction to speed up Poisons. |
|
| Recommended Passives: 1 Added Passive Skill is Unspeakable Gifts 1 Added Passive Skill is Student of Decay 1 Added Passive Skill is Wicked Pall 1 Added Passive Skill is Circling Oblivion 1 Added Passive Skill is Eternal Suffering 1 Added Passive Skill is Wasting Affliction |
|
 (Jewels) Elixir of the Unbroken Circle - We've used it in combination with Transcendence and Loreweave to generate Endurance Charges and to replenish Life on use. (Jewels) Elixir of the Unbroken Circle - We've used it in combination with Transcendence and Loreweave to generate Endurance Charges and to replenish Life on use. |
|
| +200 to Ward Restores Ward on use (20-40)% increased Duration Recover 4% of Life per Endurance Charge on use Lose all Endurance Charges on use Gain 1 Endurance Charge per Second during Effect |
|
 (Flask) Witchfire Brew - Grants increased Damage over Time and Curses nearby enemies with Despair which is the only way for you to apply a Curse in this setup. As Pathfinder it should be easy to have it up most of the time. (Flask) Witchfire Brew - Grants increased Damage over Time and Curses nearby enemies with Despair which is the only way for you to apply a Curse in this setup. As Pathfinder it should be easy to have it up most of the time. |
|
| 100% increased Evasion Rating Creates a Smoke Cloud on Use 50% increased Charges used (25-40)% increased Damage Over Time during Flask Effect Grants Level 21 Despair Curse Aura during Flask Effect |
|
Other suggested Flasks:
|
|
     |
|
|
If you have any other build requests, please leave that in the comments below.
Pictures used in this article are the intellectual property of Grinding Gear Games.


 Goldrim - The best leveling Helmet in Path of Exile that grants a TON of All Elemental Resistances and you can use it up until Maps.
 Karui Ward - Great leveling Amulet for any character that deals damage with Projectiles - and if you are leveling up with Cobra Lash, you will be.