Vaal Double Strike Bleed Gladiator build - Odealo's Crafty Guide
Mighty sword and board fighter based on the reworked Vaal Double Strike skill and Bleed damageVaal Double Strike
Bleed Gladiator build
Updated for Patch 3.5
The Best Crafty Guides by Odealo
Estimated budget: very low

| Guide notes |
| June 1, 2018 -Build created December 13, 2018 -Updated for Patch 3.5 |
Gladiator is a perfect class for a classic sword and board fighter build. It provides great defenses with high Block Chance and decent Life pool, which require very little investments in equipment. This makes Gladiator class perfectly fit for a League Starter build, which is one of the most cost-effective classes in Path of Exile. Furthermore, each of the items listed can be acquired for few Chaos Orbs each, while at the same time this build scales extremely well into end-game with better gear.
Our Vaal Double Strike Gladiator revolves around the Bringer of Rain unique helmet, which provides very cheap 7-links for your core DPS setup, and grants additional Block Chance and Endurance Charge generation. This makes this build much more budget-friendly, and easier to gear up.
The full list of our other Path of Exile Crafty Guides can be found here: Odealo's Crafty Guides - Full List
1. Gameplay
This Double Strike Gladiator build is very enjoyable to play. Thanks to high Life pool, 6 Endurance Charges, and very high Block Chance, you can ignore most of the threat, while dealing very high Physical Damage with the Double Strike attack. Monsters around you die in bloody explosions dealing massive AoE damage and for us, personally, Bleed is the most visually appealing type of builds.
|
0:06 Tier 8 Armoury |
|
|

2. Build's PROS & CONS
| PROS |
|
| CONS |
|
3. Leveling tips
Leveling with Gladiator is very easy. You should have more than enough defenses with the shield equipped, and just focus on upgrading your weapon when you feel like your DPS is too low for the current content. You do not need to detour from the final Skill Tree at any point, getting all the important nodes right away. We recommend leveling with one-handed Axe and the Sunder skill. Sunder is one of the best and most popular leveling melee attacks in Path of Exile.
Suggested leveling Gem setups:
| Cleave/Sunder setup | |
 |
Cleave - since Sunder is available at level 12, you should use Cleave for the first levels. It's a decent AoE attack that can be used with Axes as well |
 |
Sunder - one of the best attack skills in Path of Exile for the leveling phase |
 |
Added Fire Damage Support - grants extra Fire Damage based on your weapons Physical Damage |
 |
Maim Support - maims enemies, which slows them down and increases Physical Damage they take |
| Shield Charge setup | |
 |
Shield Charge - your primary mobility skill |
 |
Faster Attacks Support - increases your movement speed with Shield Charge |
| Utility gems | |
 |
Ancestral Warchief - spawns a Totem which increases your Melee Damage |
 |
Vulnerability - the recommended Curse for this build |
 |
Stone Golem - grants increased Life Regeneration per second |
 |
Herald of Ash - combined with Sunder’s Seismic Waves, it will provide amazing AoE |
Bandits:
We recommend killing all the bandits for two additional Passive Points
Leveling Skill Trees:
31 Points Skill Tree
Priorities: 1) Art of the Gladiator 2) Master of the Arena 3) Retaliation 4) Testudo 5) Splitting Strikes
62 Points Skill Tree
Priorities: 1) Command of Steel 2) Heart of Oak 3) Weapon Artistry 4) Herbalist 5) Blood Magic
Recommended leveling items:
 Blackheart - a great Melee/Physical DPS ring. Can be used starting at level 1 Blackheart - a great Melee/Physical DPS ring. Can be used starting at level 1 |
|
| Adds 1 to 4 Physical Damage to Attacks 5% increased Physical Damage Adds 1 to 3 Chaos Damage to Attacks +(20-30) to maximum Life (2-4) Life Regenerated per second 10% chance to Cause Monsters to Flee |
|
 Meginord's Girdle - amazing belt, which grants insane Life and DPS bonuses. Can be used until late game when you replace it with +1 to Endurance Charges Belt of the Deceiver Meginord's Girdle - amazing belt, which grants insane Life and DPS bonuses. Can be used until late game when you replace it with +1 to Endurance Charges Belt of the Deceiver |
|
| +(25-35) to Strength Adds 5 to 15 Physical Damage to Attacks +25 to Strength 10% increased maximum Life +(10-20)% to Cold Resistance 25% increased Flask Life Recovery rate |
|
 Crest of Perandus - great leveling shield. Grants very high defensive bonuses Crest of Perandus - great leveling shield. Grants very high defensive bonuses |
|
| Chance to Block: 31% Evasion: 51 +(60-80) to maximum Life (5-7.5) Life Regenerated per second +30% to Lightning Resistance 0.6% of Physical Attack Damage Leeched as Life +5% Chance to Block |
|
|
|
|
| Socketed Gems are supported by Level 2 Chance to Flee Adds (10-15) to (25-30) Physical Damage +(10-15) to maximum Life +(5-7) Life gained on Kill 10% increased Movement Speed |
|
 Screaming Eagle - great leveling weapon. Provides additional movement speed so if you can get enough added Physical Damage to attacks on your other gear, this can serve you well for around 30 levels
|
|
|
| (60-80)% increased Physical Damage Adds (3-5) to (7-10) Physical Damage 2% of Physical Attack Damage Leeched as Life Culling Strike You gain Onslaught for 3 seconds on Culling Strike Cannot be Chilled while you have Onslaught |
|
 Relentless Fury - another great Axe. It is cheap and very powerful - it grants Onslaught buff, Culling Strike, and Life Leech
4. Final Skill Tree, Ascendancy Points, and Pantheon
Final Skill Tree:
115 Points Final Skill Tree
115 Points Path of Building(PoB) link
Ascendancy points:
Preferably in that order:
- Painforged
- Blood in the Eyes
- Gratuitous Violence
- Versatile Combatant
Pantheon:
Major God: you should use two different setups for Boss fights and farming purposes
Maps/farming
Soul of Lunaris 1% additional Physical Damage Reduction for each nearby Enemy, up to 8%; 1% increased Movement Speed for each nearby Enemy, up to 8%
vs. Bosses
Soul of Solaris 6% Physical Damage Reduction if there is only one nearby Enemy; 20% chance to take 50% less Area Damage from Hits
Minor God: Soul of Shakari 5% reduced chaos damage taken 25% reduced chaos damage over time taken while in a caustic cloud
5. Final Gems links
| [DPS] Vaal Double Strike (Bringer of Rain) |
|
 |
Vaal Double Strike - your primary DPS skill. With the changes in Patch 3.3 on top of the Vaal effect, the skill has a regular use as well |
 |
Melee Splash Support - grants splash to your Double Strike attack. Can be replaced with Chance to Bleed Support during boss fights |
|
Brutality Support - increases Physical Damage but makes the supported skill deal no Elemental and Chaos Damage |
 |
Ruthless Support - every third hit with supported skill deals greatly increased damage. Also, Bleeding caused by Ruthless blows deals increased damage |
|
Faster Attacks Support - grants increased Attack Speed with supported skills. It is granted by the Bringer of Rain |
 |
Blind Support - grants a chance to Blind enemies on Hit. It is granted by the Bringer of Rain |
 |
Melee Physical Damage Support - increases Melee Physical Damage of supported skills. It is granted by the Bringer of Rain |
| [DPS] Ancestral Warchief setup | |
 |
Ancestral Warchief - summons a Totem which increases your Melee Damage |
|
Melee Physical Damage Support |
|
Brutality Support |
|
Faster Attacks Support |
| [COUNTER-ATTACK] Reckoning | |
 |
Reckoning - deals Physical Damage in a cone after you successfully block an Attack. It is granted by the Surrender shield, or if you are using something different, just remove one of the following red Support Gems |
|
Melee Physical Damage Support |
 |
Culling Strike Support - instantly kills enemies below 10% Life |
|
Brutality Support |
| [MOBILITY] Shield Charge setup | |
|
Shield Charge - your movement skill, greatly increases your mobility |
 |
Faster Attacks Support |
 |
Fortify Support - melee hits with Shield Charge will grant the Fortify buff which reduces your damage taken |
| [AURA] Vulnerability | |
|
Vulnerability - the best Curse for this build. Should be used as an Aura around you if you can get the Impresence amulet |
 |
Blasphemy Support - makes supported Curses work as an Aura around you |
| [UTILITY] Stone Golem/Blood Rage | |
 |
Blood Rage - grants increased Attack Speed, Frenzy Charge generation, and Life Leech. Deals damage to self |
|
Summon Stone Golem - Stone Golem grants increased Life Regeneration per second |
|
|
5. Gear Setup
This Vaal Double Strike Gladiator Duelist is a budget-friendly build which is also a great build to start a new League. The only required item is the Bringer of Rain helmet, which shouldn't cost more than couple Chaos Orbs, and it grants a very cheap 7-links for your Vaal Double Strike setup. You will find all the items listed below, while we have listed various unique items, everything except for the helmet can be replaced with rare items.
We would also like to invite you to visit our PoE market, where you can find cheap PoE Currency for sale.
Our recommended items will:
- Cap your resistances
- Give you enough DPS/Life to start mapping successfully
|
Stat priorities on items:
|
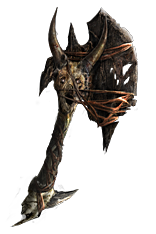
 (Helmet) Bringer of Rain - the core item for this build. Grants cheap 7 links, however, you are unable to use Body Armours (Helmet) Bringer of Rain - the core item for this build. Grants cheap 7 links, however, you are unable to use Body Armours |
|
| Socketed Gems are Supported by Level 18 Melee Physical Damage Socketed Gems are Supported by Level 12 Faster Attacks Socketed Gems are supported by Level 6 Blind Adds 20 to 30 Physical Damage to Attacks (200-300)% increased Armour and Evasion +(120-160) to maximum Life 20% chance to gain an Endurance Charge when you Block Extra gore Can't use Chest armour 6% Chance to Block |
|
| Helmet enchantment: 40% increased Double Strike Damage Double Strike has a 15% chance to deal Double Damage to Bleeding Enemies |
|
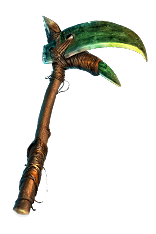
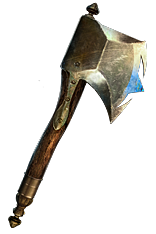
 (Weapon) Jack, the Axe - a decent pick for the weapon slot. Grants increased Life Leech (Weapon) Jack, the Axe - a decent pick for the weapon slot. Grants increased Life Leech |
|
| (90-110)% increased Physical Damage Adds (11-14) to (18-23) Physical Damage (10-15)% increased Attack Speed 2% of Physical Attack Damage Leeched as Life 50% reduced Life Leeched per second 25% chance to cause Bleeding on Hit |
|
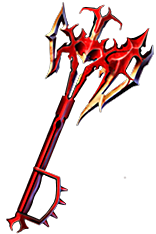
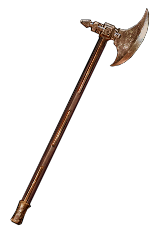
 (Weapon) Soul Taker - a great choice for lower level characters, who may experience Mana issues. High DPS Soul Taker is also a fully viable end-game option (Weapon) Soul Taker - a great choice for lower level characters, who may experience Mana issues. High DPS Soul Taker is also a fully viable end-game option |
|
| (100-140)% increased Physical Damage Adds 10 to 20 Physical Damage (20-25)% increased Attack Speed +(20-25)% to Cold Resistance Insufficient Mana doesn't prevent your Melee Attacks Your Physical Damage can Chill |
|
 (Weapon) Rare 350+ pDPS one-handed Axe - high Physical DPS Axe is the best in the slot. The higher DPS the better (Weapon) Rare 350+ pDPS one-handed Axe - high Physical DPS Axe is the best in the slot. The higher DPS the better |
|
| Min. requirements: 350 Physical DPS 1.6 Attack Speed Optional affixes: Increased Damage with Bleeding |
|
 (Shield) The Surrender - is the best in the slot. However, The Surrender is rare and expensive. For lower budget builds, just got with Lioneye's Remorse or a rare shield and use the Reckoning Gem (Shield) The Surrender - is the best in the slot. However, The Surrender is rare and expensive. For lower budget builds, just got with Lioneye's Remorse or a rare shield and use the Reckoning Gem |
|
| Chance to Block: 30% Armour: (1305 to 1513) Grants Level 30 Reckoning Skill (130-170)% increased Armour +(65-80) to maximum Life Recover 250 Life when you Block +6% Chance to Block +1500 Armour if you've Blocked Recently |
|
 (Shield) Lioneye’s Remorse - another decent option. This shield is very popular for its' high defensive bonuses (Shield) Lioneye’s Remorse - another decent option. This shield is very popular for its' high defensive bonuses |
|
| Chance to Block: 30% Armour: (1494 to 1727) (200-250)% increased Armour 20% increased Stun and Block Recovery +(160-180) to maximum Life 5% reduced Movement Speed -25 Physical Damage taken from Projectile Attacks +5% Chance to Block |
|
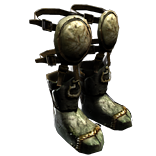
 (Boots) Rainbowstride - this pair of boots is very cheap, and grant increased chance to Block Spells (Boots) Rainbowstride - this pair of boots is very cheap, and grant increased chance to Block Spells |
|
| (20-25)% of Block Chance applied to Spells +(40-60) to maximum Mana (140-180)% increased Energy Shield +20% to all Elemental Resistances 25% increased Movement Speed |
|
| FAQ: How to get enough Intelligence to use Rainbowstride? 1) Use Impresence amulet, or rare one with Intelligence bonus 2) Search for rare rings with Intelligence bonus 3) Pick big +30 Intelligence Passive node 4) Search for rare jewels with Intelligence bonus (on top of the recommended affixes) 4) Use Fertile Mind (at this point it may be better to use rare boots) |
|
 (Boots) Rare Life/Res. boots - this pair of boots is very cheap, and grant increased chance to Block Spells (Boots) Rare Life/Res. boots - this pair of boots is very cheap, and grant increased chance to Block Spells |
|
| Min. requirements: 70 maximum Life 20% Fire Resistance 20% Cold Resistance 20% Lightning Resistance 25% increased Movement Speed |
|
| Boot enchantment: 16% increased Attack and Cast Speed if you've Killed Recently |
|
 (Belt) Belt of the Deceiver - is the best budget belt for this build. Players on Standard can try to get one with +1 to maximum Endurance Charges (Belt) Belt of the Deceiver - is the best budget belt for this build. Players on Standard can try to get one with +1 to maximum Endurance Charges |
|
| (25-35) to Strength (15-25)% increased Physical Damage You take 30% reduced Extra Damage from Critical Strikes +(30-40) to maximum Life +(10-15)% to all Elemental Resistances Nearby Enemies are Intimidated Corrupted implicit modifier: +1 to maximum Endurance Charges |
|
 (Amulet) Rare Life/res amulet - using a rare amulet will require you to manually cast the Vulnerability Curse (Amulet) Rare Life/res amulet - using a rare amulet will require you to manually cast the Vulnerability Curse |
|
| Min. requirements: 60 maximum Life 15% All Elemental Resistances Adds min. 15 Physical Damage to Attacks Optional affixes: Accuracy Rating Attributes |
|
 (Amulet) Impresence (Physical) - our top recommendation for the amulet slot. Grants very high DPS bonus and allows you to use Vulnerability Curse as an Aura around you without the Mana Reservation cost (Amulet) Impresence (Physical) - our top recommendation for the amulet slot. Grants very high DPS bonus and allows you to use Vulnerability Curse as an Aura around you without the Mana Reservation cost |
|
| +(10-16) to all Attributes Adds (12-16) to (20-25) Physical Damage +(400-500) to Armour +(50-70) to maximum Life (30-40)% increased Stun and Block Recovery 100% reduced Vulnerability Mana Reservation Gain Maddening Presence for 10 seconds when you Kill a Rare or Unique Enemy |
|
 (Ring) Rare Life/Res. Rings (Ring) Rare Life/Res. Rings |
|
| Min. requirements: 60 maximum Life 20% Fire Resistance 20% Cold Resistance 20% Lightning Resistance Adds min. 7 Physical Damage to Attacks Optional affixes: Intelligence (Rainbowstride req.) Attack Speed |
|
 (Gloves) Rare Life/Res. gloves - increased Attack Speed can be a good end-game addition here (Gloves) Rare Life/Res. gloves - increased Attack Speed can be a good end-game addition here |
|
| Min. requirements: 70 maximum Life 25% Fire resistance 25% Lightning resistance 25% Cold resistance Optional affixes: increased Attack Speed increased Melee Damage |
|
 (Gloves) Haemophilia - this is a decent pair of gloves for this build. Greatly increase the Damage you deal with Bleeding, and Damage with Hits again Bleeding enemies. They lack defensive stats (Gloves) Haemophilia - this is a decent pair of gloves for this build. Greatly increase the Damage you deal with Bleeding, and Damage with Hits again Bleeding enemies. They lack defensive stats |
|
| 25% increased Damage over Time +(20-30) to Strength Attacks have 25% chance to cause Bleeding (25-40)% increased Attack Damage against Bleeding Enemies Bleeding Enemies you Kill Explode, dealing 5% of their Maximum Life as Physical Damage 25% reduced Bleeding Duration |
|
 (Jewels) Rare Jewels - these should provide extra Life and bonus damage (Jewels) Rare Jewels - these should provide extra Life and bonus damage |
|
| Recommended affixes: % increased maximum Life % increased Generic/Physical/Melee Damage Optional affixes: % increased Attack Speed /Attack Speed while holding a Shield % increased Armour |
|
 (Jewels) Reckless Defence - using two of those is recommended. The increased chance to be Critically Hit can be mitigated by using the Belt of the Deceiver (Jewels) Reckless Defence - using two of those is recommended. The increased chance to be Critically Hit can be mitigated by using the Belt of the Deceiver |
|
| 20% of Block Chance applied to Spells (2-4)% additional Block Chance (7-10)% additional Chance to receive a Critical Strike |
|
 (Flask) Lion's Roar - amazing Melee/Physical Flask (Flask) Lion's Roar - amazing Melee/Physical Flask |
|
| +3000 to Armour Adds Knockback to Melee Attacks during Flask effect 75% chance to cause Enemies to Flee on use (20-25)% more Melee Physical Damage during effect Knocks Back Enemies in an Area when you use a Flask |
|
 (Flask) Rumi’s Concoction - mandatory Flask for this build. Allows you to cap Block Chance (Flask) Rumi’s Concoction - mandatory Flask for this build. Allows you to cap Block Chance |
|
| +3000 to Armour (14-20)% Chance to Block during Flask effect (6-10)% Chance to Block Spells during Flask effect |
|
Other suggested Flasks:
|
|
  |
|
|
If you have any other build requests please leave that in the comments below.
Pictures used in this article are the intellectual property of Grinding Gear Games.
