The Ultimate Flicker Strike Raider Build
The best installment of the insanely fast Flicker Strike buildThe Ultimate
Flicker Strike Raider build
Updated for Patch 3.16
The Best Crafty Guides by Odealo
Estimated budget: medium to high

| Guide notes |
| September 23, 2021 -Updated for Patch 3.15 October 10, 2021 -Updated gameplay video December 08, 2021 -Updated for Patch 3.16 |
Flicker Strike is one of the most unusual and exciting Melee Attacks in the entire Path of Exile. It makes you instantly teleport to a nearby enemy, dealing very high damage, but has a cooldown unless you spend a Frenzy Charge on your attack. The general idea behind this build is to generate Frenzy Charges at a higher rate than you can spend them on Flicker Strike to be able to freely spam it even against Bosses. That's achieved by utilizing the Raider class and Uniques like Farrul's Fur. Combining Flicker Strike with Multistrike will allow you to instantly teleport between packs of enemies obliterating them thanks to the extra AoE explosions from Herald of Ice, making it one of the fastest melee builds in the game. The flashy visual effects, however, may not suit everyone.
This Flicker Strike setup can get very expensive, but at the same time, it's the most powerful version of this build, that will allow you to farm pretty much all of the content in the game, with insane AoE/mobility and very solid single-target DPS. It's one of the most iconic builds that everyone should try at least once during their adventure in Path of Exile!
For the full list of our Path of Exile builds you can visit the following article: Odealo's Crafty Guides - Full List
1. Gameplay
Flicker Strike offers a very unique melee playstyle. It makes you instantly teleport between enemies, so as long as, you can see new enemies on the edge of your screen, you can progress through areas with insane speed. The main concept of this build is to generate your maximum number of Frenzy Charges (9 is something you can achieve on a reasonable budget, with 10-11 pushing you into Mirror-level equipment or so) via Farrul's Fur. By socketing Less Duration in the Item with beastcrafted Aspect of the Cat, you will trigger it every 3 seconds or so. You will be also generating extra Frenzy Charges via Blood Rage, Ice Bite Support, and Way of the Poacher from Raider's Ascendancy. This will allow you to endlessly spam Flicker Strike even with very high Attack Speed. In this build you will be dealing mainly Cold Damage which is multiplied by Paradoxica - while this weapon has low base damage, it will double all the damage from other sources like Ice Bite, Frenzy Charges (with corresponding Ring affixes), Replica Abyssus, Abyssal Jewels, and more. All around, the sky is the limit when it comes to this budget, and you can reach tens of millions DPS with this setup.
|
Full gameplay video:
|
|
|

2. Build's PROS & CONS
| PROS |
|
| CONS |
|
3. Leveling tips
It's basically impossible to start off with Flicker Strike. The cooldown and inability to generate Frenzy Charges on lower levels makes this skill pretty useless. We recommend leveling up with Frost Blades which is one of the best starting melee attacks in the game. It hits multiple targets at once and has high base Cold Damage. And since it's a Cold/Elemental Attack, you will be able to use the same Passives and Support Gems as with your final Flicker Strike Build. Still, it's best to simply have a level 90+ Raider with tons of Currency ready before you try out this build. Below you will find some recommended low-level Gem setups and possible leveling Uniques, but you can technically level up anyway you want to, and simply respect at a later phase.
Suggested leveling gem setups:
| Frost Blades | |
 |
Frost Blades - one of the best Melee Attacks for leveling which releases additional projectiles from your initial Hit and has high added Cold Damage |
 |
Melee Physical Damage Support - increases your Frost Blades damage |
 |
Added Cold Damage Support - adds flat Cold Damage to your Attacks |
 |
Multistrike Support - mandatory support Gem for the Frost Blade setup |
| Utility gems | |
 |
Herald of Ice - grants added Cold Damage and causes AoE explosions on killing Frozen enemies |
 |
Precision - Aura Spell that boosts your Accuracy Rating and Critical Strike Chance |
 |
Whirling Blades - your primary Mobility Skill |
 |
Ancestral Protector - Totem Spell which increases your Attack Speed |
 |
Summon Ice Golem - the recommended Golem for this build which increases your Crit. Chance and Accuracy Rating |
Bandits:
Both killing all the Bandits for two additional Skill Points and helping Alira for Mana Regeneration, Critical Damage Multiplier, and Elemental Resistances are viable options
Leveling Skill Trees:
32 Points Skill Tree
Priorities: 1) Finesse 2) Cold Mastery 3) Herbalism 4) Fatal Blade with Sword Mastery 5) Primeval Force
71 Points Skill Tree
Priorities: 1) Thick Skin 2) Fangs of Fros 3) Golem's Blood 4) Blood Drinker 5) Retaliation 6) Graceful Assault
Recommended leveling items:
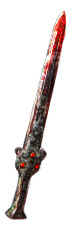 Redbeak - amazing starting weapon that has high base damage and can be used right after you start your game Redbeak - amazing starting weapon that has high base damage and can be used right after you start your game |
|
| 40% increased Global Accuracy Rating 100% increased Damage when on Low Life 50% increased Physical Damage Adds 2 to 6 Physical Damage 10% increased Attack Speed +(20-30) to maximum Life +2 Life gained for each Enemy hit by Attacks |
 Praxis - in order to maintain your Mana this Ring (or even two of them) will be extremely useful. After all, you won't get much Mana/Mana Regeneration from your Passive Skill Tree Praxis - in order to maintain your Mana this Ring (or even two of them) will be extremely useful. After all, you won't get much Mana/Mana Regeneration from your Passive Skill Tree |
|
| +(20-25) to maximum Mana +(30-60) to maximum Mana (3-6) Mana Regenerated per second -(8-4) to Mana Cost of Skills 8% of Damage taken gained as Mana over 4 seconds when Hit |
 Karui Ward - great Damage and Movement Speed boost granted by this Amulet, make it one of the best leveling items for this build. Also, the projectiles bonuses apply to Frost Blades if you end up using it on lower levels Karui Ward - great Damage and Movement Speed boost granted by this Amulet, make it one of the best leveling items for this build. Also, the projectiles bonuses apply to Frost Blades if you end up using it on lower levels |
|
| +(20-30) to Dexterity +(20-30) to Strength +100 to Accuracy Rating 30% increased Projectile Speed 10% increased Movement Speed 30% increased Projectile Damage |
 Tasalio's Sign - if you can manage your Mana without the Praxis Ring, it's recommended to grab at least one of these. Your DPS will skyrocket after equipping Tasalio's Sign Tasalio's Sign - if you can manage your Mana without the Praxis Ring, it's recommended to grab at least one of these. Your DPS will skyrocket after equipping Tasalio's Sign |
|
| +(20-30)% to Cold Resistance Adds (7-10) to (15-20) Cold Damage to Spells and Attacks +(200-300) to Evasion Rating 50% chance to Avoid being Chilled 10% chance to Freeze Adds 40 to 60 Cold Damage against Chilled Enemies |
 Ewar's Mirage - an amazing weapon for leveling a character with Frost Blades. It's also a Sword so you can benefit from all the Passives that you want to be allocated for Flicker Strike Ewar's Mirage - an amazing weapon for leveling a character with Frost Blades. It's also a Sword so you can benefit from all the Passives that you want to be allocated for Flicker Strike |
|
| +25% to Global Critical Strike Multiplier (40-55)% increased Elemental Damage with Attack Skills Adds 1 to (45-55) Lightning Damage (16-22)% increased Attack Speed Attacks Chain an additional time when in Main Hand Attacks have an additional Projectile when in Off Hand |
4. Final Skill Tree, Ascendancy Points, and Pantheon
Final Skill Tree:
90 Points Final Skill Tree (does not include Passives from Cluster Jewels and Intuitive Leap)
122 Points Path of Building(PoB) link
Ascendancy points:
Preferably in that order:
- Quartz Infusion
- Avatar of the Veil
- Way of the Poacher
- Avatar of the Slaughter
Pantheon:
Major God: Soul of the Brine King You cannot be Stunned if you've been Stunned or Blocked a Stunning Hit in the past 2 seconds
Minor God: Soul of Shakari 5% reduced Chaos Damage taken 25% reduced Chaos Damage over Time taken while on Caustic Ground
5. Final Gems links
| [DPS] Flicker Strike setup | |
 |
Flicker Strike - the build defining skill that makes you teleport instantly to nearby enemies dealing massive Cold/Elemental damage on each hit with extra explosions from Herald of Ice |
 |
Elemental Damage with Attacks Support - core Support Gem for Elemental Attack Skills |
|
Multistrike Support - makes your Attack repeat two additional times with greatly increased Attack Speed and Damage |
 |
Ruthless Support - every third Hit from linked Attacks will deal greatly increased damage, making it one of the best (DPS-wise) Gems for this setup |
 |
Ice Bite Support - adds Flat Cold Damage to your Attacks for each Frenzy Charge and also allows you to generate extra Frenzy Charges |
 |
Melee Splash Support - your Attacks will also damage nearby enemies, greatly boosting your clear speed |
| [MOBILITY] Leap Slam setup | |
 |
Leap Slam - the recommended Movement Skill you can use in this build which will also grant the Fortify buff |
 |
Faster Attacks Support - increases the "movement" speed of your Leap Slam |
 |
Fortify Support - hitting enemies with Leap Slam will grant you the Fortify buff that reduces all incoming damage to your character |
 |
Lifetap Support - makes linked skills cost Life instead of Mana |
| [UTILITY] Auras | |
 |
Hatred - the best Aura for this build. It grants a lot of extra Cold Damage and opens up new powerful options on Watcher's Eye jewel |
|
Precision - one of the best Auras for this build. It grants a lot of effective DPS increase, but also has some insane Watcher Eye's Jewel mods. Depending on your Mana Pool, you can use as low as level 1 Precision in this build |
|
Herald of Ice - adds extra Cold Damage to your Attacks and causes AoE Explosions on killing Frozen enemies |
 |
Enlighten Support - reduces the Mana Reservation Cost of linked Auras. It's best to use a level 3 or 4 Enlighten here |
| [UTILITY] Immortal Call / Aspect of the Cat (Socketed in Shield with Aspect of the Cat) |
|
 |
Cast when Damage Taken Support - keep this Gem at level 1 in order to make it cast supported Gems more frequently |
 |
Immortal Call - will grant damage reduction buff for a short duration. Keep this Gem at level 1 to 3 |
 |
Less Duration Support - this Gem should apply ONLY to Aspect of the Cat, meaning you will have to unlink it from the Immortal Call setup |
| [UTILITY] Vortex | |
 |
Vortex - an AoE Spell that is used to apply a linked Curse and also debuff enemies via Bonechill Support to increase their damage taken. You can use a level 1 Vortex to reduce its Mana Cost |
 |
Hextouch Support - will cause Vortex to apply your linked Curse |
 |
Frostbite - the best Curse for this build which reduces the monster's resistance to Cold Damage |
| Bonechill Support - increased Cold Damage taken affected by your Vortex's Chill | |
| [UTILITY] Ancestral Warchief/Blood Rage | |
 |
Ancestral Watchief - allows you to summon a Totem which increases your Melee Damage. Just place it in a safe spot when facing Bosses, on regular enemies, it won't be needed |
 |
Blood Rage - increases your Attack Speed and allows you to generate additional Frenzy Charges |
 |
Enhance Support - increases the Attack Speed bonus granted by Blood Rage |
|
|
5. Gear Setup
Below you will find all the recommended and required Items for this Flicker Strike Raider Build. This build offers some diversity when it comes it item choices, but, for the most part, picking up cheaper alternatives will be very punishing. You are also aiming at getting the maximum possible number of Frenzy Charges, and this rarely comes cheap. This combined put this build in the most expensive category, but it's one of the builds we truly recommend trying out for it's insane playstyle and exceptional performance.
Our recommended gear pieces will always:
- Cap your Resistances
- Grant sufficient Life pool for Mapping
- Give you more than enough damage to mid/high tier Map farming
|
Stat priorities on items:
|
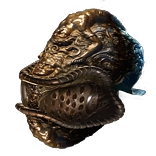 (Helmet) Replica Abyssus - in terms of raw DPS, it's one of the best Helmets for this build. It adds a ton of Elemental Damage to your Attacks, and also Melee Crit. Multiplier. As a downside, it will increase Elemental Damage taken by your character, but this is partly mitigated by high Chance to Dodge and Evade (Helmet) Replica Abyssus - in terms of raw DPS, it's one of the best Helmets for this build. It adds a ton of Elemental Damage to your Attacks, and also Melee Crit. Multiplier. As a downside, it will increase Elemental Damage taken by your character, but this is partly mitigated by high Chance to Dodge and Evade |
|
| +(20-25) to all Attributes Adds 40 to 75 Fire Damage to Attacks Adds 30 to 65 Cold Damage to Attacks Adds 10 to 130 Lightning Damage to Attacks +(100-125)% to Melee Critical Strike Multiplier (100-120)% increased Armour (40-50)% increased Elemental Damage taken |
|
 (Helmet) Replica Forbidden Shako - with the right affixes, the single-best (and most expensive) Helmet you can get here. With level 35 Ice Bite it can provide, the added damage from Frenzy Charges is simply insane, and it still can have a decent 6th link on it (Helmet) Replica Forbidden Shako - with the right affixes, the single-best (and most expensive) Helmet you can get here. With level 35 Ice Bite it can provide, the added damage from Frenzy Charges is simply insane, and it still can have a decent 6th link on it |
|
| Socketed Gems are Supported by Level (1-10) <random Support Gem> Socketed Gems are Supported by Level (25-35) <random Support Gem> +(25-30) to all Attributes |
|
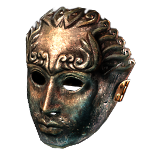 (Helmet) Rare Helmet - a Rare Helmet with high defensive stats which reduce the Cold Resistance of nearby enemies is a solid and well-rounded choice. It's also possible to get a Helmet with extra Crit. Multiplier for some additional DPS too (Helmet) Rare Helmet - a Rare Helmet with high defensive stats which reduce the Cold Resistance of nearby enemies is a solid and well-rounded choice. It's also possible to get a Helmet with extra Crit. Multiplier for some additional DPS too |
|
| Min. requirements: 80 maximum Life Nearby Enemies have -9% to Cold Resistance 75% Total Elemental Resistances Optional affixes: Critical Strike Multiplier Attributes |
|
| Helmet enchantment 9% increased Flicker Strike Damage per Frenzy Charge |
|
 (Body Armour) Farrul's Fur - a must-have Body Armour that will generate your Maximum Frenzy Charges every 3seconds or so. It offers one of the most consistent Frenzy Charge generations in the game, making it a perfect choice for this build (Body Armour) Farrul's Fur - a must-have Body Armour that will generate your Maximum Frenzy Charges every 3seconds or so. It offers one of the most consistent Frenzy Charge generations in the game, making it a perfect choice for this build |
|
| (100-150)% increased Armour and Evasion +(80-100) to maximum Life Aspect of the Cat Reserves no Mana +2 seconds to Cat's Stealth Duration Gain up to your maximum number of Frenzy and Power Charges when you gain Cat's Stealth You have Phasing while you have Cat's Stealth |
|
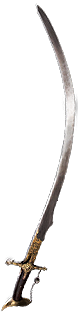 (Weapon) Paradoxica - the best in slot weapon, and actually the only one we recommend for this particular setup. It doesn't have high base damage, but it will basically double all the flat added Damage from your Items/Skill Gems and Passives, making it a truly godly weapon here (Weapon) Paradoxica - the best in slot weapon, and actually the only one we recommend for this particular setup. It doesn't have high base damage, but it will basically double all the flat added Damage from your Items/Skill Gems and Passives, making it a truly godly weapon here |
|
| +25% to Global Critical Strike Multiplier Attacks with this Weapon deal Double Damage Veiled Prefix Veiled Suffix Recommended veiled affixes: #% increased Attack Speed Attacks with this Weapon Penetrate #% Elemental Resistances |
|
 (Shield) Rare Shield - you need to have a Shield with the highest defensive stats you can afford and you need to best craft the Aspect of the Cat on it (Shield) Rare Shield - you need to have a Shield with the highest defensive stats you can afford and you need to best craft the Aspect of the Cat on it |
|
| Min. requirements: 90 maximum Life Grants level 20 Aspect of the Cat Skill Optional affixes: High Evasion Rating Elemental Resistances |
|
 (Belt) Rare Belt - we recommend picking a high Life/Resistances Rare Belt. You can use almost any base, but preferably Leather Belt, Rustic Sash, or Stygian Vise (Belt) Rare Belt - we recommend picking a high Life/Resistances Rare Belt. You can use almost any base, but preferably Leather Belt, Rustic Sash, or Stygian Vise |
|
| Min. requirements: 100 Maximum Life 10% Increased Maximum Life Optional affixes: Attributes Elemental Resistances Elemental Damage with Attacks |
|
 (Boots) Rare Boots - aim for the highest defensive stats and high Movement Speed bonus. You can also get a pair with Elusive/Tailwind, though it would be very expensive and grant a similar effect to that of Darkray Vectors for just a few Chaos Orbs (Boots) Rare Boots - aim for the highest defensive stats and high Movement Speed bonus. You can also get a pair with Elusive/Tailwind, though it would be very expensive and grant a similar effect to that of Darkray Vectors for just a few Chaos Orbs |
|
| Min. requirements: 70 maximum Life Chance to gain Elusive on Critical Strike You have Tailwind if you have dealt a Critical Strike Recently 25% increased Movement Speed Optional affixes: Elemental Resistances Chaos Resistance |
|
 (Boots) Darkray Vectors - massive Raider's bonuses for each Frenzy Charge active, make Darkray Vectors one of the best budget-wise picks for this build (Boots) Darkray Vectors - massive Raider's bonuses for each Frenzy Charge active, make Darkray Vectors one of the best budget-wise picks for this build |
|
| (40-70)% increased Armour and Evasion +(20-40)% to Lightning Resistance 5% increased Movement Speed per Frenzy Charge +1 to Maximum Frenzy Charges 40% reduced Frenzy Charge Duration 25% reduced Light Radius 2% chance to Dodge Attack Hits per Frenzy Charge |
|
| Boot enchantment: 16% increased Attack and Cast Speed if you've Killed Recently |
|
 (Gloves) Rare Gloves - very solid choice which will help you Cap your Resistances. Also, Spiked Gloves will both provide a decent DPS increase via its implicit mod. End-game items should add extra Frenzy Charge via Warlord affix (Gloves) Rare Gloves - very solid choice which will help you Cap your Resistances. Also, Spiked Gloves will both provide a decent DPS increase via its implicit mod. End-game items should add extra Frenzy Charge via Warlord affix |
|
| Min. requirements: 70 maximum Life 60% Total Elemental Resistances +1 to Maximum Frenzy Charges Optional affixes: Attributes Accuracy Rating Adds # to # Cold Damage if you've dealt a Critical Strike Recently |
|
 (Amulet) Yoke of Suffering - you are going to apply three types of Elemental Ailments if you are using Replica Abyssus, so this Amulet will provide a substantial DPS bonus (Amulet) Yoke of Suffering - you are going to apply three types of Elemental Ailments if you are using Replica Abyssus, so this Amulet will provide a substantial DPS bonus |
|
| +(10-16) to all Attributes +(10-20)% to Fire Resistance +(10-20)% to Cold Resistance +(20-40)% to Lightning Resistance 30% reduced Duration of Ailments on Enemies (5-10)% chance to Shock Enemies take 5% increased Damage for each type of Ailment you have inflicted on them Your Elemental Damage can Shock |
|
 (Amulet) Rare Amulet - great pick for all kinds of missing stats, and possibly a ton of extra DPS bonuses. There are too many powerful options here to list them, below you will find the most common ones (Amulet) Rare Amulet - great pick for all kinds of missing stats, and possibly a ton of extra DPS bonuses. There are too many powerful options here to list them, below you will find the most common ones |
|
| Min. requirements: 60 maximum Life 28% increased Critical Strike Multiplier Optional affixes: Attributes Increased Damage per Frenzy Charge Added Cold Damage to Attacks Elemental Damage with Attacks Accuracy Rating Critical Strike Chance |
|
 (Rings) Rare Rings - since you are going to use so many Unique Items, you will need a lot of Life and Resistances on your Rings to provide this build with sufficient defenses (Rings) Rare Rings - since you are going to use so many Unique Items, you will need a lot of Life and Resistances on your Rings to provide this build with sufficient defenses |
|
| Min. requirements: 70 maximum Life 90% Total Elemental Resistances Optional affixes: Elemental Damage with Attacks Added Cold Damage per Frenzy Charge Added Cold Damage against Chilled enemies Increased Critical Strike Multiplier if you have Shattered an enemy recently Chaos Resistance Attributes |
|
 (Jewel) Intuitive Leap - allows you to pick up a bunch of important Passives without connecting them to your Tree and saving you a lot of points in the process. It should be allocated right above Herbalism (Jewel) Intuitive Leap - allows you to pick up a bunch of important Passives without connecting them to your Tree and saving you a lot of points in the process. It should be allocated right above Herbalism |
|
| Passives in Radius can be Allocated without being connected to your tree Allocated Passives: Herbalism Survivalist Fervour Heartseeker Acuity |
|
 (Jewel) Watcher's Eye - one of the best end-game Jewels for this build. You should get one with Added Cold Damage or Cold Penetration while you are affected by Hatred and possibly some additional Precision mod Life Flask Charges on Crit. or Crit. Multiplier (Jewel) Watcher's Eye - one of the best end-game Jewels for this build. You should get one with Added Cold Damage or Cold Penetration while you are affected by Hatred and possibly some additional Precision mod Life Flask Charges on Crit. or Crit. Multiplier |
|
| (4-6)% increased maximum Energy Shield (4-6)% increased maximum Life (4-6)% increased maximum Mana <Two or Three random aura modifiers> Recommended Aura modifiers: Damage Penetrates (10-15)% Cold Resistance while affected by Hatred Adds (58-70) to (88-104) Cold Damage while affected by Hatred Gain a Flask Charge when you deal a Critical Strike while affected by Precision +(20-30)% to Critical Strike Multiplier while affected by Precision |
|
 (Jewel) Large Cluster Jewel - you are looking to maximize your DPS via Medium Cluster Jewels, so you need at least two Large Cluster Jewels with some bonus DPS and two types of Leech to increase your sustainability (Jewel) Large Cluster Jewel - you are looking to maximize your DPS via Medium Cluster Jewels, so you need at least two Large Cluster Jewels with some bonus DPS and two types of Leech to increase your sustainability |
|
| Recommended affixes: 1 Added Passive Skill is Prismatic Heart 1 Added Passive Skill is Sadist 1 Added Passive Skill is Doryani's Lesson 1 Added Passive Skill is Fuel the Fight 1 Added Passive Skill is Calamitous 1 Added Passive Skill is Smite the Weak |
|
 (Jewel) Medium Cluster Jewel - stack as many Crit. Medium Jewels as possible to reach as high Crit. Chance and Crit. Damage as possible, as those two stats are a great way to boost your effective DPS (Jewel) Medium Cluster Jewel - stack as many Crit. Medium Jewels as possible to reach as high Crit. Chance and Crit. Damage as possible, as those two stats are a great way to boost your effective DPS |
|
| Recommended affixes: 1 Added Passive Skill is Basics of Pain 1 Added Passive Skill is Pressure Points 1 Added Passive Skill is Precise Commander 1 Added Passive Skill is Quick Gateway |
|
 (Jewel) Abyss Jewels - with flat Added Elemental Damage, Crit. Multiplier and Life. Any type of Damage will do, but Cold is the preferred one (Jewel) Abyss Jewels - with flat Added Elemental Damage, Crit. Multiplier and Life. Any type of Damage will do, but Cold is the preferred one |
|
| Recommended affixes: maximum Life added Elemental Damage to Attacks/Claw Attacks Critical Strike Multiplier Optional affixes: Attributes/Resistances |
|
 (Jewel) Rare Jewels - look for similar stats as on Abyss Jewels. The best end-game Jewels should have two types of Crit. The multiplier that benefits this build. Aim to get one Jewel with Corrupted Blood cannot be inflicted on you implicit mod (Jewel) Rare Jewels - look for similar stats as on Abyss Jewels. The best end-game Jewels should have two types of Crit. The multiplier that benefits this build. Aim to get one Jewel with Corrupted Blood cannot be inflicted on you implicit mod |
|
| Recommended affixes: Maximum Life Global/Melee Critical Strike Multiplier Optional affixes: Increased Damage with Swords Corrupted Blood cannot be inflicted on you Attributes Resistances |
|
 (Flask) Bottled Faith - one of the best Flasks in the game which adds a ton of effective Crit. Chance (Flask) Bottled Faith - one of the best Flasks in the game which adds a ton of effective Crit. Chance |
|
| 40% increased Damage Creates Consecrated Ground on Use (20-40)% increased Duration Consecrated Ground created by this Flask has Tripled Radius Consecrated Ground created during Effect applies (7-10)% increased Damage taken to Enemies (100-150)% increased Critical Strike Chance against Enemies on Consecrated Ground during Flask effect |
|
 (Flask) Atziri's Promise - a great inexpensive flask. It's one of the most popular flasks in Path of Exile - grants additional Chaos Damage and Life Leech (Flask) Atziri's Promise - a great inexpensive flask. It's one of the most popular flasks in Path of Exile - grants additional Chaos Damage and Life Leech |
|
| +35% to Chaos Resistance 2% of Chaos Damage Leeched as Life during Flask effect Gain (5-8)% of Physical Damage as Extra Chaos Damage during effect Gain (5-8)% of Elemental Damage as Extra Chaos Damage during effect |
|
 (Flask) Cinderswallow Urn - grants Onslaught buff and increases your damage against enemies Ignited by your Hits (which is basically anything you manage to Hit) (Flask) Cinderswallow Urn - grants Onslaught buff and increases your damage against enemies Ignited by your Hits (which is basically anything you manage to Hit) |
|
| +90 to Maximum Charges Recharges 5 Charges when you Consume an Ignited corpse (175-200)% increased Charges used Enemies Ignited by you during Flask Effect take (7-10)% increased Damage Veiled Suffix <One of the three modifiers> |
|
Other suggested Flasks:
|
|
  |
|
|
We will appreciate all suggestions regarding this build. Also if you have a request for a future guide please leave it in the comments below.
Pictures used in this article are the intellectual property of Grinding Gear Games.
