
The Real Battlemage Inquisitor Build
Find out what a true Battlemage is by playing a self-cast Fireball Fanatic InquisitorBattlemage Fireball
Inquisitor Build
Created for Patch 3.19
The Best Crafty Guides by Odealo
| Guide notes |
| October 18, 2022 -Build created |
| Build Overview | |||
| Tags: [CASTER] [ELEMENTAL] [LIFE] [CRITICAL] | |||
|
Budget: Defenses: |
|
Boss DPS: AoE: |
|
Fireball is the most iconic Spell in the fantasy genre ever existed. Many in their childhood often imagined epic adventures and battles fought by powerful mages who bring destruction to the battlefield with their powerful magic. With this Build, our goal was to fulfill this fantasy, but don't worry if you are not into roleplay, the build is very capable on its own!
Fireball in Path of Exile is a very simple Spell - you throw a ball of Fire at your opponents until they die. At the end of its destination, the Fireball explodes dealing Damage to every Enemy in a rather small Area of Effect around it. Those explosions can overlap with a single enemy, but it's more of a neat trick instead of a reliable tactic to increase your single-target Damage.
To further deepen our bonds with an image of a mage devoted to their cause, we utilize the Fanaticism mechanic. It is a unique tool available only to the Inquisitor ascendancy, which greatly reduces Mana Costs as well as boosts your Cast Speed and Area of Effect if you alternate between casting Spells and using Attacks. Fortunately, you do not need to undergo any muscle training to do that, you can simply integrate Leap Slam or Smite into your regular gameplay to have this Buff almost all the time. To trigger the Fanaticism Buff, you have to reach the maximum amount of Fanatic charges, and you can obtain them while the previous Fanaticism is still active. Thanks to this, you can either prepare a very powerful 4-second burst, paired with various buffs from being Focused, or continuously interrupt your Casts with Leap Slam to get solid sustained DPS.
As every righteous Inquisitor, we completely ignore enemy Resistances with the help of our Inevitable Judgment. That means we cannot lower their Resistances into negative values, making them more prone to that type of Damage, but it also means we don't have to do it in the first place.
Battlemage granted by another Inquisitor Ascendancy Passive is a very interesting mechanic that adds all the damage from your Main Hand Weapon to your Spells. Fireball has one of the best Damage Effectiveness in the game, as high as 370%, making it a great candidate for this mechanic.
Pinpoint is an amazing Support Gem that adapts to the situation. When you clear the map, jump around using Leap Slam, don't cast that often etc, it adds additional projectiles to your Fireball, but when you encounter a tough enemy and start continuously casting, it reduces the number of Projectiles in exchange for a great Damage boost. Unfortunately, we cannot make use of additional Intensify levels available via Passive Tree Mastery, because it reduces the number of projectiles to a literal 0. With the Dying Sun Flask, you will still have enough projectiles, but we find that Flask to be unreliable in longer fights.
Another unusual aspect of this Build are the Elemental Ailments. Instead of regular ones, we decided to use alternative versions available through Secrets of Suffering. The most important one is Brittle, which increases Base Critical Strike Chance by a flat amount, up to 6%. It doesn't sound like that big of a deal, but in practice it doubles our total Critical Strike Chance, allowing us to reach 100% Chance very easily. The Sap is also very useful, as it decreases the Damage dealt by the enemy. Scorch has no use for this build as we ignore Elemental Resistances anyway.
As our defensive layers, we choose to specialize in high maximum Life and Armour Rating. with a bit of Energy Shield on top of that. We also use Glancing Blows with a decent amount of Block Chances - it's not block capped but you can opt for a more defensive setup with a Shield instead of Dual Wielding. Thanks to the Corrupted Soul from Timeless Jewel, half of the Damage we take splits into Life and Energy Shield, allowing you to recover both of them at once.
This Build uses almost only Rare Items, so only you decide on its budget. It works quite well with just regular Rares, but if you invest in better Rares, your Character will accordingly become stronger. We wouldn't recommend it as a League starter, as the market for some of those Rares is quite scarce during the first days.
You can also check our other Path of Exile builds right over here Odealo's Crafty Guides - Full List
1. Gameplay
During regular Mapping, you don't have to worry about Fanaticism Buff at all, you can just spam your Spells and move around using Leap Slam. To quickly take down the Bosses, you will want to use Smite and Arcanist Brand which will trigger Sniper Mark and Flame Wall on the enemy. Tornado is also a very powerful tool, which you can automate with a proper Helmet modifier. Taking full advantage of Fanaticm Buff might take a while to get used to, but it's a very interesting and rewarding playstyle.
|
|
|
|

2. Build's PROS & CONS
| PROS |
|
| CONS |
|
3. Leveling tips
Leveling a Spell Caster Templar is a breeze. You can start using Fireball from the very beginning, but you can also choose to use other Spells, especially the ones that don't need additional Projectiles from Support Gems to have good clear. There are many very powerful Uniques for low-level Casters - as always, Tabula Rasa is the best Item you can get to improve your Damage early on. Pair of Axiom Perpetuums will allow you to spec into Critical Strikes very early into the game.
Suggested leveling Gem setups:
| Fireball setup | |
 |
Fireball - you can level up using your End-game Spell from the very beginning. The lack of Pierce or additional Projectiles might be a bit noticeable |
 |
Arcane Surge Support - spending Mana gives a Buff that boosts your Damage and Mana Regeneration |
 |
Lesser Multiple Projectiles Support - without additional Projectiles the Clear Speed is quite poor. Change to Pinpoint once you unlock that Support Gem in Act 3 |
 |
Increase Critical Strikes Support - boost your Critical Strike Chance significantly |
 |
Increase Critical Damage Support - improves the Damage of your Critical Strikes |
 |
Elemental Focus Support - greatly increases Damage and disables Ailments. Ignite is very weak with this build. |
| Auras setup | |
 |
Determination - grants a big amount of flat Armour Rating, which is very helpful during the leveling. |
 |
Vitality - it gives a lot of Life Regeneration, improving your survivability. |
 |
Clarity - provides a flat amount of Mana Regeneration, try to keep it on a low level to minimalize Mana Reservation |
 |
Herald Of Ash - this Herald grants a decent amount of Damage for Fire Spells |
| Utility setup | |
 |
Flame Dash - quickly teleports you in a short distance |
 |
Sniper Mark - increases Projectile Damage taken by the enemy, and splits them towards nearby enemies for extra clear |
 |
Steelskin -a Buff that reduces the Damage you take for a short duration |
 |
Flame Wall - Projectiles that travel through the Wall deal additional Fire Damage and apply the Flame Wall debuff on the enemies. |
Bandits:
Kill all Bandits to get additional 2 Passive Tree Skill Points
Leveling Skill Trees:
31 Points Passive Tree
We recommend this order:
1) Light of Divinity 2) Devotion 3) Divine Judgement 4) Heart and Soul 5) Annihilation
61 Points Passive Tree
Allocate:
1) Cruel Preparations 2) Influence 3) Doom Cast 4) Written in Blood 5) Nibleness 6) Melding
Recommended leveling items:
 Le Heup of All - a very strong Ring, that provides very much-needed Attributes and Elemental Resistances Le Heup of All - a very strong Ring, that provides very much-needed Attributes and Elemental Resistances |
|
| Adds 1 to 4 Physical Damage to Attacks +(10-30) to all Attributes (10-30)% increased Damage (10-30)% increased Rarity of Items found +(10-30)% to all Elemental Resistances |
|
 Goldrim - grants a lot of Elemental Resistances, available at level 1 Goldrim - grants a lot of Elemental Resistances, available at level 1 |
|
| +(30-50) to Evasion Rating 10% increased Rarity of Items found +(30-40)% to all Elemental Resistances Reflects 4 Physical Damage to Melee Attackers Level Requirement reduced by 100 (Hidden) |
 Tabula Rasa - the best leveling Item you can get, managing Mana at early levels may be a bit problematic Tabula Rasa - the best leveling Item you can get, managing Mana at early levels may be a bit problematic |
|
| Item has no level requirement and Energy Shield (Hidden) Item has 6 White Sockets and is fully linked (Hidden) |
|
 Axiom Perpetuum - very strong Sceptre, allows you to opt for Critical Strikes from the very beginning, Cast Speed is also quite useful. Can be used for the whole Campaign Axiom Perpetuum - very strong Sceptre, allows you to opt for Critical Strikes from the very beginning, Cast Speed is also quite useful. Can be used for the whole Campaign |
|
| Adds (2-3) to (5-6) Fire Damage to Spells Adds (2-3) to (5-6) Cold Damage to Spells Adds 1 to (10-12) Lightning Damage to Spells (4-6)% increased Cast Speed (100-140)% increased Critical Strike Chance for Spells |
|
 Doedre's Tenure - they provide an enormous boost to your Spell Damage, try to get the ones with the lowest Cast Speed penalty Doedre's Tenure - they provide an enormous boost to your Spell Damage, try to get the ones with the lowest Cast Speed penalty |
|
| +(20-50) to Intelligence 100% increased Spell Damage (25-15)% reduced Cast Speed |
|
| (16-22)% Chance to Block Spell Damage 1000% increased Armour and Energy Shield Damage taken from Blocked Hits cannot bypass Energy Shield Damage taken from Unblocked hits always bypasses Energy Shield Glancing Blows |
|
 Kikazaru - grants a decent amount of Attributes and some Resistances, and a very powerful sustain Kikazaru - grants a decent amount of Attributes and some Resistances, and a very powerful sustain |
|
| +(20-30)% to Lightning Resistance +(10-15) to all Attributes (20-40)% increased Mana Regeneration Rate 60% reduced Effect of Curses on you Regenerate 3 Life per second per Level |
|
 Praxis - if you run into Mana problems, use this Ring to solve them once and for all Praxis - if you run into Mana problems, use this Ring to solve them once and for all |
|
| +(20-30) to maximum Mana +(30-60) to maximum Mana Regenerate (3-6) Mana per second -(8-4) to Total Mana Cost of Skills 8% of Damage taken Recouped as Mana |
|
 Perandus Blazon - grants Attributes and improves the duration of your Flasks Perandus Blazon - grants Attributes and improves the duration of your Flasks |
|
| (15-25)% increased Stun and Block Recovery +(20-30) to all Attributes (6-8)% increased Quantity of Items found +20% to Fire Resistance 20% increased Flask Effect Duration -2 Physical Damage taken from Attack Hits |
|
 Karui Ward- very good Amulet as it improves your Damage and Movement Speed Karui Ward- very good Amulet as it improves your Damage and Movement Speed |
|
| +(20-30) to Dexterity +(20-30) to Strength +100 to Accuracy Rating 30% increased Projectile Speed 10% increased Movement Speed 30% increased Projectile Damage |
|
 Wanderlust - this pair of boots help with your Mana Regeneration and make you immune to Frozen Ailment. Wanderlust - this pair of boots help with your Mana Regeneration and make you immune to Frozen Ailment. |
|
| +5 to Dexterity +(10-20) to maximum Energy Shield (20-40)% increased Mana Regeneration Rate 20% increased Movement Speed Cannot be Frozen |
|
 Seven-League Step - the best pair of boots to improve your Movement Speed Seven-League Step - the best pair of boots to improve your Movement Speed |
|
| 50% increased Movement Speed Level Requirement reduced by 100 (Hidden) |
|
4. Final Skill Tree, Ascendancy Points, and Pantheon
Final Skill Tree:
118 Points Final Passive Tree
118 Points Path of Building (PoB) link
Ascendancy points:
Preferably in this order:
- Righteous Providence
- Inevitable Judgement
- Instruments of Virtue
- Instruments of Zeal
- Sanctuary (once you get Forbidden Jewels setup)
Pantheon:
Major God: Brine King: You cannot be Stunned if you've been Stunned in the past 2 seconds, Cannot be Frozen, 50% reduced Effect of Chill on you
Minor God: Soul of Abberath: 60% less Duration of Ignite on You; Unaffected by Burning Ground
5. Final Gems links
| [DPS] Fireball setup | |
|
Fireball - a fiery Projectile that explodes upon final impact, that explosion can overlap with a single enemy. Has great Added Damage Effectiveness. Vaal Version allows for better scaling, but getting a 21 Gem level is more important. |
 |
Spell Echo Support - doubles your Casts with increased Cast Speed. The Awakened version of this Gem adds a chance to deal Double Damage |
|
Increased Critical Damage Support - adds a lot of Critical Strike Multiplier |
 |
Inspiration Support - improves your Damage and Critical Strike Chances |
 |
Pinpoint Support - every Cast adds a stack of Intensify, which fades away once you stop Casting or start Moving. Every stack of Intensify removes Projectiles added by this Gem and increases your Damage |
 |
Pierce Support - projectile Pierce up to 4 enemies before they explode. You can also use Awakened Fork Support for better Clear but slightly weaker Damage |
| [UTILITY] Auras | |
|
Determination - grants you a lot of Armour Rating and boosts it even further. |
 |
Zealotry - improves Damage and Critical Strike Chance, and creates Consecrated ground under your enemies. |
 |
Defiance Banner - increases your Armour and reduced the Critical Strike Chance of nearby enemies. Do not link with Enlighten Support |
 |
Petrified Blood - keeps you at Low Life status and splits incoming Hit Damage into Hit and DoT effect. Allows Reserving half of your Life without any disadvantage |
 |
Enlighten Support - reduces the Reservation of linked Auras |
| [UTILITY] Auras reserving Life | |
|
Herald of Ash - increases your Fire Damage and adds a satisfying visual effect on Kill |
|
Vitality - improves your Life Regeneration. Adjust Gem Level to not Reserve over 50% of your Life |
 |
Arrogance Support - linked Auras Reserve Life instead of Mana. Use Anomalous Quality to increase Reservation Effectiveness. |
| [UTILITY] Tornado setup Socket in Helmet | |
 |
Tornado - Hitting a newly created Tornado with your Fireballs will add a portion of that Damage to the Tornado |
 |
Onslaught Support - Tornado has a chance to grant you Onslaught Buff when hitting an Enemy. |
 |
Power Charge on Critical Support - Tornado has a Chance to give you a Power Charge when it deals Critical Strike |
| [UTILITY] Arcanist Brand setup | |
|
Sniper's Mark - increases Projectile Damage dealt to Marked Enemy. Upon collision, Projectiles are Split and sent in direction of nearby enemies. |
 |
Arcanist Brand - attach a Brand that Casts linked Spells on the enemy |
|
Flame Wall - adds flat Fire Damage to projectiles that travel through the Wall. The DoT effect is insignificant but adds the Burning Status |
 |
Lifetap - without Fanaticism Buff, Brand drains your Mana very fast |
| [UTILITY] Leap Slam and Smite setup | |
 |
Leap Slam - use this Skill to quickly move around, dodge incoming attacks and get Fanatic Charges |
 |
Smite - hitting an enemy with this Skill grants a short-duration Buff that grants a lot of flat lightning damage. It also grants Fanatic Charge |
 |
Faster Attacks Support - speeds up usage of linked Attacks |
| [UTILITY] Molten Shell | |
|
Molten Shell - creates an absorbing Shield that reduces the amount of Damage you take. Scales well with your Armour Rating |
|
|
6. Gear Setup
This build uses only a few Unique Items, and the rest of them are Rare. You will use two different kinds of Weapons: a pretty typical Spell Caster one, and one suited for Battlemage, so with a lot of Flat Elemental Damage and some useful modifiers for a Caster. It will be pretty similar to the Weapon made for an Attack Build, except you still want Cast Speed instead of Attack Speed etc. Prioritize the Cold Damage on this Weapon, as it affects the Brittle Effect, which is very important for your overall Damage.
You will have to get Secrets of Suffering to get access to Alternative Elemental Ailments - the best way to do so would be to use the Alternating Sceptre as a Base for one of your Weapons, but you could also use The Interrogation Unique Jewel at the cost of additional Passive Skill Points. If possible, all your Gear should be Hybrid Armour and Energy Shield based to improve your Defences. Having mostly Rare Equipment lets you heavily customize your Gear and adjust it to your budget. It also lets you reach high Maximum Life on this Build, as Uniques often lack this modifier. Passive Tree lacks Dexterity, so you will have to cover those requirements with your Gear.
Our recommended items will:
- Cap your resistances at 75%
- Provide you with enough DPS and Life to start mapping
|
Stat priorities on items:
|
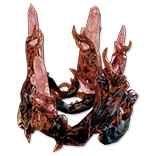 (Helmet) Rare Helmet - Blizzard Crown is the best Base for your Helmet as it adds a lot of Flat Cold Damage, which boosts your Brittle Effect. Try to get High Life, Resistances, or Attributes, and craft a Trigger modifier to automate your Tornado Setup (Helmet) Rare Helmet - Blizzard Crown is the best Base for your Helmet as it adds a lot of Flat Cold Damage, which boosts your Brittle Effect. Try to get High Life, Resistances, or Attributes, and craft a Trigger modifier to automate your Tornado Setup |
|
| Min. requirements: +60% to Elemental Resistances +70 to Maximum Life Dexterity Optional affixes: Trigger Socketed Spells when you Focus, with a 0.25 second Cooldown |
|
| Helmet enchantments: Sniper's Mark has 30% increased Curse Effect 40% increased Fireball Damage |
|
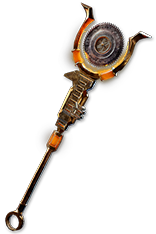 (Weapon)Rare Sceptre - one of the Weapons has to be an Alternating Sceptre Base, it doesn't matter which one. On your Main Hand get as much Flat Elemental Damage as possible, and some useful Caster modifiers. Elemental Damage will be added to Fireball at 370% Effectiveness via the Battlemage, and Cold Damage is the most important one here. (Weapon)Rare Sceptre - one of the Weapons has to be an Alternating Sceptre Base, it doesn't matter which one. On your Main Hand get as much Flat Elemental Damage as possible, and some useful Caster modifiers. Elemental Damage will be added to Fireball at 370% Effectiveness via the Battlemage, and Cold Damage is the most important one here. |
|
|
Min. requirements: |
|
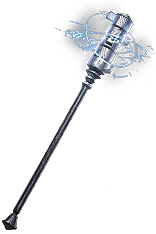
 (Weapon)Rare Sceptre - your other Sceptre should be a typical Spell Caster one, with lots of Spell Damage, Cast Speed, and additional Levels of Fire Gems. (Weapon)Rare Sceptre - your other Sceptre should be a typical Spell Caster one, with lots of Spell Damage, Cast Speed, and additional Levels of Fire Gems. |
|
| Min. requirements: +70% increased Spell Damage +20% increased Cast Speed Optional affixes: +70% increased Critical Strike Chance for Spells +25% to Global Critical Strike Multiplier +1 to Level of all Fire Spell Skill Gems |
|
 (Body Armour) Rare Body Armour - on your Body Armour you can get a lot of Maximum Life and many good Offensive modifiers such as a way to generate Frenzy Charges, additional Levels for Socketed Gems, extra Base Critical Strike Chance, etc. (Body Armour) Rare Body Armour - on your Body Armour you can get a lot of Maximum Life and many good Offensive modifiers such as a way to generate Frenzy Charges, additional Levels for Socketed Gems, extra Base Critical Strike Chance, etc. |
|
| Min. requirements: +90 to maximum Life +30% to Elemental Resistances Optional affixes: 10% chance to gain a Frenzy Charge on Hit +1 to Level of Socketed Active Skill Gems +(0.5–1.5)% to Spell Critical Strike Chance You can apply an additional Curse |
|
 (Boots) Rare Boots - Movement Speed is not as important as you will use mostly Leap Slam to move around, but you can get a Hybrid modifier with a chance to get an Onslaught on Kill here. Other than that, get maximum Life, Resistances, and missing Attributes. (Boots) Rare Boots - Movement Speed is not as important as you will use mostly Leap Slam to move around, but you can get a Hybrid modifier with a chance to get an Onslaught on Kill here. Other than that, get maximum Life, Resistances, and missing Attributes. |
|
| Min. requirements: +70 to maximum Life 20% increased Movement Speed (8–12)% chance to gain Onslaught for 4 seconds on Kill +60% to Elemental Resistances Optional affixes: Attributes 6% increased Action Speed (Searing Exarch Implicit) |
|
| Min. requirements: +70 to maximum Life +90% to Elemental Resistances Optional affixes: Cast Speed 30% chance to Unnerve Enemies for 4 seconds on Hit (Searing Exarch Implicit) (31-36)% increased Attack and Cast Speed while Focused |
|
 (Belt) Rare Belt - Stygian Vise base allows you to use additional Abyss Jewel, but it's not required. Again, get as much Life and Resistances as possible. Flask modifiers are also useful to grant you better uptime. (Belt) Rare Belt - Stygian Vise base allows you to use additional Abyss Jewel, but it's not required. Again, get as much Life and Resistances as possible. Flask modifiers are also useful to grant you better uptime. |
|
| Min. requirements: +100 to Maximum Life +80% to Elemental Resistances Optional affixes: % Increased Maximum Life Attributes 17% reduced Flask Charges used |
|
 (Jewel)Rare Abyss Jewel - as for Jewel socketed in the Belt, try to get one with maximum Life and Critical Strike Multiplier. Cold Damage added to your Spell is also good as it will boost your Brittle Effect. (Jewel)Rare Abyss Jewel - as for Jewel socketed in the Belt, try to get one with maximum Life and Critical Strike Multiplier. Cold Damage added to your Spell is also good as it will boost your Brittle Effect. |
|
| Min. requirements: +30 to maximum Life +10% to Global Critical Strike Multiplier Optional affixes: 12 to 16 Added Spell Cold Damage while Dual Wielding Attributes Resistances |
|
 (Amulet) Rare Amulet - a good Amulet can grant you tons of Damage. Try to get one with at least Maximum Life and an additional Level for your Skills, and then look for other, less potent Damage modifiers. (Amulet) Rare Amulet - a good Amulet can grant you tons of Damage. Try to get one with at least Maximum Life and an additional Level for your Skills, and then look for other, less potent Damage modifiers. |
|
| Min. requirements: +30% to Elemental Resistances +60 to Maximum Life +1 to Level of all Fire Skill Gems Optional affixes: +1 to Level of all Skill Gems Critical Strike Multiplier increased Cast Speed |
|
| Recommended Anointments: Charisma |
|
 (Ring)Mark of the Shaper - this Ring can give enormous amounts of Spell Damage if your other ring is an Elder-influenced Item. (Ring)Mark of the Shaper - this Ring can give enormous amounts of Spell Damage if your other ring is an Elder-influenced Item. |
|
| (15-25)% increased Elemental Damage 20% chance to Trigger Level 20 Summon Volatile Anomaly on Kill Adds (13-18) to (50-56) Lightning Damage to Spells (6-10)% increased maximum Energy Shield (6-10)% increased maximum Life (60-80)% increased Spell Damage if your other Ring is an Elder Item Cannot be Stunned by Spells if your other Ring is a Shaper Item |
|
 (Ring) Rare Ring - to fully utilize Elder Influence on your other Ring you can get one with a Critical Strike Multiplier bonus, but you can settle for just high maximum Life and Elemental Resistances (Ring) Rare Ring - to fully utilize Elder Influence on your other Ring you can get one with a Critical Strike Multiplier bonus, but you can settle for just high maximum Life and Elemental Resistances |
|
| Min. requirements: +80% to Elemental Resistances +60 to Maximum Life Optional affixes: +(17–20)% to Global Critical Strike Multiplier Attributes |
|
 (Jewel) Rare Jewels - try to get one with maximum Life and at least one Critical Strike Multiplier modifier. The rest of the mods depends on your budget (Jewel) Rare Jewels - try to get one with maximum Life and at least one Critical Strike Multiplier modifier. The rest of the mods depends on your budget |
|
| Recommended affixes: 7% increased maximum Life +17% to Critical Strike Multiplier with Fire Skills +15% to Critical Strike Multiplier with Elemental Skills Resistances Attributes |
|
 (Jewel) Watcher's Eye - there are many modifiers of great use from this Jewel, although the choices are pretty limited to Zealotry and Determination. (Jewel) Watcher's Eye - there are many modifiers of great use from this Jewel, although the choices are pretty limited to Zealotry and Determination. |
|
| (4-6)% increased maximum Energy Shield (4-6)% increased maximum Life (4-6)% increased maximum Mana <Two or Three random aura modifiers> Recommended Aura mods: Consecrated Ground you create while affected by Zealotry causes enemies to take (8-10)% increased Damage +(5-8)% Chance to Block Attack Damage while affected by Determination |
|
 (Jewel) Glorious Vanity - Corrupted Soul granted by this Jewel is a great defensive mechanic that splits half of the Damage between Life and Energy Shield, allowing you to recover them both at the same time. (Jewel) Glorious Vanity - Corrupted Soul granted by this Jewel is a great defensive mechanic that splits half of the Damage between Life and Energy Shield, allowing you to recover them both at the same time. |
|
| Bathed in the blood of (100-8000) sacrificed in the name of Doryani Passives in radius are Conquered by the Vaal Historic |
|
  (Jewel) Forbidden Flame&Flesh - with those Jewels you can take 5th Inquisitor Notable. Pius Path is the best one you can get, but it's also the most expensive. The cheapest option is to get Instruments of Zeal and allocate either Sanctuary or Augury of Penitence (Jewel) Forbidden Flame&Flesh - with those Jewels you can take 5th Inquisitor Notable. Pius Path is the best one you can get, but it's also the most expensive. The cheapest option is to get Instruments of Zeal and allocate either Sanctuary or Augury of Penitence |
|
| Allocates <Random Ascendancy Notable> if you have the matching modifiers on Forbidden Flesh/Flame | |
 (Jewel) The Interrogation - if you can't get a good Weapon on the Alternating Sceptre Base you can optionally use this Jewel instead (Jewel) The Interrogation - if you can't get a good Weapon on the Alternating Sceptre Base you can optionally use this Jewel instead |
|
| Adds Secrets of Suffering | |
 (Flask)Bottled Faith- this Flask is second to none in terms of how much Damage it gives. It's a bit expensive but definitely worth the price. (Flask)Bottled Faith- this Flask is second to none in terms of how much Damage it gives. It's a bit expensive but definitely worth the price. |
|
| Creates Consecrated Ground on Use (30-15)% reduced Duration Consecrated Ground created by this Flask has Tripled Radius Consecrated Ground created during Effect applies (7-10)% increased Damage taken to Enemies (100-150)% increased Critical Strike Chance against Enemies on Consecrated Ground during Flask effect |
|
 (Flask)Dying Sun - provides a very nice boost to your clear speed. Area of Damage increases the final explosion from Fireball, making overlapping much easier. (Flask)Dying Sun - provides a very nice boost to your clear speed. Area of Damage increases the final explosion from Fireball, making overlapping much easier. |
|
| (125-150)% increased Charges per use (60-40)% less Duration (10-20)% increased Area of Effect during Flask Effect Skills fire 2 additional Projectiles during Flask Effect |
|
|
Suggested Flasks:
|
|
   |
|
|
If you have any other build requests please leave that in the comments below. We are always open to suggestions and constructive feedback.
Pictures used in this article are the intellectual property of Grinding Gear Games.
