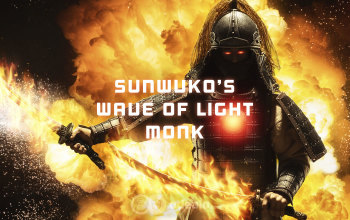
The Best Monk Build for Season 12 - Diablo 3 Patch 2.6.1
A powerful Monk build based on the Wave of Light skill and Monkey King's Garb setSunwuko Wave of Light
Monk build
Diablo 3 Patch 2.6.4
Monkey King's Garb (Sunwuko) is a very solid Monk set based on damage amplification caused by Sweeping Winds. The main idea is to increase the maximum number of Sweeping Wind stacks and making it never expire via certain Legendary items for Monks. With the recent buffs to Incense Torch of the Grand Temple and Tzo Krin's Gaze, Wave of Light is one of the most powerful Monk skills in Diablo 3. Below you will find a detailed guide on how to build a Sunwuko WoL Monk which is most suited for speed-farming Rifts and doing Bounties. You can find the Solo GR pushing variation of this build here.
To check the full list of our Best Diablo 3 builds visit: The Best Diablo 3 builds by Odealo

Table of contents
- General information
- Recommended items
- Recommended skills
General information
The entire build is based on the Monkey King's Garb (named after Sunwuko the Monkey King) set which provides the following bonuses:
- Damage taken is reduced by 50% while Sweeping Wind is active (2/6)
- Sweeping Wind spawns a decoy every tick next to the last enemy the Monk hit. The decoy taunts nearby enemies and then explodes for 1000% damage for each stack of Sweeping Wind currently active within 10 yards (4/6)
- Lashing Tail Kick, Tempest Rush, and Wave of Light have their damage increased by 1500% for each stack of Sweeping Wind the Monk currently has (6/6)
Having all six pieces of Sunwuko and maximum Sweeping Wind stacks grants the player an extremely high damage bonus. With Vengeful Wing equipped it goes up to 15,000% Increased damage of the supported skills. This combined with all the additional supporting items that include: Incense Torch of the Grand Temple, Tzo Krin's Gaze and Kyoshiro's Blade make Wave of Light one of the hardest-hitting skills in the game.
The mechanics for this build are rather simple. Pop your Sweeping wind for increased damage and damage reduction and spam Wave of Light. You can use Epiphany for either extra damage reduction (Desert Shroud rune) or Spirit regeneration for smoother playstyle.
|
|
Recommended items
| Equipment | |
 |
Head - Tzo Krin's Gaze Stat priorities: 1) Critical Hit Chance 2) Socket 3) Dexterity / High special power value 4) Vitality 4) Secondary res. Socket:  Special power: Increases Wave of Light damage by 125-150% Wave of Light is now cast at your enemy |
 |
Chest - Sunwuko's Soul Stat priorities: 1) Dexterity 2) Vitality 3) Life% 4) Secondary res. Sockets:    (If you feel squishy replace some Emeralds with Diamonds) |
 |
Pants - Sunwuko's Leggings |
 |
Gloves - Sunwuko's Paws Stat priorities: 1) Dexterity 2) Critical Hit Chance 3) Critical Hit Damage 4) Area damage% / Vitality 5) Secondary res. |
 |
Boots - Crudest Boots Stat priorities: 1) Dexterity 2) Vitality 3) Increased Wave of Light damage 4) All elemental res. Special power: Mystic Ally summons double the number of Mystic Allies that fight by your side |
 |
Pauldrons - Sunwuko's Balance |
 |
Bracers - Nemesis Bracers Stat priorities: 1) Critical Hit Chance 2) Fire damage% 3) Dexterity 4) Vitality 5) Secondary res. Special power: Shrines will spawn an enemy champion |
 |
Amulet - Sunwuko's Shines Stat priorities: 1) Socket 2) Critical Hit Damage 3) Critical Hit Chance 4) Fire damage% 5) Dexterity |
 |
Ring - Stone of Jordan Stat priorities: 1) Socket 2) Critical Hit Chance 3) Fire damage% 4) vs Elite damage% 5) Critical Hit Damage 6) Dexterity 7) Secondary res. |
 |
Ring - Unity |
 |
Belt - Kyoshiro's Soul Stat priorities: 1) Dexterity 2) Vitality 3) Life% 4) Armor 5) Secondary res. Special power: Sweeping Wind gains two stacks every second it does not deal damage to any enemies |
 |
Weapon - In-geom Stat priorities: 1) Socket 2) High average damage 3) Damage% 4) Dexterity 6) Attack speed% Sockets:  Special power Your skill cooldowns are reduced by 8–10 seconds for 15 seconds after killing an elite pack Used for better mobility and faster clear-speed. Replace with Kyoshiro's Blade for maximum damage (for example very high GRs, or Uber bosses) |
 |
Weapon - Vengeful Wind (mandatory) 1) Socket 2) Stack count increased by 7 3) High average damage 4) Damage% 5) Dexterity 6) Attack speed% Sockets:  Special power Increases the maximum stack count of Sweeping Wind by 6-7 |
 |
Weapon - Kyoshiro's Blade (optional) 1) Socket 2) High average damage 3) Damage% 4) Dexterity 5) Attack speed% Sockets:  Special power Increases the damage of Wave of Light by 150%. When the initial impact of Wave of Light hits 3 or fewer enemies, the damage is further increased by 200-250% |
| Bonus Items for Season 16 (thanks to built-in Ring of Royal Grandeur power) |
|
 |
Obsidian Ring of the Zodiac Reduces the remaining cooldown of one of the skills by 1 second when hitting with a resource-spending attack Use in Kanai Cube instead of RoRG |
| Kanai Cube powers | |
 |
Incense Torch of The Grand Temple Reduces the Spirit cost of Wave of Light by 50%, and increases its damage by 450-500% |
 |
Pinto's Pride Wave of Light also Slows enemies by 80% for 3 seconds and deals 125–150% increased damage Can be freely replaced with Nemesis Bracers. If you put Pinto's Pride bracers in the cube, you are guaranteed to get the 150% Increased Wave of Light damage though |
 |
Ring of Royal Grandeur Reduces the number of items needed for set bonuses by 1 (to a minimum of 2) Replace with Obsidian Ring of the Zodiac or Convention of Elements in Season 16 |
| Legendary Gems | |
 |
Bane of the Trapped
|
 |
Bane of the Stricken
|
 |
Esoteric Alteration
|
Recommended skills
| Active Skills | |
 |
Wave of Light Focus a wave of light that crushes enemies for 835% damage as Holy Explosive Light Releases 8 waves in all directions, each dealing 830% weapon damage. Changes damage type to Fire Your main DPS skill. With all the required items equipped, you are allowed to spam it freely |
 |
Dashing Strike Quickly dash up to 50 yards, striking enemies along the way for 370% damage as Physical Blinding Speed Changes damage type to Cold, and grants 40% dodge chance for 4 seconds after using the dash Main mobility skill. Used also for the fantastic defensive buff |
 |
Epiphany Have an Epiphany, increasing the Monk's Spirit Regeneration per Second by 20 and enabling melee attacks to instantly dash to the target for 15 seconds Desert Shroud (defensive) Grants 50% damage reduction for the duration Insight (high GR pushing) Increases Spirit regeneration to a total of 45 per second We recommend using Desert Shroud rune. The additional spirit regen. might be only useful in extremely long and exhausting fights (GR.100+) |
 |
Sweeping Wind Surrounds the Monk in a vortex that continuously deals 105% damage as Physical per tick to all enemies within 10 yards. The vortex lasts 6 seconds and is refreshed each time the Monk strikes an enemy with a melee attack. Landing a Critical Hit has a chance to increase the vortex effect, up to 3 stacks for a total of 315% damage per tick Inner Storm While at maximum stacks grants 8 spirit regenerated per second Mandatory skill. Cast it once after you start your game, or after death. With the Kyoshiro's Soul belt you do not need to recast it or worry about stacks. |
 |
Mystic Ally Passive: A mystic ally fights by the Monk's side. The ally deals 130% of their damage as Physical per swing. When the ally dies, it is reborn after 5 seconds Active: The mystic ally has its damage increased by 50% for 10 seconds Air Ally Passive: Increases spirit regeneration by 4 per second Active: Instantly restores 100 spirit This skill is used for the amazing spirit regeneration |
 |
Mantra of Healing Passive: Player and his allies within 60 yards gain 10,728 increased Life regeneration per second. The heal amount is increased by 7% of the Monk's Life per Second bonus Active: Shroud the Monk and his allies with a shield that absorbs up to 62,064 damage for 3 seconds. Absorb amount is increased by 15% of the Player's Health Globe Healing Bonus Circular Breathing Passively increases spirit regen. by 3 Used solely for the additional spirit regen. If you are playing low/mid tiers GRs and feel like you don't run out of spirits under any circumstances, you can optionally replace it with any other utility mantra. |
| Passive Skills | |
 |
Harmony 40% of the Player's single elemental resistances from items also increases resistance to all elements |
| Beacon of Ytar Reduces all cooldowns by 20% |
|
 |
Exalted Soul
Increases maximum Spirit by 50 and Spirit Regeneration by 4 per second |
 |
Near Death Experience When receiving fatal damage, the character's Life and Spirit are restored to 35%. For 2 seconds the Player is also immune to all damage and all forms of control impairing effects This effect can occur only once every 60 seconds |
|
|
We hope you will enjoy this build as much as we did. And see you soon in the world of Sanctuary.
If you have any ideas on how this build could be improved, or if you feel like there is another more powerful Monk build, please let us know in the comments below.
Pictures used in this article are the intellectual property of Blizzard Entertainment.


