
Tectonic Slam Chieftain Build
Tectonic Slam build for Chieftain that uses Warcries. It's a Crit builds that combined with Staff can deal surprisingly high damageTectonic Slam
Chieftain Build
Updated for Patch 3.18
The Best Crafty Guides by Odealo
| Guide notes |
| June 18, 2021 -Build created July 04, 2022 -Updated for Patch 3.18 |
| Build overview | |||
| Tags: [MELEE] [ELEMENTAL] [LIFE] [STARTER] | |||
|
Budget: Defenses: |
|
Boss DPS: AoE: |
|
There are a few cheap Chieftain builds worth mentioning that performs surprisingly well. Tectonic Slam is a simple, straightforward Attack that's easy to assemble and play. It's a Melee Slam that consumes one of your Endurance Charges every third time you attack with this Skill. The Attack scales its Area of Effect with Endurance Charges and it converts 60% of your Physical Damage to Fire Damage, making it perform very well with Chieftain as its user. You mostly focus on accumulating Physical Damage and Lowering the Fire Resistance of your opponents - all of your Physical Damage is going to be converted to Fire. You should also look for Accuracy Rating and Critical Strike Chance and Multiplier. This build also reaps the benefits of Warcries and Exertion mechanics.
The version of the build presented here uses Glorious Vanity Timeless Jewel that turns one of your Keystones into Corrupted Soul, for a more effective Health Pool and a chance to score some good nodes. Your usual defenses with this build however will mainly consist of Maximum Health, Chance to Block, Life Leech, Life Regeneration, Fortify, and Endurance Charges. As for Ascendancy Skill Tree - the most important Notables are Valako and Hinekora, for the other two we Recommend Tasalio - for free 100% Fire Resistance allowing you to cheaply gear up and grant some useful defenses, and Ngamahu, for it offers a lot of offensive stats, mostly Physical to Fire conversion and Extra Fire as Physical periodically. Ramako is a Notable we could take if we focused more on Burning Damage, and Tawoha is just not worth taking at all.
You can also check our other Path of Exile builds right over here Odealo's Crafty Guides - Full List
1. Gameplay
For the most part, this build is as simple as it gets - you run around the map while attacking enemies with your Slam. You can additionally use Warcreis to increase your effectiveness or quickly regenerate Life. Use Flame Dash as your movement Skill. When fighting bosses it's crucial to summon your Ancestral Totems for each of them increases your Damage, it's also a good opportunity to utilize Exerted Attack by using your Warcries.
|
|
|
|
2. Build's PROS & CONS
| PROS |
|
| CONS |
|
3. Leveling tips
You can use any AoE Melee Attack like Ground Slam/Sunder/Cleave (depending on what weapons you currently have with the highest DPS) until you reach level 28 when you can start using Tectonic Slam. It has solid AoE and Damage, making it a great pick for the leveling phase, and since it's your final primary Attack, it's best to learn how to use it properly while leveling. Below you will find basic Skill Gem setups and several useful Uniques that will aid you during the campaign.
Suggested leveling Gem setups:
| Tectonic Slam setup | |
 |
Tectonic Slam - use Tectonic Slam as your main DPS Skill after you reach level 28 |
 |
Melee Physical Damage Support - best in slot Support Gem to increase your Melee Physical Damage |
 |
Fortify Support - use to gain Fortify buff |
 |
Elemental Damage with Attacks Support - increases your damage |
| Aura and Banner setup | |
 |
Anger - offensive Aura that adds Fire Damage to your Attacks |
 |
Blood and Sand - a Stance/Aura Skill that increases your AoE damage at the cost of reducing the radius of your Skills |
 |
Precision - Aura which increases your Accuracy Rating and Critical Strike Chance |
| Warcry setup | |
 |
Intimidating Cry - enemies take more damage by Intimidating them. It also doubles the damage of Exerted Attacks, making it the best Warcry on lower levels, whereas you should add additional Warcries when you can use them efficiently (meaning you need more Warcry Speed/Cooldown recovery, which comes at later levels) |
 |
Second Wind Support - allows you to use your Warcries a second time and reduces their cooldown |
| Utility Gems | |
 |
Ancestral Warchief - allows you to create a Totem that boosts your Melee Damage significantly |
 |
Flammability - the best Curse for this build which increases your Fire Damage against enemies. Just cast it manually versus Bosses on lower levels |
Bandits:
Killing all three Bandits for two additional Skill Points is the best option, but if you struggle with Mana or Elemental Resistances - pick Alira
Leveling Skill Trees:
37 Points Skill Tree
Head for the closest Staff-related cluster and pick some useful notables on the way
73 Points Skill Tree
Go for the other Staff clusters, pick up Maximum Endurance Charges and more Maximum Life
Recommended leveling items:
 Replica Blood Thorn - great staff you can use right after you kill Hillock, and the fact that it increases your Fire Damage by 100% and Curses enemies with Flammability on Block are good enough reasons for that Replica Blood Thorn - great staff you can use right after you kill Hillock, and the fact that it increases your Fire Damage by 100% and Curses enemies with Flammability on Block are good enough reasons for that |
|
| +18% Chance to Block Attack Damage while wielding a Staff +12% Chance to Block Attack Damage while wielding a Staff 100% increased Fire Damage (5-10)% increased Attack Speed Curse Enemies with Flammability on Block, with 20% increased Effect Reflects (22-44) Fire Damage to Attackers on Block Level Requirement reduced by 100 (Hidden) |
|
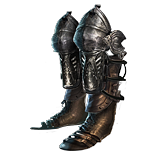 Redblade Tramplers - cheap pair of Boots with generic but good enough stats for a tight budget Redblade Tramplers - cheap pair of Boots with generic but good enough stats for a tight budget |
|
| Adds (2-5) to (7-10) Physical Damage to Attacks (5-10)% reduced Enemy Stun Threshold (150-200)% increased Armour +(50-70) to maximum Life +(20-30)% to Fire Resistance 25% increased Movement Speed Unaffected by Burning Ground |
|
 Deidbellow - one of the best leveling Helmets for Warcries users Deidbellow - one of the best leveling Helmets for Warcries users |
|
| +(20-30) to Strength +(20-30) to Dexterity Adds 10 to 20 Physical Damage to Attacks +(200-300) to Armour 20% increased Melee Damage Cannot Leech when on Low Life If you've Warcried Recently, you and nearby allies have 20% increased Attack, Cast, and Movement Speed |
|
 Tabula Rasa - outstanding Body Armour for leveling, can be used even up to level 90 or maybe higher Tabula Rasa - outstanding Body Armour for leveling, can be used even up to level 90 or maybe higher |
|
| Item has no level requirement and Energy Shield (Hidden) Item has 6 White Sockets and is fully linked (Hidden) |
|
 Kaom's Way - an upgraded version of Kaom's Sign, it scales well with Endurance Charges granting you Life Regeneration in a similar fashion to Valako Ascendancy Notable, you should have 5 or 6 of them before you put it on Kaom's Way - an upgraded version of Kaom's Sign, it scales well with Endurance Charges granting you Life Regeneration in a similar fashion to Valako Ascendancy Notable, you should have 5 or 6 of them before you put it on |
|
| +(20-30) to maximum Life +(10-20) to Strength Regenerate 0.4% of Life per second per Endurance Charge +(2-4) Life gained for each Enemy hit by your Attacks +1 to Maximum Endurance Charges |
|
4. Final Skill Tree, Ascendancy Points, and Pantheon
Final Skill Tree:
105 Points Final Skill Tree (doesn't include Cluster Jewels)
123 Points Path of Building (PoB) link
Ascendancy points:
Preferably in that order:
- Valako
- Tasalio
- Ngamahu
- Hinekora
Pantheon:
Major God: Soul of Lunaris: 1% additional Physical Damage Reduction for each nearby Enemy, up to 8%; 1% increased Movement Speed for each
nearby Enemy, up to 8%
Minor God: Soul of Ralakesh: Moving while Bleeding doesn't cause you to take extra Damage; 25% reduced Physical Damage over Time Damage taken while moving
5. Final Gems links
| [DPS] Tectonic Slam setup | |
 |
Tectonic Slam - An Attack that will deal Fire Damage to your opponents as a result of Damage Conversion. It has a decent AoE and the damage per Hit is really high. |
 |
Elemental Damage with Attacks Support - the end-user of your attacks will receive mostly Fire Damage |
 |
Melee Physical Damage Support - simply the best option for more Physical Damage |
 |
Pulverise Support - more Aoe and more Damage for AoE Attacks at the cost of Attack Speed |
 |
Fist of War Support - every few seconds your Slam Attack will be enhanced with more Aoe and increased Damage |
 |
Fortify - Fortify is a buff that you can benefit a lot from, if you have already a steady source of this buff, take  Fire Penetration, Fire Penetration, Inspiration, or Inspiration, or Elemental Focus Elemental Focus |
| [UTILITY] Warcries setup | |
 |
Enduring Cry - quickly regenerates a big portion of your Life Pool, use as a substitute for Life Flask |
 |
Intimidating Cry - the best Warcry to increase the damage of your next Attacks |
 |
Second Wind Support - allows you to use your Warcries a second time |
| [UTILITY] Aura, Stance, and Herald setup | |
 |
Anger - don't use Pride, you won't benefit from it as much as from Anger for the type of Damage your opponents will be receiving is purely Fire |
 |
Herald of Purity - Grants you more Physical Damage, which will later be converted to Fire Damage. Herald of Ash is another option, you can use it if that's your preference, the difference in damage is negligible. |
 |
Precision - for Accuracy Rating and Critical Strike Chance. Depending on your Mana Pool, you can use it at a lower gem level |
 |
Blood and Sand - switch between the Stances depending on your playstyle - more Damage or more AoE |
 |
Clarity - use Clarity for more Mana regen, if you have an option to use another high-cost mana-reserving skill, use Summon Skitterbots Summon Skitterbots |
 |
Enlighten Support - reduces the mana reservation cost of all linked skills |
| [UTILITY] Cast when Damage Taken setup | |
 |
Wave of Conviction - keep it at a level low enough so that it will trigger when you take a specified amount of damage, it lowers the Fire Resistance of your opponents |
 |
Immortal Call - a brief buff that increases your defenses by a lot, it should be automatically triggered as well |
 |
Cast when Damage Taken - triggers the linked Spells when you take damage |
| [UTILITY] Totems setup | |
 |
Ancestral Protector - summons a Totem that increases your Attack Speed |
 |
Ancestral Warchief - summons a Totem that increases your Melee Damage |
 |
Multiple Totems Support - allows you to have both Ancestral Warchief and Ancestral Protector Totems at the same time |
| Combustion Support - lowers the Fire Resistance of the Ignited opponents by 10% | |
| [UTILITY] Blood Rage | |
 |
Blood Rage - Greatly increased Attacks Speed and Life Leech. It generates Frenzy Charges on Kill |
| [MOBILITY] Flame Dash | |
 |
Flame Dash - a Travel Skill that teleports you over a short distance |
|
|
6. Gear Setup
It's a generic build that does not use any Uniques, your gear will consist of rare pieces that can be switched to more expensive ones, with more beneficial mods as you progress through the game. There are several Uniques listed below, though their use is completely optional, and they can be replaced with Rares at any point.
Our recommended items will:
- Cap your resistances at 75%
- Provide you with enough DPS and Life to start mapping
|
Stat priorities on items:
|
 (Helmet) Rare Helmet - Maximum Life and Elemental Resistances should be a priority, it's also a good place to look for Accuracy Rating or decreasing Fire Resistance of your enemies with Conqueror's Influence (Helmet) Rare Helmet - Maximum Life and Elemental Resistances should be a priority, it's also a good place to look for Accuracy Rating or decreasing Fire Resistance of your enemies with Conqueror's Influence |
|
|
Min. requirements: |
|
 (Helmet) Abyssus - It's really not recommended unless you know what you're doing - the helmet will make your character extremely fragile while increasing your Damage by a lot. Use it if you don't mind dying. (Helmet) Abyssus - It's really not recommended unless you know what you're doing - the helmet will make your character extremely fragile while increasing your Damage by a lot. Use it if you don't mind dying. |
|
| +(20-25) to all Attributes Adds 40 to 60 Physical Damage to Attacks +(100-125)% to Melee Critical Strike Multiplier (100-120)% increased Armour (40-50)% increased Physical Damage taken |
|
| Helmet enchantments: Tectonic Slam has 24% increased Area of Effect Tectonic Slam has +20% fissure branching chance Tectonic Slam deals 40% increased Damage |
|
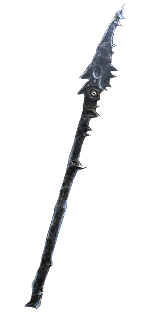 (Weapon) Rare Staff - Focus on increased Physical Damage - the more you can get the better, all the other mods are not as important as Physical Damage. There are a lot of extremely useful mods, mostly on the Warlord's Influenced weapons. (Weapon) Rare Staff - Focus on increased Physical Damage - the more you can get the better, all the other mods are not as important as Physical Damage. There are a lot of extremely useful mods, mostly on the Warlord's Influenced weapons. |
|
| Min. requirements: 140% increased Physical Damage Adds 40 to 70 Physical Damage +300 to Accuracy Rating Optional affixes: #% increased Attack Speed #% increased Critical Strike Chance #% to Quality Gain #% of Physical Damage as Extra Fire Damage #% of Physical Damage Converted to Fire Damage #% increased Area of Effect Adds # to # Fire Damage Attacks with this Weapon Penetrate #% Fire Resistance Attacks with this Weapon Penetrate #% Elemental Resistances #% Chance to Block Spell Damage if you were Damaged by a Hit Recently #% Chance to Block Attack Damage if you were Damaged by a Hit Recently +# to Weapon Range #% increased Attack Speed if you've Killed Recently #% to Critical Strike Multiplier if you haven't dealt a Critical Strike Recently Culling Strike |
|
 (Body Armour) Rare Body Armour - A regular Body Armour is your best option. Aim for generic defensive stats such as Maximum Life. Hunter's Influence offers a chance for Increased Maximum Life and added Critical Strike Chance so it's one of the best ones. (Body Armour) Rare Body Armour - A regular Body Armour is your best option. Aim for generic defensive stats such as Maximum Life. Hunter's Influence offers a chance for Increased Maximum Life and added Critical Strike Chance so it's one of the best ones. |
|
| Min. requirements: +150 to Maximum Life +80% to Elemental Resistances Optional affixes: Increased Armour Maximum Life % You Can Apply Additional Curse Attributes Attacks have +#% to Critical Strike Chance |
|
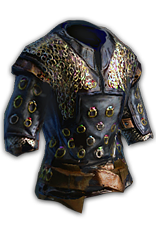 (Body Armour) Replica Loreweave - a cheap substitute for a rare Armour, it cripples your Maximum Elemental Resistances but the stats are significantly better and the price is usually lower compared to Lorewave (Body Armour) Replica Loreweave - a cheap substitute for a rare Armour, it cripples your Maximum Elemental Resistances but the stats are significantly better and the price is usually lower compared to Lorewave |
|
| Has 6 Sockets +(8-24) to all Attributes Adds (4-10) to (14-36) Physical Damage to Attacks (120-160)% increased Global Critical Strike Chance +(150-200) to maximum Energy Shield +(120-160) to maximum Life +(120-160) to maximum Mana (6-30)% increased Rarity of Items found (15-50)% increased Elemental Damage Your Maximum Resistances are (70-72)% |
|
 (Boots) Rare Boots - Find yourself a pair of boots with decent Maximum Life, Elemental Resistances, and Movement Speed. Tailwind and Onslaught mods are a luxury that you can get later on. (Boots) Rare Boots - Find yourself a pair of boots with decent Maximum Life, Elemental Resistances, and Movement Speed. Tailwind and Onslaught mods are a luxury that you can get later on. |
|
| Min. requirements: +70 to Maximum Life in total +60% to Elemental Resistances +25% increased Movement Speed Optional affixes: Increased Armour You have Tailwind if you have dealt a Critical Strike Recently #% chance to gain Onslaught for 4 seconds on Kill Attributes |
|
 (Gloves) Rare Gloves - Spiked Gloves should be an obvious choice since they increase your damage. You can find a mod for Accuracy Rating here but other than that, it's just more Maximum Life and Elemental Resistances. (Gloves) Rare Gloves - Spiked Gloves should be an obvious choice since they increase your damage. You can find a mod for Accuracy Rating here but other than that, it's just more Maximum Life and Elemental Resistances. |
|
| Min. requirements: +60 to Maximum Life +60% to Elemental Resistances +300 to Accuracy Rating Optional affixes: Chaos Resistance Increased Damage while Leeching Increased Attack Speed |
|
 (Belt) Rare Belt - The best place to look for Elemental Resistances. Hunter's Influence allows you for increased Maximum Life, making it the most popular one. Stygian Vise grants you more Flexibility by having an Abyssal Socket. (Belt) Rare Belt - The best place to look for Elemental Resistances. Hunter's Influence allows you for increased Maximum Life, making it the most popular one. Stygian Vise grants you more Flexibility by having an Abyssal Socket. |
|
| Min. requirements: +100 to maximum Life 120% to Elemental Resistances Optional affixes: increased maximum Life increased Damage increased Elemental Damage with Attacks increased Fire Damage |
|
 (Amulet) Rare Amulet - Amulet is a good place to look for Attributes such as Intelligence (Amulet) Rare Amulet - Amulet is a good place to look for Attributes such as Intelligence |
|
| Min. requirements: +80 to maximum Life 80% to Elemental Resistances Attributes Optional affixes: Global Critical Strike Multiplier Anger has reduced Reservation Damage Penetrates Fire Resistance Chaos Resistance |
|
| Recommended Anointments: Measured Fury Lava Lash Tenacity |
|
 (Ring) Rare Rings - use Vermilion, Diamond, Opal, Steel, or Two-Stone Ring as a base. Rings similar to Amulets can provide you with a lot of Attributes, Maximum Life, and Elemental Resistances but what you should especially look for is Curse on Hit - Flammability in this case. (Ring) Rare Rings - use Vermilion, Diamond, Opal, Steel, or Two-Stone Ring as a base. Rings similar to Amulets can provide you with a lot of Attributes, Maximum Life, and Elemental Resistances but what you should especially look for is Curse on Hit - Flammability in this case. |
|
| Min. requirements: Curse Enemies with Flammability on Hit Attributes +70 to Maximum Life Optional affixes: Chaos Resistance Accuracy Rating Elemental Resistances |
|
 (Jewel) Rare Abyss Jewels - "Corrupted Blood cannot be inflicted on you" is one of the most useful corrupted Implicit you can find on Jewels. Look for Murderous or Searching Jewels as a base. (Jewel) Rare Abyss Jewels - "Corrupted Blood cannot be inflicted on you" is one of the most useful corrupted Implicit you can find on Jewels. Look for Murderous or Searching Jewels as a base. |
|
| Min. requirements: +30 to maximum Life Optional affixes: Added Physical Damage to Attacks Attributes Accuracy Rating Critical Strike Chance and Multiplier |
|
 (Jewel) Rare Jewels - Jewels should be mostly used to increase your Maximum Life and Critical Strike Chance, these mods are easy to find (Jewel) Rare Jewels - Jewels should be mostly used to increase your Maximum Life and Critical Strike Chance, these mods are easy to find |
|
| Min. requirements: 7% increased Maximum Life Optional affixes: Attributes Elemental Resistances Increased Fire Damage Critical Strike Chance with Fire Skills or Melee Attacks increased Attack Speed |
|
 (Jewel) Large Cluster Jewel - Fuel the Fight is a notable that is necessary to literally fuel the fight by leeching Mana so it's good to have one, other than that, there are many Notables worth mentioning, look for Critical, Accuracy, and Physical Damage related ones (Jewel) Large Cluster Jewel - Fuel the Fight is a notable that is necessary to literally fuel the fight by leeching Mana so it's good to have one, other than that, there are many Notables worth mentioning, look for Critical, Accuracy, and Physical Damage related ones |
|
| Recommended affixes: 1 Added Passive Skill is Fuel the Fight 1 Added Passive Skill is Martial Prowess 1 Added Passive Skill is Calamitous 1 Added Passive Skill is Titanic Swings 1 Added Passive Skill is Surefooted Striker 1 Added Passive Skill is Graceful Execution 1 Added Passive Skill is Brutal Infamy 1 Added Passive Skill is Fearsome Warrior 1 Added Passive Skill is Smite the Weak |
|
 (Jewel) Medium Cluster Jewel - Look for Fire Penetration Notables such as Cooked Alive, completely optional Jewels (Jewel) Medium Cluster Jewel - Look for Fire Penetration Notables such as Cooked Alive, completely optional Jewels |
|
| Recommended affixes: 1 Added Passive Skill is Cooked Alive 1 Added Passive Skill is Smoking Remains |
|
 (Jewel) Watcher's Eye - Your auras are Precision and Anger, there are a few aura modifiers here that could benefit you greatly. (Jewel) Watcher's Eye - Your auras are Precision and Anger, there are a few aura modifiers here that could benefit you greatly. |
|
| (4-6)% increased maximum Energy Shield (4-6)% increased maximum Life (4-6)% increased maximum Mana <Two or Three random aura modifiers> Recommended Aura modifiers: Anger and Precision related Auras |
|
 (Jewel) Glorious Vanity - Doryani Variant grants you Corrupted Soul that you can allocate instead of Eternal Youth Keystone for an extra defense layer in form of ES (Jewel) Glorious Vanity - Doryani Variant grants you Corrupted Soul that you can allocate instead of Eternal Youth Keystone for an extra defense layer in form of ES |
|
| Bathed in the blood of (100-8000) sacrificed in the name of Doryani Passives in radius are Conquered by the Vaal Historic |
|
 (Flask) Lion's Roar - Use Lion's Roar more Armour. It's a great defensive Flask: it adds a Knockback effect, causes Enemies to Flee, and increases your damage (Flask) Lion's Roar - Use Lion's Roar more Armour. It's a great defensive Flask: it adds a Knockback effect, causes Enemies to Flee, and increases your damage |
|
| +1500 to Armour Adds Knockback to Melee Attacks during Flask effect Knocks Back Enemies in an Area when you use a Flask 75% chance to cause Enemies to Flee on use (7-10)% more Melee Physical Damage during effect |
|
 (Flask) Bottled Faith - It's one of the best flasks in the game, quite pricey at that. Use Bottled Faith for more Critical Strike Chance, More DPS, and Life Regeneration. (Flask) Bottled Faith - It's one of the best flasks in the game, quite pricey at that. Use Bottled Faith for more Critical Strike Chance, More DPS, and Life Regeneration. |
|
| 40% increased Damage Creates Consecrated Ground on Use (30-15)% reduced Duration Consecrated Ground created by this Flask has Tripled Radius Consecrated Ground created during Effect applies (7-10)% increased Damage taken to Enemies (100-150)% increased Critical Strike Chance against Enemies on Consecrated Ground during Flask effect |
|
|
Other suggested Flasks:
|
|
     |
|
|
If you have any other build requests please leave that in the comments below. We are always open to suggestions and constructive feedback.
Pictures used in this article are the intellectual property of Grinding Gear Games.


