
Stunning Boneshatter Slayer Build
One of the best Melee builds that uses Boneshatter to Stun enemies causing powerful Pulses for extra AoEBoneshatter
Slayer Build
Updated for Patch 3.21
The Best Crafty Guides by Odealo
| Guide notes |
| June 20, 2022 -Build created April 7, 2023 -Updated for Patch 3.21 |
| Build overview | |||
| Tags: [MELEE] [PHYSICAL] [IMPALE] [LIFE] | |||
|
Budget: Defenses: |
|
Boss DPS: AoE: |
|
Anomalous Boneshatter has a unique Property - it reduces the Enemy Stun Threshold. Stuns are an often overlooked game mechanics, it renders an enemy incapable of doing anything and interrupts whatever it was Channeling or Casting. It requires landing a Hit. If the Maximum Life of the opponent is low enough, your chance of Stunning them is higher. Lowering Stun Threshold makes your Hits treat enemies as if their Life would be lower than it actually is, increasing Stun Chance as a result. This build allows for around 50 to 100 percent Reduced Stun Threshold, granting a good chance to Stun most Bosses in the game given your Damage is high enough. The Boneshatter itself is one of the best Strike Skills, it generates Trauma which grants more Damage, but at the same time damages your character, requiring a lot of Physical Damage mitigation. You don't actually need to put much effort into increasing the Gem Quality. You don't need to link it with Enhance Support nor buy the immensely expensive Ashes of The Stars. The build works excellent with the regular rare gear and is seemingly not much different from any other Physical Melee Strike type of build. If you don't really feel like stunning bosses is a must-have, it's still the best Melee Skill if you choose the Divergent Boneshatter which increases your Attack Speed per Trauma Stack.
It's a Precise Technique build - meaning you won't deal Critical Strikes but having more Accuracy Rating than Maximum Life will result in dealing 40% more damage. It requires a bit of effort to achieve, running Precision is pretty much essential, alongside having a Helmet, Gloves, and Jewelry with it. It is somewhat required anyway to actually land a Hit with a Mace, but investing in Critical Strikes is not as beneficial when it comes to Maces as one would assume. Maces are just not as good as Swords with Critical Strikes. What Maces are good at, however, are Stuns - it's Pilerdriver's inherent stat to lower Stun Threshold by 20%, which is a lot. The build deals high Damage but it heavily depends on your weapon, prices of the good ones might be very high. The Defences are very basic but reliable. The build is capable of reaching over 6k of Maximum Life, a lot of Armour, high Maximum Elemental Resistances, Spell Suppression Chance, Endurance Charges, and of course rapid Life Leech via Slayer's Ascendancy Keystones.
You can also check our other Path of Exile builds right over here Odealo's Crafty Guides - Full List
1. Gameplay
It's one of the most enjoyable Melee builds, and it's a Strike one, which may be surprising to say. Hits will create pulses to deal Area of Affect Damage, the size of which scales up with Stun Duration. With Tribal Fury, Ancestral Call, and Attack Mastery for Strike Range it requires just one Attack to clear the entire screen of the enemies. Ancestral Call will have to be used as often as possible to exert Attacks and for additional Strike Targeting. For a Guard Spell use Molten Shell which is good when combined with the abundant Armour Rating, it should be cast automatically. For a movement Skill use Leap Slam, it's the best one for such builds. Ancestral Protector and Ancestral Warchied shall be used during boss Fights to gain more DPS. If you have Rage, you should also use Berserk for a temporary damage bonus. Blood Rage for Attack Speed and Frenzy Charges. The Curse of your choice should be Warlord's Mark. For the Mana-reserving Spells use Determination, Pride, Herald of Purity, War Banner, and Precision.
|
Full gameplay video:
This video was recorded on a level 93 Slayer with approx 700 Physical DPS Mace equipped. |
|
|

2. Build's PROS & CONS
| PROS |
|
| CONS |
|
3. Leveling tips
Leveling with a Strike Skill supported by Ancestral Strike Support is a pleasant experience, you're offered a wide range of good Support Gems, and some of the best Passive Skills are right outside of your starting location. Start with general Physical and Attack Damage and Maximum Life, to later gather Armour and Accuracy. Do not pick up the Resolute Technique too early as you will constantly gain more and more Life, Accuracy is much harder to get. Just get enough to have a high Hit chance, but that's easy. There are no unique weapons to recommend really, rare ones can outmatch them even in the early stages of the game. You can use Essences or vendor recipes to get a good one with added and increased Physical Damage. You are able to equip Boneshatter at level 28.
Suggested leveling Gem setups:
| Glacial Hammer setup | |
 |
Glacial Hammer - It does only Cold Damage, but it's converted from Physical so it's not an issue early on, you can swap it as you become more specialized in Physical Damage only. |
 |
Melee Physical Damage Support - The best-in-slot Support Gem to increase your Melee Physical Damage, and slightly lower Attack Speed. |
 |
Maim Support - It's a low-level Support Gem that can apply Maim debuff on enemies, and deal more damage. |
 |
Ruthless Support - Grants more damage, every third Attack is much more powerful. |
 |
Ancestral Call Support - Allows you to target two additional enemies with your Strike Skills, massively increasing your clear speed. |
| Aura and Banner setup | |
 |
Pride - The best option for an Aura as it increases your Physical Damage. |
 |
War Banner - Banner that grants Accuracy Rating and Physical Damage. |
| Warcry and Ancestral Totems setup | |
 |
Ancestral Cry - The Warcry to enhance your Strike Skills, heavily recommended for a better clear speed and more damage. |
 |
Ancestral Warchief - A Totem for more Attack Speed. |
 |
Ancestral Protector - A Totem for more Melee Damage. |
 |
Multiple Totems Support - With this Support Gem you will be able to have both Ancestral Totems active at the same time. |
Bandits:
you should kill all three Bandits for two additional Skill Points
Leveling Skill Trees:
29 Points Skill Tree
Go immediately for the Tribal Fury and its mastery, then pick the Born to Fight
61 Points Skill Tree
Allocate Call to Arms, more Maximum Life, the Two-hand Clusters, and some Jewel sockets. After that head for the Mace Cluster on the left.
Recommended leveling items:
 Daresso's Salute - It gives you tons of Resistances, Melee Strike Range, and Melee Damage on Full Life - good with Life Leech Daresso's Salute - It gives you tons of Resistances, Melee Strike Range, and Melee Damage on Full Life - good with Life Leech |
|
| +(16-24) to Strength and Dexterity 50% reduced maximum Energy Shield +(30-40)% to Fire Resistance +(30-40)% to Cold Resistance 10% increased Movement Speed when on Full Life +2 to Melee Strike Range 60% increased Melee Damage when on Full Life |
|
 Le Heup of All - it's a generally good Ring for all leveling characters due to Attributes, Damage, and Resistances Le Heup of All - it's a generally good Ring for all leveling characters due to Attributes, Damage, and Resistances |
|
| Adds 1 to 4 Physical Damage to Attacks +(10-30) to all Attributes (10-30)% increased Damage (10-30)% increased Rarity of Items found +(10-30)% to all Elemental Resistances |
|
 Goldrim - a Helmet that offers a lot of Elemental Resistances Goldrim - a Helmet that offers a lot of Elemental Resistances |
|
| +(30-50) to Evasion Rating 10% increased Rarity of Items found +(30-40)% to all Elemental Resistances Reflects 4 Physical Damage to Melee Attackers Level Requirement reduced by 100 (Hidden) |
|
 Tabula Rasa - use Tabula for an optimal leveling experience Tabula Rasa - use Tabula for an optimal leveling experience |
|
| Item has no level requirement and Energy Shield (Hidden) Item has 6 White Sockets and is fully linked (Hidden) |
|
4. Final Skill Tree, Ascendancy Points, and Pantheon
Final Skill Tree:
113 Points Final Skill Tree (doesn't include Cluster nor Timeless Jewels)
120 Points Path of Building (PoB) link
Ascendancy points:
Preferably in that order:
- Impact
- Brutal Fervour
- Bane of Legends
- Headsman
Pantheon:
Major God: Soul of Lunaris: 1% additional Physical Damage Reduction for each nearby Enemy, up to 8%; 1% increased Movement Speed for each
nearby Enemy, up to 8%
Minor God: Soul of Gruthkul: 1% additional Physical Damage Reduction for each Hit you've taken Recently up to a maximum of 5%
5. Final Gems links
| [DPS] Boneshatter setup | |
 |
Anomalous Boneshatter - Anomalous Boneshatter reduces enemy Stun Threshold, it's the core element of the build allowing for immobilizing any opponent you're facing. It's a Strike Skill which damage ramps up when attacking, for both - attacker and attacked. If you don't really care about stunning bosses, get the Divergent Boneshatter for damage. |
 |
Brutality Support - This Gem allows you to deal only Physical Damage but makes you deal much more of it. |
 |
Impale Support - Imaple is a powerful addition to all melee builds. Use the Anomalous version and allocate Harpooner - it should get you a 100% Chance to Impale on Hit. |
|
Ruthless Support - Every third Attack is a Ruthless Blow, dealing much more damage, and having a base Stun duration of 0.8 seconds. |
|
Melee Physical Damage Support - Simply grants more Melee Physical Damage while slightly reducing Attack Speed. |
 |
Fortify Support - It not only grants Fortify Buff, which is an excellent layer of defense but also more Damage with Melee Hits. If you have another source of Fortify you can use Maim Support instead. |
| [UTILITY] Mana-reserving Skills | |
 |
Herald of Purity - It's simply used for more Physical Damage, Minions are not very important. |
|
War Banner - Use it for increased Accuracy Rating and to deal increased Physical Damage. Grants Adrenaline when placed. |
 |
Determination - Determination adds and increases your Armour, it's a very efficient way of damage mitigation |
|
Pride - An Aura that makes nearby enemies receive more Physical Damage, the effect is magnified after four seconds of exposure. |
 |
Precision - Use it only to get enough Accuracy Rating to activate the Precise Technique, it doesn't have to be leveled all the way up. |
| [MOBILITY] Leap Slam setup | |
 |
Leap Slam - a basic mobility Attack Skill that allows you to jump and move faster |
 |
Faster Attacks Support - increases the speed at which you jump |
| [UTILITY] Molten Shell setup | |
 |
Molten Shell - The best Guard Spell, especially when one has a lot of Armour. It prevents a portion of incoming Hit Damage for a duration. |
 |
Cast when Damage Taken - It should be cast automatically, you can't be bothered with casting it manually all the time. It can be leveled all the way up. |
| [UTILITY] Warlord's Mark setup | |
 |
Warlord's Mark - It's an essential Curse - not only does it make you Leech Life and Mana from enemies, but it also has a chance to make your Stuns last twice as long, and most importantly - it grants you Rage Buff |
 |
Mark on Hit Support - linked Mark should be used as often as possible to consistently generate Rage, later to be spent on Berserk |
| [UTILITY] Blood Rage | |
 |
Blood Rage - Generates Frenzy Charges, grants Life Leech, and increases Attack Speed. It drains your Life over time and resets its duration after every kill. |
| [UTILITY] Berserk | |
 |
Berserk - You can spend the accumulated Rage to gain the same bonuses as the buff itself grants, that is Attack Damage, Attack Speed, and Movement Speed, but greatly magnified. It makes you take less damage too. |
| [UTILITY] Ancestral Cry | |
|
Ancestral Cry - It's a warcry to be used every time it's off cooldown, as it helps you clear maps by increasing the number of enemies you can target and Melee Strike Range. It grants Armour too. |
| [UTILITY] Totems setup | |
|
Ancestral Warchief - increases your Melee Damage |
|
Ancestral Protector - increases your Attack Speed |
|
Multiple Totems Support - allows you to summon both Ancestral Totems at the same time |
|
Maim Support - Maimed enemies receive more Physical Damage from all sources, including your main DPS setup. Optional. |
|
|
6. Gear Setup
It's a very simple build, it requires only Maximum Life, Resistances, and more Accuracy than Life. To check if your Maximum Life is higher than Accuracy, and how much more of it you need, import your character to PoB, go to Calculations, and check the MH Accuracy. Remember that if you have granted extra Maximum Life as a result of Timeless Jewels enhancing notables to grant more Maximum Life or Strength (which grants Maximum Life), it will not show it - you have to add it manually. There is no tool to check your Main Hand Accuracy Rating in-game, sadly. Remember that Enfeeble Curse will lower your Accuracy Rating - avoid being cursed with it. It has no special stats to scale up the damage. There's just the weapon that needs to deal a lot of the regular Physical Damage, and Gear that is defensively oriented. There are no Unique Items that are mandatory or even recommended. Ashes of The Stars is too expensive, and simply not worth its price. The build doesn't use any Blue Gems so it requires little to no Intelligence. All Dexterity and Strength that you need are allocated on the Passive Skill Tree already. You will be able to lower the Mana Cost of Skills to 0 with the right Amulet and Rings, but that's unnecessary as you have a good source of Mana Leech near Spirit Void. Mana Reservation Efficiency might be an issue, but that can be fixed with Anointment if necessary.
Our recommended items will:
- Cap your resistances at 75%
- Provide you with enough DPS and Life to start mapping
|
Stat priorities on items:
|
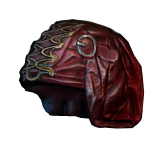
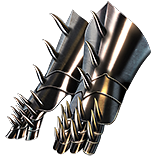
 (Helmet) Rare Helmet - A Helmet is a great source of Accuracy, you can go for the flat Accuracy, Global increased Accuracy, or the Warlord's very unique Suffix which grants an Accuracy Rating equal to your Strength. If you have it it may completely alter the rest of your gear to be focused more on Strength - you can rather easily accumulate over 500 of it, the same amount of the Accuracy granted by the regular Suffix. (Helmet) Rare Helmet - A Helmet is a great source of Accuracy, you can go for the flat Accuracy, Global increased Accuracy, or the Warlord's very unique Suffix which grants an Accuracy Rating equal to your Strength. If you have it it may completely alter the rest of your gear to be focused more on Strength - you can rather easily accumulate over 500 of it, the same amount of the Accuracy granted by the regular Suffix. |
|
| Min. requirements: +80 to Maximum Life +60% to Elemental Resistances Accuracy Rating Nearby Enemies take 9% increased Physical Damage Optional affixes: Gain Accuracy Rating equal to your Strength increased Global Accuracy Rating Elemental Resistances Strength |
|
| Helmet enchantments: Boneshatter enchantment |
|
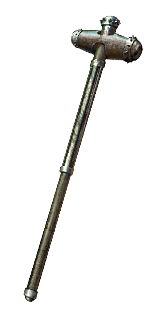 (Weapon) Rare Mace - You want the Piledriver Rare Two-Hand Mace, which is the only one with an implicit reducing Stun Threshold by 20%. Get around 20% increased Attack Speed and as much Physical DPS as you can afford. If you don't care that much about stuns, get literally any other 2-hand weapon with high Physical DPS. (Weapon) Rare Mace - You want the Piledriver Rare Two-Hand Mace, which is the only one with an implicit reducing Stun Threshold by 20%. Get around 20% increased Attack Speed and as much Physical DPS as you can afford. If you don't care that much about stuns, get literally any other 2-hand weapon with high Physical DPS. |
|
| Min. requirements: 20% increased Attack Speed over 500 Physical DPS Optional affixes: increased Physical Damage added Physical Damage Accuracy Rating Quality |
|
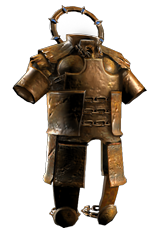 (Body Armour) Rare Body Armour - Get a Body Armour with a lot of Maximum Life and Resistances, don't prioritize any of the fancy mods over it. (Body Armour) Rare Body Armour - Get a Body Armour with a lot of Maximum Life and Resistances, don't prioritize any of the fancy mods over it. |
|
| Min. requirements: +120 to Maximum Life +80% to Elemental Resistances Optional affixes: enemies you Kill have a #% chance to Explode, dealing a tenth of their Maximum Life as Physical Damage Chance to Suppress Spell Damage Maximum Life % You Can Apply Additional Curse |
|
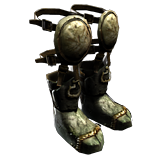 (Boots) Rare Boots - Maximum Life, Movement Speed, Elemental Resistances, and the Redeemer's mod for Onsalugh on Kill would make a decent pair of boots. (Boots) Rare Boots - Maximum Life, Movement Speed, Elemental Resistances, and the Redeemer's mod for Onsalugh on Kill would make a decent pair of boots. |
|
| Min. requirements: +60 to maximum Life 25% increased Movement Speed +70% to Elemental Resistances Optional affixes: Chaos Resistance Armour chance to gain Onslaught for 4 seconds on Kill |
|
 (Gloves) Rare Gloves - Gloves are another great source of Accuracy Rating, you can get up to 600 of it just from one Suffix. To enhance your clear speed you can use an Exarh's Orbs and craft the upgrade for Strike Skills to target an additional enemy or two, but that might just be overkill. (Gloves) Rare Gloves - Gloves are another great source of Accuracy Rating, you can get up to 600 of it just from one Suffix. To enhance your clear speed you can use an Exarh's Orbs and craft the upgrade for Strike Skills to target an additional enemy or two, but that might just be overkill. |
|
| Min. requirements: +60 to maximum Life +70% to Elemental Resistances up to 600 Accuracy Rating Optional affixes: increased Attack Speed increased Melee Damage increased Damage while Leeching (crafted) |
|
 (Belt) Rare Belt - A Belt is good for Life, Resistances, and nothing else really. Try to get a Stygian Vise for an extra Abyssal Jewel Socket. (Belt) Rare Belt - A Belt is good for Life, Resistances, and nothing else really. Try to get a Stygian Vise for an extra Abyssal Jewel Socket. |
|
| Min. requirements: +80 to Maximum Life +80% to Elemental Resistances Optional affixes: increased Maximum Life Strength increased damage |
|
 (Belt) Ryslatha's Coil - Ryslatha's Coli is good for any Physical Attack Build - it grants a lot of Damage, and in this case, it will also grant a lot of Life on Stun (Belt) Ryslatha's Coil - Ryslatha's Coli is good for any Physical Attack Build - it grants a lot of Damage, and in this case, it will also grant a lot of Life on Stun |
|
| (20-30)% increased Stun Duration on Enemies +(20-40) to Strength (30-40)% more Maximum Physical Attack Damage (40-30)% less Minimum Physical Attack Damage Adds 1 to (15-20) Physical Damage to Attacks +(80-100) to maximum Life Gain 50 Life when you Stun an Enemy |
|
 (Amulet) Rare Amulet - The Amulet can offer a lot of great Affxies, such as up to 480 Accuracy Rating, Pride's Reservation Efficiency as Warlord's Suffix, Reduced Mana Cost of Skills, and of course, Life, and Resistances. (Amulet) Rare Amulet - The Amulet can offer a lot of great Affxies, such as up to 480 Accuracy Rating, Pride's Reservation Efficiency as Warlord's Suffix, Reduced Mana Cost of Skills, and of course, Life, and Resistances. |
|
| Min. requirements: +70 Maximum Life +70% to Elemental Resistances Optional affixes: Adds Physical Damage to Attacks Accuracy Rating (crafted) Attributes Non-Channelling Skills have -7 to Total Mana Cost Pride has (40–50)% increased Mana Reservation Efficiency |
|
 (Amulet) Ashes of the Stars - It's a very expensive Amulet that grants reduced Stun Threshold by another 30% if you have the right Alternate Quality Boneshatter, Gem Level, and Mana Reservation Efficiency. It's not your priority. (Amulet) Ashes of the Stars - It's a very expensive Amulet that grants reduced Stun Threshold by another 30% if you have the right Alternate Quality Boneshatter, Gem Level, and Mana Reservation Efficiency. It's not your priority. |
|
| +(10–16) to all Attributes (5–10)% increased Experience Gain of Gems (10–20)% increased Reservation Efficiency of Skills +1 to Level of all Skill Gems +(20–30)% to Quality of all Skill Gems |
|
| Recommended Anointments: Charisma Constitution Panopticon |
|
 (Ring) Rare Rings - A lot of what you can get on a Ring is also available on an Amulet - Accuracy, Reduced Mana Cost of Skills, Attributes, and the basic Maximum Life and Resistances. You can also craft some Attack Speed. (Ring) Rare Rings - A lot of what you can get on a Ring is also available on an Amulet - Accuracy, Reduced Mana Cost of Skills, Attributes, and the basic Maximum Life and Resistances. You can also craft some Attack Speed. |
|
| Min. requirements: +60 to Maximum Life +80% to Elemental Resistances Accuracy Rating Optional affixes: Adds Physical Damage to Attacks increased Attack Speed Attributes |
|
 (Jewel) Rare Jewels - Maximum Life, Elemental Resistances, Attack Speed, Attributes or some mods to increase the specific type of Damage you're dealing are the mods to look for on the Jewels (Jewel) Rare Jewels - Maximum Life, Elemental Resistances, Attack Speed, Attributes or some mods to increase the specific type of Damage you're dealing are the mods to look for on the Jewels |
|
| Min. requirements: increased Maximum Life increased Attack Speed Elemental Resistances increased Global Physical Damage increased Damage with Two Handed Weapons Strength |
|
 (Jewel) Lethal Pride - Lethal Pride grants mostly a lot of Strength, but if you're lucky it can also grant the Notables in its radius a unique property like increased Strength or Damage, it can be very helpful. (Jewel) Lethal Pride - Lethal Pride grants mostly a lot of Strength, but if you're lucky it can also grant the Notables in its radius a unique property like increased Strength or Damage, it can be very helpful. |
|
| Commanded leadership over (10000-18000) warriors under (Akoya-Kaom-Rakiata) Passives in radius are Conquered by the Karui Historic |
|
 (Jewel) Watcher's Eye - Look for Pride modifiers on your Watcher's Eye, other Auras you're using re Precision and Determination, these are not as good as the Pride ones (Jewel) Watcher's Eye - Look for Pride modifiers on your Watcher's Eye, other Auras you're using re Precision and Determination, these are not as good as the Pride ones |
|
| (4-6)% increased maximum Energy Shield (4-6)% increased maximum Life (4-6)% increased maximum Mana <Two or Three random aura modifiers> |
|
 (Jewel) Large Cluster Jewel - We've used one Large Cluster Jewel mostly for the two Jewel Sockets and some additional Notables, comparable in damage to the nodes found on the Skill Tree (Jewel) Large Cluster Jewel - We've used one Large Cluster Jewel mostly for the two Jewel Sockets and some additional Notables, comparable in damage to the nodes found on the Skill Tree |
|
| Recommended affixes: 1 Added Passive Skill is Battle-Hardened 1 Added Passive Skill is Force Multiplier 1 Added Passive Skill is Devastator 1 Added Passive Skill is Iron Breaker 1 Added Passive Skill is Martial Prowess 1 Added Passive Skill is Master the Fundamentals |
|
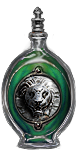
 (Flask) Lion's Roar - The Knockbak Effect is very annoying, but eventually, you can pin the boss against the wall - it's a fair price for a major damage boost and some Armour (Flask) Lion's Roar - The Knockbak Effect is very annoying, but eventually, you can pin the boss against the wall - it's a fair price for a major damage boost and some Armour |
|
| +1500 to Armour Adds Knockback to Melee Attacks during Flask effect Knocks Back Enemies in an Area when you use a Flask 75% chance to cause Enemies to Flee on use (7-10)% more Melee Physical Damage during effect |
|
|
Other suggested Flasks:
|
|
    |
|
|
If you have any other build requests please leave that in the comments below. We are always open to suggestions and constructive feedback.
Pictures used in this article are the intellectual property of Grinding Gear Games.
