
Storm Rain of Conduit Hierophant Build
A popular Mana-stacking Bow build for a Hierophant which uses Storm Rain of Conduit with increased damageManaforged Arrows
Hierophant Build
Updated for Patch 3.24
The Best Crafty Guides by Odealo
| Guide notes |
| May 14, 2024 -Build created |
| Build overview | |||
| Tags: [RANGED] [ELEMENTAL] [LOW-LIFE] [ENERGY SHIELD] | |||
|
Budget: Defenses: |
|
Boss DPS: AoE: |
|
Mana-stacking is one of the best foundations for a build in terms of offense and defense alike. This Bow build is one of the most popular examples of such a build - it's a bit more complex than the regular Spell Damage build (and is quite expensive at that), so we wouldn't recommend it for inexperienced players. Hierophant is almost always the only choice for a Mana-stacking character due to the Divine Guidance and Sanctuary of Thought Ascendancy Passives. These grant you a lot of Maximum Mana, Damage sourced from Mana, a bit of Damage taken from Mana before Life, a huge amount of Energy Shield sourced from Mana, increased Reservation Efficiency, AoE, and halved Mana Cost of Skills. Transfiguration of Mind from DIvine Guidance is not the most important boon - the bulk of the overall damage comes from the Indigon & Battlemage's Cry combo (since it's an Attack, not a Spell build). This Helmet increases damage per Mana Spent in the past 4 seconds, and to spend a lot of it quickly you have to use the Arcane Cloak - the only Spell which has a built-in fixed high Mana Cost. To save sockets and to squeeze the most Spell-to-Attack damage from the Battlemage's Cry bonus, most players use the weapon swap to perform a Warcry before they're about to face a tough enemy. This Warcry buff will persist after swapping back.
Another big damage boost is gained via Manaforged Arrows Support Gem - it grants more Damage per Mana Cost of the whole setup it is linked to. Its Mana Cost grows after using your other Bow Attack, whose purpose is mostly to burn through your Mana quickly. You can set the Mana Cost of all your Skills to be very high just by using Arcane Cloak and then continuously spending Mana with any Bow Attack. In this case, you will manually use Rain of Arrows of Saturation and trigger Storm Rain of the Conduit. These Skills are used mainly because they Hit a lot of enemies very often. It's important to Hit with high frequency to Leech Life and Energy Shield quickly. The Leech Rate is often bottlenecked by the Cast or Attack Rate - you can't Leech more than 10% of your Maximum Life/Mana/ES from a single Hit. With a Leech Mastery to make 10% of Leech instant and a single source of ES and Mana Leech, you will not run out of either. The Manaforged Arrows Support Gem grants so much damage that you won't even need to activate your Battlemage's Cry during mapping, only when up against pinnacle bosses and T17 Rares.
The most effective way to get a lot of Mana is by stacking Intelligence alongside Mana - check the gear section for more info about that. This Maximum Mana is needed to reach the Damage Cap present on Indigon, but it's also a defensive mechanism. The 10% Shift from Divine Guidance combined with Arcane Cloak, The Ivory Tower, and Coruscating Elixir are also not the primary defensive layers - you don't want to run out of Mana by receiving Damage, but by Spending it yourself. Your Actual Life Pool is the vast Energy Shield gained from nearly 2000 Intelligence, Maximum ES sourced from Mana via Sanctuary of Thought, and Watcher's Eye with a specific Clarity modifier. Other defensive layers are a high Evasion Rating from Shaper's Touch, high Maximum Elemental Resistances from Flasks, Ghost Dance Keystone, a bit of Armour with Physical Damage Reduction from 4 Minimum Endurance Charges, and of course the instant Mana/ES Recovery via Leech. The only way to kill the character is to slam it really hard with some kind of Physical Damage.
You can also check our other Path of Exile builds right over here Odealo's Crafty Guides - Full List
1. Gameplay
Use Rain of Arrows (which can be swapped into Lightning Arrow on a high-end version just for convenience) to slay enemies you encounter. Spending Mana on it will Trigger Storm Rain which is the main damage-dealing Skill. It shall also Trigger Frenzy, or even another Rain of Arrows setup, which can be implemented if you can spare sockets for it. Arcane Cloak shall be activated whenever it's off-cooldown to spend Mana and provide a defensive buff. We don't recommend using Automation here for better control over your damage when facing bosses. Battlemage's Cry should be socketed in your weapon swap setup for the most optimal performance, but you could omit that part and use it normally, which can be done if you feel like your damage is high enough or the content you're running anyway, Your Auras are Grace, Discipline, Clarity, and Dread Banner.
|
|
|
|

2. Build's PROS & CONS
| PROS |
|
| CONS |
|
3. Leveling tips
You should of course start as a Life build, preferably by using Mind Over Matter and Archamge Support Gem linked to a Lightning Damage Spell such as Manabond or Lightning Tendrils. Maybe even The Agnostic Keystone. You can start stacking Mana right away via passives scattered all around your starting location and from Unique Items. You will, however, struggle with Mana Recovery, so you must be equipped with Mana Flasks. Seek Items that would reduce the Mana Cost of Skills. You can start using Indigon as soon as level 69. You can then slowly begin switching into an Attack build. All you need is Battlemage's Cry and Arance Cloak. Start using Bows to benefit from Manaforged Arrows, Mana Leech Support, and WIdowhail. We recommend gathering all the required items first - it's not a starter build and you shouldn't play it as one.
Suggested leveling Gem setups:
| Manabond setup | |
 |
Manabond - it quickly increases in damage and AoE as you gain more Mana. |
 |
Controlled Destruction Support - you have less Crit Chance, but significantly more damage. |
 |
Arcane Surge Support - more Spell Damage, increased mana Regeneration Rate as you spend mana on linked Spells. |
 |
Added Lightning Damage Support - adds Lightning Damage to linked Spell |
 |
Elemental Focus Support - disables Elemental Ailments, but increases your Damage. |
 |
Faster Casting Support - you will have a rather low Cast Speed at first, so you can use this Support Gem to improve it. |
| various Gems | |
 |
Conductivity - use it to lower the Lightning Resistance of your opponents. |
 |
Flame Dash - a Movement Spell that allows you to dash. |
 |
Clarity - It regenerates your Mana. |
 |
Arcane Cloak - transforms a portion of your Mana into a protective shield that reduces the damage you take. |
Bandits:
Two Additional Passive Skill Points are the best option for this build.
Leveling Skill Trees:
Start with generic Elemental Damage, Mana, and Life
93 Points Skill Tree
There's a lot of Mana passives north of the Witch's starting location (go there first), but also near the center of the passive skill tree.
Recommended leveling items:
 Lifesprig - A generic Wand for Spell-casters available at level 1. Lifesprig - A generic Wand for Spell-casters available at level 1. |
|
| (8-12)% increased Spell Damage +1 to Level of Socketed Spell Gems (20-28)% increased Spell Damage (5-8)% increased Cast Speed +(15-20) to maximum Life +(15-20) to maximum Mana Regenerate (6-8) Life over 1 second when you Cast a Spell |
|
 Atziri's Foible - Grants a lot of Mana, Mana Regeneration, and reduces Attribute Requirements for all your other gear pieces. Atziri's Foible - Grants a lot of Mana, Mana Regeneration, and reduces Attribute Requirements for all your other gear pieces. |
|
| (20-30)% increased Mana Regeneration Rate +100 to maximum Mana (16-24)% increased maximum Mana (80-100)% increased Mana Regeneration Rate Items and Gems have 25% reduced Attribute Requirements |
|
 Praxis - Reduces Mana Cost of Skills by a flat amount and grants a lot of Mana, Praxis - Reduces Mana Cost of Skills by a flat amount and grants a lot of Mana, |
|
| +(20-30) to maximum Mana +(30-60) to maximum Mana Regenerate (3-6) Mana per second -(8-4) to Total Mana Cost of Skills 8% of Damage taken Recouped as Mana |
|
 Goldrim - One of the best unique leveling helmets, it provides you with tons of Elemental Resistances. Goldrim - One of the best unique leveling helmets, it provides you with tons of Elemental Resistances. |
|
| +(30-50) to Evasion Rating 10% increased Rarity of Items found +(30-40)% to all Elemental Resistances Reflects 4 Physical Damage to Melee Attackers Level Requirement reduced by 100 (Hidden) |
|
 Dream Fragments - Has a lot of Mana, Mana Regeneration, Cold Resistance, and Cold Ailment Immunity. Dream Fragments - Has a lot of Mana, Mana Regeneration, Cold Resistance, and Cold Ailment Immunity. |
|
| +(20-30)% to Cold Resistance 20% increased maximum Mana 50% increased Mana Regeneration Rate +(30-40)% to Cold Resistance Cannot be Chilled Cannot be Frozen |
|
4. Final Skill Tree, Ascendancy Points, and Pantheon
Final Skill Tree:
99 Points Final Skill Tree (doesn't include Cluster Jewels)
123 Points Path of Building (PoB) link
Ascendancy points:
Preferably in that order:
- Arcane Blessing
- Conviction of Power
- Divine Guidance
- Sanctuary of Thought
Pantheon:
Major God: Soul of Lunaris: 1% additional Physical Damage Reduction for each nearby Enemy, up to 8%; 1% increased Movement Speed for each nearby Enemy, up to 8%
Minor God: Soul of Garukhan: 60% reduced Effect of Shock on you
5. Final Gems links
| [DPS] Storm Rain of Conduit setup | |
 |
Storm Rain of Conduit - It's the main damage source. This transfigured version seems better as it would be hard to reach the 100-arrow limit from the regular Storm Rain anyway. It has higher damage. |
 |
Manaforged Arrows Support - Storm Rain is triggered after spending 300% of its Mana Cost on other Bow Attacks. It also grants 1% more Damage per 1 Mana Cost. It quickly adds up as its Mana Cost is very high after using Arcane Cloak. |
 |
Mirage Archer Support - Summons a Mirage Archer that uses the same setup but with lower damage and Attack Speed. |
 |
Elemental Damage with Attacks Support - More Elemental Damage with Attacks. |
 |
Lightning Penetration Support - Damage Penetrates a lot of Lightning Resistance. Get the level 5 Awakened version for Lightning Exposure on Hit. |
 |
Concentrated Effect Support - Arrows are more concentrated resulting in a much higher damage against bosses. |
| [DPS] Rain of Arrows of Saturation setup | |
 |
Rain of Arrows of Saturation - This Skill is the Mana-spending Bow Attack. Its other role is to Hit as many times per second as possible to Leech and gain Mana on Hit from Primal Spirit Notable. It will cost a lot of Mana after you activate the Arcane Cloak. |
 |
Trinity Support - If you have added two types of Elemental Damage on your Quiver, such as Lightning and Fire, you'll be able to create Resonances for more Elemental Damage. |
 |
Mana Leech Support - Skill Leeches Mana. 10% of this Leech is instant with a specific Leech mastery. It can be omitted if you have a secondary setup with another Rain of Arrows. If that's the case, use  Enhance here. Enhance here. |
|
Elemental Damage with Attacks Support |
|
Lightning Penetration Support |
|
Concentrated Effect Support |
| [UTILITY] Life Reservation setup | |
 |
Dread Banner - Nearby enemies have less Accuracy Rating, making your Evasion better. |
|
Clarity - Use level-1 Clarity. It's not supposed to Regenerate Mana but unlock a specific modifier on a Watcher's Eye. |
 |
Discipline - Adds extra Maximum ES and increases its Recharge Rate. |
 |
Arrogance Support - Linked Skills should Reserve almost all of your Life Pool. You won't need it. |
| [UTILITY] Grace setup | |
 |
Grace - Grace adds and increases Evasion Rating, which you have a lot of due to Shaper's Touch and Evasion and Energy Shield Mastery. |
 |
Eternal Blessing Support - You can have Grace off-charge with increased Aura Effect if it's your only Mana-Reserving Aura. |
| [UTILITY] Arcane Cloak setup | |
|
Arcane Cloak - Spends 64% of your Mana to create a protective layer shielding you from a portion of incoming damage. It also grants additional Spell Damage from Indigon, translated to Attack Damage with Battlemage's Cry and Iron Will. It's the most efficient way of ramping up Indigon's Damage. |
|
Enhance Support - Enhances Arcane Cloak resulting in more Buff Effect. |
| [UTILITY] Battlemage's Cry setup | |
 |
Battlemage's Cry - It's a very important Skill. It causes your Spell Damage to apply to Attack Damage at up to 150% of its value. Spell Damage is gained from Indigon by spending Mana and Iron Will if you have high Strength. |
 |
Call to Arms Support - Activates Battlemage's Cry whenever it's off Cooldown. |
| [UTILITY] Frenzy setup | |
 |
Frenzy - Grants Frenzy Charges for increased Attack Speed and more Damage. If you're weapon-swapping to cast Battlemage's Cry, you'll be able to host another Rain of Arrows of Saturation here with Mana Leech Support. |
|
Manaforged Arrows Support |
| [UTILITY] Movement Spell | |
 |
Frostblink - If you have one socket to spare, use some kind of mobility Skill. It can be placed in a Ring socket, replace Enhance on Arcane Cloak, or Call to Arms on Battlemage's Cry setup. |
The Weapon Swap setup:
| [UTILITY] Battlemage's Cry setup for Weapon Swapping | |
|
Battlemage's Cry - If you plan to use a Weapon Swap setup (which you should if you want to fight pinnacle bosses) with Redblade Banner and Al Dhih, you can socket your Warcy there instead. This maneuver lets you accommodate another Rain of Arrows of Saturation linked to a Manaforged Arrows and Frenzy. |
 |
Urgent Orders Support - Increased Warcry Speed and additional Cooldowns stored for the linked Warcry. |
 |
Increased Duration Support - Increases the Duration of Battlemage's Cry. |
|
|
6. Gear Setup
The build needs mostly Mana and Intelligence - all the other merits like damage and survivability are derived from it. Mana increases your defenses via Arcane Cloak and Sanctuary of Thought. It's not supposed to absorb damage directly as is often the case in Mana builds because it doesn't need to. It's more important for your character to Spend that Mana and gain more Damage via Manaforged Arrows Support and increased Damage via the Indigon. Mana is a source of Energy Shield from the aforementioned Sanctuary of Thought and a specific Clarity mod on a Watcher's Eye. Combined with Intelligence, which also grants ES, it can add up to around 15-20k of Maximum ES. You can reach up to around 20k or even more Maximum Mana. Intelligence also increases Accuracy and Evasion via Shaper's Touch Gloves, so you won't need any more of these stats on your gear. The same Gloves grant you Energy Shield and Mana per Strength, so gathering Strength is heavily encouraged. This Attribute additionally adds a bit of extra damage via the Iron Will Keystone. Your Mana and ES are sustained primarily by Mana Leech from Support Gem and ES Leech from Storm Drinker Notable. Leech is often capped by hit rate, so Attack Speed and number of Arrows are very important here. A lot of your Resistances are provided by Flasks and they should stay up at all times, making Magblood a great addition. It's a non-Crit build - there's no way to fit in any meaningful Crit Chance and Multiplier here.
|
Stat priorities on items:
|
 (Helmet) Indigon - A core element of the build. After spending Mana, it increases Spell Damage, which turns into Attack Damage after using Battlemage's Cry. It's possible to reach the 2000% increased Damage cap, but it's difficult - you have to spend 16,000 Mana in 4 seconds, assuming you have the 25% roll. (Helmet) Indigon - A core element of the build. After spending Mana, it increases Spell Damage, which turns into Attack Damage after using Battlemage's Cry. It's possible to reach the 2000% increased Damage cap, but it's difficult - you have to spend 16,000 Mana in 4 seconds, assuming you have the 25% roll. |
|
| (150-180)% increased Energy Shield (6-10)% increased maximum Mana Recover (8-10)% of Life when you use a Mana Flask Non-instant Mana Recovery from Flasks is also Recovered as Life (50-60)% increased Cost of Skills for each 200 total Mana Spent Recently (20-25)% increased Spell Damage for each 200 total Mana you have Spent Recently, up to 2000% |
|
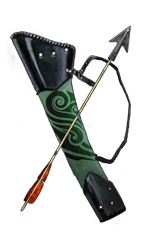
 (Weapon) Widowhail - A Widowhail with at least 200% roll is crucial. It's better than any Rare Bow because you're looking for unusual (for a Bow build) modifiers on a Quiver. (Weapon) Widowhail - A Widowhail with at least 200% roll is crucial. It's better than any Rare Bow because you're looking for unusual (for a Bow build) modifiers on a Quiver. |
|
| (150-250)% increased bonuses gained from Equipped Quiver | |
 (Weapon) Al Dhih - "25% increased Warcry Buff Effect" will improve your Battlemage's Cry. The buff granted by this Warcry will persist after you swap back to a Bow/Quiver setup. (Weapon) Al Dhih - "25% increased Warcry Buff Effect" will improve your Battlemage's Cry. The buff granted by this Warcry will persist after you swap back to a Bow/Quiver setup. |
|
| Grants 19 Life per Enemy Hit (100-120)% increased Physical Damage 3% of Physical Attack Damage Leeched as Life Enemies Taunted by your Warcries Explode on death, dealing 8% of their maximum Life as Chaos Damage 25% increased Warcry Buff Effect Warcry Skills' Cooldown Time is 4 seconds |
|
 (Off-hand) The Poised Prism - It adds Significant damage per each Attribute, and you do have a lot of Intelligence with some Strength. It's a great budget option if you have a Corrupted copy that fires an additional Arrow, but due to the lack of Mana, Intelligence, and Attack Speed, it's not as good as a Rare Quiver. (Off-hand) The Poised Prism - It adds Significant damage per each Attribute, and you do have a lot of Intelligence with some Strength. It's a great budget option if you have a Corrupted copy that fires an additional Arrow, but due to the lack of Mana, Intelligence, and Attack Speed, it's not as good as a Rare Quiver. |
|
| (20-30)% increased Elemental Damage with Attack Skills +(15-25)% to Fire Resistance +(15-25)% to Cold Resistance +(15-25)% to Lightning Resistance Adds 1 to 2 Cold Damage to Attacks per 10 Dexterity Adds 1 to 2 Fire Damage to Attacks per 10 Strength Adds 0 to 3 Lightning Damage to Attacks per 10 Intelligence |
|
 (Off-hand) Rare Broadhead Arrow Quiver - It needs to have Attack Speed, Mana, Intelligence, and an additional Arrow with added Lightning and Fire or Cold Damage. A lot of Intelligence can be gained from an Essence. Mana can be Crafted. Don't put any important stats here such as Attributes or Resistances - you will probably need to swap it to cast Battlemage's Cry once in a while when fighting bosses. (Off-hand) Rare Broadhead Arrow Quiver - It needs to have Attack Speed, Mana, Intelligence, and an additional Arrow with added Lightning and Fire or Cold Damage. A lot of Intelligence can be gained from an Essence. Mana can be Crafted. Don't put any important stats here such as Attributes or Resistances - you will probably need to swap it to cast Battlemage's Cry once in a while when fighting bosses. |
|
| Min. requirements: +50 to Maximum Mana +30 to Intelligence Bow Attacks fire an additional Arrow 15% increased Attack Speed Optional affixes: Cooldown Recovery Rate Attributes |
|
 (Off-hand) Redblade Banner - Used alongside Al Dhih. It ensures that the Battlemage's Cry is at its maximum potency each time you cast it, no matter if there's an enemy nearby. Swap back to the Bow/Quiver setup after using this Warcry. (Off-hand) Redblade Banner - Used alongside Al Dhih. It ensures that the Battlemage's Cry is at its maximum potency each time you cast it, no matter if there's an enemy nearby. Swap back to the Bow/Quiver setup after using this Warcry. |
|
| +(20-30) to maximum Life (80-100)% increased Armour +(50-60) to maximum Life 20% increased Taunt Duration +5% Chance to Block 50% increased Warcry Cooldown Recovery Rate Warcries have infinite Power |
|
 (Body Armour) The Ivory Tower - The usual element of all Energy Shield builds that wish to Reserve all their Life instead of going for Chaos Inoculation. (Body Armour) The Ivory Tower - The usual element of all Energy Shield builds that wish to Reserve all their Life instead of going for Chaos Inoculation. |
|
| +(40-70) to Intelligence +30 to maximum Energy Shield per 100 Reserved Life +(80-100) to maximum Mana Regenerate 2% of Energy Shield per second Chaos Damage is taken from Mana before Life |
|
 (Boots) Rare Boots - Boots should grant you Mana, Intelligence, Movement Speed, Resistances, and maybe Strength. Elemental Resistances are especially important for a build with no Mageblood. For Eldritch mods seek Action Speed and increased Battlemage's Cry Buff Effect. (Boots) Rare Boots - Boots should grant you Mana, Intelligence, Movement Speed, Resistances, and maybe Strength. Elemental Resistances are especially important for a build with no Mageblood. For Eldritch mods seek Action Speed and increased Battlemage's Cry Buff Effect. |
|
| Min. requirements: +60 to Maximum Mana 25% Movement Speed +45 to Intelligence Optional affixes: +50% to Elemental Resistances Strength Chaos Resistances Freeze Immunity |
|
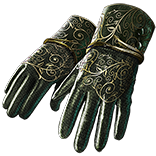 (Gloves) Shaper's Touch - It single-handedly solves your Accuracy problem and increases Evasion, which can be incorporated as one of the main defensive layers. With Strength, which you will also have quite a bit of, it grants Mana and Energy Shield. That's the main reason why Strength is valued in this build. (Gloves) Shaper's Touch - It single-handedly solves your Accuracy problem and increases Evasion, which can be incorporated as one of the main defensive layers. With Strength, which you will also have quite a bit of, it grants Mana and Energy Shield. That's the main reason why Strength is valued in this build. |
|
| (80-120)% increased Armour and Energy Shield +4 Accuracy Rating per 2 Intelligence +1 Life per 4 Dexterity +1 Mana per 4 Strength 1% increased Energy Shield per 10 Strength 2% increased Evasion Rating per 10 Intelligence 2% increased Melee Physical Damage per 10 Dexterity |
|
 (Belt) Rare Belt - A Rare Belt can be used in this build instead of Mageblood. Here you will need Maximum Mana, Resistances, Attributes, and one or two Flask modifiers that will ensure your Flasks are always active. Hunter's modifiers could be extremely great here for Flask Charges on Crit, and increased Attributes in addition to that. Remember you can also use Tattoos of the Tawhoa Herbalist for increased Flask Effect Duration. (Belt) Rare Belt - A Rare Belt can be used in this build instead of Mageblood. Here you will need Maximum Mana, Resistances, Attributes, and one or two Flask modifiers that will ensure your Flasks are always active. Hunter's modifiers could be extremely great here for Flask Charges on Crit, and increased Attributes in addition to that. Remember you can also use Tattoos of the Tawhoa Herbalist for increased Flask Effect Duration. |
|
| Min. requirements: +60 to Maximum Mana +90% to Elemental Resistances Optional affixes: increased Attributes Attributes Gain a Flask Charge when you deal a Critical Strike Flask modifiers |
|
 (Amulet) Astramentis - It's the budget option. It grants you a lot of Attributes, most of which are beneficial. It also lets you Tattoo over Dexterity nodes as you will no longer need them. (Amulet) Astramentis - It's the budget option. It grants you a lot of Attributes, most of which are beneficial. It also lets you Tattoo over Dexterity nodes as you will no longer need them. |
|
| +(10-16) to all Attributes +(80-100) to all Attributes -4 Physical Damage taken from Attack Hits |
|
 (Amulet) Eyes of the Greatwolf - Two modifiers for increased Attributes and increased Mana make this option by far superior to any other Amulet. Such a copy is undoubtedly very expensive. (Amulet) Eyes of the Greatwolf - Two modifiers for increased Attributes and increased Mana make this option by far superior to any other Amulet. Such a copy is undoubtedly very expensive. |
|
| <Two random talisman implicit modifiers> Implicit Modifier magnitudes are doubled |
|
| Recommended Anointments: Primal Spirit |
|
 (Ring) Rare Rings - If your Resistances are sorted out, look for Intelligence and Strength on Suffixes. If not - Resistances. Prefixes can only grant you additional Mana; that's why using Experimented Ring bases with more pronounced Suffixes is a great idea. Remember to use Catalysts. (Ring) Rare Rings - If your Resistances are sorted out, look for Intelligence and Strength on Suffixes. If not - Resistances. Prefixes can only grant you additional Mana; that's why using Experimented Ring bases with more pronounced Suffixes is a great idea. Remember to use Catalysts. |
|
| Min. requirements: +50 to Strength +50 to Intelligence +80 to Maximum Mana Optional affixes: +60% to Elemental Resistances Chaos Resistance |
|
 (Jewel) The Adorned - The build can accommodate 10 magic Jewels, so Adorned is a natural choice. The Maximum Rolls for Attributes and Mana on these Jewels are even numbers, so the best Adorned is in fact one with a 150% increased Effect. (Jewel) The Adorned - The build can accommodate 10 magic Jewels, so Adorned is a natural choice. The Maximum Rolls for Attributes and Mana on these Jewels are even numbers, so the best Adorned is in fact one with a 150% increased Effect. |
|
| (50-150)% increased Effect of Jewel Socket Passive Skills containing Corrupted Magic Jewels | |
 (Jewel) Rare Jewels - These Jewels have to be Magic with only two Affixes. Look for Attributes and Mana. We recommend Intelligence mixed with Strength for Attributes. These are slightly better than pure Intelligence. You can Corrupt them for a chance to Avoid Ailments. (Jewel) Rare Jewels - These Jewels have to be Magic with only two Affixes. Look for Attributes and Mana. We recommend Intelligence mixed with Strength for Attributes. These are slightly better than pure Intelligence. You can Corrupt them for a chance to Avoid Ailments. |
|
| Recommended affixes: increased Maximum Mana Strength and Intelligence |
|
 (Jewel) Split Personality - This build has perfect conditions for Split Personality. Socket them near Point Blank where the distance to start is 47. They should grant you Intelligence and Mana. (Jewel) Split Personality - This build has perfect conditions for Split Personality. Socket them near Point Blank where the distance to start is 47. They should grant you Intelligence and Mana. |
|
| This Jewel's Socket has a 25% increased effect per Allocated Passive Skill between it and your Class' starting location. | |
 (Jewel) Watcher's Eye - The most important mod is added Energy Shield based on Maximum Mana from the Clarity's pool. Your other Aurca is Grace, which offers Movement Speed or an additional Chance to Evade. (Jewel) Watcher's Eye - The most important mod is added Energy Shield based on Maximum Mana from the Clarity's pool. Your other Aurca is Grace, which offers Movement Speed or an additional Chance to Evade. |
|
| (4-6)% increased maximum Energy Shield (4-6)% increased maximum Life (4-6)% increased maximum Mana |
|
 (Jewel) Large Cluster Jewels - This version of a build lets you make use of 4 Large Cluster Jewels. One reason for this many Jewels is the opportunity to host more Magic Jewels for The Adorned, but also because of the immensely powerful Scintillating Idea Notable, which should be present on each of these. Prismatic Heart grants Resistances and Damage, Storm Drinker - Energy Shield Leech (important, you should have at least one), and Disorienting Display Blinds enemies, making your Evasion more pronounced. (Jewel) Large Cluster Jewels - This version of a build lets you make use of 4 Large Cluster Jewels. One reason for this many Jewels is the opportunity to host more Magic Jewels for The Adorned, but also because of the immensely powerful Scintillating Idea Notable, which should be present on each of these. Prismatic Heart grants Resistances and Damage, Storm Drinker - Energy Shield Leech (important, you should have at least one), and Disorienting Display Blinds enemies, making your Evasion more pronounced. |
|
| Recommended affixes: 1 Added Passive Skill is Scintillating Idea 1 Added Passive Skill is Storm Drinker 1 Added Passive Skill is Disorienting Display 1 Added Passive Skill is Prismatic Heart |
|
 (Flask) Coruscating Elixir - If you're out of Mana, any amount of Chaos Damage will kill your character instantly. That's why Coruscating Elixir is so important - it prevents that. There's also Fire Resistance and Maximum Fire Resistance so try to keep that flask up at all times. (Flask) Coruscating Elixir - If you're out of Mana, any amount of Chaos Damage will kill your character instantly. That's why Coruscating Elixir is so important - it prevents that. There's also Fire Resistance and Maximum Fire Resistance so try to keep that flask up at all times. |
|
| +40% to Fire Resistance +5% to maximum Fire Resistance Chaos Damage taken does not bypass Energy Shield during effect Removes all but one Life on use Removed life is Regenerated as Energy Shield over 2 seconds 25% increased Duration |
|
|
Other suggested Flasks:
|
|
    |
|
|
If you have any other build requests please leave that in the comments below. We are always open to suggestions and constructive feedback.
Pictures used in this article are the intellectual property of Grinding Gear Games.
