Starforge Sweep Juggernaut Sick AoE Build
Very powerful Melee build which can cover your entire screen with Sweep AttacksStarforge Sweep
AoE Juggernaut build
Updated for Patch 3.9
The Best Crafty Guides by Odealo
Estimated budget: medium

| Guide notes |
| January 23, 2020 -Build created February 7, 2020 -Added gameplay video -Updated Skill Gems |
Sweep is a very interesting, and surprisingly unpopular, Melee Attack. It uses Two-Handed Weapons to deal damage to all enemies around you in a full 360 degrees circle. It also has very high base Damage and high Added Damage Effectiveness, which allows you to easily reach Millions of effective Shaper DPS without spending tons of Currency on Mirror-level equipment. At the same time, we can utilize the Juggernaut, which will offer enough defensive stats to deal with any Boss in the game via Endurance Charges and Increased Armour Rating.
That is one of the most interesting Melee Builds we have tested in Patch 3.9 and the Metamorph League. With the occasional damage spikes that got us down (after all, we had "merely" 5,500 Maximum Life), it did exceptionally well for a non-meta Melee build.
You can also check our other PoE build right here Odealo's Crafty Guides - Full List
1. Gameplay
This build is simply beautiful in its' simplicity. All you have to do is Leap Slam into packs, use Sweep once, and look for another pack. You also have several Utility skills like Ancestral Warchief, Blood Rage, and Molten Shell which you should use against Metamorphs and Bosses - for casual farming you don't even have to bother. All other Skills like your Golem or Curse will be triggered automatically. You also get to use a total of 4 Auras, which grant Passive bonuses.
Even though you are a Juggernaut, we have decided to focus more on increasing the DPS, so when facing end-game Bosses, you may actually need to learn to avoid their powerful abilities. Occasionally, a high damage spike from Sirius or Guardians may hurt.
|
This video was recorded on a level 92 Juggernaut on Metamorph Softcore. In most cases, I have only swapped Stances for Bosses, but you could also have a Inc. Area/Concentrated Effect Swap for much faster clearing |
|
|

2. Build's PROS & CONS
| PROS |
|
| CONS |
|
3. Leveling tips
Leveling is very easy. You need to focus high Physical Damage Weapons - preferably Two-Handed Swords, as you start getting Passives for this Weapon type at around level 30+, and high Life/Resistances equipment. If you can get Edge of the Madness on level 22, it should carry you all the way to lower Tier Maps, as its' damage scales with your character Level. There is a number of useful Unique Items that can boost your Mobility as well, since leveling with a Melee character isn't usually the fastest option. Both that and basic Gem setups are listed below.
Suggested leveling Gem setups:
| Sweep setup | |
 |
Sweep - primary Attack used in this build. It works great for leveling as it Hits enemies all around you, and if you manage to get a high Physical DPS Weapon, it will one-shot most of the enemies, allowing you to progress fast |
 |
Melee Physical Damage Support - increases Sweep's Physical Melee Damage |
 |
Maim Support - this Gem increases your Physical DPS and Maim enemies, slowing them down |
 |
Close Combat Support - grants high DPS bonus to nearby enemies, and increases the Movement Speed of your Mobility Skills (Leap Slam in this case) greatly increasing your mobility |
| Utility Gems | |
 |
Ancestral Warchief - summons a Totem which increases your Melee Damage |
 |
Vulnerability - the recommended Curse for this build which increases your Physical DPS. You can cast it manually against Bosses to increase your Damage output - later on it should be applied via Glove Corruption |
 |
Blood and Sand - allows switching between Blood and Sand stances. You should use Sand for leveling/farming, and switch to Blood Stance when facing Bosses or tougher Rare monsters |
 |
Herald of Ash - grants high bonus damage and causes fiery AoE explosions which helps with clearing bigger packs |
 |
Leap Slam - the recommended Movement Skill used in this build |
 |
Summon Ice Golem - increases your Accuracy Rating and Critical Strike Chance |
Bandits:
It's recommended to help Alira for extra Elemental Resistances and Crit. Multiplier
Leveling Skill Trees:
35 Points Skill Tree
Priorities: 1) Born to Fight 2) Kinetic Impacts 3) Martial Experience 4) Art of the Gladiator 5) Destroyer
66 Points Skill Tree
Priorities: 1) Blade of Cunning 2) Rampart (link Sweep with Fortify at this point) 3) Golem's Blood 4) Thick Skin
Recommended leveling items:
 Blackheart - one of the best leveling Rings for this build. You should be able to efficiently use for around 30 levels right from the start. Later on, replace them with rares with higher Life and Resistances Blackheart - one of the best leveling Rings for this build. You should be able to efficiently use for around 30 levels right from the start. Later on, replace them with rares with higher Life and Resistances |
|
| Adds 1 to 4 Physical Damage to Attacks 5% increased Physical Damage Adds 1 to 3 Chaos Damage to Attacks +(20-30) to maximum Life (2-4) Life Regenerated per second 10% chance to Cause Monsters to Flee |
|
 Meginord's Girdle - very solid Belt which can be used until early Maps Meginord's Girdle - very solid Belt which can be used until early Maps |
|
| +(25-35) to Strength Adds 5 to 15 Physical Damage to Attacks +25 to Strength 10% increased maximum Life +(10-20)% to Cold Resistance 25% increased Flask Life Recovery rate |
|
 Coward's Chains - another great Belt which grants increased Movement Speed, Damage, and Attributes. As a Juggernaut with high Life, you should be able to nullify the Vulnerability Curse that's cast on you Coward's Chains - another great Belt which grants increased Movement Speed, Damage, and Attributes. As a Juggernaut with high Life, you should be able to nullify the Vulnerability Curse that's cast on you |
|
| +(9-20) to maximum Energy Shield +(10-15) to all Attributes (20-25)% increased Damage (5-10)% increased Movement Speed Damage from Enemies Hitting you is Unlucky while you are Cursed with Vulnerability You are Cursed with Level 10 Vulnerability |
|
|
|
|
| 40% increased Global Accuracy Rating +1 to Level of Socketed Active Skill Gems (40-60)% increased Physical Damage Adds (60-68) to (90-102) Chaos Damage 1% increased Chaos Damage per Level Adds 1 to 2 Physical Damage to Attacks per Level |
|
 Edge of Madness - insane and inexpensive leveling Weapon for this build. It scales its' DPS with your character level, which allows you to easily complete the entire campaign using it
|
|
|
| 50% increased Movement Speed Level Requirement reduced by 100 (Hidden) |
|
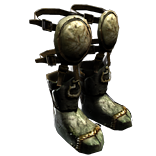
 Seven League Step - this pair of Boots grant the highest possible Movement Speed bonus making it one of the most popular leveling items in the game. It works perfectly for this initially slower Melee character
4. Final Skill tree, Ascendancy Points, and Pantheon
Final Skill Tree:
113 Points Final Skill Tree
113 Points Path of Building(PoB) link
Ascendancy points:
Preferably in that order:
- Undeniable
- Unstoppable
- Unflinching
- Unrelenting
Pantheon:
Major God: there are two choices depending on if you are grinding Maps or want to challenge end-game Bosses.
Maps: Soul of Lunaris 1% additional Physical Damage Reduction for each nearby Enemy, up to 8%; 1% increased Movement Speed for each nearby Enemy, up to 8%
Bosses: Soul of Solaris 6% Physical Damage Reduction if there is only one nearby Enemy; 20% chance to take 50% less Area Damage from Hits
Minor God: Soul of Gruthkul - 1% additional Physical Damage Reduction for each Hit you've taken Recently up to a maximum of 5%
5. Final Gems links
| [DPS] Sweep setup | |
|
Sweep - your primary DPS skill which has insane AoE radius, and deals very high damage to all enemies in range |
|
Melee Physical Damage Support - one of the core Support Gems for all Melee/Physical skills |
 |
Brutality Support - grants the highest Physical Damage bonus, but makes supported Skills unable to deal non-physical damage (which is negligible since we are using Starforge anyway) |
 |
Concentrated Effect Support - greatly increases Area Damage at the cost of reducing the Skills radius. You can replace it with Increased Area of Effect Support for faster farming/leveling, but lose approximately 30% of effective DPS |
 |
Fortify Support - grants very high bonus damage and a very strong defensive buff |
 |
Pulverise Support - has a very similar effect to that of Concentrated Effect Support Gem. It grants very high Area Damage bonus but reduces the radius of your Sweep |
| [UTILITY] Auras | |
 |
Pride - the most powerful Aura DPS-wise. It makes you deal greatly increased Physical Damage to nearby enemies. It can also grant additional bonuses via Watcher's Eye Unique Jewel |
|
Blood and Sand - allows you to switch between stances, to either grant you more AoE or more AoE Damage. In most cases, you will be using the Blood Stance for higher DPS output |
 |
Flesh and Stone - grants additional effects whenever you are using Blood/Sand stances |
 |
Precision - grants extra Accuracy Rating and Critical Strike Chance. Depending on your gear, you may need to use it on lower levels so that it doesn't reserve too much of your Mana |
 |
Enlighten Support - pretty much mandatory Support Gem here, which will allow us to use all the listed Auras. It's recommended to get at least lvl. 3 Enlighten |
| [UTILITY] Molten Shell/Leap Slam | |
|
Leap Slam - the recommended Movement Skill used in this build |
 |
Faster Attacks Support - increases the speed of your Leaps |
 |
Blood Magic Support - causes Leap Slam to cost Life instead of Mana |
 |
Vaal Molten Shell - grants increased Armour and a protective shield to absorb damage based on your Armour Rating. It has to be triggered manually whenever you need some extra protection |
| [UTILITY] Ancestral Warchief and Golem | |
 |
Ancestral Warchief - will increase your Melee Damage when active |
|
Summon Ice Golem - increases your Accuracy Rating and Critical Strike Chance. It will be summoned automatically by Cast when Damage Taken Gem |
 |
Cast when Damage Taken Support - will automatically resummon your Golem once in a while |
 |
Culling Strike Support - will cause your Ancestral Totem and Golem to instantly kill enemies below 10% Life |
| [UTILITY] Blood Rage | |
 |
Blood Rage - increases your Attack Speed, Life Leech, and generates Frenzy Charges. It also deals a moderate amount of damage to self |
| [UTILITY] Assassin's Mark | |
|
Cast when Damage Taken Support - will automatically cast Ball Lightning that's used to apply your second Curse, or you could only link it to Power Charge on Critical to generate Power Charges if you can't afford the Awakened Curse on Hit Support. Use CwDT level 1 Gem |
 |
Ball Lightning - one of the most efficient Spells to apply Curses via Cast when Damage Taken |
 |
Awakened Curse on Hit Support - when you have this Gem on level 5 it makes supported Spells apply an additional Curse (Assassin's Mark in our case) |
 |
Assassin's Mark - recommended for your second Curse. It grants high Crit. Chance, generates Power Charges and grants extra Life/Mana Recovery |
|
|
5. Gear Setup
Below you will find the recommended gear for this Starforge Sweep Juggernaut build. We have included several alternative Item choices and added "end-game" affixes on the Rare equipment if you were looking forward to investing more Currency into your build. In general, this build offers very high flexibility in terms of equipment, and you can potentially play it only with random Rares.
Our recommended items will:
- Cap your resistances
- Give you enough DPS/Life to start mapping successfully
|
Stat priorities on items:
|
 (Helmet) Rare Helmet - a Rare Helmet can provide very high defensive stats and is always a solid choice (Helmet) Rare Helmet - a Rare Helmet can provide very high defensive stats and is always a solid choice |
|
| Min. requirements: 70 maximum Life 90% All Elemental Resistances Optional affixes: Nearby enemies take #% Physical Damage |
|
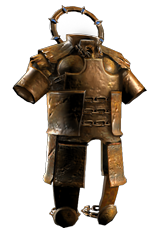
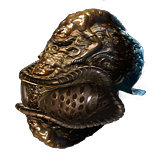 (Helmet) Abyssus - grants insane bonus damage but increases Physical Damage you take. If you strictly follow this build, this may be the option to go as you still should have your Physical Damage Reduction capped at maximum (Helmet) Abyssus - grants insane bonus damage but increases Physical Damage you take. If you strictly follow this build, this may be the option to go as you still should have your Physical Damage Reduction capped at maximum |
|
| Adds 40 to 60 Physical Damage to Attacks +(20-25) to all Attributes +(100-125)% to Melee Critical Strike Multiplier (100-120)% increased Armour (40-50)% increased Physical Damage taken |
|
| Helmet enchantment: 40% increased Sweep Damage |
|
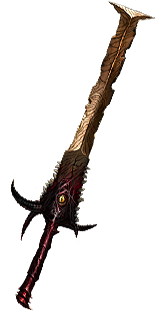
 (Weapon) Starforge - one of the most powerful swords in the game. It also grants a high Life bonus (which is quite important in this setup) and lets you, Shock enemies, with Physical Damage (Weapon) Starforge - one of the most powerful swords in the game. It also grants a high Life bonus (which is quite important in this setup) and lets you, Shock enemies, with Physical Damage |
|
| 30% increased Global Accuracy Rating (400-500)% increased Physical Damage (5-8)% increased Attack Speed +(90-100) to maximum Life Your Physical Damage can Shock 20% increased Area of Effect for Attacks Deal no Elemental Damage |
|
 (Weapon) Rare Two-Handed Sword - simply aim for as high Physical DPS as possible. Unlike Starfoge, Rare swords will not provide additional Life and Shock but can have much higher overall DPS stats (if you are looking to spend that much obviously) (Weapon) Rare Two-Handed Sword - simply aim for as high Physical DPS as possible. Unlike Starfoge, Rare swords will not provide additional Life and Shock but can have much higher overall DPS stats (if you are looking to spend that much obviously) |
|
| Minimum requirements: 600 Physical DPS Global Critical Strike Multiplier Global Critical Strike Chance End-game affixes: Socketed Skills deal 20% more Attack Damage (Delve-crafted) Socketed Gems are Supported by Level 10 Fortify (Vaal Orb) |
|
 (Body Armour) Rare Body Armour - can grant much higher defensive utility if you get an Elder Chest with high Life bonuses and possibly high Armour Rating (Body Armour) Rare Body Armour - can grant much higher defensive utility if you get an Elder Chest with high Life bonuses and possibly high Armour Rating |
|
| Min. requirements: 110 maximum Life 5% maximum Life 1200 Armour Rating Optional affixes: Elemental Resistances End-game affixes: Attacks have +# to Critical Strike Chance (20–25)% increased Effect of Auras on you (Delve-crafted) |
|
 (Body Armour) Carcass Jack - a great "budget" option for this build. It grants very high AoE and AoE damage bonuses, and since we don't need six-links in here, it's also relatively easy to obtain (Body Armour) Carcass Jack - a great "budget" option for this build. It grants very high AoE and AoE damage bonuses, and since we don't need six-links in here, it's also relatively easy to obtain |
|
| (120-150)% increased Evasion and Energy Shield +(50-70) to maximum Life +(9-12)% to all Elemental Resistances (40-50)% increased Area of Effect (40-50)% increased Area Damage Extra gore |
|
 (Boots) Rare Boots - get pair with the highest maximum Life bonus you can afford (Boots) Rare Boots - get pair with the highest maximum Life bonus you can afford |
|
| Min. requirements: 80 maximum Life 30% increased Movement Speed 30% Chaos Resistance Optional affixes: High Armour Rating Strength Elemental Resistances |
|
| Boot enchantment: 16% increased Attack and Cast Speed if you've Killed Recently |
|
 (Belt) Stygian Vise - again, aim for high defensive stats (Belt) Stygian Vise - again, aim for high defensive stats |
|
| Min. requirements: 80 maximum Life 110% Total Elemental Resistances Optional affixes: increased Damage or Physical Damage Armour Rating |
|
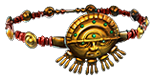
 (Amulet) Rare Amulet - you need to pick a rare Amulet with high bonus Intelligence otherwise you will be unable to use all the required Gear and Gems (Amulet) Rare Amulet - you need to pick a rare Amulet with high bonus Intelligence otherwise you will be unable to use all the required Gear and Gems |
|
| Min. requirements: 60 maximum Life 60 Intelligence Adds min. 12 Physical Damage to Attacks 26% increased Global Critical Strike Multiplier Optional affixes: Other Attributes |
|
Recommended Anointments:
|
|
 (Ring) Rare Rings - aim for high defensive stats mainly and flat Added Physical Damage (Ring) Rare Rings - aim for high defensive stats mainly and flat Added Physical Damage |
|
| Min. requirements: 70 maximum Life 90% Total Elemental Resistances Min. 10 Added Physical Damage to Attacks Optional affixes: Attributes |
|
 (Ring) Romira's Banquet - grants insane DPS bonuses, and allows you to generate Power Charges. If you have no problems with Life/Resistances and Attributes, you may just pick it to boost up your offensive stats (Ring) Romira's Banquet - grants insane DPS bonuses, and allows you to generate Power Charges. If you have no problems with Life/Resistances and Attributes, you may just pick it to boost up your offensive stats |
|
| (20-30)% increased Global Critical Strike Chance +333 to Accuracy Rating +(15-25)% to Global Critical Strike Multiplier +(40-60) to maximum Mana 0.4% of Physical Attack Damage Leeched as Mana Gain a Power Charge on Non-Critical Strike Lose all Power Charges on Critical Strike |
|
| (80-120)% increased Armour and Energy Shield +4 Accuracy Rating per 2 Intelligence +1 Life per 4 Dexterity +2 Mana per 4 Strength 2% increased Energy Shield per 10 Strength 2% increased Evasion Rating per 10 Intelligence 2% increased Melee Physical Damage per 10 Dexterity |
|
 (Jewels) Lethal Pride - when socketed right below Duelist's starting node, it can provide an insane DPS bonus depending on the roll and Jewel that you have. You are looking for additional Melee Damage/Crit/and a chance to deal double damage. 16k Kaom Jewel can give this build a 10% Chance to Intimidate on Hit which is insane DPS bonus (Jewels) Lethal Pride - when socketed right below Duelist's starting node, it can provide an insane DPS bonus depending on the roll and Jewel that you have. You are looking for additional Melee Damage/Crit/and a chance to deal double damage. 16k Kaom Jewel can give this build a 10% Chance to Intimidate on Hit which is insane DPS bonus |
|
| Commanded leadership over (10000-18000) warriors under Kilaova Passives in radius are Conquered by the Karui Historic Our Kaom Jewel with around 16k kills had the following bonuses: 20% Increased Physical Damage 20% Increased Melee Damage 30% Increased Melee Critical Strike Chance approx. 30 Strength |
|
 (Jewels) Rare Jewels - this should provide extra Life and damage bonuses (Jewels) Rare Jewels - this should provide extra Life and damage bonuses |
|
| Recommended affixes: increased maximum Life increased Physical/Melee/Area Damage increased Global Critical Strike Multiplier Optional affixes: Attributes Elemental Resistances |
|
 (Jewels) Murderous Eye Jewel - if you get solid Jewels with the chance to gain the Onslaught buff you could also get an extra Utility Flask (Jewels) Murderous Eye Jewel - if you get solid Jewels with the chance to gain the Onslaught buff you could also get an extra Utility Flask |
|
| Recommended affixes: maximum Life added Physical Damage to Attacks/Sword Attacks increased Global Critical Strike Multiplier Optional affixes: Increased Damage if you've killed recently |
|
 (Flask) Lion's Roar - grants very high bonus Melee Damage and Armour Rating (Flask) Lion's Roar - grants very high bonus Melee Damage and Armour Rating |
|
| +3000 to Armour (14-20)% Chance to Block during Flask effect (6-10)% Chance to Block Spells during Flask effect |
|
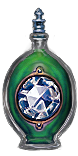
 (Flask) Bottled Faith - greatly increases your Critical Strike Chance and creates Consecrated Grounds for even more bonuses (Flask) Bottled Faith - greatly increases your Critical Strike Chance and creates Consecrated Grounds for even more bonuses |
|
| 40% increased Damage Creates Consecrated Ground on Use (30-50)% increased Duration Consecrated Ground created by this Flask has Tripled Radius +(1-2)% to Critical Strike Chance against Enemies on Consecrated Ground during Effect Consecrated Ground created during Effect applies (7-10)% increased Damage taken to Enemies |
|
Other suggested Flasks:
|
|
   |
|
|
If you have any other build requests please leave that in the comments below.
Pictures used in this article are the intellectual property of Grinding Gear Games.
