Spectral Shield Throw Pure Physical Gladiator - Odealo's Crafty Guide
A powerful Bleed-based Build based on Spectral Shield Throw which fires chaining projectilesSpectral Shield Throw
Gladiator Build
Updated for Patch 3.25
The Best Crafty Guides by Odealo
| Guide notes | |||
| July 31, 2024 -Build updated for Patch 3.25 |
|||
| Build overview | |||
| Tags: [MELEE] [PHYSICAL] [DOT] [LIFE] [STARTER] | |||
|
Budget: Defenses: |
|
Boss DPS: AoE: |
|
Gladiator is a class specializing in Bleed and Block. This build employs both mechanics to reach high Bleed Damage while using a Shield. Spectral Shield Throw deals damage based on your Shield's Armour and Evasion. It shatters on impact, which combined with Gratuitous Violence, will detonate any pack of enemies it Hits. It only requires a high Bleed Chance, which you do have as it's a Bleed build. SST is a Projectile Attack making clearing that much easier. To move around you will use another Skill that benefits from your Shield's Defence Stats. Shield Charge deals high damage even with no Support Gems to boost it. With this Skill, you will move faster the higher your Attack Speed is. It's a recipe for one of the best builds for clearing maps on the first few days of a new league. The build's a great league starter because it uses no Unique items and it doesn't need a good weapon, but a Shield which is generally much cheaper and easier to obtain.
Jagged Technique causes all your Bleedings to be Aggravated, which is required for a Bleed build to work. Other classes have to put some effort into Aggravating their Bleeds but here it's a given. To enhance your Bleed Damage you should keep Hitting the enemy in hopes of rolling a high damage number. Even if you can inflict only one Bleed on an enemy, the game is generous about which Bleed instance is currently damaging the enemy, and it's always the strongest one. To have a higher chance of overriding previous Bleeds with stronger versions invest in Maximum Attack Physical Damage from Physical Mastery, Volatility Support, and Ryslatha's Coil.
The build is tanky because of its high Block Chance that prevents all damage. With Versatile Combatant, you can easily cap your Attack and Spell Block Chance at 70% and 65% respectively. Your Block Chance is Lucky for the next 4 seconds after you Block, meaning the Chance to Block is rolled twice and the favourable outcome is being selected. That's your main defensive layer. You also have a very high Maximum Life with Blood Magic, around 50k Armour that will mitigate most Hits you're likely to receive on T16 maps by 90%, Endurance Charges, and Life Regeneration that comes from Items and Vitality. All it makes it an excellent T16 farmer, but it does struggle with bosses later on on account of its low damage.
You can also find our other Path of Exile builds right over here Odealo's Crafty Guides - Full List
1. Gameplay
Shield Charge into enemies to slay them. If that's not enough, or if there are any foes out of your range, use Spectral Shield Throw - your main damaging ability. To Regenerate Life and gain Endurance Chargers use Enduring Cry. During boss fights cast Vulnerability on them. Blood Rage, Phase Run, and Molten Shell are triggered automatically. Your Auras are Pride and Vitality.
|
|

2. Build's PROS & CONS
| PROS |
|
| CONS |
|
3. Leveling tips
Start with any Attack. Double Strike is great, but you can also switch to Puncture of Shanking, Bladestorm, Lacerate, or Lacerate of Haemorrhage if you have it - that would be the best Skill. Start allocating all the Bleed nodes on your Skill Tree to gain more damage. You should also use a weapon with high Physical Damage or any Bleed-oriented Unique weapons. Swap to SST after acquiring a good Shield.
Suggested leveling Gem setups:
| Double Strike setup | |
 |
Double Strike - a simple melee attack which deals extra damage against Bleeding targets |
 |
Chance to Bleed Support - core Support Gem for any Bleed build which boosts your chance to inflict this ailment and its damage |
 |
Melee Physical Damage Support - just alike above, a mandatory support Gem for all Melee/Physical builds with extra bonuses to ailment damage |
 |
Maim Support - increases your Physical damage and inflicts Main on enemies |
| various Gems | |
 |
Vulnerability - the best offensive Curse for Physical/Bleed builds |
 |
Pride - core Aura which increases your Physical Damage against nearby enemies, which increases its effect over time |
 |
Flesh and Stone - allows you to use stances for additional bonuses |
 |
Herald of Purity - a Herald Spell that boosts your Physical Damage |
 |
Leap Slam - recommended Movement skill |
Bandits:
We recommend killing all the Bandits for two additional Passive Points.
Leveling Skill Trees:
27 Points Skill Tree
Go for the Resolute Technique as such. Pick Bleed nodes on your way there.
67 Points Skill Tree
Allocate more Maximum Life, Reservation Efficiency, and Damage. You can also allocate nodes corresponding to your weapon, as long as they increase your damage with Ailments.
Recommended leveling items:
|
|
|
| 30% increased Global Critical Strike Chance+(10-15) to Dexterity (50-70)% increased Physical Damage Adds (1-2) to (3-5) Physical Damage 30% increased Critical Strike Chance 40% increased Attack Damage against Bleeding Enemies 50% chance to cause Bleeding on Critical Strike |
|
 Haemophilia - Level 43, you can start wearing Haemophilia for more damage and explosions. Haemophilia - Level 43, you can start wearing Haemophilia for more damage and explosions. |
|
| +(20-30) to Strength 25% increased Damage over Time Attacks have 25% chance to cause Bleeding (25-40)% increased Attack Damage against Bleeding Enemies Bleeding Enemies you Kill Explode, dealing 5% of their Maximum Life as Physical Damage 25% reduced Bleeding Duration |
|
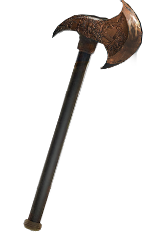
 Jack, the Axe - One of the best Bleed-oriented weapons. Use it until you switch to Shield. Jack, the Axe - One of the best Bleed-oriented weapons. Use it until you switch to Shield. |
|
| Grants Level 20 Thirst for Blood Skill (130-150)% increased Physical Damage Adds (11-14) to (18-23) Physical Damage 25% chance to cause Bleeding on Hit +(25-35)% to Damage over Time Multiplier for Bleeding from Hits with this Weapon |
|
 Kikazaru - This one, among other perks, has high Life Regeneration that will be probably needed. Kikazaru - This one, among other perks, has high Life Regeneration that will be probably needed. |
|
| +(20-30)% to Lightning Resistance +(10-15) to all Attributes (20-40)% increased Mana Regeneration Rate 60% reduced Effect of Curses on you Regenerate 3 Life per second per Level |
|
 Carnage Heart - Grants Life Leech, a lot of Resistances, and Attributes. Carnage Heart - Grants Life Leech, a lot of Resistances, and Attributes. |
|
| +(10-16) to all Attributes +(20-40) to all Attributes +(10-20)% to all Elemental Resistances (1.2-2)% of Physical Attack Damage Leeched as Life 50% increased total Recovery per second from Life Leech (30-40)% increased Damage while Leeching |
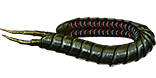
 Goredrill - At level 5 you can equip this weapon for more DPS.
4. Final Skill Tree, Ascendancy Points, and Pantheon
Final Skill Tree:
116 Points Final Skill Tree (doesn't include Unique or Cluster Jewels)
123 Points Path of Building (PoB) link
Ascendancy points:
Preferably in that order:
- Determined Survivor
- Gratuitous Violence
- Jagged Technique
- More Than Skill
Pantheon:
Major God: Soul of the Brine King: You cannot be Stunned if you've been Stunned or Blocked a Stunning Hit in the past 2 seconds
Minor God: Soul of Abberath: 60% less Duration of Ignite on You
5. Final Gems links
| [DPS] SST setup | |
 |
Spectral Shield Throw - Deals damage derived from your Shield's Armour and Evasion combined via a Projectile that shatters on impact. |
 |
Cruelty Support - More Damage over Time with the Cruelty Buff. |
 |
Volatility Support - Higher Maximum Damage and lower Minimum Damage. You can keep using SST to roll a high number, the best Bleed will "stick" to the enemy. |
 |
Brutality Support - More Physical Damage. |
 |
Swift Affliction Support - More Damage over Time, but shorter Bleed Duration. |
 |
Vicious Projectiles Support - More Physical Damage and Physical Damage over Time at the cost of Attack Speed. |
| [MOBILITY] Shield Charge setup | |
 |
Shield Charge - Since you have a good Shield you may as well use a mobility Skill that benefits from it - you will deal a lot of damage with Shield Charge, but its primary role is to keep you moving. |
|
Maim Support - Maimed enemies take increased Physical Damage and move slower. |
 |
Faster Attacks Support - Shield Charge is faster. |
 |
Fortify Support - Fortify yourself with Shield Charge's Hits to take less Hit Damage. |
| [UTILITY] Automation setup | |
 |
Automation - Linked Spells are triggered automatically. |
 |
Blood Rage - Grants more Attack Speed and Frenzy Charges on kill for more Damage. |
 |
Phase Run - Grants Phasing and Movement Speed which is very useful. |
 |
More Duration - Linked Skills last longer. |
| [UTILITY] Molten Shell setup | |
 |
Molten Shell - Absorbs a portion of incoming Hit Damage, it scales up with your Armour. |
 |
Cast when Damage Taken Support - Molten Shell is triggered after you take a certain amount of damage. |
|
More Duration |
| [UTILITY] Pride setup | |
|
Pride - Increases the Physical Damage nearby enemies take. It's more effective after 4 seconds. |
 |
Eternal Blessing Support - If you have only one non-Life Reserving Aura, link it to Eternal Blessing to make it Reserve no Mana/Life at all. |
| [UTILITY] Vitality setup | |
 |
Vitality - Vitality Regenerates Life - it's your main defensive layer against DoT. |
 |
Arrogance Support - You have to Reserve Life with Vitality due to Blood Magic and Eternal Blessing. |
| [UTILITY] Enduring Cry setup | |
 |
Enduring Cry - Regenerates Life and grants 4 Endurance Charges if fighting a pinnacle boss. |
 |
Urgent Orders Support - Increases Warcry Speed. |
| [UTILITY] Vulnerability | |
|
Vulnerability - Your sole Curse. Enemies take increased Physical Damage and are more likely to Bleed. You can also use Replica Witchfire Brew if you prefer it as an Aura, but that requires some good Flask modifiers to sustain it. |
|
|
5. Gear Setup
It's a Bleed build that uses Shield to inflict this Ailment so you'll have to pay attention to this quirk. There are multiple ways in which you can increase your Bleed Damage, but the source of it all is your Shield so it better be a good one - it has to have a lot of Evasion, Armour, or both. Your character will also wear gear pieces with Evasion and Armour to benefit from Evasion Mastery for Spell Suppression. This way it's possible to reach 100% Spell Suppression Chance. All the Evasion is converted into Armour with Iron Reflexes because you need it to withstand large Physical Hits, which won't happen often as the character has a high Block Chance. Remember to cap your Block Chance; it's trivial with Versatile Combatant. You're now well-prepared to take on Hits, but DoT is still a big problem that has to be patched up with Life Regeneration. It can be found on nearly all gear pieces as a Suffix. You should have around 6k of Maximum Life. You don't need Mana Regeneration, Reservation Efficiency, or Accuracy. You will need some extra Dexterity.
|
Stat priorities on items:
|
 (Helmet) Rare Helmet - Seek Maximum Life, some Resistances, and Spell Suppression Chance. For the Eldritch mods, you can get an increased Vulnerability Curse Effect and Reduced Shock Effect on you. (Helmet) Rare Helmet - Seek Maximum Life, some Resistances, and Spell Suppression Chance. For the Eldritch mods, you can get an increased Vulnerability Curse Effect and Reduced Shock Effect on you. |
|
| Min. requirements: +90 maximum Life +40% to Total Elemental Resistances +10% Spell Suppression Chance Evasion or Mixed Evasion base Optional affixes: Life Regeneration Intelligence |
|
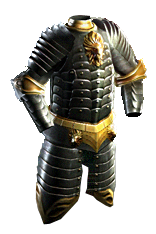 (Body Armour) Rare Body Armour - For Prefixes try to get Armour and Evasion with Maximum Life. For Suffixes get Resistances and Spell Suppression. For Eldritch mods you may pick up 10% of Physical Damage taken as Elemental, increased Global Physical Damage, or Life Recoup. (Body Armour) Rare Body Armour - For Prefixes try to get Armour and Evasion with Maximum Life. For Suffixes get Resistances and Spell Suppression. For Eldritch mods you may pick up 10% of Physical Damage taken as Elemental, increased Global Physical Damage, or Life Recoup. |
|
| Min. requirements: +150 maximum Life +40% to Total Elemental Resistances +15% Spell Suppression Chance Evasion or Mixed Evasion base Optional affixes: Elemental Resistances Life Regeneration Evasion and Armour |
|
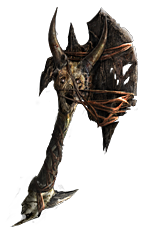
 (Weapon) Rare Axe - Almost all modifiers on a weapon are local, thus useless, as you use a Shield to Hit. There are however some global modifiers worth paying attention to. (Weapon) Rare Axe - Almost all modifiers on a weapon are local, thus useless, as you use a Shield to Hit. There are however some global modifiers worth paying attention to. |
|
| Min. requirements: 80% increased Physical Damage over Time +20% to Physical Damage over Time Multiplier (Warlord's) increased Damage over Time (Crafted Prefix) Optional affixes: Attributes Resistances |
|
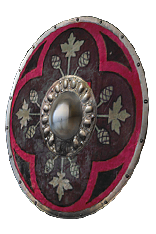 (Shield) Rare Shield - The easiest way to gain a lot of Armour and Evasion on a Shield is to get a mixed base with Prefixes that increase Armour and Evasion. Try a Cardinal Round Shield. There are also tons of useful Suffixes, but don't pay too much attention to them, a perfect Shield will cost too much. (Shield) Rare Shield - The easiest way to gain a lot of Armour and Evasion on a Shield is to get a mixed base with Prefixes that increase Armour and Evasion. Try a Cardinal Round Shield. There are also tons of useful Suffixes, but don't pay too much attention to them, a perfect Shield will cost too much. |
|
| Min. requirements: over 2000 mixed ES and Armour Optional affixes: Spell Suppression Chance Life gained on Block Resistances Life Regeneration Additional Physical Damage Reduction Attack Speed (Crafted) |
|
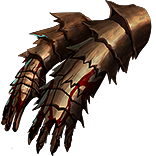
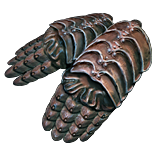 (Gloves) Rare Gloves - Here you can get Maximum Life, Resistances, Suppression Chance, Life Regeneration, and Dexterity. For the Eldritch mods seek Spell Suppression Chance and Physical Damage over Time Multiplier. (Gloves) Rare Gloves - Here you can get Maximum Life, Resistances, Suppression Chance, Life Regeneration, and Dexterity. For the Eldritch mods seek Spell Suppression Chance and Physical Damage over Time Multiplier. |
|
| Min. requirements: +90 maximum Life +40% to Total Elemental Resistances +10% Spell Suppression Chance Evasion or Mixed Evasion base Optional affixes: Life Regeneration Dexterity |
|
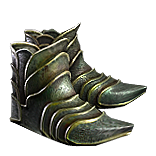 (Boots) Rare Boots - Maximum Life, Spell Suppression, and Movement Speed are your top priorites. For the Eldritch mods seek Chaos Resistance, Life Regeneration, or faster Bleeding. (Boots) Rare Boots - Maximum Life, Spell Suppression, and Movement Speed are your top priorites. For the Eldritch mods seek Chaos Resistance, Life Regeneration, or faster Bleeding. |
|
| Min. requirements: +90 maximum Life +10% Spell Suppression Chance 25% increased Movement Speed Evasion or Mixed Evasion base Optional affixes: Elemental Resistances Life Regeneration |
|
 (Belt) Rare Belt - Use a Rare Belt only if you cannot afford Ryslatha's Coil or if you're short on Resistances. There are plenty of useful modifiers and an abyssal socket if you happen to have a Stygian Vise. (Belt) Rare Belt - Use a Rare Belt only if you cannot afford Ryslatha's Coil or if you're short on Resistances. There are plenty of useful modifiers and an abyssal socket if you happen to have a Stygian Vise. |
|
| Min. requirements: +100 maximum Life +80% to Total Elemental Resistances Life Regeneration Optional affixes: Armour and Evasion Strength increased Maximum Life |
|
 (Belt) Ryslatha's Coil - It's the best Belt for such builds due to more Maximum Physical Damage that allows you to inflict stronger Bleed instances. (Belt) Ryslatha's Coil - It's the best Belt for such builds due to more Maximum Physical Damage that allows you to inflict stronger Bleed instances. |
|
| (20-30)% increased Stun Duration on Enemies +(20-40) to Strength (30-40)% more Maximum Physical Attack Damage (40-30)% less Minimum Physical Attack Damage Adds 1 to (15-20) Physical Damage to Attacks +(80-100) to maximum Life Gain 50 Life when you Stun an Enemy |
|
 (Amulet) Rare Amulet - Amulet is a great source of Maximum Life, Attributes, Resistances, DoT Multiplier, and Life Regeneration. (Amulet) Rare Amulet - Amulet is a great source of Maximum Life, Attributes, Resistances, DoT Multiplier, and Life Regeneration. |
|
| Min. requirements: +90 Maximum Life +40% to Elemental Resistances Damage over Time Multiplier Optional affixes: Life Regeneration Chaos Resistance increased Armour increased Evasion Attributes Physical DoT Multiplier (Hunter's Suffix) |
|
| Recommended Anointments: Entrench Inveterate Acrimony |
|
 (Ring) Rare Rings - On Rings seek mainly Attributes with Maximum Life. Elemental Resistances and other mods are less important. Try Amethyst Rings for Chaos Resistance. (Ring) Rare Rings - On Rings seek mainly Attributes with Maximum Life. Elemental Resistances and other mods are less important. Try Amethyst Rings for Chaos Resistance. |
|
| Min. requirements: +80 maximum Life Attributes Optional affixes: Resistances Life Regeneration Life Recoup increased Damage with Bleeding (Warlord's Suffix) |
|
 Jewel) Brutal Restraint - It can be used for Dexterity and to upgrade Notables in its radius. There are tons of Notable enhancements that would suit this build. Socket it near Stamina. Jewel) Brutal Restraint - It can be used for Dexterity and to upgrade Notables in its radius. There are tons of Notable enhancements that would suit this build. Socket it near Stamina. |
|
| Denoted service of (500-8000) dekhara in the akhara of Nasima Passives in radius are Conquered by the Maraketh Historic |
|
 (Jewel) Rare Jewels - We recommend fixing your Resistances and Attributes with gear pieces to benefit from excellent Jewel mods for Physical Damage over Time Multiplier, Bleeding Damage, or Block Chance if you need it. (Jewel) Rare Jewels - We recommend fixing your Resistances and Attributes with gear pieces to benefit from excellent Jewel mods for Physical Damage over Time Multiplier, Bleeding Damage, or Block Chance if you need it. |
|
| Recommended affixes: increased maximum Life Physical Damage over Time Multiplier Damage over Time Multiplier Chance to Block Spells and Attacks increased Damage with Bleeding |
|
 (Jewel) Large Cluster Jewel - Large Physical Cluster Jewels have a good selection of useful notables and very few bad ones. You should be able to fit one of these in this build. (Jewel) Large Cluster Jewel - Large Physical Cluster Jewels have a good selection of useful notables and very few bad ones. You should be able to fit one of these in this build. |
|
| Recommended affixes: 1 Added Passive Skill is Battle-Hardened 1 Added Passive Skill is Force Multiplier 1 Added Passive Skill is Master the Fundamentals 1 Added Passive Skill is Furious Assault |
|
|
Other suggested Flasks:
|
|
     |
|
|
If you have any other build requests, please leave that in the comments below.
Pictures used in this article are the intellectual property of Grinding Gear Games.
