
Smite Energy-Stacking Trickster
A very powerful Setup for Trickster using Smite and Ephemeral Edge that allows you to scale your Damage through Defense!Ephemeral Edge Smite
Trickster Build
Created for Patch 3.26
The Best Crafty Guides by Odealo
| Guide notes |
| July 18, 2025 - Build created |
| Build overview | |||
| Tags: [ENERGY SHIELD] [ATTACK] [ELEMENTAL] | |||
|
Budget: Defenses: |
|
Boss DPS: AoE: |
|
The Transfigured Smite of the Divine Judgement is a variant heavily focused on Clear Speed. It deals less Damage than the original version, but its Strikes can reach up to 3 additional Enemies within 7 Metres of your main target, massively improving your AoE coverage. It also lacks the extra Damage Aura, although a much more powerful Aura can be sourced from the Vaal Smite, as Transfigured Gems do not have special Vaal versions currently. To boost your Damage, you should try to Hit Enemies with both the AoE and Melee Strike components, which can be achieved by keeping a small distance from an enemy, which requires a bit of practice.
To supplement your Damage, you should use the fully automated General's Cry setup. It creates up to six Clones that fully Channel Blade Flurry once before dissipating. To create Clones, you will need a nearby Corpse, also created automatically thanks to the Cast when Damage Taken Support.
The Ephemeral Edge combined with the Trickster Ascendency is a cornerstone of multiple Builds beloved by many players for a very simple reason. This Setup allows you to scale your Damage by improving your Defense. It can also be started with a fairly low investment, and gradually upgraded over a long time with noticeable jumps in performance.
The main synergy comes from one specific modifier on this Unique Sword: "Attacks with this Weapon have Added Maximum Lightning Damage equal to (10-15)% of Player's Maximum Energy Shield". By increasing your Energy Shield, you will massively improve your Damage, which quickly makes this Weapon one of the strongest Swords you can wield in Path of Exile. It obviously also improves your own survivability, as reaching over 15k Energy Shield is well within reason, and can be pushed much more with higher investments.
While this interaction received a well-deserved adjustment in the Path Notes, the utility of the Marcenaries far outweighs the losses, making this Build stronger than ever, and much more affordable on top of that. Your main Damage type is Lightning, so you will use the well-known Doryani Prototype Setup on your Mercenary to bring the Enemy's Lightning Resistance down to -200%, massively improving your own Damage. The Lucky Hit effect granted by Perquil's Toe also provides a substantial boost. Since Mercenary is responsible for a large amount of your Damage, the rest of their Items should focus on ensuring their own survivability via Block and Life Recovery.
The Trickster Ascendency is the best choice for multiple reasons. It is very easy to obtain large amounts of Energy Shield, Evasion Rating, and Spell Suppression. Your Leech will be active for its full Duration, granting you a constant 20% maximum ES recovery during combat. You will also recover a large percentage of your ES by slaying Enemies. Finally, your Action Speed cannot be lowered under 108% of the base value, which usually can become very deadly in the highest difficulty of content.
You can also check our other Path of Exile builds right over here Odealo's Crafty Guides - Full List
1. Gameplay
You will primarily use Smite to deal with enemies. The Vaal Smite can be activated for a strong burst of Damage, or to obliterate a large Area around your character. The automatic General's Cry Setup will summon additional Minions that use Blade Flurry for you, dealing large amounts of passive Damage. For Movement, you should use the Shield Charge and Flame Dash.
|
|
|
|

2. Build's PROS & CONS
| PROS |
|
| CONS |
|
3. Leveling tips
Although the Ephemeral Edge is a fairly low-level Unique, to unlock its potential, you will have to equip proper end-game Rare Items. For leveling, we recommend using a straightforward variant with Smite and a Rare Sword suitable for your level. The Energy Shield is also an ineffective defense during leveling - you will want to pick up maximum Life Notables instead.
Bandits:
Kill all three bandits to get one additional Passive Skill Point or kill Alira to help with Gearing.
Leveling Skill Trees:
35 Points Passive Tree
Pick up bonuses for your Elemental Damage with One-handed Weapons. The Attack Mastery allows you to double-hit with your Smite.
66 Points Passive Tree
Travel towards the Precise Technique, picking up nearby useful Damage Notables. Make sure to have enough Accuracy to fulfill the Keystone's condition.
4. Final Skill Tree, Ascendancy Points, and Pantheon
Final Skill Tree:
90 Points Final Passive Tree (doesn't include Cluster or Unique Jewels)
118 Points Path of Building (PoB) link
Ascendancy points:
Preferably in that order:
- One Step Ahead
- Polymath
- Escape Artist
- Soul Drinker
Pantheon:
Major God: Soul of Arakaali: 10% reduced Damage taken from Damage Over Time, +40% Chaos Resistance against Damage Over Time
Minor God: Soul of Ralakesh: 25% reduced Physical Damage over Time taken while moving, Moving while Bleeding doesn't cause you to take extra Damage
5. Final Gems links
| [DPS] Smite of Divine Judgement Setup | |
 |
Vaal Smite of Divine Judgement - strikes multiple nearby Enemies with Lightning. You can also use the regular version for more Damage but lower AoE Coverage. The Vaal version can also be used as a standalone Gem for the Buff only, as it is quite expensive. |
 |
Multistrike Support |
 |
Volatility Support |
 |
Energy Leech Support |
 |
Elemental Focus Support |
 |
Elemental Damage with Attacks Support |
| [UTILITY] General's Cry Setup | |
 |
Blade Flurry - the strongest Melee Skill per single use. Your Clones will fully Channel this ability and release automatically upon reaching the maximum stage. |
 |
General's Cry - creates up to 6 Mirage Warriors that use a single Skill before dissipating. Adjust the Gem levels for your Strength - investing a lot into that Attribute, just to get a few more levels here, is not worth it. |
 |
Autoexertion - automatically triggers your Warcry at a small cost of your Mana Reservation. |
|
Volatility Support |
| [UTILITY] Aura Setup | |
 |
Discipline - improves your Energy Shield and enables favorable Watcher's Eye modifiers. |
 |
Tempest Shield - improves your Spell Block Chance. It also grants you immunity to Shock, which will be useful at lower budgets. |
 |
Precision - grants you tons of Accuracy. You will need it to never miss your Attacks. |
 |
Flesh and Stone - it is a Stance Skill, but you will always stay in the Sand Stance. It lowers the Damage of nearby Enemies. |
 |
Enlighten Support |
| [UTILITY] CwDT Setup | |
 |
Immortal Call - the most effective Guard Skill for Builds with huge amounts of Energy Shield. |
 |
Desecrate - creates Corpses required for the General's Cry. Try to get Hit at the start of the fight to summon your Clones immediately. |
 |
Blood Rage - a Buff that grants you Attack Speed. It will be easily offset by your Leech. It is usable only with the Whispers of Infinity Amulet. |
 |
Cast when Damage Taken Support - triggers linked Spells when you receive a small amount of Damage. Keep it at the lowest level possible. |
| [UTILITY] Curse Setup | |
 |
Poacher's Mark - the only way to generate Frenzy Charges. You could also use Punishment or Enfeeble Curses, but they require manual casting. |
 |
Mark on Hit Support |
| [UTILITY] Movement Setup | |
 |
Flame Dash - a quick teleport towards the targeted location, the first use is nearly instant. |
 |
Shield Charge - your main Movement Skill, it has no Cooldown and scales up with your Attack and Movement Speed. |
 |
Faster Attacks Support |
|
|
6. Gear Setup
Your Damage is primarily sourced from your Weapon, which in turn comes from your Energy Shield. You will also need plenty of Attack Speed or increases to your Damage. The Energy Shield is granted by your Rare Gear pieces, further improved by Intelligence. You will also need to cap your Elemental Resistances and get enough Strength to use your Gems. Optimising and fine-tuning your Equipment has seemingly no limit here.
|
Stat priorities on items:
|
 (Helmet) Rare Helmet - aim for a high amount of Energy Shield, Resistance, and Intelligence. You can also craft Spell Suppression Chance if you lack just a few %. (Helmet) Rare Helmet - aim for a high amount of Energy Shield, Resistance, and Intelligence. You can also craft Spell Suppression Chance if you lack just a few %. |
|
| Min. requirements: +300 to Energy Shield 30% total Elemental Resistance Optional affixes: +#% to Intelligence +#% chance to Suppress Spell Damage #% of Physical Damage from Hits taken as Chaos Damage (Eater Influence) |
|
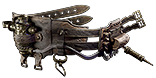
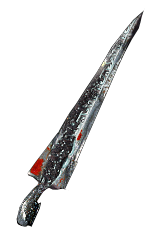 (Weapon) Ephemeral Edge - the foundation of this Build, it grants you Lightning Damage based on your Energy Shield. The baseline version is very cheap, but additional Corruption Implicits can be very expensive. (Weapon) Ephemeral Edge - the foundation of this Build, it grants you Lightning Damage based on your Energy Shield. The baseline version is very cheap, but additional Corruption Implicits can be very expensive. |
|
| 40% increased Global Accuracy Rating +10 to Intelligence 50% increased Global Critical Strike Chance (40-50)% increased maximum Energy Shield 25% reduced maximum Life Adds 1 to 75 Lightning Damage Attacks with this Weapon have Added Maximum Lightning Damage equal to (10-15)% of Player's Maximum Energy Shield Recommended Corruptions: (5-7)% increased Attack Speed Melee Hits have (10-15)% chance to Fortify |
|
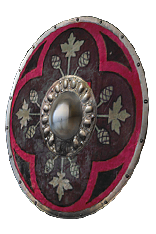
 (Off-hand) Rare Shield - the primary role of your Shield is to provide a large amount of Energy Shield. You can also get a bit of Spell Suppression or Resistance here. (Off-hand) Rare Shield - the primary role of your Shield is to provide a large amount of Energy Shield. You can also get a bit of Spell Suppression or Resistance here. |
|
| Min. requirements: +300 to Energy Shield 30% total Elemental Resistance Optional affixes: +#% to Intelligence +#% chance to Suppress Spell Damage |
|
 (Body Armour) Rare Armour - the only source of Evasion Rating in this Build, but it still provides a large amount of Energy Shield as well. It can also redirect a portion of Physical Damage to be taken as Chaos, or improve your Flask Sustain. (Body Armour) Rare Armour - the only source of Evasion Rating in this Build, but it still provides a large amount of Energy Shield as well. It can also redirect a portion of Physical Damage to be taken as Chaos, or improve your Flask Sustain. |
|
| Min. requirements: +500 to Energy Shield +2000 to Energy Shield +20% chance to Suppress Spell Damage Optional affixes: +#% to Intelligence Resistance #% of Physical Damage from Hits taken as Chaos Damage (Eater Influence) |
|
 (Belt) Bated Breath - a great option for low Budget, although getting enough Resistances elsewhere might be problematic. Use Tempering Catalyst to improve the Energy Shield modifiers. (Belt) Bated Breath - a great option for low Budget, although getting enough Resistances elsewhere might be problematic. Use Tempering Catalyst to improve the Energy Shield modifiers. |
|
| +(9-20) to maximum Energy Shield +(15-25) to Intelligence 10% increased Damage +(20-30) to maximum Energy Shield 20% increased maximum Energy Shield 50% increased Energy Shield Recharge Rate |
|
 (Belt) Rare Belt - a Rare Belt with Crusader Influence can improve your Energy Shield by a similar amount, while also providing Elemental Resistances, a bit of Damage, and an Abyss Socket. (Belt) Rare Belt - a Rare Belt with Crusader Influence can improve your Energy Shield by a similar amount, while also providing Elemental Resistances, a bit of Damage, and an Abyss Socket. |
|
| Min. requirements: 15% increased maximum Energy Shield (Crusader Influence) 70% total Elemental Resistance Optional affixes: +# to maximum Energy Shield % increased Elemental Damage with Attack Skills |
|
 (Belt) Mageblood - solving your Resistances with permanent Elemental Flasks allows you to get much more Energy Shield and Intelligence elsewhere, and it pushes your Elemental Defense to maximum. It is an aspirational upgrade; the Build is planned without it in mind. (Belt) Mageblood - solving your Resistances with permanent Elemental Flasks allows you to get much more Energy Shield and Intelligence elsewhere, and it pushes your Elemental Defense to maximum. It is an aspirational upgrade; the Build is planned without it in mind. |
|
| +(25-35) to Strength +(30-50) to Dexterity +(15-25)% to Fire Resistance +(15-25)% to Cold Resistance Magic Utility Flasks cannot be Used Leftmost (2-4) Magic Utility Flasks constantly apply their Flask Effects to you Magic Utility Flask Effects cannot be removed |
|
 (Belt) Rare Abyss Jewels - the Abyss Jewel is especially important after you acquire the Stormshroud Jewel, as it can grant tons of Shock Avoidance. Other than that, it should give you ES, Resistance, and Attributes or Attack Speed. (Belt) Rare Abyss Jewels - the Abyss Jewel is especially important after you acquire the Stormshroud Jewel, as it can grant tons of Shock Avoidance. Other than that, it should give you ES, Resistance, and Attributes or Attack Speed. |
|
| Min. requirements: +30 to maximum Energy Shield 40% chance to Avoid being Shocked Optional affixes: Intelligence Resistance #% increased Attack Speed |
|
 (Gloves) Rare Gloves - the flat Energy Shield gained from Gloves is not trivial, but much lower than other Armour pieces. You should prioritise Attack Speed, Intelligence, and Resistances. (Gloves) Rare Gloves - the flat Energy Shield gained from Gloves is not trivial, but much lower than other Armour pieces. You should prioritise Attack Speed, Intelligence, and Resistances. |
|
| Min. requirements: +150 to Energy Shield +12% increased Attack Speed 40% total Elemental Resistance Optional affixes: +#% to Intelligence +# to Accuracy Rating +#% chance to Suppress Spell Damage |
|
 (Boots) Rare Boots - the Energy Shield granted by Boots is also not great, as you will have to sacrifice one Prefix to get Movement Speed instead. They should also grant you tons of Shock Avoidance. (Boots) Rare Boots - the Energy Shield granted by Boots is also not great, as you will have to sacrifice one Prefix to get Movement Speed instead. They should also grant you tons of Shock Avoidance. |
|
| Min. requirements: +150 to Energy Shield +40% to Elemental Resistances +30% increased Movement Speed 35% chance to Avoid being Shocked 15% chance to Avoid Elemental Ailments Optional affixes: Intelligence Resistance |
|
 (Amulet) Whispers of Infinity - this Amulet grants tons of Energy Shield, and allows you to use Skills that usually cost Life. You will still need Mana Leech to sustain Tincture. (Amulet) Whispers of Infinity - this Amulet grants tons of Energy Shield, and allows you to use Skills that usually cost Life. You will still need Mana Leech to sustain Tincture. |
|
| (10-15)% faster start of Energy Shield Recharge (5-10) to (20-25) Added Attack Chaos Damage per 100 Maximum Mana +(200-400) to maximum Energy Shield (60-40)% reduced maximum Mana Skills Cost Energy Shield instead of Mana or Life |
|
 (Ring) Rare Ring - the Crusader Influence is also useful here, providing the same increase to Energy Shield as on the Belt. Other than that, or on a lower Budget, focus on Elemental Resistances, Intelligence, and Elemental Damage. (Ring) Rare Ring - the Crusader Influence is also useful here, providing the same increase to Energy Shield as on the Belt. Other than that, or on a lower Budget, focus on Elemental Resistances, Intelligence, and Elemental Damage. |
|
| Min. requirements: 15% increased maximum Energy Shield (Crusader Influence) 70% total Elemental Resistance Optional affixes: +# to maximum Energy Shield % increased Elemental Damage with Attack Skills +1 to minimum Endurance Charge |
|
 (Ring) Shavronne's Revelation - this Ring provides a massive amount of Energy Shield and Intelligence. The Mana Regeneration won't be good enough to sustain the Tincture; you still need to get Leech. (Ring) Shavronne's Revelation - this Ring provides a massive amount of Energy Shield and Intelligence. The Mana Regeneration won't be good enough to sustain the Tincture; you still need to get Leech. |
|
| +(15-25) to maximum Energy Shield +(60-75) to Intelligence Right ring slot: You cannot Regenerate Mana Right ring slot: Regenerate 6% of Energy Shield per second Right ring slot: +250 to maximum Mana Left ring slot: You cannot Recharge or Regenerate Energy Shield Left ring slot: Regenerate 40 Mana per Second Left ring slot: +250 to maximum Energy Shield |
|
 (Jewel) Rare Jewels - the Rare Jewels should improve your Energy Shield and boost your Damage. Since it is not a Critical Strike Build, the options to do that are quite limited. Usually, the Attack Speed is the best choice. (Jewel) Rare Jewels - the Rare Jewels should improve your Energy Shield and boost your Damage. Since it is not a Critical Strike Build, the options to do that are quite limited. Usually, the Attack Speed is the best choice. |
|
| Min. requirements: 7% increased maximum Energy Shield Optional affixes: +# to Intelligence #% increased Attack Speed while holding a Shield #% increased Lightning/Area/Melee Damage +% Chance to Block Attack Damage while holding a Shield |
|
 (Jewel) Large Cluster Jewels - you will need 2 types of Large Cluster Jewels. On regular Jewels you will look for Veteran Defender Notable combined with each of the Leech Notables. The third Notable should be the Martial Prowess, which not only is the best option for DPS, but also grants Accuracy. You might also need to use a Sword Cluster for the Bloodscent Notable to generate Rage. (Jewel) Large Cluster Jewels - you will need 2 types of Large Cluster Jewels. On regular Jewels you will look for Veteran Defender Notable combined with each of the Leech Notables. The third Notable should be the Martial Prowess, which not only is the best option for DPS, but also grants Accuracy. You might also need to use a Sword Cluster for the Bloodscent Notable to generate Rage. |
|
| Recommended affixes: 1 Added Passive Skill is Fuel the Fight 1 Added Passive Skill is Feed the Fury 1 Added Passive Skill is Martial Prowess 1 Added Passive Skill is Veteran Defender 1 Added Passive Skill is Bloodscent |
|
| (Jewel) Large Cluster Jewels - you should also use one or two Jewels with the increased Effect of small Notables. Those empowered Notables should provide Energy Shield, Resistances, and Intelligence or Strength. Thanks to this, you will be able to get more ES on your main armour pieces. |
|
| Recommended affixes: Added Small Passive Skills have 35% increased Effect Added Small Passive Skills also grant: +#% to all Elemental Resistances Added Small Passive Skills also grant: +# to Intelligence/Strength Added Small Passive Skills also grant: +# to Maximum Energy Shield |
|
 (Jewel) Lethal Pride - the role of this Jewel is to provide a source of Rage generation, although just a single Jewel will be quite slow. It also provides a bit of extra Strength and Damage. (Jewel) Lethal Pride - the role of this Jewel is to provide a source of Rage generation, although just a single Jewel will be quite slow. It also provides a bit of extra Strength and Damage. |
|
| Commanded leadership over (10000-18000) warriors under (Akoya-Kaom-Rakiata) Passives in radius are Conquered by the Karui Historic |
|
 (Jewel) Stormshroud - a usual way to deal with Elemental Ailments on higher budgets, by stacking Shock Avoidance, you will be immune to them all. Keep in mind that the simple Immunity from the Tempest Shield does not apply here. (Jewel) Stormshroud - a usual way to deal with Elemental Ailments on higher budgets, by stacking Shock Avoidance, you will be immune to them all. Keep in mind that the simple Immunity from the Tempest Shield does not apply here. |
|
| +(10-15)% to Lightning Resistance Modifiers to Chance to Avoid being Shocked apply to all Elemental Ailments |
|
 (Jewel) Watcher's Eye - another usual Jewel, it grants you useful modifiers depending on your Aura Setup, in this case, its Discipline and Precision. (Jewel) Watcher's Eye - another usual Jewel, it grants you useful modifiers depending on your Aura Setup, in this case, its Discipline and Precision. |
|
| Recommended modifiers: +(5-8)% Chance to Block Spell Damage while affected by Discipline (40-60)% increased Attack Damage while affected by Precision (10-15)% increased Attack Speed while affected by Precision |
|
  (Jewel) Forbidden Flame&Flesh - with this Set of Jewels, you can borrow another Ascendency Notable. The Sabateur's Bomb Specialist is very effective for its price tag, but you might also use Born in the Shadows or Swift Killer. (Jewel) Forbidden Flame&Flesh - with this Set of Jewels, you can borrow another Ascendency Notable. The Sabateur's Bomb Specialist is very effective for its price tag, but you might also use Born in the Shadows or Swift Killer. |
|
| Allocates <Random Ascendancy Notable> if you have the matching modifier on Forbidden Flesh | |
 (Tincture) Prismatic Tincture - sustaining your Tincture requires some extra investments into Mana and Leech, but the payoff in Damage is worth it. (Tincture) Prismatic Tincture - sustaining your Tincture requires some extra investments into Mana and Leech, but the payoff in Damage is worth it. |
|
| (70-100)% increased Elemental Damage with Melee Weapons Recommended modifiers: 35% increased effect 40% increased Mana Burn rate 25% increased Melee Weapon Attack Speed |
|
|
Suggested Flasks:
|
|
    |
6. Mercenary Setup
The Kineticist Mercenary provides the Haste Aura for extra Speed, and makes gearing much easier as you don't have to worry about Attribute Requirements. It is a standard Setup with Doryani's Prototype and Perquil's Toe.
|
Stat priorities on items:
|
|
 (Body Armour) Doryani's Prototype - you can skip any investments into Curses, Exposure, or Penetration simply by giving this Body Armour to your Mercenary and lowering their Lightning Resistance. (Body Armour) Doryani's Prototype - you can skip any investments into Curses, Exposure, or Penetration simply by giving this Body Armour to your Mercenary and lowering their Lightning Resistance. |
|
| (150-200)% increased Armour and Energy Shield +(60-90) to maximum Life Deal no Non-Lightning Damage Armour also applies to Lightning Damage taken from Hits Lightning Resistance does not affect Lightning Damage taken Nearby Enemies have Lightning Resistance equal to yours |
|
 (Amulet) Perquil's Toe - this Amulet makes your personal Damage Lucky, which is very powerful for the Lightning Archetypes. (Amulet) Perquil's Toe - this Amulet makes your personal Damage Lucky, which is very powerful for the Lightning Archetypes. |
|
| (12-20)% increased Rarity of Items found +(40-50) to Dexterity (5-8)% increased Movement Speed Lightning Damage of Enemies Hitting you is Lucky Nearby Allies' Damage with Hits is Lucky |
|
 (Amulet) Defiance of Destiny - in the highest difficulty of content, you might need to use this Amulet instead. It provides massive Life Recovery. (Amulet) Defiance of Destiny - in the highest difficulty of content, you might need to use this Amulet instead. It provides massive Life Recovery. |
|
| (20-30)% increased Mana Regeneration Rate +(60-80) to maximum Life +(10-40)% to Fire Resistance +(10-40)% to Cold Resistance +(10-40)% to Lightning Resistance Gain (10-20)% of Missing Unreserved Life before being Hit by an Enemy |
|
 (Helmet) Voll's Vision - grants your Mercenary a massive amount of Life Regeneration, but you have to avoid using Corrupted Items. (Helmet) Voll's Vision - grants your Mercenary a massive amount of Life Regeneration, but you have to avoid using Corrupted Items. |
|
| +(260-300) to Armour +(26-32)% to Fire Resistance +(8-16)% to Chaos Resistance 20% increased Light Radius (8-12)% increased Maximum Life if no Equipped Items are Corrupted Regenerate 400 Life per second if no Equipped Items are Corrupted |
|
 (Belt) Immortal Flesh - another great source of Life Regeneration, as well as negative Lightning Resistance. (Belt) Immortal Flesh - another great source of Life Regeneration, as well as negative Lightning Resistance. |
|
| +(25-40) to maximum Life +(75-100) to maximum Life Regenerate (200-350) Life per second Regenerate (8-10) Mana per second -(25-15)% to all Elemental Resistances -(50-40) Physical Damage taken from Attack Hits 40% increased Armour while not Ignited, Frozen or Shocked |
|
 (Shield) Rare Shield - use a Shaper-influenced Shield with Life Recovery on Block, paired with a high chance to Block Spells and Attacks. (Shield) Rare Shield - use a Shaper-influenced Shield with Life Recovery on Block, paired with a high chance to Block Spells and Attacks. |
|
| Recommended modifiers: Sap Enemies when you Block their Damage #% Chance to Block Spell Damage Recover #% of Life when you Block #% increased Chance to Block |
|
 (Gloves) Rare Gloves and Boots - improves the Life and Regeneration of your Mercenary, and allows them to inflict Intimidate. The same modifiers should be used on their Boots as well. (Gloves) Rare Gloves and Boots - improves the Life and Regeneration of your Mercenary, and allows them to inflict Intimidate. The same modifiers should be used on their Boots as well. |
|
| Recommended modifiers: 15% chance to Intimidate Enemies for 4 seconds on Hit (Exarch) 0.2% of Physical Damage Leeched as Life (Eater) +100 to maximum Life 20% increased Life Regeneration rate Resistance |
|
 (Ring) Rare Ring - to make the best use of the Doryani's Prototype, you should use a special Mirrored Jewellery with negative Lightning Resistances. (Ring) Rare Ring - to make the best use of the Doryani's Prototype, you should use a special Mirrored Jewellery with negative Lightning Resistances. |
|
| Min. requirements: -50% to Lightning Resistance Optional affixes: Fire, Cold, and Chaos Resistance Maximum Life |
|
|
If you have any other build requests please leave that in the comments below. We are always open to suggestions and constructive feedback.
Pictures used in this article are the intellectual property of Grinding Gear Games.
