Shockwave Totem Chieftain Starter Build
Beginner-friendly Totem build which offers good AoE and defensesShockwave Totem
Chieftain Build
Created for Patch 3.21
The Best Crafty Guides by Odealo
| Guide notes |
| July 19, 2023 -Build created |
| Build Overview | |||
| Tags: [TOTEM] [ELEMENTAL] [LIFE] [STARTER] | |||
|
Budget: Defenses: |
|
Boss DPS: AoE: |
|
Shockwave Totem is a very simple Skill, it summons a Totem that constantly pulses with Physical Damage Nova around it, applying Knockback with every Hit. A very efficient way to scale it is by converting its Damage to Elemental Damage, and picking up Chieftain Ascendency and Avatar of Fire is one of the easiest ways to do it. Picking this Ascendency also provides many other bonuses for the Totem playstyle unobtainable elsewhere, such as Life Leech from Totem's Hits or Covering enemies in Ash, which increase the Fire Damage they take and slow their Movement Speed. Chieftain offers amazing value at low investments, but quickly hits diminishing returns, making it an amazing Build to start the League. Getting close to the Critical Strike cap would be very taxing on the rest of the Build, so we use the Elemental Overload Keystone instead. It grants 30% more Elemental Damage, but you can't scale the Damage through the Critical Strike Multiplier. To solve the Mana sustain problems, we simply don't use Mana. The Malachai's Simula Helmet is a very cheap yet powerful Helmet that grants tons of Double Damage chance and allocates Blood Magic Keystone. It reduces the amount of Auras you can use, but it's still plenty. On the other hand, the Life sustain is so good you can effortlessly use Righteous Fire to boost your Damage. The Astral Projector is not required, but it will significantly improve the enjoyability of the Build, as it makes your Totems cast their Novas directly on the Enemies.
The Build uses simple yet effective ways to stay alive. You can have tons of Armour Rating, lots of Life Regeneration and Leech, decent block Chance, and a naturally safe playstyle of Totems.
As mentioned before, it excels at low budget. You can comfortably start this Build with no savings whatsoever and accumulate wealth for your next project.
You can also check our other Path of Exile builds right over here Odealo's Crafty Guides - Full List
1. Gameplay
At the beginning of the Map, you should turn on the Righteous Fire buff to boost your Spell Damage. To quickly move around you can use the Shield Charge or Flame Dash, depending on your preferences. Your Totems will obliterate everything around them, especially when you equip the Astral Projector Ring. To improve your Damage, you should Curse Enemies with Flammability to lower their Fire Resistance. Vaal Righteous Fire grants your powerful temporary Buff, but it is risky to use as it will consume most of your Life upon use.
|
|
|
|

2. Build's PROS & CONS
| PROS |
|
| CONS |
|
3. Leveling tips
You should start off by using Holy Flame Totems. They have the same type of damage as Shockwave Totems, which lets you use the exact same Support Gems and Passive Tree. You should prioritize getting Ancestral Bond first, which will basically double your DPS. As a Marauder you will have to get most of your Intelligence from the Gear.
Suggested leveling Gem setups:
| Holy Flame Totem setup | |
 |
Holy Flame Totem - Holy Flame Totems fire projectiles that deal base Physical Damage that gets partly Converted to Fire. |
 |
Added Fire Damage Support - adds additional Fire Damage based on Physical Damage deal by Supported Skills. |
| Combustion Support - increases Fire Damage and lowers the Fire Resistance of your foes. | |
 |
Controlled Destruction Support - greatly improves your Spell Damage but lowers the Critical Strike Chance. |
 |
Faster Casting Support - it significantly improves your Cast Rate, leading to higher DPS and better Clear. |
 |
Concentrated Effect Support - grants lots of Damage but lowers your AoE. |
| Aura setup | |
 |
Herald of Ash - improves your Fire Damage with Spells. |
 |
Vitality - grants additional Life Regeneration to improve your sustain. |
 |
Clarity - provides decent Mana Regeneration to ease Skill spamming. |
| Utility setup | |
 |
Flame Dash - teleports you a short distance. |
 |
Elemental Weakness - a Curse Spell that lowers all Elemental Resistances. |
 |
Steelskin - grants you a Shield and disables Bleeding effects. |
Bandits:
Kill all Bandits to get additional 2 Passive Tree Skill Points
Leveling Skill Trees:
39 Points Passive Tree
We recommend this order:
1) Born to Fight 2) Magmatic Strikes) 3) Shamanistic Fury 4) Divine Judgement 5) Ancestral Bond 6) Primal Manifestation 7) Purity of Flesh 8) Divine Fury
69 Points Passive Tree
Allocate:
1) Elemental Overload 2) Explosive Impact 3) Light of Divinity&Holy Dominion 4) Devotion 5) Tireless 6) Glancing Blows 7) Sanctuary
Recommended leveling items:
 Le Heup of All - great Ring to cover your Attribute and Resistance needs. Le Heup of All - great Ring to cover your Attribute and Resistance needs. |
|
| Adds 1 to 4 Physical Damage to Attacks +(10-30) to all Attributes (10-30)% increased Damage (10-30)% increased Rarity of Items found +(10-30)% to all Elemental Resistances |
|
 Tabula Rasa - provides a six-link setup to boost up your power level in the early game. Tabula Rasa - provides a six-link setup to boost up your power level in the early game. |
|
| Item has no level requirement and Energy Shield (Hidden) Item has 6 White Sockets and is fully linked (Hidden) |
|
 Goldrim - a very useful Helmet that grants lots of Elemental Resistances. Goldrim - a very useful Helmet that grants lots of Elemental Resistances. |
|
| +(30-50) to Evasion Rating 10% increased Rarity of Items found +(30-40)% to all Elemental Resistances Reflects 4 Physical Damage to Melee Attackers Level Requirement reduced by 100 (Hidden) |
|
 Perandus Blazon - boosts your Attributes and Flask uptime. Perandus Blazon - boosts your Attributes and Flask uptime. |
|
| (15-25)% increased Stun and Block Recovery +(20-30) to all Attributes (6-8)% increased Quantity of Items found +20% to Fire Resistance 20% increased Flask Effect Duration -2 Physical Damage taken from Attack Hits |
|
 Seven-League Step - lots of Movement Speed allow you to go through the campaign even faster. Seven-League Step - lots of Movement Speed allow you to go through the campaign even faster. |
|
| 50% increased Movement Speed Level Requirement reduced by 100 (Hidden) |
|
4. Final Skill Tree, Ascendancy Points, and Pantheon
Final Skill Tree:
105 Points Final Passive Tree (doesn't include Cluster or Unique Jewels)
120 Points Path of Building (PoB) link
Ascendancy points:
Preferably in this order:
- Ngamahu, Flame's Advance
- Hinekora, Death's Fury
- Tukohama, War's Herald
- Arohongui, Moon's Presence
Pantheon:
Major God: Soul of the Brine King: You cannot be Stunned if you've been Stunned or Blocked a Stunning Hit in the past 2 seconds; 30% increased Stun and Block Recovery
Minor God: Soul of Shakari: 50% less Duration of Poisons on You; You cannot be Poisoned while there are at least 3 Poisons on you
5. Final Gems links
| [DPS] Shockwave Totem setup | |
 |
Shockwave Totem - a Totem Spell which deals high Physical Damage in a nova around it, which is fully Converted to Fire Damage in this build. |
 |
Multiple Totems Support - allows you to raise the Maximum Summoned Totem limit and summon two Totems instead of one with each cast. |
|
Added Fire Damage Support - adds additional Fire Damage based on the Supported Skill's Physical Damage. |
 |
Empower Support - increases the Base Damage of Shockwave Totem by increasing its Gem Levels. |
| Combustion Support - increases your Fire Damage and causes your Ignites to lower Fire Resistance. | |
|
Concentrated Effect Support - grants an insane amount of Damage at the cost of AoE. You can also use the Faster Casting Support for better clear. |
| [UTILITY] Aura setup | |
|
Herald of Ash - this Herald grants you tons of Fire Damage. It is especially powerful when you combine it with the Circle of Anguish Ring. |
 |
Petrified Blood - lets you benefit from Low Life Status without putting you at risk by splitting incoming Damage into DoT. It also makes your Leech much more effective. |
|
Vitality - grants you plenty of Life Regeneration. It Reserves a flat amount of Mana, which is paid with your Life in this case. |
 |
Enlighten Support - lowers the Reservation amount of all linked Auras. |
 |
Defiance Banner - if you got enough Reservation reduction, you can try to fit in this Banner to improve your Armour Rating a bit. |
| [UTILITY] Eternal Blessing setup | |
 |
Determination - grants lots of flat Armour Rating and makes your overall Armour stronger. |
 |
Eternal Blessing Support - you can have one free Aura but you can't Reserve Mana with other Skills. The downside doesn't apply to Life Reservation which you will do via Blood Magic Keystone. |
| [UTILITY] Searing Bond (optional) | |
 |
Searing Totem - in Crucible League, you can get plenty of additional Damage just by using this Totem. It comes with an additional Totem Limit, so it doesn't take away any of your resources anyway. |
| [UTILITY] Guard Skill | |
 |
Molten Shell - the best Guard Skill for this Build. It improves your Armour and can soak tons of Damage. |
| [UTILITY] Curse | |
|
Flammability - significantly lowers Fire Resistance of affected enemies. It also increases your Chances to Ignite them, so you can apply Combustion more reliably. |
 |
Elemental Weakness - an optional Curse, it will further lower Enemy Resistance. You will need Anointment on your Amulet to use this Curse. |
| [UTILITY] Other Utility setups | |
 |
Righteous Fire - engulfs you in a Fire that burns you for a high percent of your Maximum Life but grants you tons of Spell Damage. You can sustain it quite easily thanks to your high Life Regeneration and constant Leech. |
 |
Flame Dash - a swift teleport in a quite long range used for better Movement. It won't deal Damage due to Ancestral Bond Keystone, so you can't use it for Combustion Debuff. |
 |
Enduring Cry - a Warcry used to generate Endurance Charges and Recover lots of Life on demand. |
|
|
6. Gear Setup
The gearing process is very easy for this Build. It uses plenty of cheap and powerful Unique Items, but you can comfortably start with your Rares. The most impactful one is the Astral Projector Ring which vastly improves the range of your Totems. The Malachai's Simula saves up a few points on the Blood Magic Keystone and grants lots of Damage via Double Damage Chance. Since it is so cheap, you can get many good Corrupted Implicits for cheap. On your Rare Gear, you should look mostly for the maximum Life and Resistance. Flat Life Regeneration or Life Recovery Rate will be helpful to comfortably sustain Righteous Fire. To scale Damage you should focus on Cast Speed. Additional Levels for your Gems or Extra Fire Damage from Physical Damage are also very useful. It is important to use a Shaper-influenced Shield with one extra Totem.
|
Stat priorities on items:
|
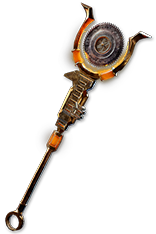 (Weapon) Rare Weapon - here you should look for additional Gem Levels, Spell Damage, Cast Speed, and potentially Extra Fire Damage from Physical. You can optionally use the Alternating Sceptre to gain access to Scorch, but you will lose out on Combustion, so use it only if you have good modifiers on it. (Weapon) Rare Weapon - here you should look for additional Gem Levels, Spell Damage, Cast Speed, and potentially Extra Fire Damage from Physical. You can optionally use the Alternating Sceptre to gain access to Scorch, but you will lose out on Combustion, so use it only if you have good modifiers on it. |
|
|
Min. requirements: |
|
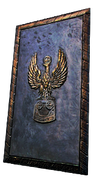 (Weapon) Rare Shield - a Shaper-Influenced Shield allows you to raise the maximum Summoned Totem Limit by 1. It should also provide you with useful defensive modifiers such as maximum Life, Resistance, or Block Chance. (Weapon) Rare Shield - a Shaper-Influenced Shield allows you to raise the maximum Summoned Totem Limit by 1. It should also provide you with useful defensive modifiers such as maximum Life, Resistance, or Block Chance. |
|
| Min. requirements: +1 to maximum number of Summoned Totems +60 to maximum Life Optional affixes: Resistance Spell Block Chance Life Regeneration maximum Fire Resistance |
|
|
|
|
| +20 to Strength +(20-30)% to Lightning Resistance Spells have a 20% chance to deal Double Damage Blood Magic |
|
 (Body Armour) Skin of the Lords - due to usually undesirable Socket Colors you can get this Armour for quite cheap. It provides a lot of Damage and Armour Rating. It can also grant you the Pain Attunement Keystone for even more Damage. (Body Armour) Skin of the Lords - due to usually undesirable Socket Colors you can get this Armour for quite cheap. It provides a lot of Damage and Armour Rating. It can also grant you the Pain Attunement Keystone for even more Damage. |
|
| Sockets cannot be modified +2 to Level of Socketed Gems 100% increased Global Defences You can only Socket Corrupted Gems in this item |
|
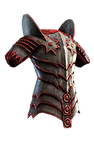 (Body Armour) Rare Armour - at first you will probably want to use Rare Armour. It should grant tons of maximum Life and Life Regeneration. It can also grant additional Physical Damage mitigation by taking it as Elemental Damage. (Body Armour) Rare Armour - at first you will probably want to use Rare Armour. It should grant tons of maximum Life and Life Regeneration. It can also grant additional Physical Damage mitigation by taking it as Elemental Damage. |
|
| Min. requirements: +100 to maximum Life Optional affixes: Resistance Life Regeneration % increased Life Additional Curse % of Physical Damage from Hits taken as Fire Damage |
|
 (Boots) Rare Boots - maximum Life and Movement Speed are mandatory here. Aside from that, look for Elemental Resistances, Life Regeneration, Action Speed, or Ailment Avoidances. (Boots) Rare Boots - maximum Life and Movement Speed are mandatory here. Aside from that, look for Elemental Resistances, Life Regeneration, Action Speed, or Ailment Avoidances. |
|
| Min. requirements: +70 to maximum Life 30% increased Movement Speed 5% increased Action Speed (Searing Exarch Implicit) Optional affixes: Chaos Resistance Attributes % chance to Avoid Elemental Ailments |
|
 (Boots) Legacy of Fury - you can use those Boots to inflict the Scorch on Enemies without missing out on the Combustion Debuff. Scorch reduces all Elemental Resistances of affected Foes. You won't be able to trigger the Burning Effect on Kill with Totems. (Boots) Legacy of Fury - you can use those Boots to inflict the Scorch on Enemies without missing out on the Combustion Debuff. Scorch reduces all Elemental Resistances of affected Foes. You won't be able to trigger the Burning Effect on Kill with Totems. |
|
| (200-300)% increased Armour and Evasion 30% increased Movement Speed Nearby Enemies are Scorched (30-50)% increased Effect of Scorch (30-40)% chance when you Kill a Scorched Enemy to Burn Each surrounding Enemy for 4 seconds, dealing 8% of the Killed Enemy's Life as Fire Damage per second |
|
 (Gloves) Rare Gloves - Gloves can provide a decent amount of Damage for this Build with just Eldritch Implicits. They should also grant you maximum Life and lacking Resistnaces or Attributes. To get more Damage, you should look for Cast Speed when Focused modifier for a powerful burst. (Gloves) Rare Gloves - Gloves can provide a decent amount of Damage for this Build with just Eldritch Implicits. They should also grant you maximum Life and lacking Resistnaces or Attributes. To get more Damage, you should look for Cast Speed when Focused modifier for a powerful burst. |
|
|
Min. requirements: |
|
 (Belt) The Magnate - a cheap and effective way to get tons of Damage and Resistances. It will also make your Flask nearly permanent during Mapping. You should look for useful Corrupted Implicits that would give you even more Resistances or Cast Speed. (Belt) The Magnate - a cheap and effective way to get tons of Damage and Resistances. It will also make your Flask nearly permanent during Mapping. You should look for useful Corrupted Implicits that would give you even more Resistances or Cast Speed. |
|
| +(40-50) to Strength +(20-25)% to all Elemental Resistances 50% increased Flask Charges gained 10% chance to deal Double Damage while you have at least 200 Strength 5% chance to deal Triple Damage while you have at least 400 Strength |
|
 (Amulet) Rare Amulet - here you should look for additional Levels for your Gems and Cast Speed. It should also grant the usual maximum Life and Resistance modifiers. (Amulet) Rare Amulet - here you should look for additional Levels for your Gems and Cast Speed. It should also grant the usual maximum Life and Resistance modifiers. |
|
| Min. requirements: +60 to maximum Life +40% to Elemental Resistance +1 to Level of all Skill Gems Optional affixes: +1 to Level of all Physical Skill Gems Cast Speed Life Regeneration Attributes |
|
| Recommended Anoint: Whispers of Doom Heart of Flame |
|
 (Ring) Astral Projector - with this Ring your Totems will automatically target nearby Enemies with their Novas at the cost of their AoE. (Ring) Astral Projector - with this Ring your Totems will automatically target nearby Enemies with their Novas at the cost of their AoE. |
|
| +(30-50) to Intelligence (20-25)% increased Spell Damage 30% chance to Avoid Elemental Ailments Nova Spells have 20% less Area of Effect Nova Spells deal 30% less Damage to Players with Hits and Ailments Nova Spells Cast at the targeted location instead of around you |
|
 (Ring) Circle of Anguish - a very powerful and efficient Ring to boost your Damage. You can use Catalysts to make the Fire Damage bonus even stronger. (Ring) Circle of Anguish - a very powerful and efficient Ring to boost your Damage. You can use Catalysts to make the Fire Damage bonus even stronger. |
|
| +(20-30) to Strength Adds (20-25) to (26-35) Fire Damage +(20-30)% to Fire Resistance (40-60)% increased Fire Damage while affected by Herald of Ash Herald of Ash has (40-60)% increased Buff Effect |
|
 (Jewel) Rare Jewels - there are not many modifiers that would be particularly useful for this Build. You should look for maximum Life and any form of Cast Speed here. (Jewel) Rare Jewels - there are not many modifiers that would be particularly useful for this Build. You should look for maximum Life and any form of Cast Speed here. |
|
| Min. requirements: increased maximum Life Recommended affixes: Cast Speed Resistances Attributes increased Totem/Spell/Physical/Fire Damage |
|
 (Jewel) Large Cluster Jewel - you can get a lot of Physical Damage bonuses from a proper Jewel. (Jewel) Large Cluster Jewel - you can get a lot of Physical Damage bonuses from a proper Jewel. |
|
| Recommended affixes: 1 Added Passive Skill is Battle-Hardened 1 Added Passive Skill is Furious Assault 1 Added Passive Skill is Iron Breaker 1 Added Passive Skill is Force Multiplier |
|
 (Jewel) Medium Cluster Jewel - Totems can get many useful Passives through their Cluster Jewels. Most notably, you can get permanent Onslaught and Hinder on your Enemies. (Jewel) Medium Cluster Jewel - Totems can get many useful Passives through their Cluster Jewels. Most notably, you can get permanent Onslaught and Hinder on your Enemies. |
|
| Recommended affixes: 1 Added Passive Skill is Ancestral Echo 1 Added Passive Skill is Ancestral Inspiration 1 Added Passive Skill is Sleepless Sentries 1 Added Passive Skill is Snaring Spirits 1 Added Passive Skill is Ancestral Reach |
|
  (Jewel) Forbidden Flame&Flesh - those Jewels allow you to take many powerful Notables from Marauder Ascendencies, especially the Defensive ones from Juggernaut. They are not required, but greatly recommended. (Jewel) Forbidden Flame&Flesh - those Jewels allow you to take many powerful Notables from Marauder Ascendencies, especially the Defensive ones from Juggernaut. They are not required, but greatly recommended. |
|
| Allocates <Ascendency Notable> if you have the matching modifiers on Forbidden Flesh/Flame Recommended Notables: Tasalio, Cleansing Water Aspect of Carnage Untiring Unbreakable |
|
 (Jewel) Watcher's Eye - you use only defensive Auras, and this Jewel will further amplify their usefulness. The Vitality modifiers are especially useful to sustain your Righteous Fire. (Jewel) Watcher's Eye - you use only defensive Auras, and this Jewel will further amplify their usefulness. The Vitality modifiers are especially useful to sustain your Righteous Fire. |
|
| (4-6)% increased maximum Energy Shield (4-6)% increased maximum Life (4-6)% increased maximum Mana <Two or Three random aura modifiers> Recommended Aura mods: (Regenerate (1-1.5)% of Life per second while affected by Vitality (10-15)% increased Life Recovery Rate while affected by Vitality +(5-8)% Chance to Block Attack Damage while affected by Determination You take (60-40)% reduced Extra Damage from Critical Strikes while affected by Determination |
|
 (Jewel) Brutal Restraint - it has many Notables in its radius which gives you many opportunities to get great bonuses on them. Finding a good one is a bit tricky and requires external tools such as Path of Building. (Jewel) Brutal Restraint - it has many Notables in its radius which gives you many opportunities to get great bonuses on them. Finding a good one is a bit tricky and requires external tools such as Path of Building. |
|
| Denoted service of (500-8000) dekhara in the akhara of (Asenath-Balbala-Nasima) Passives in radius are Conquered by the Maraketh Historic |
|
 (Flask) Taste of Hate - the bonus Cold Damage will be partially converted to Fire Damage, but it isn't much. It should be used for the defensive aspect it grants. (Flask) Taste of Hate - the bonus Cold Damage will be partially converted to Fire Damage, but it isn't much. It should be used for the defensive aspect it grants. |
|
| (10-15)% of Physical Damage from Hits taken as Cold Damage during Effect Gain (10-15)% of Physical Damage as Extra Cold Damage during effect 30% chance to Avoid being Chilled during Effect 30% chance to Avoid being Frozen during Effect |
|
|
Suggested Flasks:
|
|
    |
 (Helmet) Malachai's Simula - this Helmet grants tons of Double Damage chances and solves your Mana problems by allocating the Blood Magic. This limits the amount of Auras you can use, but it's still plenty.
 |
|
If you have any other build requests please leave that in the comments below. We are always open to suggestions and constructive feedback.
Pictures used in this article are the intellectual property of Grinding Gear Games.
