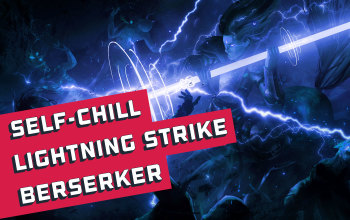
Self-Chill Lightning Strike Berserker Build
One of the fastest builds in Path of Exile which doesn't even require a Headhunter for thatSelf-Chilling
Lightning Strike Berserker Build
Updated for Patch 3.14
The Best Crafty Guides by Odealo
Estimated budget: very high

| Guide notes |
| May 8, 2021 -Build created May 13, 2021 -Added gameplay video |
Self-Chilling is a very unusual, yet powerful, mechanics offered by the Unique Winterweave Ring. It allows you to reverse the effect of Chill when applied to your character, which will now increase your Action Speed instead of reducing it. This allows characters like Berserker to reach tremendous swiftness even without wearing a Headhunter Belt and hoping to get its' Haste Aura. On top of the reversed Chill with increased effect, the Berserker class generates Rage which greatly increases your Attack Damage, Movement, and Attack Speed. Min-maxed characters of this type can reach even over 400% Increased Movement Speed, which combined with Lightning Strike's solid AoE and DPS (partly, thanks to the effect of Rage again) makes it one of the most enjoyable and fastest Map farming builds out there.
In order to consistently Chill your own character, you are going to use Maligaro's Restraint Unique Belt and Cold Conduit Passive from a Medium Cluster Jewel. The Belt reverts the Shock you Inflict to enemies to yourself, and the Passive causes targets - including yourself - Shocked by you to be also Chilled. To sum it up, whenever you Shock an enemy, you will also Chill yourself. To mitigate the negative effect of Shock, it's mandatory to use Inpulsa's Broken Heart so that you don't take extra damage from the Shock inflicted.
You can also check our other Path of Exile builds: Odealo's Crafty Guides - Full List
1. Gameplay
From the "playstyle" perspective this build is just a typical Melee build that just benefits from greatly increased Action Speed. Lightning Strike offers decent clear speed thanks to hitting additional targets further away by creating extra Lightning Projectiles that will always hit their targets if your primary Attack doesn't miss. For the defenses, this build utilizes a moderate Life pool, Life Leech, Endurance Charges, some extra Physical Damage mitigation from Armour - overall this should be enough to farm most of the content, but it's the most sturdy character out there. It's safe to say that this build's offense is its most reliable defensive mechanic.
You should be also looking to level your Cold and Lightning Damage dealt with Lightning Strike so that you can use Trinity Support which is the best Gem DPS-wise for builds that can deal the highest damage of two different Elements. If the damage is nearly on the same level, sometimes the highest Hit can roll to have the highest damage of the Cold Element, generating Fire/Lightning Resonance, and at other times the Hit may deal more Lightning Damage and generate Cold and Fire Resonance stacks, greatly boosting your DPS.
|
|
|
|

2. Build's PROS & CONS
| PROS |
|
| CONS |
|
3. Leveling tips
Leveling up with Lightning Strike is quite smooth as the skill itself offers decent AoE and hits multiple targets from a distance. You may need to get some Dexterity on your Items (or allocate Versatility and Precision quite early) to equip the Skill Gem as it's based on Dexterity. You can use Lightning Strike with any weapon of choice, but since Staff-oriented Passives are the closest to Marauder's starting Point we recommend using them (remember that during the first levels it's completely irrelevant what weapon you use - just aim to get a Staff when you start allocating corresponding Passives for them). Below you will find some basic leveling Gem setups and several useful Uniques that are accessible on lower levels.
Suggested leveling Gem setups:
| Ground Slam setup | |
 |
Ground Slam - very strong AoE Attack which should be used until level 12 when you can start using Lightning Strike |
 |
Melee Physical Damage Support - a great boost to Physical Damage |
 |
Added Lightning Damage Support - adds a good deal of extra Lightning Damage to linked Skills |
 |
Fortify Support - increases Melee Damage and grants a very strong defensive buff |
| Lightning Strike setup | |
 |
Lightning Strike - the core Attack used in the final version of this build. It offers amazing AoE and clear for a Melee Attack, and it's best to use it as soon as possible to master it before getting into Maps |
 |
Multistrike Support - one of the best Support Gems for this build which makes linked Attack repeat twice with greatly increased Attack Speed |
|
Melee Physical Damage Support |
|
Added Lightning Damage Support |
|
Fortify Support |
| Utility Gems | |
 |
Herald of Ice - adds extra Cold Damage to your Attacks and causes powerful AoE explosions when you kill Frozen enemies |
 |
Ancestral Warchieft - summons a Totem that increases your Melee Physical Damage |
 |
Precision - a very important Aura for the leveling part; it increases your Accuracy Rating and Critical Strike Chance |
 |
Dash - recommended movement Skill for this build which later on can be replaced with Flame Dash |
Bandits:
We recommend killing all the Bandits for two additional Passive Points. Helping Alira is also a good option if you want to min-max your build at higher levels for the extra Crit. Multiplier
Leveling Skill Trees:
34 Points Skill Tree
Priorities: 1) Born to Fight 2) Versatility 3) Constitution 4) Divine Judgement and Wrath
61 Points Skill Tree
Priorities: 1) Counterweight 2) Discipline and Training 3) Precision 4) Blunt Trauma
Recommended leveling items:
 Belt of the Deceiver - very solid Belt which grants a high DPS bonus and extra defensive stats. Thanks to the high bonus damage multiplier from Intimidate, it can be even used on low-tier Maps Belt of the Deceiver - very solid Belt which grants a high DPS bonus and extra defensive stats. Thanks to the high bonus damage multiplier from Intimidate, it can be even used on low-tier Maps |
|
| +(25-35) to Strength (15-25)% increased Global Physical Damage You take 30% reduced Extra Damage from Critical Strikes +(30-40) to maximum Life +(10-15)% to all Elemental Resistances Nearby Enemies are Intimidated |
|
 Goldrim - the best leveling Helmet in PoE that grants very high All Elemental Resistances Goldrim - the best leveling Helmet in PoE that grants very high All Elemental Resistances |
|
| +(30-50) to Evasion Rating 10% increased Rarity of Items found +(30-40)% to all Elemental Resistances Reflects 4 Physical Damage to Melee Attackers Level Requirement reduced by 100 (Hidden) |
|
 Blackheart - the best low-level Rings for Melee builds. You can use two of these for around 45 levels before replacing them with better Rares Blackheart - the best low-level Rings for Melee builds. You can use two of these for around 45 levels before replacing them with better Rares |
|
| Adds 1 to 4 Physical Damage to Attacks 5% increased Global Physical Damage Adds 1 to 3 Chaos Damage to Attacks +(20-30) to maximum Life (2-4) Life Regenerated per second 10% chance to Cause Monsters to Flee |
|
|
|
|
| +18% Chance to Block Attack Damage while wielding a Staff (80-100)% increased Physical Damage Adds (25-35) to (45-60) Cold Damage Adds (1-10) to (70-90) Lightning Damage (20-35)% increased Critical Strike Chance Cannot be Shocked while Chilled 50% chance to Shock Chilled Enemies |
|
 The Stormheart - an amazing leveling Staff that adds a lot of Damage to your Attacks
|
|
|
| +(20-30) to Dexterity +(20-30) to Strength +100 to Accuracy Rating 30% increased Projectile Speed 10% increased Movement Speed 30% increased Projectile Damage |
|
 Karui Ward - amazing Amulet for leveling that also boosts the damage of Lightning Strike's projectiles
4. Final Skill Tree, Ascendancy Points, and Pantheon
Final Skill Tree:
116 Points Final Skill Tree (doesn't include 1-2 Large Cluster Jewels, and 1-2 Medium Cluster Jewels and all the Passives allocated on them)
116 Points Path of Building (PoB) link (complete setup for Path of Building)
Ascendancy points:
Preferably in that order:
- Flawless Savagery
- Aspect of Carnage
- War Bringer
- Blitz
Pantheon:
Major God: Soul of Lunaris 1% additional Physical Damage Reduction for each nearby Enemy, up to 8%; 1% increased Movement Speed for each nearby Enemy, up to 8%
Minor God: Soul of Gruthkul 1% additional Physical Damage Reduction for each Hit you've taken Recently up to a maximum of 5%
5. Final Gems links
| [DPS] Lightning Strike | |
|
Lightning Strike - your primary DPS skill which is a Melee Attack that created additional projectiles that hit nearby enemies for extra clear. It has some its' base Physical Damage Converted to Lightning |
|
Multistrike Support - makes supported Attacks repeat additional times with greatly increased Attack Speed making it one of the best Support Gems for this build in terms of raw DPS |
 |
Trinity Support - this Gem offers the highest DPS bonus out of all Gems in this setup if you can roll both Cold and Lightning as your highest damage with his, generating all types of Resonance Charges (and it should be if you are following this setup) |
 |
Elemental Damage with Attacks Support - core support Gem in this setup since this is a nearly 100% Elemental Attack build |
 |
Inspiration Support - reduces the Mana Cost of your Lightning Strike which is necessary not to run into Mana issues. It also increases your Elemental Damage and Crit. Chance |
 |
Hypothermia Support - grants high bonus damage against Chilled enemies, and all of them should be |
| [UTILITY] Berserk, Dash, and other Utility Gems Note: You can link all the sockets in this setup so that they benefit from Enhance and Inspiration Support Gems but that's not mandatory |
|
 |
Berserk - offers a massive burst of damage but consumes Rage at an increased rate. It's best to be used against Bosses to melt them in seconds |
 |
Flame Dash - the recommended mobility skill used in this build which allows you to progress faster through Maps. You may as well use any other Movement skill like Dash or Leap Slam |
 |
General's Cry - the optional War Cry for this build which has the lowest cooldown of them all. It doesn't benefit you directly in any way but allows you to generate Rage via War Bringer Passive at the highest rate |
 |
Second Wind Support - reduces the cooldown of linked Spells and adds extra Flame Dash/Dash charge |
 |
Enhance Support - increases the Quality of all linked Gems which slightly increases their effectiveness which applies to all the 5 Gems linked to it here so it's best to use it in a 6-link Item |
|
Inspiration Support - reduces the Mana Cost of all linked Spell - other bonuses from it are irrelevant here |
| [UTILITY] Utility Gems | |
|
Ancestral Warchief - summons a Totem that increases your Melee Attack Damage |
 |
Blood Rage - allows you to generate Frenzy Charges and increases your Attack Speed. Match its' level with your Dexterity - it doesn't have to be on maximum level |
 |
Steelskin - a great Guard Spell for this build which will boost your defenses by absorbing a portion of the incoming damage. It's the only Skill in this setup that should be linked to Cast When Damage Taken |
 |
Cast when Damage Taken Support - will automatically cast your Steelskin - do not link it to the other Gems in this setup |
| [UTILITY] Hydrosphere | |
 |
Hydrosphere - a great Utility/AoE Spell that allows you to apply both Cold and Lightning Exposure to enemies which are both your primary damage types |
| Bonechill Support - increases the effect of your Chill and Cold Damage taken by affected enemies | |
 |
Awakened Hextouch Support - allows you to apply a second Curse via Hydrosphere hits |
 |
Elemental Weakness - the second-best Curse for this build which reduces all the Resistances of affected enemies |
| [UTILITY] Auras | |
 |
Hatred - a must-have Aura that helps you even out your Cold and Lightning Damage that you deal with Lightning Strike |
|
Herald of Ice - adds extra Cold Damage to Attacks and causes AoE explosions when you kill Frozen enemies |
|
Precision - amazing Aura which increases your Accuracy Rating and Critical Strike Chance. Upgrade it to the Maximum level your current Mana allows you |
 |
Enlighten Support - reduces the Mana Reservation Cost of linked Auras |
| [UTILITY] Assassin's Mark (applied by Ring affix) |
|
 |
Assassin's Mark - this is the best Curse for this build which greatly increases your Critical Strike Chance and allows you to generate Power Charges |
|
|
5. Gear Setup
In this section, you can find the recommended equipment for this build. Sadly, it doesn't offer much flexibility as is requires a bunch of specific Unique Items; which also determine the stats that you need to find on all other equipment pieces.
Using this opportunity, we would love to invite you to visit our Path of Exile Marketplace where you can buy cheap PoE Currency in case you can't afford all the items for your character.
Our recommended items will:
- Cap your resistances
- Give you enough DPS/Life to take down Shaper on a 1 Ex budget
|
Stat priorities on items:
|
 (Helmet) Rare Helmet - just aim for decent Life, Elemental Resistances and possibly Attributes bonus (Helmet) Rare Helmet - just aim for decent Life, Elemental Resistances and possibly Attributes bonus |
|
| Min. requirements: 100 maximum Life 100% Total Elemental Resistances Optional affixes: Attributes Increased Physical Damage Reduction when you Focus |
|
| Helmet enchantments: Lightning Strike pierces 3 additional Targets Lightning Strike fires 3 additional Projectiles 40% increased Lightning Strike Damage |
|
 (Weapon) Rare Staff - the BiS item. Simply Aim for the highest base Physical DPS that you afford (Weapon) Rare Staff - the BiS item. Simply Aim for the highest base Physical DPS that you afford |
|
| Min. requirements: 700 Base Physical DPS Optional affixes: Socketed Gems are Supported by level 10 Endurance Charge on Melee Critical Strike Multiplier Chance to Deal Double Damage Damage Penetrates #% Elemental Resistance |
|
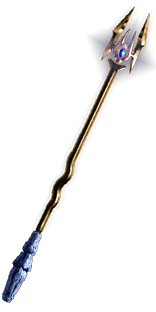 (Weapon) Hegemony's Era - a decent budget-alternative for a high DPS Rare. It offers decent damage, extra Crit. and Block, making it one of the best Unique Staves for this build (Weapon) Hegemony's Era - a decent budget-alternative for a high DPS Rare. It offers decent damage, extra Crit. and Block, making it one of the best Unique Staves for this build |
|
| +20% Chance to Block Spell Damage while wielding a Staff +6% Chance to Block Attack Damage while wielding a Staff Adds (135-145) to (160-175) Physical Damage (12-16)% increased Attack Speed (10-20)% increased Critical Strike Chance +1 to Maximum Power Charges 10% chance to gain a Power Charge if you Knock an Enemy Back with Melee Damage |
|
 (Weapon) The Fulcrum - another very interesting option, however, it could also cause you to get self-Ignited, which requires getting a pair of Boots with the "Unaffected by Ignite" affix. Either way, it offers some insane Damage Conversion and extra bonuses to self-Chilled and self-Ignited characters (Weapon) The Fulcrum - another very interesting option, however, it could also cause you to get self-Ignited, which requires getting a pair of Boots with the "Unaffected by Ignite" affix. Either way, it offers some insane Damage Conversion and extra bonuses to self-Chilled and self-Ignited characters |
|
| +20% Chance to Block Attack Damage while wielding a Staff (140-180)% increased Physical Damage (0-50)% of Physical Damage Converted to Fire Damage (0-50)% of Physical Damage Converted to Cold Damage (0-50)% of Physical Damage Converted to Lightning Damage Elemental Ailments you inflict are Reflected to you Elemental Damage with Hits is Lucky while you are Shocked Damage Penetrates (8-10)% Elemental Resistances while you are Chilled Gain (30-40)% of Physical Damage as Extra Damage of a random Element while you are Ignited |
|
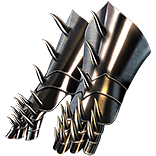
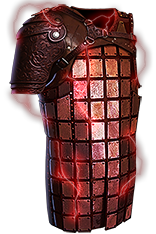 (Body Armour) Inpulsa's Broken Heart - the mandatory Armour for this build which makes you unaffected by Shock - so you don't have 50% extra Damage when you apply it yourself (Body Armour) Inpulsa's Broken Heart - the mandatory Armour for this build which makes you unaffected by Shock - so you don't have 50% extra Damage when you apply it yourself |
|
| +(60-80) to maximum Life (20-50)% increased Damage if you have Shocked an Enemy Recently (15-25)% increased Effect of Shock Shocked Enemies you Kill Explode, dealing 5% of their Life as Lightning Damage which cannot Shock Unaffected by Shock |
|
 (Boots) Rare Boots - aim for the highest defensive Stats here and possibly Cannot be Frozen affix (Boots) Rare Boots - aim for the highest defensive Stats here and possibly Cannot be Frozen affix |
|
| Min. requirements: 70 Maximum Life 60% Total Elemental Resistances 30% increased Movement Speed Cannot bo Frozen Optional affixes: 9% chance to gain Elusive on Critical Strike You have Tailwind if you have dealt a Critical Strike Recently Attributes Increased effect of non-damaging Ailments |
|
| Boot enchantment: 10% Chance to Dodge Attack Hits if you've taken a Critical Strike Recently 16% increased Attack and Cast Speed if you've Killed Recently |
|
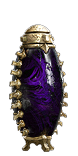
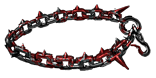 (Belt) Maligaro's Restraint - a must-have Belt for this entire build's mechanic to work. It allows you to reflect Shock that you inflict, which in result also Chills you (Belt) Maligaro's Restraint - a must-have Belt for this entire build's mechanic to work. It allows you to reflect Shock that you inflict, which in result also Chills you |
|
| +(9-20) to maximum Energy Shield Adds 1 to (30-50) Lightning Damage to Attacks 100% increased Shock Duration on you Shocks you cause are reflected back to you 60% increased Damage while Shocked 15% increased Movement Speed while Shocked |
|
 (Amulet) Rare Amulet - again, you are looking for a ton of different stats here, with just Life and Attributes being mandatory (Amulet) Rare Amulet - again, you are looking for a ton of different stats here, with just Life and Attributes being mandatory |
|
| Min. requirements: 60 maximum Life 50 Dexterity Optional affixes: Elemental Resistances Critical Strike Multiplier Intelligence Increased Effect of Non-Damaging Ailments Non-Channelling Skills have -# to Total Mana Cost |
|
| Recommended Anointments: Storm Weaver |
|
 (Ring) Rare Ring - aim to the highest defensive stats, Attributes, and Assassin's Mark as your primary Curse has to be applied via the Ring (Ring) Rare Ring - aim to the highest defensive stats, Attributes, and Assassin's Mark as your primary Curse has to be applied via the Ring |
|
| Min. requirements: 60 maximum Life Trigger Level 12 Assassin's Mark when you Hit a Rare or Unique Enemy Optional affixes: Attributes Elemental Resistances Non-Channelling Skills have -# to Total Mana Cost |
|
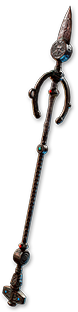
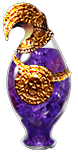
 (Ring) Winterweave - another mandatory item for the entire Self-Chill mechanic. It reverts the effect of Chill on you which causes all the boost to your Action Speed (Ring) Winterweave - another mandatory item for the entire Self-Chill mechanic. It reverts the effect of Chill on you which causes all the boost to your Action Speed |
|
| +(20-30) to maximum Life Adds (12-15) to (25-30) Fire Damage to Attacks Adds (12-15) to (25-30) Cold Damage to Attacks +(20-40) to maximum Life +(25-30)% to Cold Resistance 10% increased Movement Speed while Ignited The Effect of Chill on you is reversed |
|
 (Gloves) Rare Gloves - in our case, we had a lot of Dexterity here and crafted Physical to Cold Conversion which allows you to generate Lightining Resonance quicker (otherwise most Hits will have the highest damage of the LIghtning Type) (Gloves) Rare Gloves - in our case, we had a lot of Dexterity here and crafted Physical to Cold Conversion which allows you to generate Lightining Resonance quicker (otherwise most Hits will have the highest damage of the LIghtning Type) |
|
| Min. requirements: 80 maximum Life 50 Dexterity Optional affixes: (20-25)% of Physical Damage Converted to Cold Damage Elemental Resistances Effect of non-damaging Ailments |
|
 (Jewel) Watcher's Eye - a very powerful Jewel that offers extra Aura Modifiers when you are affected by Hatred and/or Precision. The best one is flat Crit. Chance from Hatred, which allows you to easily reach 90% effective Crit. Chance (Jewel) Watcher's Eye - a very powerful Jewel that offers extra Aura Modifiers when you are affected by Hatred and/or Precision. The best one is flat Crit. Chance from Hatred, which allows you to easily reach 90% effective Crit. Chance |
|
| (4-6)% increased maximum Energy Shield (4-6)% increased maximum Life (4-6)% increased maximum Mana <Two or Three random aura modifiers> Recommended Aura modifiers: +(1.2-1.8)% to Critical Strike Chance while affected by Hatred +(20-30)% to Critical Strike Multiplier while affected by Precision (40-60)% increased Attack Damage while affected by Precision |
|
 (Jewel) Abyss Jewel - generally, regular Rare Jewels are preferred, but you can look for an Abyssal Jewel with extra Onslaught buff on kill that gives you pretty much a 100% uptime on it (Jewel) Abyss Jewel - generally, regular Rare Jewels are preferred, but you can look for an Abyssal Jewel with extra Onslaught buff on kill that gives you pretty much a 100% uptime on it |
|
| Min. requirements: 35 maximum Life Added Physical Damage to Attacks/Staff Attacks Chance to gain Onslaught on kill Optional affixes: Critical Strike Multiplier |
|
 (Jewel) Rare Jewels - try to get extra Life and Critical Strike Multiplier. If you can afford it, also extra damage mods like Melee/Physical/Area (Jewel) Rare Jewels - try to get extra Life and Critical Strike Multiplier. If you can afford it, also extra damage mods like Melee/Physical/Area |
|
| Recommended affixes: maximum Life Critical Strike Multiplier Optional affixes: Attributes Melee/Area/Physical Damage |
|
 (Jewel) Lethal Pride - you can try equipping your Lethal Pride Jewel right above Devotion. You have six notables here, so if you had lucky rolled one, it will grant a lot of bonuses for a single Jewel Socket. You also get plenty of Strength from it. You might also want to try Brutal Restraint, which can fix your needs for Dexterity, but it's more likely to roll some useless bonuses too (Jewel) Lethal Pride - you can try equipping your Lethal Pride Jewel right above Devotion. You have six notables here, so if you had lucky rolled one, it will grant a lot of bonuses for a single Jewel Socket. You also get plenty of Strength from it. You might also want to try Brutal Restraint, which can fix your needs for Dexterity, but it's more likely to roll some useless bonuses too |
|
| Denoted service of (500-8000) dekhara in the akhara of (Asenath-Balbala-Nasima) Passives in radius are Conquered by the Maraketh Historic |
|
 (Jewel) Replica Hotheaded - grants massive speed boost for Chilled characters making it a must-have Jewel for this build (Jewel) Replica Hotheaded - grants massive speed boost for Chilled characters making it a must-have Jewel for this build |
|
| (10-20)% increased Attack Speed while Chilled (10-20)% increased Cast Speed while Chilled (10-20)% increased Movement Speed while Chilled |
|
 (Jewel) Large Cluster Jewel - you should use two Large Cluster Jewels, one with Elemental Damage for extra Life Leech from Doryani's Lesson, the second one with Bonus Damage with Staves for Overlord Passive and Fortify (Jewel) Large Cluster Jewel - you should use two Large Cluster Jewels, one with Elemental Damage for extra Life Leech from Doryani's Lesson, the second one with Bonus Damage with Staves for Overlord Passive and Fortify |
|
| Recommended affixes: 1 Added Passive Skill is Doryani's Lesson 1 Added Passive Skill is Inspired Oppression 1 Added Passive Skill is Prismatic Heart 1 Added Passive Skill is Calamitous 1 Added Passive Skill is Martial Prowess 1 Added Passive Skill is Overlord |
|
 (Jewel) Medium Cluster Jewel - you are also going to use two Medium Cluster Jewels - one is mandatory to grant the Cold Conduit Passive and allows you to self-chill yourself, while the other can provide extra Onslaught from (Jewel) Medium Cluster Jewel - you are also going to use two Medium Cluster Jewels - one is mandatory to grant the Cold Conduit Passive and allows you to self-chill yourself, while the other can provide extra Onslaught from |
|
| Recommended affixes: 1 Added Passive Skill is Astonishing Affliction 1 Added Passive Skill is Cold Conduction (must-have) 1 Added Passive Skill is Haunting Shout 1 Added Passive Skill is Lead By Example |
|
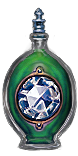
 (Flask) Atziri's Promise - one of the best Flasks for Damage conversion builds which adds a ton of extra Chaos Damage to your Attacks (Flask) Atziri's Promise - one of the best Flasks for Damage conversion builds which adds a ton of extra Chaos Damage to your Attacks |
|
| +35% to Chaos Resistance 2% of Chaos Damage Leeched as Life during Flask effect Gain (15-20)% of Physical Damage as Extra Chaos Damage during effect Gain (10-15)% of Elemental Damage as Extra Chaos Damage during effect |
|
 (Flask) Cinderswallow Urn - grants Onslaught and extra instant Life/Mana recovery. You can also get additional Crit. from the Veiled mod (Flask) Cinderswallow Urn - grants Onslaught and extra instant Life/Mana recovery. You can also get additional Crit. from the Veiled mod |
|
| Onslaught Recharges 1 Charge when you Consume an Ignited corpse Enemies Ignited by you during Flask Effect take 10% increased Damage Recover (1-3)% of Life when you Kill an Enemy during Flask Effect Recover (1-3)% of Mana when you Kill an Enemy during Flask Effect Recover (1-3)% of Energy Shield when you Kill an Enemy during Flask Effect Veiled Suffix |
|
Other suggested Flasks:
|
|
   |
|
|
If you have any other build requests please leave that in the comments below.
Pictures used in this article are the intellectual property of Grinding Gear Games.
