Self-Cast Forbidden Rite Occultist Build
Forbidden Rite build for self-casting Occultist which deals a lot of Chaos Damage thanks to Power ChargesForbidden Rite
Occultist Build
Updated for Patch 3.22
The Best Crafty Guides by Odealo
| Guide notes |
| September 24, 2021 -Build created October 31, 2023 Updated for Patch 3.22 |
| Build overview | |||
| Tags: [CASTER] [CHAOS] [LIFE] | |||
|
Budget: Defenses: |
|
Boss DPS: AoE: |
|
Forbidden Rite is a Chaos Spell that deals damage not only to your enemies but also to your Character - because of that you will need to heavily invest in Chaos Resistance. To achieve high Chaos Resistance use Xibaqua's Glorious Vanity to get Divine Flesh Keystone, two Small Cluster Jewels with Born of Chaos Notable, and allocate Withering Presence. With around 85% Chaos Resistance your Character will take little to no Chaos Damage, and to quickly recover what's lost use the lowest level of Blazing Salvo and Ball Lightning Skills with multiple Projectiles and Watcher's Eye with a Vitality mod that grants you instant Life on Hit, that's all very important. With the problem of sustaining the damage you deal to yourself out of the way now you can focus on the damage you deal - it's very simple as you will be playing as Occultist with Badge of the Brotherhood. Your Power and Frenzy Charges will reach 10 granting you an enormous amount of DPS, thanks to Forbidden Power, Disciple of the Forbidden, and Void Batteries. Profane Bloom Keysone will completely take care of your clear speed. Equip rare gear with a lot of Life - you should reach around 6k of it, Use Clarity and Vitality to replenish the ever-draining resources, some other Curses, and Auras to enhance your performance, and that's it, the build is good to go.
You can also check our other Path of Exile builds right over here Odealo's Crafty Guides - Full List
1. Gameplay
Use Forbidden Rite to kill all kinds of enemies, with Pinpoint Support it's better to stand still during Boss Fights and constantly cast your Spell. For longer flights, it is also recommended to use Wither cast via Totems to erode Chaos Resistance and Hinder your opponents. Ball Lightning and Blazing Salvo should be cast automatically via level 1 Cast when Damage Taken to instantly replenish your Life and Mana via Watcher's Eye and Ring affixes. Use Flame Dasht to dodge attacks and Steelskin as your Guard Spell.
|
This video was recorded in Patch 3.15 with very similar gear and Tree as in the following Guide. The updated one should be released shortly (though it won't differ much in basically none of the aspects) |
|
|

2. Build's PROS & CONS
| PROS |
|
| CONS |
|
3. Leveling tips
We don't recommend using Forbidden Rite as soon as you can, you will simply die from the damage you're dealing to yourself. The generic nature of the Passive Skill Tree grants you a lot of Skills to choose from, use one you're comfortable with. Arc is a good candidate to get through the first few Acts. After some time start using Soul Rend - it's a Spell similar to Forbidden Rite but it doesn't hurt you, use it until your Chaos Resistance is 75% or more. when it comes to gear, you should seek primarily Maximum Life and Elemental Resistances. Use Essences of Envy increased Chaos Damage or Chaos Resistance.
Suggested leveling Gem setups:
| Frostbolt setup | |
 |
Arc - Arc is a good Spell to kill small foes, it has a decent Crit Chance and is available since level 1 |
 |
Arcane Surge Support - as you spend Mana on Skills it grants you more Spell Damage, Mana Regeneration, and Cast Speed |
 |
Power Charge on Critical Support - use this Support Gem for better synergy with Power Charges after picking up Forbidden Power Keystone at the end of the first Lab |
 |
Inspiration Support - reduces Mana Cost, increases Elemental Damage, and Critical Strike Chance |
| Flame Dash setup | |
 |
Flame Dash - one of the most versatile Movement Spells |
 |
Faster Casting Support - increases the Cast Speed of Flame Dash |
| Arcanis Brand setup | |
 |
Zealotry - it's the best Aura if you're using Spells and want to increase your Critical Strike Chance |
 |
Clarity - Use Clarity for faster Mana Regeneration |
 |
Vitality - Vitality Regenerates a fixed amount of your Life each second |
Bandits:
Killing all three Bandits for two Passive Skill Points is the best option, but consider helping Alira for Mana Regen, Crit Multiplier, and Elemental Resistances
Leveling Skill Trees:
31 Points Skill Tree
Pick up Spell Damage, Maximum Life and Mana, Critical Strike, and Lightning Damage nodes
61 Points Skill Tree
look for more Maximum Life, allocate the Maximum Power Charges and Disciple of the Forbidden, and prepare for allocating Glorious Vanity
Recommended leveling items:
 Le Heup of All - this Ring grants you damage and Elemental Resistances Le Heup of All - this Ring grants you damage and Elemental Resistances |
|
| Adds 1 to 4 Physical Damage to Attacks +(10-30) to all Attributes (10-30)% increased Damage (10-30)% increased Rarity of Items found +(10-30)% to all Elemental Resistances |
 Goldrim - Goldrim is a standard leveling Helmet - it provides you with a lot of Elemental Resistances Goldrim - Goldrim is a standard leveling Helmet - it provides you with a lot of Elemental Resistances |
|
| +(30-50) to Evasion Rating 10% increased Rarity of Items found +(30-40)% to all Elemental Resistances Reflects 4 Physical Damage to Melee Attackers Level Requirement reduced by 100 (Hidden) |
 Tabula Rasa - it has six, white, and already linked sockets Tabula Rasa - it has six, white, and already linked sockets |
|
| Item has no level requirement and Energy Shield (Hidden) Item has 6 White Sockets and is fully linked (Hidden) |
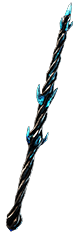 Storm Prison - Wand that has a great Synergy with Power Charges and Mana Regeneration Storm Prison - Wand that has a great Synergy with Power Charges and Mana Regeneration |
|
| (11-15)% increased Spell Damage (40-60)% increased Physical Damage Adds 1 to (35-45) Lightning Damage (15-25)% increased Mana Regeneration Rate +1 to Maximum Power Charges (25-35)% chance to gain a Power Charge on Kill |
4. Final Skill Tree, Ascendancy Points, and Pantheon
Final Skill Tree:
90 Points Final Skill Tree (doesn't include Cluster nor Unique Jewels)
117 Points Path of Building (PoB) link
Ascendancy points:
Preferably in that order:
- Forbidden Power
- Void Beacon
- Withering Presence
- Profane Bloom
Pantheon:
Major God: Soul of the Brine King You cannot be Stunned if you've been Stunned or Blocked a Stunning Hit in the past 2 seconds
Minor God: Soul of Garukhan 60% reduced Effect of Shock on you
5. Final Gems links
| [DPS] Forbidden Rite setup | |
 |
Forbidden Rite - It launches a lot of Projectiles that deal Chaos Damage and take a percentage of your Life and ES. Fires extra projectiles aimed at enemies standing nearby. |
 |
Greater Volley Support - Projectiles deal less damage but there are more of them, traveling with increased speed. use this or  Greater Multiple Projectiles Support Greater Multiple Projectiles Support |
 |
Void Manipulation Support - more Chaos Damage at the cost of Elemental Damage, which you won't deal at all |
 |
Pinpoint Support - Pinpoint enhances subsequential Casts of this Spell with Intensify as long as you're standing Still, but you will cast fewer Projectiles. You can also go for  Spell Echo Support for raw damage. Spell Echo Support for raw damage. |
|
Power Charge on Critical Support - you deal more damage per Power Charge, and your Critical Strike Chance is increased |
 |
Increased Critical Damage Support - increases the Damage of your Critical Strikes |
| [MOBILITY] Flame Dash setup | |
 |
Flame Dash - Flame Dash is one of the best Mobility Skills, it allows you to quickly dash leaving a line of Burning Ground |
|
Arcane Surge Support - keep it at a level no higher than 5 so that you will gain Arcane Surge with a single use of Flame Dash |
| [UTILITY] Curse setup | |
 |
Cast when Damage Taken - keep it at level 1 so that the linked Spell will be triggered frequently |
 |
Assassin's Mark - it should be at level 5, use it to Regenerate Life and Mana, and to increase your Critical Strike Chance and damage |
| [UTILITY] Aura setup | |
 |
Determination - Use Determination for more and increased Armour. You could alternatively use  Arctic Armour, but it's not recommended, use it only if you can't afford Determination. Arctic Armour, but it's not recommended, use it only if you can't afford Determination. |
|
Zealotry - Zealotry is an Aura that increases your Critical Strike Chance for Spells, Spell Damage, and creates Consecrated Ground |
 |
Enlighten Support - lowers the cost of all linked Mana-reserving Skills |
| [UTILITY] second Aura setup | |
|
Clarity - Aura that makes you Regenerate Mana at a faster rate. Just use a level 1 Clarity so that it doesn't reserve too much of your Mana |
|
Vitality - Vitality greatly increases the amount of Life you regenerate each second. Adjust this Gem's level to your current Mana pool as well |
|
Enlighten Support |
| [UTILITY] Blazing Salvo and Ball Lightning setup | |
 |
Blazing Salvo - Use Blazing Salvo as it fires a lot of Projectiles which then can spread out landing a lot of Hits and recovering a lot of your Life, keep it at level 1 |
 |
Ball Lightning - Ball Lightning can Hit very often as it passes through enemies, It's important to land a lot of Hits to recover more Life from Watcher's Eye, keep it at level 1 |
|
Greater Multiple Projectiles Support - by firing more projectiles you'll Hit more enemies and recover more Life |
|
Cast when Damage Taken - keep it at level 1 |
| [UTILITY] Wither Totem setup | |
 |
Wither - it Debuffs enemies, they take more Chaos Damage and have decreased Movement Speed, can stack up to 15 times |
 |
Spell Totem Support - Wither will be cast automatically via Spell Totem you can place |
 |
Multiple Totems Support - you can place more Totems, allowing you to quickly hit the cap of 15 Wither Debuffs |
| [UTILITY] Steelskin | |
 |
Steelskin - Steelskin is a versatile Guard Spell that absorbs some of the incoming damage. If you're also using Detemniation switch to  Molten Shell. Molten Shell. |
|
|
5. Gear Setup
Void Batteries and Badge of the Brotherhood are important Unique Items, the rest of your Gear is Rare - you should aim for Maximum Life, Elemental Resistances, Chaos, Spell, and Projectile Damage, Critical Strike Chance for Spells, and Critical Strike Multiplier. Remember to cap your Chaos Resistance at more than 85%. Try to lower the Cost of your Spells and increase your Mana Regeneration Rate. You will need to get some Dexterity for Greater Vollry or Multiple Projectiles Support. Maximum Mana is not really important but having more of it will help. You can look for some exotic mods with will enhance the effect of Power of Frenzy Charges. Overall the build is not really expensive, it's achievable for a casual player to get all the items needed.
Our recommended items will:
- Cap your resistances at 75%
- Provide you with enough DPS, Life, and ES to start mapping
|
Stat priorities on items:
|
 (Helmet) Rare Helmet - Aim for a Helmet with a high bonus to Maximum Life, an additional maximum Power Charge, and some Elemental Resistances. (Helmet) Rare Helmet - Aim for a Helmet with a high bonus to Maximum Life, an additional maximum Power Charge, and some Elemental Resistances. |
|
| Min. requirements: 80 Maximum Life +60% Total Elemental Resistances +1 to Maximum Power Charges Optional affixes: Nearby Enemies have -#% to Chaos Resistance Chaos Resistance Dexterity |
|
| Helmet enchantments: Forbidden Rite enchantments |
|
 (Weapon) Void Battery - use two of them to increase your Cast Speed, Critical Strike Chance, Maximum Mana, Spell Damage, and to increase the limit of your Maximum Power Charges (Weapon) Void Battery - use two of them to increase your Cast Speed, Critical Strike Chance, Maximum Mana, Spell Damage, and to increase the limit of your Maximum Power Charges |
|
| (36-40)% increased Spell Damage 80% reduced Spell Damage (10-20)% increased Cast Speed (50-65)% increased Global Critical Strike Chance +(40-50) to maximum Mana +1 to Maximum Power Charges 25% increased Spell Damage per Power Charge |
|
 (Body Armour) Rare Body Armour - the main reason to use a Rare Body Armour is to have a source of Frenzy Charges, it also provides a lot of Maximum Life and Elemental Resistances (Body Armour) Rare Body Armour - the main reason to use a Rare Body Armour is to have a source of Frenzy Charges, it also provides a lot of Maximum Life and Elemental Resistances |
|
| Min. requirements: 110 Maximum Life +60% Total Elemental Resistances 10% Chance to gain a Frenzy Charge on Hit Optional affixes: Critical Strike Chance Chaos Resistance increased Maximum Life and mana |
|
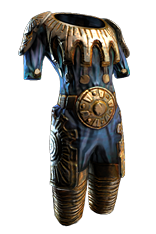
 (Body Armour) Doppelgänger Guise - It reduces self-inflicted Chaos Damage by 40% and regenerates tons of Life if you set it to sane. You can also go insane for more Crit Chance. (Body Armour) Doppelgänger Guise - It reduces self-inflicted Chaos Damage by 40% and regenerates tons of Life if you set it to sane. You can also go insane for more Crit Chance. |
|
| Grants Level 20 Unhinge Skill (40-60)% more Critical Strike Chance while Insane Enemies Killed by your Hits are destroyed while Insane (40-30)% less Physical and Chaos Damage Taken while Sane Regenerate 10% Life over one second when Hit while Sane |
|
 (Boots) Rare Boots - a pair of Boots with high Elemental Resistances, Energy Shield, and Movement Speed is good enough (Boots) Rare Boots - a pair of Boots with high Elemental Resistances, Energy Shield, and Movement Speed is good enough |
|
| Min. requirements: +70% Total Elemental Resistances 60 Maximum Life 25% Increased Movement Speed Optional affixes: You have Tailwind if you have dealt a Critical Strike Recently Dexterity or Strength chance to gain Onslaught for 4 seconds on Kill Chaos Resistance |
|
 (Gloves) Rare Gloves - your options to increase your DPS are limited when it comes to Gloves, focus mostly on Maximum Life and Elemental Resistances (Gloves) Rare Gloves - your options to increase your DPS are limited when it comes to Gloves, focus mostly on Maximum Life and Elemental Resistances |
|
| Min. requirements: 80 Maximum Life +80% Total Elemental Resistances Optional affixes: Dexterity increased Spell Damage Chaos Resistance |
|
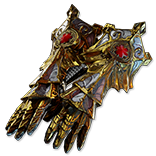 (Gloves) Hands of the High Templar - Besides the regular modifiers present here, you can obtain some great Corrupted Implicits, such as "Curse Enemies with Despair on Hit", "increased Cast Speed", or "+#% to Spell Critical Strike Chance". (Gloves) Hands of the High Templar - Besides the regular modifiers present here, you can obtain some great Corrupted Implicits, such as "Curse Enemies with Despair on Hit", "increased Cast Speed", or "+#% to Spell Critical Strike Chance". |
|
| Can be modified while Corrupted Can have up to 5 Implicit Modifiers while Item has this Modifier (150-200)% increased Armour and Energy Shield (7-12)% increased maximum Life +(20-30)% to Fire and Lightning Resistances |
|
 (Belt) Rare Belt - a Belt that has a lot of Maximum Life and Elemental Resistances should be good, you can craft some additional mod such as increased Damage or additional Strength (Belt) Rare Belt - a Belt that has a lot of Maximum Life and Elemental Resistances should be good, you can craft some additional mod such as increased Damage or additional Strength |
|
| Min. requirements: 100 Maximum Life +100% Total Elemental Resistances Optional affixes: Strength and Dexterity increased Damage increased Damage with Hits against Chilled Enemies |
|
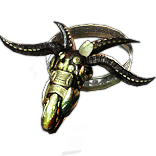
 (Amulet) Badge of the Brotherhood - This Amulet allows you to have up to 10 Frenzy Charges which increase your Damage, Movement, and Cast Speed. It increases the effect of Elusive and Cooldown Recovery Rate of Travel Skills. (Amulet) Badge of the Brotherhood - This Amulet allows you to have up to 10 Frenzy Charges which increase your Damage, Movement, and Cast Speed. It increases the effect of Elusive and Cooldown Recovery Rate of Travel Skills. |
|
| +(16-24) to Dexterity and Intelligence (7-10)% increased Cooldown Recovery Rate of Travel Skills per Frenzy Charge (7-10)% increased Effect of Elusive on you per Power Charge (20-25)% chance to lose a Frenzy Charge when you use a Travel Skill (20-25)% chance to lose a Power Charge when you gain Elusive Your Maximum Frenzy Charges is equal to your Maximum Power Charges |
|
| Recommended Anointments: Infused |
|
 (Ring) Rare Ring - get yourself a Ring with a lot of maximum Life and Elemental Resistances, and Life gained for the enemies you Hit with your Spells in at least one of your Rings - it's important to have a reliable Life recovery. If you can apply more than one Curse, let it be Despair on Hit. (Ring) Rare Ring - get yourself a Ring with a lot of maximum Life and Elemental Resistances, and Life gained for the enemies you Hit with your Spells in at least one of your Rings - it's important to have a reliable Life recovery. If you can apply more than one Curse, let it be Despair on Hit. |
|
| Min. requirements: 90 Maximum Life +90% Total Elemental Resistances +16 Life gained for each Enemy hit by your Spells Optional affixes: Chaos Resistance Non-channelling Skills have -# to Total Mana Cost Attributes Curse enemies with Despair on Hit |
|
 (Jewel) Rare Jewels - Look for Increased Maximum Life and the stats you lack, Attributes or Resistances. If you need damage look for Spell or Chaos Damage, and Critical Strike mods. (Jewel) Rare Jewels - Look for Increased Maximum Life and the stats you lack, Attributes or Resistances. If you need damage look for Spell or Chaos Damage, and Critical Strike mods. |
|
|
Recommended affixes: |
|
 (Jewel) Unnatural Instinct - it's expensive Jewels for finishing touches, the best place for it is next to the Shaper Notable. (Jewel) Unnatural Instinct - it's expensive Jewels for finishing touches, the best place for it is next to the Shaper Notable. |
|
| Allocated Small Passive Skills in Radius grant nothing Grants all bonuses of Unallocated Small Passive Skills in Radius |
|
 (Jewel) Watcher's Eye - it is very important to have Life gained on Hit while affected by Vitality here - it will ensure that your Life Pool is replenished constantly, Zealotry and Clarity are your other Auras (Jewel) Watcher's Eye - it is very important to have Life gained on Hit while affected by Vitality here - it will ensure that your Life Pool is replenished constantly, Zealotry and Clarity are your other Auras |
|
| (4-6)% increased maximum Energy Shield (4-6)% increased maximum Life (4-6)% increased maximum Mana <Two or Three random aura modifiers> Recommended Aura modifiers: +25 Life gained for each Enemy Hit while affected by Vitality |
|
 (Jewel) Glorious Vanity - Look for a Xibaqua version of this Jewel and allocate it near The Agnostic and transform it to Divine Flesh for more Maximum Chaos Resistance. (Jewel) Glorious Vanity - Look for a Xibaqua version of this Jewel and allocate it near The Agnostic and transform it to Divine Flesh for more Maximum Chaos Resistance. |
|
| Bathed in the blood of (100-8000) sacrificed in the name of Xibaqua Passives in radius are Conquered by the Vaal Historic |
|
 (Jewel) Large Cluster Jewels - you will use one or two of these, it's the best way to increase your Chaos Damage, and to make place for later important Small Cluster Jewels (Jewel) Large Cluster Jewels - you will use one or two of these, it's the best way to increase your Chaos Damage, and to make place for later important Small Cluster Jewels |
|
| Recommended affixes: 1 Added Passive Skill is Wicked Pall 1 Added Passive Skill is Touch of Cruelty 1 Added Passive Skill is Unholy Grace 1 Added Passive Skill is Unwaveringly Evil |
|
 (Jewel) Medium Cluster Jewels - Magnifier and Vast Power are the best Notables here, Vast power scales Aoe with Power Charges while Vast Power increases Critical Strike Multiplier and AoE (Jewel) Medium Cluster Jewels - Magnifier and Vast Power are the best Notables here, Vast power scales Aoe with Power Charges while Vast Power increases Critical Strike Multiplier and AoE |
|
| Recommended affixes: 1 Added Passive Skill is Magnifier 1 Added Passive Skill is Vast Power |
|
 (Jewel) Small Cluster Jewels - allocate Born of Chaos for 3% more Maximum Chaos Resistance, the more of them you have the less damage Forbidden Rite will deal to you (Jewel) Small Cluster Jewels - allocate Born of Chaos for 3% more Maximum Chaos Resistance, the more of them you have the less damage Forbidden Rite will deal to you |
|
| Recommended affixes: 1 Added Passive Skill is Born of Chaos |
|
| 40% increased Damage Creates Consecrated Ground on Use (20-40)% increased Duration Consecrated Ground created by this Flask has Tripled Radius Consecrated Ground created during Effect applies (7-10)% increased Damage taken to Enemies (100-150)% increased Critical Strike Chance against Enemies on Consecrated Ground during Flask effect |
|
 (Flask) Dying Sun - you take less Fire Damage and fire more Projectiles with increased AoE (Flask) Dying Sun - you take less Fire Damage and fire more Projectiles with increased AoE |
|
| +50% to Fire Resistance 20% less Fire Damage taken (125-150)% increased Charges used (40-60)% reduced Duration (10-20)% increased Area of Effect during Flask Effect Skills fire 2 additional Projectiles during Flask Effect |
|
 (Flask) Kiara's Determination - you're immune to Freeze, Chill, Curses and Stuns, and buffed with Onslaught (Flask) Kiara's Determination - you're immune to Freeze, Chill, Curses and Stuns, and buffed with Onslaught |
|
| Onslaught Immune to Freeze, Chill, Curses and Stuns during Flask Effect 60% reduced Duration |
|
|
Other suggested Flasks:
|
|
   |
|
|
If you have any other build requests please leave that in the comments below. We are always open to suggestions and constructive feedback.
Pictures used in this article are the intellectual property of Grinding Gear Games.
