Scourge Arrow/Toxic Rain Pathfinder build - Odealo's Crafty Guide
Mighty Bow build that uses Poison to melt hordes of monsters. A very well-rounded character for any kind of content Scourge Arrow
Pathfinder build
Updated for Patch 3.23
The Best Crafty Guides by Odealo
| Guide notes |
| September 19, 2021 -Updated for Patch 3.19 October 31, 2023 -Updated for Patch 3.22 December 17, 2023 -Updated for Patch 3.23 |
| Build Overview | |||
| Tags: [BOW] [CHAOS] [LIFE] | |||
|
Budget: Defenses: |
|
Boss DPS: AoE: |
|
Scourge Arrow is currently one of the best Bow Skills for any Bow build that uses Ailments to deal Damage. It is especially good with Poisons. At the same time, the Pathfinder class grants very high Poison and Chaos Damage bonuses from Attack skills, making it one of the most powerful DoT classes in Path of Exile. Pathfinders are also known for very good Flask sustainability which makes them more efficient in Boss fights.
The following build revolves around the Scourge Arrow Attack, a channeled skill that fires a single projectile when released. While the projectile passes over the ground, it creates Pods that burst into tons of secondary projectiles. All those projectiles have increased Damage based on the number of stacks accumulated while Channeling. With each release, you will be applying multiple Poison stacks on enemies all around your screen, with the extra Poison "proliferation" from Pathfinder's Ascendancy, you will see enemies melt all over your screen after each Hit, and with high Attack Speed, this build will feel swift and mobile, even though you need to be stationary while charging your Scourge Arrow skill. On the other hand, this build offers quite solid Defenses which are based on Life, Spell Suppression, and Evasion, but can be further enhanced by Divine Flesh Passive. With high Chaos Resistance from Cluster Jewels, you can effectively reduce incoming Elemental Damage by approximately 30%, and a bit less when it comes to Physical Damage. With a high chance to evade damage from Attack Hits, you end up with quite a tanky character with deadly DOT at its disposal.
Spawn behavior of Pods created by released Scourge Arrow depends on your mouse cursor. Adding more projectiles to this skill will not make more Pods, they will distribute evenly between the projectiles. Be aware, sometimes Pods will fail to spawn at all if you aim at walls or big terrain level differences. It doesn't matter much for general mapping, but if you want to maximize your single target damage, this is something you have to master when using this ability.
As of patch 3.22, we've updated the build to be played with Wilma's Requital, now it's completely dependent on Totems and uses only one damaging setup. We can also benefit from Onslaught, Frenzy Charges, Haste, and maybe even Adrenaline or Mokou's Embrace Rings for a much higher Attack Rate.
Patch 3.23 introduced the Scourge Arrow of Menace, which you don't have to Channel anymore. It doesn't alter the build in any significant way, but the damage grows significantly, especially after putting on Wilma's Requital to gain vastly more Attack Speed.
You can also check our other Path of Exile builds at Odealo's Crafty Guides - Full List
1. Gameplay
This Scourge Arrow Pathfinder is a ranged build where your main activity is Dashing into a relatively safe spot, putting down your Siege Ballistas for extra DPS and Withered debuff, and then spamming Scourge Arrow to deal massive Poison Damage with it. This build is quite tanky, so you can charge your Scourge Arrow pretty safely. You can also load your Plague Bearer, which when activated will nearly instantly kill trash enemies all around you, allowing you to progress faster without having to stop to fire Scourge Arrow. In the optimal setup, most other Skills should be triggered automatically or applied automatically like your Curses via Ring modifier or corrupted Implicit on Gloves.
|
This is an outdated video from Patch 3.22 - while the gameplay should remain the same, there may be some differences. We should be updating the video shortly |
|
|

2. Build's PROS & CONS
| PROS |
|
| CONS |
|
3. Leveling tips
Leveling this character is very easy. Quill Rain provides the highest bonus Attack Speed in the entire game and initially, the Less Damage Multiplier is not that noticeable, but you might run into Mana problems very quickly. You can level up with several different Bow Attacks, but the best ones are Caustic Arrow and Toxic Rain. One of the Skills should be linked to Mirage Archer (preferably Toxic Rain) while you occasionally also cast Caustic Arrow beneath your enemies to add a secondary Source of Chaos DOT effect. You can get Tabula Rasa with corrupted Implicit for +2 levels for Socketed Duration, Projectile, or AoE Skill Gems. all of them will apply to mentioned Skills.
Skills that are supposed to inflict Poison, like for example Scourge Arrow, will not deal enough damage initially, so it's better to stick to Toxic Rain/Caustic Arrow for the leveling part. All the Passives corresponding to those two Skill types are near to each other, so there won't be much respeccing required.
Suggested leveling Gem setups:
| Caustic Arrow setup | |
 |
Caustic Arrow - one of the best skills for leveling which has high base Damage over Time. It should be used on the first levels as your primary damaging ability, and when you get Toxic Rain, it plays more of a secondary role (so make sure to have more Support Gems linked to Toxic Rain at that point) |
 |
Void Manipulation Support - increases Chaos Damage dealt by supported skills |
 |
Vicious Projectiles Support - increases Caustic Arrow's Damage over Time |
 |
Efficacy - this will give you more Damage and Duration for your DoT skill |
| Toxic Rain setup | |
 |
Toxic Rain - is used to slow down enemies and deal heavy Damage over Time |
|
Void Manipulation Support - again for straight-up DPS increase |
|
Vicious Projectiles Support - same as above, one of the best Gems for this type of build so you definitely want to have them linked to both Skills |
 |
Mirage Archer Support - spawns a Spectral Archer on your back that will use Toxic Rain even if you aren't fighting yourself. Allows you to progress faster and gain extra experience on the way |
| Utility Gems | |
 |
Malevolence - during leveling there aren't many Mana reserving skills that can be used, so it's just best to use Malevolence Aura for direct DoT increase |
 |
Clarity - increases your Mana Regeneration Rate. It's very useful on lower levels when you don't get much from gear and Passives |
 |
Summon Lightning Golem - grants increased Attack and Cast Speed |
 |
Dash - the best Movement Skill used in this build |
Bandits:
We recommend killing all the Bandits for two additional Passive Points
Leveling Skill Trees:
36 Points Skill Tree
Priorities: 1) Finesse 2) Aspect of the Eagle 3) Farsight 4) Hunter's Gambit 5) Inventerate
Priorities: 1) Blood Drinker 2) Trickery 3) Careful Conservationist 4) Thick Skin 5) Entrench
When leveling up, you are initially going to take nodes that grant Chaos Damage over Time Multiplier with Bows and Damage over Time with Bow, but those have to be later replaced with nodes that grant Chance to Poison and Chaos Damage over Time Multiplier from Poison. The Tree has been designed so that the lowest amount of Passives has to be refunded. It's simply faster to level up with Toxic Rain, so we have decided to set the build this way, but of course, that's entirely up to your personal preference.
Recommended leveling items:
 Praxis - an amazing Ring that will solve all your low-level Mana issues. It grants a high reduction to the Total Mana Cost of Skills which has a similar value to that of end-game crafted Rings Praxis - an amazing Ring that will solve all your low-level Mana issues. It grants a high reduction to the Total Mana Cost of Skills which has a similar value to that of end-game crafted Rings |
|
| +(20-30) to maximum Mana +(30-60) to maximum Mana Regenerate (3-6) Mana per second -(8-4) to Total Mana Cost of Skills 8% of Damage taken gained as Mana over 4 seconds when Hit |
|
 Le Heup of All - very strong and versatile Unique Ring for any character during leveling. Le Heup of All - very strong and versatile Unique Ring for any character during leveling. |
|
| Adds 1 to 4 Physical Damage to Attacks +(10-30) to all Attributes (10-30)% increased Damage (10-30)% increased Rarity of Items found +(10-30)% to all Elemental Resistances |
|
 Death Rush - a reworked version of this Ring is very powerful for leveling. Adrenaline grants a massive bonus to Damage and Movement Speed. Death Rush - a reworked version of this Ring is very powerful for leveling. Adrenaline grants a massive bonus to Damage and Movement Speed. |
|
| +(17-23)% to Chaos Resistance Recover (3-5)% of Life on Kill Gain Adrenaline for (1-3) seconds on kill |
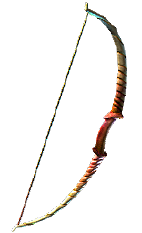 Quill Rain - the best leveling weapon for this build. It grants an insane Attack Speed bonus and Mana Recovery, which will allow you to endless spam Toxic Rain for insane DPS Quill Rain - the best leveling weapon for this build. It grants an insane Attack Speed bonus and Mana Recovery, which will allow you to endless spam Toxic Rain for insane DPS |
|
| +(10-20) to Dexterity 100% increased Physical Damage 100% increased Attack Speed Gain 2 Mana per Enemy Hit with Attacks (50-100)% increased Projectile Speed +(25-50) to Accuracy Rating 30% less Damage |
|
 Storm Cloud - if you find yourself lacking in Damage you can use this Bow instead. It has slightly less Attack Speed but doesn't have the Damage penalty Storm Cloud - if you find yourself lacking in Damage you can use this Bow instead. It has slightly less Attack Speed but doesn't have the Damage penalty |
|
| No Physical Damage Adds 1 to 85 Lightning Damage (36–50)% increased Attack Speed |
|
|
|
| +(30-50) to Evasion Rating 10% increased Rarity of Items found +(30-40)% to all Elemental Resistances Reflects 4 Physical Damage to Melee Attackers Level Requirement reduced by 100 (Hidden) |
 Goldrim - the best leveling Helmet in Path of Exile. It has no level requirement and offers tons of Elemental Resistances
|
|
|
| +(20-30) to Dexterity +(20-30) to Strength +100 to Accuracy Rating 30% increased Projectile Speed 10% increased Movement Speed 30% increased Projectile Damage |
|
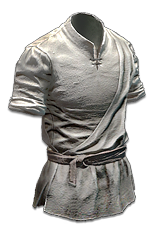 Tabula Rasa - ultimate leveling item. Gives you a white six-link for an early power spike Tabula Rasa - ultimate leveling item. Gives you a white six-link for an early power spike |
|
| Item has no level requirement and Energy Shield (Hidden) Item has 6 White Sockets and is fully linked (Hidden) |
|
 String of Servitude - with a correct modifier, this belt can give you 45% of each Elemental Resistance at level 1 String of Servitude - with a correct modifier, this belt can give you 45% of each Elemental Resistance at level 1 |
|
| <(1-2) Random corrupted implicit modifiers> Implicit Modifier magnitudes are tripled Level Requirement reduced by 100 (Hidden) |
|
 Wanderlust - a very useful pair of Boots, they grant a good Movement Speed bonus and make you Immune to Freeze Wanderlust - a very useful pair of Boots, they grant a good Movement Speed bonus and make you Immune to Freeze |
|
| +5 to Dexterity +(10-20) to maximum Energy Shield (20-40)% increased Mana Regeneration Rate 20% increased Movement Speed Cannot be Frozen |
 Karui Ward - great leveling Amulet for Bow/Ranged characters
4. Final Skill Tree, Ascendancy Points, and Pantheon
Final Skill Tree:
89 Points Final Skill Tree (doesn't include Passives from Cluster Jewels)
123 Points Path of Building (PoB) link
Ascendancy points:
Preferably in that order:
- Nature's Reprisal
- Nature's Adrenaline
- Master Toxicist
- Nature's Boon
Pantheon:
Major God: Soul of the Brine King You cannot be Stunned if you've been Stunned or Blocked a Stunning Hit in the past 2 seconds
Minor God: Soul of Garukhan 60% reduced Effect of Shock on you
5. Final Gems links
| [DPS] Scourge Arrow socketed in The Covenant |
|
|
Scourge Arrow - it's a channeled Bow skill that should be released at 5 stacks for maximum Damage. It deals moderate "on Hit" damage and insane Poison Damage from all the smaller arrows that are shot from the Spore Pods. You can also replace it with the Scourge Arrow of Menace which is no longer a Channelling Skill - it causes you to fire more often and deliver damage faster. |
 |
Ballista Totem Support - Turns Bow Skill into a Totem Skill. You will be able to set up 4 of them with the right Helmet, Watchtowers, and Panopticon. |
 |
Void Manipulation Support - grants a high bonus for any form of Chaos Damage |
|
Deadly Ailments Support - with this Support Gem you will deal increased Damage over Time but less Damage with initial Hits |
 |
Unbound Ailments Support - increases the Damage from Ailments inflicted by supported Skills |
 |
Returning Projectiles Support - Returning Projectile will create more Spore Pods, resulting in more damage. |
| [UTILITY] Frenzy and Flame Dash setup | |
 |
Frenzy - Generates Frenzy Charges on Hit, which are twice as effective with Wilma's Requital. |
 |
Manaforged Arrows Support - Frenzy is cast automatically after spending enough Mana on Ballista Totems. |
 |
Lifetap Support - Linked Skills cost Life, but no Mana. |
 |
Flame Dash - A simple Movement Skill to travel a short distance. |
| [UTILITY] Immortal Call/Plague Bearer | |
 |
Immortal Call - the best Guard Skill for this build which grants a brief but very powerful damage reduction buff. It should be triggered automatically. Keep it on low level |
 |
Plague Bearer - a powerful duration Spell that accumulates some of your Poison DPS and when released will deal it to nearby enemies. It's an amazing way for a single socket cost to deal with trash enemies. Divergent Alternate Quality provides a hefty bonus to Damage over Time Multiplier |
 |
Cast when Damage Taken Support - is used to trigger Immortal Call. You can try getting the Anomalous version for an increase to Skill Effect Duration. Preferably, keep this Gem at level 10 for more frequent casts |
| [UTILITY] Mana Reservation Skills (Socketed in crafted Item with Aspect of the Spider) |
|
 |
Grace - mandatory Aura to get decent levels of Evasion Rating. Vaal version of this Skill can be really helpful in dangerous situations |
 |
Herald of Agony - increases your Chance to Poison and the Damage you deal with it |
 |
Aspect of the Spider - increases your Chaos DPS. It has to be beast crafted on a Rare Item, so make sure you socket the other Skills in that item so that the Aspect also benefits from Enlighten Support Gem |
 |
Flesh and Stone - if you prefer a more defensive option over Aspect of the Spider, you can run this skill. It will blind nearby enemies and reduce the Damage you take from non-blinded enemies |
 |
Enlighten Support - reduces Mana Reservation Cost of Supported Spells |
|
Clarity - it will give you some Mana Regeneration. You can keep it at a very low level, and you do not need Enlighten Support for that one. |
| [UTILITY] Vaal Haste and Blood Rage | |
 |
Vaal Haste - Use Vaal Haste for a temporary bonus to your Attack Speed. |
 |
Blood Rage - increases your Attack Speed and allows you to generate Frenzy Charges for more damage |
| [UTILITY] Malevolence setup | |
|
Malevolence - It improves Damage over Time and Skill effect Duration, resulting in more Poison Damage. |
 |
Divine Blessing Support - Malevolence is a temporary Aura that doesn't reserve Mana. |
 |
Inspiration Support - The temporary Maleveolence Aura cost less Mana. |
| [UTILITY] Vaal Blight/Grace | |
 |
Vaal Blight - if you have an extra Socket, you can use it for Vaal Blight which increases Chaos Damage Taken by Enemies and offers a very powerful slow |
|
|
5. Gear Setup
Below you will find all the recommended gear for this build. This build is relatively cheap and shouldn't include any expensive Items. The only mandatory Uniques are Darkscorn and Covenant, which are quite easy to obtain. It will work just fine with random Rares, but obviously, Items with proper Damage scaling will make this build smoother to play. Luckily, you can gradually upgrade the equipment as you progress without any pressure. For your Defense, on top of maximum Life and Elemental Resistances, you will also need a lot of Chaos Resistance. It puts a heavy strain on our gear, but it's definitely worth it.
Using this opportunity, we would like to invite you to join our PoE Marketplace where you can Buy/Sell, and Trade PoE Currency with the use of real money. You can access that section at the top of this page.
Our recommended items will:
- Cap your resistances
- Give you enough DPS/Life to start mapping successfully
|
Stat priorities on items:
|
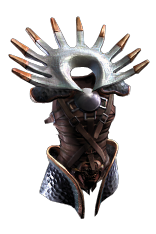
 (Helmet) Wilma's Requital - You can now benefit from an extra Maximum Totem and Cast Speed in your Ballista Totem build. You don't miss out on not being able to deal damage yourself. (Helmet) Wilma's Requital - You can now benefit from an extra Maximum Totem and Cast Speed in your Ballista Totem build. You don't miss out on not being able to deal damage yourself. |
|
| +(300-500) to Accuracy Rating (200-250)% increased Energy Shield Increases and Reductions to Cast Speed apply to Attack Speed (20-30)% increased Elemental Damage with Attack Skills Ancestral Bond |
|
| Helmet enchantment: Scourge Arrow creates an additional spore pod at Maximum Stages |
|
 (Body Armour) Rare Body Armour - aim for high Life and Extra Curse. Obviously, you can also get additional Resistances here, or a flat Reduction to Mana Cost of Socketed Skills, but such a combination with the extra Curse can be very expensive (Body Armour) Rare Body Armour - aim for high Life and Extra Curse. Obviously, you can also get additional Resistances here, or a flat Reduction to Mana Cost of Socketed Skills, but such a combination with the extra Curse can be very expensive |
|
| Min. requirements: 100 maximum Life You can apply an additional Curse Optional affixes: Elemental Resistances Attributes Socketed Attacks have -15 to Total Mana Cost |
|
 The Covenant - a Best-In-Slot item for this build. Level 29 Added Chaos Damage is equal to 471 flat Chaos Damage making it insanely good for our Poisons. The Covenant - a Best-In-Slot item for this build. Level 29 Added Chaos Damage is equal to 471 flat Chaos Damage making it insanely good for our Poisons. |
|
| Socketed Gems are Supported by Level 29 Added Chaos Damage Skills gain a Base Life Cost equal to 100% of Base Mana Cost +(20-30) to Intelligence (210-250)% increased Energy Shield 10% increased maximum Life |
|
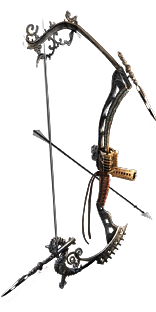
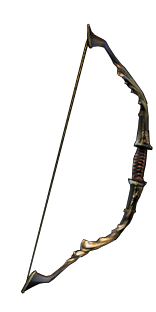 (Weapon) Darkscorn - another BiS Item for this build. It offers insane damage to Poison and high base DPS. It also makes you take 1/4 of Physical Damage as Chaos Damage for extra synergy with Divine Flesh. (Weapon) Darkscorn - another BiS Item for this build. It offers insane damage to Poison and high base DPS. It also makes you take 1/4 of Physical Damage as Chaos Damage for extra synergy with Divine Flesh. |
|
| +(15-25)% to Global Critical Strike Multiplier (60-80)% increased Physical Damage Adds (15-20) to (25-30) Physical Damage 20% increased Attack Speed (15-30)% increased Global Accuracy Rating 25% of Physical Damage Converted to Chaos Damage 25% of Physical Damage from Hits taken as Chaos Damage 20% chance for Poisons inflicted with this Weapon to deal 300% more Damage |
|
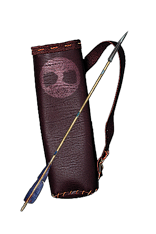 (Weapon) Rare Quiver - aim for a high Chaos DoT multiplier and maximum Life, and as many remaining Damaging mods as you can afford to get. (Weapon) Rare Quiver - aim for a high Chaos DoT multiplier and maximum Life, and as many remaining Damaging mods as you can afford to get. |
|
| Min. requirements: 60 maximum Life 20% Chaos Damage over Time Multiplier Optional affixes: increased Damage with Bow Skills Gain (10-15)% of Physical Damage as Extra Chaos Damage Added Chaos damage to Attacks Attack Speed #% Chance to Gain Onslaught on Kill Elemental Resistances |
|
 (Boots) Rare Boots - with high defensive stats, Life, and Movement Speed bonus. Eldritch modifiers here are nice to have, but not necessary. (Boots) Rare Boots - with high defensive stats, Life, and Movement Speed bonus. Eldritch modifiers here are nice to have, but not necessary. |
|
| Min. requirements: 70 maximum Life 40% Chaos Resistance 40 Intelligence 25% increased Movement Speed Optional affixes: Elemental Resistances Eldritch Implicits: Poisons you inflict deal Damage 9% faster 5% increased Action Speed |
|
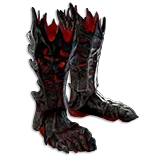 (Boots) Annihilation's Approach - It grants you Adrenaline biff which results in more Damage that is twice as effective with Wilma's Requital. To sustain the Fire Damage you will need the Master Surgeon passive, and a Sorrow of the Divine with the Life Flask with increased Life Recovery permanently active, which is troublesome. (Boots) Annihilation's Approach - It grants you Adrenaline biff which results in more Damage that is twice as effective with Wilma's Requital. To sustain the Fire Damage you will need the Master Surgeon passive, and a Sorrow of the Divine with the Life Flask with increased Life Recovery permanently active, which is troublesome. |
|
| Grants Level 20 Approaching Flames Skill (60-100)% increased Armour and Evasion 30% increased Movement Speed Cannot be Chilled Cannot be Frozen Take 10000 Fire Damage per Second while Flame-Touched Gain Adrenaline when you become Flame-Touched Lose Adrenaline when you cease to be Flame-Touched |
|
| Boot enchantment: 16% increased Attack and Cast Speed if you've Killed Recently Adds 120 to 180 Chaos Damage if you've taken a Critical Strike Recently |
|
 (Belt) Rare Belt - aim for high defensive stats here and possibly Strength for attribute requirements (Belt) Rare Belt - aim for high defensive stats here and possibly Strength for attribute requirements |
|
| Min. requirements: 90 maximum Life 90% Total Elemental Resistances 40 Strength Optional affixes: Chaos Resistance Flasks applied to you have #% increased Effect |
|
 (Amulet) Rare Amulet - Life and Damage over Time multipliers are the most important stats for your amulet. Other than that, look for missing Attributes and Resistances (Amulet) Rare Amulet - Life and Damage over Time multipliers are the most important stats for your amulet. Other than that, look for missing Attributes and Resistances |
|
| Min. requirements: 80 maximum Life 20% Chaos Damage over Time Multiplier Strength and Intelligence 30% Chaos Resistance Optional affixes: 20% Damage over Time Multiplier Elemental Resistances Adds # to # Chaos Damage to Attacks |
|
| Recommended Anointments: Dirty Techniques |
|
 (Ring) Rare Rings - just basic stats here like Life, Resistances, and Attributes if needed. You can also get Despair on Hit to automate your Curse setup (Ring) Rare Rings - just basic stats here like Life, Resistances, and Attributes if needed. You can also get Despair on Hit to automate your Curse setup |
|
| Min. requirements: 70 maximum Life 80% Total Elemental Resistances 30% Chaos Resistance Optional affixes: Attributes Channeling skills have -3 to total Mana Cost Curse enemies with Despair on Hit, with 20% increased Effect |
|
 (Ring) Circle of Nostalgia - can grant very high bonus Damage and possibly a lot of Chaos Resistance which boosts your defenses (Ring) Circle of Nostalgia - can grant very high bonus Damage and possibly a lot of Chaos Resistance which boosts your defenses |
|
| +(9-13)% to Chaos Resistance <One to three random Synthesis implicit modifiers> +(10-20) to all Attributes Adds (15-20) to (21-30) Chaos Damage +(17-23)% to Chaos Resistance <Two Random Herald of Agony modifiers> Recommended modifiers: (40-60)% increased Chaos Damage while affected by Herald of Agony Herald of Agony has (40-60)% increased Buff Effect |
|
 (Ring) Mokou's Embrace - With these Rings, you can get almost 200% increased Attack Speed after applying Catalysts on them, and Ignite on your character. You can do so with a low-level Forbidden Rite. (Ring) Mokou's Embrace - With these Rings, you can get almost 200% increased Attack Speed after applying Catalysts on them, and Ignite on your character. You can do so with a low-level Forbidden Rite. |
|
| +(20-30)% to Fire Resistance +(25-40)% to Cold Resistance (25-40)% increased Attack Speed while Ignited (25-40)% increased Cast Speed while Ignited +25% chance to be Ignited All Damage Taken from Hits can Ignite you |
|
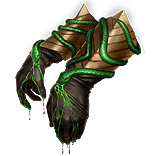 (Gloves) Snakebite - You should be able to generate Frenzy charges, making these Gloves the most appealing option. It increases Attack Speed, Accuracy, and DoT Multiplier per Frenzy Charge. (Gloves) Snakebite - You should be able to generate Frenzy charges, making these Gloves the most appealing option. It increases Attack Speed, Accuracy, and DoT Multiplier per Frenzy Charge. |
|
| (150-180)% increased Evasion Rating +(60-70) to maximum Life 2% increased Attack Speed per Frenzy Charge 6% increased Accuracy Rating per Frenzy Charge 10% reduced Frenzy Charge Duration per Frenzy Charge Attacks have 60% chance to Poison while at maximum Frenzy Charges +5% to Damage over Time Multiplier for Poison per Frenzy Charge |
|
 (Jewel) Large Cluster Jewel - you should get two Large Cluster Jewels which can offer bonuses to Chaos Damage or Bow Damage/DoT. Unwaveringly Evil offers extra protection from Stuns, and Fuel the Fight is very useful when it comes to Mana management (Jewel) Large Cluster Jewel - you should get two Large Cluster Jewels which can offer bonuses to Chaos Damage or Bow Damage/DoT. Unwaveringly Evil offers extra protection from Stuns, and Fuel the Fight is very useful when it comes to Mana management |
|
| Recommended affixes: 1 Added Passive Skill is Touch of Cruelty 1 Added Passive Skill is Unholy Grace 1 Added Passive Skill is Unwaveringly Evil 1 Added Passive Skill is Fuel the Fight 1 Added Passive Skill is Martial Prowess 1 Added Passive Skill is Tempered Arrowheads |
|
 (Jewel) Medium Cluster Jewel - you can get up to four Medium Cluster Jewels. One should be Flask focused while remaining ones should be used to boost your Damage (Jewel) Medium Cluster Jewel - you can get up to four Medium Cluster Jewels. One should be Flask focused while remaining ones should be used to boost your Damage |
|
| Recommended affixes: 1 Added Passive Skill is Mender's Wellspring 1 Added Passive Skill is Spiked Concoction 1 Added Passive Skill is Circling Oblivion 1 Added Passive Skill is Eternal Suffering |
|
 (Jewel) Small Cluster Jewels - you can get very high Maximum Chaos Resistances by using Born on Chaos notable. It's very effective since it will affect every type of Damage you take. (Jewel) Small Cluster Jewels - you can get very high Maximum Chaos Resistances by using Born on Chaos notable. It's very effective since it will affect every type of Damage you take. |
|
| Recommended affixes: 1 Added Passive Skill is Born of Chaos |
|
 (Jewel) Rare Jewels - these should provide extra Life and damage bonuses (Jewel) Rare Jewels - these should provide extra Life and damage bonuses |
|
| Recommended affixes: Maximum Life Chaos Damage over Time Multiplier Optional affixes: Damage with Poison Attack Speed Poison Duration Elemental Resistances Attributes |
|
 (Jewel) Abyss Jewels - try finding similar stats to that on the regular Jewels. Obviously, if you are missing Resistances, focus on those primarily here (Jewel) Abyss Jewels - try finding similar stats to that on the regular Jewels. Obviously, if you are missing Resistances, focus on those primarily here |
|
| Recommended affixes: Maximum Life Optional affixes: Added Physical/Chaos Damage to Attacks Chance to gain Phasing on Kill Resistances |
|
 (Jewel) Glorious Vanity - allows you to convert Supreme Ego to Divine Flesh, which effectively reduces Elemental Damage taken by your character by approximately 30% (depending on your Chaos Resistance). (Jewel) Glorious Vanity - allows you to convert Supreme Ego to Divine Flesh, which effectively reduces Elemental Damage taken by your character by approximately 30% (depending on your Chaos Resistance). |
|
| Bathed in the blood of (100-8000) sacrificed in the name of (Ahuana-Doryani-Xibaqua) Passives in radius are Conquered by the Vaal Historic |
|
 (Jewel) Rain of Splinters - Reduces each Totem's Damage, but makes them fire two extra Projectiles, which is often a good deal. (Jewel) Rain of Splinters - Reduces each Totem's Damage, but makes them fire two extra Projectiles, which is often a good deal. |
|
| (50-30)% reduced Totem Damage Totems fire 2 additional Projectiles |
|
 (Flask) The Sorrow of the Divine - With it, you may Recover ES as fast as Life, which is good if you use this ES to mitigate the constant damage you take from Annihilation's Approach. (Flask) The Sorrow of the Divine - With it, you may Recover ES as fast as Life, which is good if you use this ES to mitigate the constant damage you take from Annihilation's Approach. |
|
| Creates Consecrated Ground on Use (25-50)% increased Duration Zealot's Oath during Effect Life Recovery from Flasks also applies to Energy Shield during Effect |
|
 Dying Sun - this Flask is very good for Map clear if you don't have any source of additional Projectiles elsewhere, but is rather weak in Single-Target scenario Dying Sun - this Flask is very good for Map clear if you don't have any source of additional Projectiles elsewhere, but is rather weak in Single-Target scenario |
|
| (125-150)% increased Charges per use (60-40)% less Duration (10-20)% increased Area of Effect during Flask Effect Skills fire 2 additional Projectiles during Flask Effect |
|
Other suggested Flasks:
|
|
    |
|
|
If you have any other build requests, please leave that in the comments below.
Pictures used in this article are the intellectual property of Grinding Gear Games.
