Scorching Ray Max Block Guardian Templar - Odealo's Crafty Guide
Extremely tank Righteous Fire/Scorching Ray Guardian build which can reach nearly 20,000 Energy Shield and massive Armour BonusesScorching Ray
Righteous Fire
Low-Life Guardian Build
Updated for Patch 3.8
The Best Crafty Guides by Odealo
Estimated budget: high

| Guide notes |
| November 4, 2019 -Updated for Patch 3.8 November 5, 2019 -Added gameplay video |
Guardian is one of the best Tank/Support Classes in the Path of Exile. This build is based on maximizing your Maximum Mana and converting it to Energy Shield, which allows us to reach nearly 20,000 Energy Shield via Guardian's Passives, and Watcher's Eye Jewel. On top of that, by using Memory Vault and Shavronne's Wrappings to reserve our Life for extra Auras, we can reach around 40,000 Armour. This build uses Righteous Fire, as it scales with your Maximum ES, and also Scorching Ray since we can freely cast other Spells while RF is active. The previously mentioned stats, combined with Time of Need Passive, allows you to indefinitely sustain Righteous Fire, and pretty much become immortal in most encounters. This build's core mechanics are presumably the only setup that allows you to take down Uber Elder while afk. This should give you the general idea of how much potential this build carries.
This is primarily a Support Build as it uses 6-7 Auras, but with high defenses and solid DPS, it's also a fully viable Solo build that's capable of taking down all the end-game Bosses in PoE.
Full list of our other Path of Exile Builds is in this article: Odealo's Crafty Guides - Full List
1. Basic gameplay
This is one of the tankiest builds in Path of Exile. All you have to do is pop your Righteous Fire and progress through Maps. Some enemies may require you to finish them off with Scorching Ray which has increased damage with each stage. Unless you have entered a "Reduced Life Regen" Map, you will be immortal, and you don't really have to put much attention to your Energy Shield Pool. This build also deals quite solid AoE/Fire Damage Over Time, but in that manner, you will find it slower than other Meta builds in current Patch. Blight encounters aren't also the optimal type of battles this Guardian likes to face, but it's overall a very solid build that works great a Support, Lab Farmer, or casual Map farmer.
|
This video was recorded on a level 91 Guardian on Standard mode. We had just medium budget gear which gave us approximately 13,000 Energy Shield and 40,000 Armour Rating |
|
|
2. Build's PROS & CONS
| PROS |
|
| CONS |
|
3. Leveling tips
Leveling this Guardian is quite easy but you should be prepared to spend a bunch of Regrets when you switch to your Final Build after level 80+. The first couple levels can seem slow if you can't afford any of the recommended Uniques, but as soon as you get Holy Fire node and Pyre rings, your Searing Bond/RF Totem becomes extremely powerful and melts everything on your way. As a Guardian character, you should have no problem with your defenses, which helps with smooth leveling.
Suggested leveling gem setups:
| Searing Bond Totem setup | |
 |
Searing Bond - a totem spell, that connects your other totems and yourself with a beam of fire, dealing damage every second |
 |
Burning Damage Support - Searing Bond's damage is considered burning damage, so this is the gem to go |
 |
Elemental Focus Support - another good option |
| Righteous Fire setup | |
 |
Righteous Fire - powerful spell that deals insane damage at the cost of its' casters Life. In order to remove the downside of this Spell, you can link it to the Spell Totem Support Gem, which will cause the Totem loose life instead |
 |
Spell Totem Support - will be used to cast the RF spell and deal damage |
 |
Burning Damage Support |
 |
Elemental Focus Support - will greatly increase the Damage of your Totems |
| Utility Gems | |
 |
Stone Golem - provides great Life Regeneration bonuses |
 |
Flammability - great Curse if you need some extra Damage while leveling |
 |
Herald of Ash - grants extra Fire Spell Damage and causes fiery AoE Explosions on killing enemies |
 |
Storm Brand - an extremely important part of this build. It will proc Elemental Equilibrium by hitting enemies with Lightning |
Bandits:
Kill all the Bandits for two additional Passive Points
Leveling Skill Trees:
34 Points Skill Tree
Priorities: 1) Amplify 2) Light of Divinity 3) Ancestral Bond 4) Holy Fire
62 Points Skill Tree
Priorities: 1) Elemental Overload 2) Breath of Flames 3) Cruel Preparation 4) Elemental Equilibrium
Passive Skill Tree before respeccing to Energy Shield/Low-Life at around level 80+
104 Points Skill Tree (level 81) (Health)
Priorities: 1) Blood Siphon 2) Growth and Decay 3) Arsonist 4) Heart of the Warrior
104 Points Skill Tree (level 81) (Energy Shield/Low-Life)
Recommended leveling items:
 Ashcaller - is an extremely powerful leveling wand. Grands amazing damage bonuses to both your Searing Bond and RF Spell Totems, and may work fairly well till late game Ashcaller - is an extremely powerful leveling wand. Grands amazing damage bonuses to both your Searing Bond and RF Spell Totems, and may work fairly well till late game |
|
| (18-22)% increased Spell Damage Adds (10-14) to (18-22) Fire Damage Adds (4-6) to (7-9) Fire Damage to Spells (40-50)% increased Burning Damage (16-22)% chance to Ignite 10% chance to Trigger Level 8 Summon Raging Spirit on Kill |
|
 Pyre - this is one of the best leveling Rings for this build and can be used very early in the game. Pyre provides one of the highest Burning Damage bonuses Pyre - this is one of the best leveling Rings for this build and can be used very early in the game. Pyre provides one of the highest Burning Damage bonuses |
|
| +(20-30)% to Cold Resistance +(25-35)% to Fire Resistance (60-80)% increased Burning Damage 40% of Cold Damage Converted to Fire Damage 10% increased Light Radius Ignited Enemies you hit are destroyed on Kill |
|
 Trolltimber Spire - quite fine leveling shield. It provides good defenses, and increases your Totem's AoE. The Leech will not work with DoT caused by RF or Searing Bond Totems though Trolltimber Spire - quite fine leveling shield. It provides good defenses, and increases your Totem's AoE. The Leech will not work with DoT caused by RF or Searing Bond Totems though |
|
| 3% reduced Movement Speed (Hidden) +(20-30) to maximum Life (130-150)% increased Armour +(40-60) to maximum Life 0.5% of Life Regenerated per second 15% increased Area of Effect for Skills used by Totems 0.5% of Damage dealt by your Totems is Leeched to you as Life |
|
 Lavianga's Wisdom - decent weapon for leveling with SB/RF Totems. It is inferior to Ashcaller in terms of raw DPS bonuses though Lavianga's Wisdom - decent weapon for leveling with SB/RF Totems. It is inferior to Ashcaller in terms of raw DPS bonuses though |
|
| 10% reduced Enemy Stun Threshold +(10-20) to maximum Life +(10-20) to maximum Mana (130-160)% increased Physical Damage 5% reduced Movement Speed 10% increased Area of Effect of Area Skills (10-15)% increased Area Damage |
|
|
|
|
| 3% reduced Movement Speed (Hidden) Item has no level requirement and Energy Shield (Hidden) Item has 6 White Sockets and is fully linked (Hidden) |
|
4. Final Skill tree, Ascendancy Points and Pantheon
Final skill tree:
115 Points Final Skill Tree
115 Points Path of Building link
Ascendancy points:
Preferably in that order:
- Radiant Crusade
- Unwavering Crusade
- Bastion of Hope
- Time of Need
After you switch to Low-Life and Energy Shield respect the first two Passives for Radiant Faith and Unwavering Faith. The listed ones are so much better for leveling
Pantheon:
Major God: Soul of Arakaali 5% reduced Damage taken from Damage Over Time; 10% chance to Avoid Lightning Damage when Hit
Minor God: Soul of Tukohama While stationary, gain 2% additional Physical Damage Reduction each second, up to a maximum of 8%
5. Final Gem setup
| [DPS] Scorching Ray setup | |
 |
Scorching Ray - your main "active" Spell when using this build. Since Righteous Fire is always and passively active, Scorching Ray will keep you occupied on Maps |
 |
Efficacy Support - increases Spell Damage and Damage over Time |
 |
Burning Damage Support - one of the most important DPS support gems in this setup |
 |
Swift Affliction Support - increases your Damage over Time |
 |
Controlled Destruction Support - increases Spell Damage at the cost of Critical Strike Chance. Since Scorching Ray can't Crit, there is basically no downside to using this Gem |
 |
Elemental Focus Support - increases Elemental Damage, but your Supported Spell won't apply Ignite (Scorching Ray can't do it anyway) |
| [DPS] Righteous Fire | |
 |
Vaal Righteous Fire - one of the core Spells used in this build. It's an Area Spell that deals high DoT around your character at the cost of your Life and Energy Shield. Vaal Part of this Spell deals more damage for a short duration |
 |
Burning Damage Support |
 |
Elemental Focus Support |
 |
Concentrated Effect Support |
| [UTILITY] Storm Brand | |
 |
Storm Brand - it's used to trigger Elemental Equilibrium by hitting enemies with Lightning Element and Elemental Overload since your other Spells can't Crit. |
 |
Curse on Hit Support - will make Storm Brand apply supported Curse |
 |
Increased Critical Strikes Support - makes it easier to proc Elemental Overload |
 |
Elemental Weakness - reduces Elemental Resistances of affected enemies |
| [UTILITY] Auras part 1 (in Prism Guardian Shield) |
|
 |
Malevolence - increases Damage over Time and Skill Effect Duration |
 |
Vaal Discipline - increases maximum Energy Shield. Vaal Discipline makes ES Recovery to be unaffected by damaging, giving us some extra defenses (not that it's necessary) |
 |
Vaal Impurity of Fire - increases your maximum Fire Resistance, reducing the degeneration damage from Righteous Fire |
| [UTILITY] Auras part 2 | |
 |
Vitality - increases your Life Recovery per second |
 |
Determination - increases your Armour Rating |
 |
Clarity - grants increased Mana Regeneration Rate |
 |
Enlighten Support - reduces the Mana Reservation Cost of Supported Spells. This is optional, use only when you need more unreserved Mana |
| [MOBILITY] Flame Dash setup | |
 |
Flame Dash - your main mobility Spell. Each Cast will grant Arcane Surge buff which increases our Spell Damage |
 |
Faster Casting Support |
 |
Arcane Surge Support - grants increased Spell Damage after you spend enough Mana on Supported Spell. Keep this Gem at level 7 to proc with each Cast |
|
|
5. Gear Setup
Righteous Fire/Scorching Ray Guardian is, in general, quite an expensive build with high Item Requirements. However, for the stats this build offers, it's still a reasonable choice, and none of the items listed below will cost a fortune. Below you will find all the required for this build. It offers very little flexibility, and potential improvements come with more Attributes, higher Mana and Energy Shield bonuses.
If you would like to try this build, but you are unable to afford some of the required items, we are delighted to invite you to visit our PoE Currency marketplace. You will find the links to it on top of the page on the main bar.
|
Stat priorities on items:
|
 (Helmet) Memory Vault - a mandatory Helmet for this build which grants insane amounts of Mana and Armour (Helmet) Memory Vault - a mandatory Helmet for this build which grants insane amounts of Mana and Armour |
|
| +(130-160) to maximum Energy Shield +(150-200) to maximum Mana (30-40)% increased Mana Regeneration Rate +(20-30)% to Fire Resistance 10% increased Mana Reserved Gain Armour equal to your Reserved Mana |
|
| Helmet enchantments: Righteous Fire grants 30% increased Spell Damage 12% increased Scorching Ray Cast Speed |
|
 (Weapon) Rare Crafted Spectre - Damage bonuses should be your secondary priority, as you need Mana and Attributes mainly. Either way, self-crafting a decent Sceptre shouldn't be expensive (Weapon) Rare Crafted Spectre - Damage bonuses should be your secondary priority, as you need Mana and Attributes mainly. Either way, self-crafting a decent Sceptre shouldn't be expensive |
|
| Min. requirements: 60% increased Spell/Fire Damage 45 Strength 45 Intelligence 100 Maximum Mana Optional affixes: Fire Damage over Time Multiplier Damage over Time |
|
 (Shield) Prism Guardian - another mandatory Unique item required for this build. It allows us to socket Auras with Blood Magic and reduced Mana Reservation Cost (Shield) Prism Guardian - another mandatory Unique item required for this build. It allows us to socket Auras with Blood Magic and reduced Mana Reservation Cost |
|
| +12% to all Elemental Resistances +2 to Level of Socketed Aura Gems Socketed Gems have Blood Magic Socketed Gems have 25% reduced Mana Reservation +(20-30) to Dexterity +25% to all Elemental Resistances |
|
 (Body Armour) Shavronne's Wrappings - a foundation of any Low-Life Build. It allows us to run at nearly 0 Life by protecting it from Chaos Damage (Body Armour) Shavronne's Wrappings - a foundation of any Low-Life Build. It allows us to run at nearly 0 Life by protecting it from Chaos Damage |
|
| (3-10)% increased Spell Damage (100-150)% increased Energy Shield 10% faster start of Energy Shield Recharge +(30-40)% to Lightning Resistance Reflects 1 to 250 Lightning Damage to Melee Attackers Chaos Damage does not bypass Energy Shield |
|
 (Boots) Rare Boots - preferably with high Energy Shield (Boots) Rare Boots - preferably with high Energy Shield |
|
| Min. requirements: 55 maximum Mana 35 Intelligence 35% Cold Resistance 25% increased Movement Speed Optional affixes: high Energy Shield |
|
| (80-120)% increased Armour and Energy Shield +4 Accuracy Rating per 2 Intelligence +1 Life per 4 Dexterity +2 Mana per 4 Strength 2% increased Energy Shield per 10 Strength 2% increased Evasion Rating per 10 Intelligence 2% increased Melee Physical Damage per 10 Dexterity |
|
 (Belt) Rare Belt - preferably Crystal Belt for the highest base Energy Shield (Belt) Rare Belt - preferably Crystal Belt for the highest base Energy Shield |
|
| Min. requirements: 100 maximum Energy Shield 50 maximum Mana 100% Total Elemental Resistances Optional affixes: Strength Increased Damage% (Crafting Bench) |
|
 (Amulet) Presence of Chayula - the BiS Amulet for most of the Low-Life builds. It grants very high bonus Energy Shield and Stun Immunity (Amulet) Presence of Chayula - the BiS Amulet for most of the Low-Life builds. It grants very high bonus Energy Shield and Stun Immunity |
|
| +(10-16) to all Attributes 30% increased Rarity of Items found +60% to Chaos Resistance Cannot be Stunned 20% of Maximum Life Converted to Energy Shield |
|
  (Ring) Rare Rings (Ring) Rare Rings |
|
| Min. requirements: 40 maximum Energy Shield 50 maximum Mana 50 Strength and/or Intelligence 60% Total Elemental Resistances Optional affixes: %maximum Mana (Cerulean Rings only) |
|
 (Jewel) Grand Spectrum - you can use three of them or none at all. They will grant significant Maximum Mana bonus (Jewel) Grand Spectrum - you can use three of them or none at all. They will grant significant Maximum Mana bonus |
|
| Gain 30 Mana per Grand Spectrum | |
 (Jewel) Healthy Mind - will grand insane Bonus Mana if Socketed right above Witch's starting point. It will make both Cruel Preparation and Heart and Souls' Passives to apply to Mana instead of Life. Sadly, as of Patch 3.8, we can only use one of these (Jewel) Healthy Mind - will grand insane Bonus Mana if Socketed right above Witch's starting point. It will make both Cruel Preparation and Heart and Souls' Passives to apply to Mana instead of Life. Sadly, as of Patch 3.8, we can only use one of these |
|
| (15-20)% increased maximum Mana Increases and Reductions to Life in Radius are Transformed to apply to Mana at 200% of their value |
|
 (Jewel) Watcher's Eye - grabbing Watcher's Eye which converts some of Mana Reserved into Energy Shield is pretty much a must-have here (Jewel) Watcher's Eye - grabbing Watcher's Eye which converts some of Mana Reserved into Energy Shield is pretty much a must-have here |
|
| Min. requirements: Gain (12-18)% of Maximum Mana as Extra Maximum Energy Shield while affected by Clarity |
|
 (Jewel) Rare Jewels - just get some extra Energy Shield and DPS bonuses here. Fire Damage over Multiplier will provide the biggest boost to your RF and SR (Jewel) Rare Jewels - just get some extra Energy Shield and DPS bonuses here. Fire Damage over Multiplier will provide the biggest boost to your RF and SR |
|
| Min. requirements: maximum Energy Shield Fire Damage over Time Multiplier Optional affixes: maximum Mana Damage over Time Attributes |
|
 (Flask) Cinderswallow Urn - grants high Energy Shield Recovery, Onslaught, and other Veiled bonus (Flask) Cinderswallow Urn - grants high Energy Shield Recovery, Onslaught, and other Veiled bonus |
|
| Onslaught Recharges 1 Charge when you Consume an Ignited corpse Enemies Ignited by you during Flask Effect take 10% increased Damage Recover (1-3)% of Life when you Kill an Enemy during Flask Effect Recover (1-3)% of Mana when you Kill an Enemy during Flask Effect Recover (1-3)% of Energy Shield when you Kill an Enemy during Flask Effect <One Veiled Mod> |
|
 (Flask) Witchfire Brew - grants high bonus Damage over Time making it one of the best Utility Flasks for this build (Flask) Witchfire Brew - grants high bonus Damage over Time making it one of the best Utility Flasks for this build |
|
| +3000 to Armour (14-20)% Chance to Block during Flask effect (6-10)% Chance to Block Spells |
|
Other suggested Flasks:
|
|
     |
|
|
If you have any other build requests please leave that in the comments below.
Pictures used in this article are the intellectual property of Grinding Gear Games.


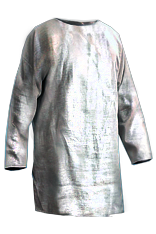
 Tabula Rasa - one of the best, and certainly the most popular leveling item in Path of Exile. Can be used to build extremely powerful Totem setups