
Sacrifice Hexblast Occultist
A very powerful setup for Occultist that accumulates high amounts of maximum Life to boost Damage with the new Sacrifice Support GemSacrifice Hexblast
Occultist Build
Created for Patch 3.22
The Best Crafty Guides by Odealo
| Guide notes |
| October 9, 2023 -Build created |
| Build Overview | |||
| Tags: [CHAOS] [CASTER] [LIFE] [CRIT] | |||
|
Budget: Defenses: |
|
Boss DPS: AoE: |
|
One of the new Support Gems introduced in Path 3.22 is the Sacrifice Support. Every time you cast a Spell you will lose 25% of your current Life, and a big portion of lost Life will be added to your Spell as a Chaos Damage. The list of Spells that synergize with this Support is rather short. The best candidate for that is the Hexblast Spell. It has a very high Effectiveness of Added Damage and a unique gameplay style that rewards slow Hits, which gives you time to regain your current Life between Casts, all of those qualities are important for the Sacrifice Support.
With the Dissolution of the Flesh Unique Jewel, you can obtain very high amounts of maximum Life, up to 10k. Its unique mechanic changes the way your maximum Life works. When you take Damage you will Reserve your maximum Life for the same amount instead of losing it. If you stop taking Damage for at least 2 seconds, all Reservation is undone. This allows you to freely Sacrifice all your maximum Life without any worries about dying. With the Eternal Youth Keystone, you will constantly recharge 1/3 of your maximum Life per second. It is important for the Sacrifice Support, as its bonus depends on your current Life, not the maximum limit.
The Hexblast is a very powerful and unique Spell. It deals Chaos Damage but it can inflict Elemental Ailments and is resisted by the lowest Enemy Resistances. Hexblast deals insanely high but slow Hits, which makes it very easy to apply Freeze and Shock on your Enemies. By default, it deals Damage to a single Enemy, but if the target is Hexed it will deal much more Damage in the Area around it, and remove the Hex. You can use the Profane Proxy Ring to make your Skitterbots apply a Curse of your choice to all Enemies in their radius or use the Blasphemy Support to turn your Hex into Aura.
The Build is both tanky and squishy due to the Dissolution of the Flesh. You will have a very high amount of Life, but you cannot survive sustained Damage for too long. The Petrified Blood is especially powerful in this setup, as it reduces the Damage taken by 40%, and the Damage over time effect is negated by the Life Reservation mechanic.
You can also check our other Path of Exile builds right over here Odealo's Crafty Guides - Full List
1. Gameplay
Use Hexblast on Cursed Enemies. The Curse should be applied automatically by your Skitterbots or Blasphemy Aura. You can automate the Assassin Mark by using Shield Charge and Glove Enchant or Cast it manually for better Mark Effectiveness. To move around use Shield Charge and Flame Dash. You will sometimes have to back up a bit and wait 2 seconds to clear out Life Reservation.
|
|
|
|
2. Build's PROS & CONS
| PROS |
|
| CONS |
|
3. Leveling tips
You can level up as a generic Spell Caster Witch, you don't have to use Chaos Spells or Sacrifice Support straight away. Cold Spells like Freezing Pulse seem to work out the best, as the Occultist's Notable lowers both the Chaos and Cold Resistance of nearby Enemies. Hexblast is also a great choice, but you will need level 28 to start using it.
Suggested leveling Gem setups:
| Freezing Pulse setup | |
 |
Freezing Pulse - creates a Projectile that deals Cold Damage and Pierces all targets. |
 |
Added Cold Damage Support - adds a flat amount of Cold Damage to your Spells. |
 |
Lesser Multiple Projectiles Support - adds 2 more Projectiles but lowers their Damage. |
 |
Arcane Surge Support - grants you Spell Damage, Cast Speed, and Mana Regeneration. |
 |
Increased Critical Damage Support - increases your Damage with Critical Strikes. |
 |
Increased Critical Strikes Support - improves your Chances of landing a Critical Strike. |
| Aura setup | |
 |
Petrified Blood - allows you to benefit from the Pain Attunement Keystone for a 30% more Spell Damage bonus. |
 |
Clarity - grants you Mana Regeneration which is very important for Casting your Spells. |
 |
Vitality - this Aura grants you Life Regeneration. You will need it to make the Petrified Blood useful defensively too. |
| Utility setup | |
 |
Flame Dash - a short teleport used to cross terrain gaps. |
 |
Frostbite - lowers Cold Resistances of affected Foes and makes them easier to Freeze. |
 |
Steelskin - it is a Guard Skill that protects you from incoming Damage and disables Bleeds. |
Bandits:
Kill all Bandits to get an additional 2 Passive Tree Skill Points.
Leveling Skill Trees:
35 Points Passive Tree
1) Annihilation 2) Disciple of the Forbidden 3) Assassination 4) Coordination 5) Pain Attunement
70 Points Passive Tree
Allocate:
1) Arcane Potency 2) Purity of Flesh 3) Sovereignty 4) Corruption 5) Heart of Darkness (respec when you equip Cluster Jewels) 6) Retribution
Recommended leveling items:
 Tasalio's Sign - this Ring grants you an insane amount of Cold Damage for your Spells. Tasalio's Sign - this Ring grants you an insane amount of Cold Damage for your Spells. |
|
| Adds (7-10) to (15-20) Cold Damage to Spells and Attacks +(200-300) to Evasion Rating 50% chance to Avoid being Chilled 10% chance to Freeze Adds 40 to 60 Cold Damage against Chilled Enemies |
|
| 12% increased Elemental Damage Adds (2-3) to (5-6) Fire Damage to Spells Adds (2-3) to (5-6) Cold Damage to Spells Adds 1 to (10-12) Lightning Damage to Spells (4-6)% increased Cast Speed (100-140)% increased Critical Strike Chance for Spells |
|
 Tabula Rasa - a mandatory Unique Item for leveling. It grants you easy access to a six-link setup. Tabula Rasa - a mandatory Unique Item for leveling. It grants you easy access to a six-link setup. |
|
| Item has no level requirement and Energy Shield (Hidden) Item has 6 White Sockets and is fully linked (Hidden) |
|
 Goldrim - Elemental Resistances are the only defensive modifier you should care about during the Campaign, and this Helmet provides a lot of them. Goldrim - Elemental Resistances are the only defensive modifier you should care about during the Campaign, and this Helmet provides a lot of them. |
|
| +(30-50) to Evasion Rating 10% increased Rarity of Items found +(30-40)% to all Elemental Resistances Reflects 4 Physical Damage to Melee Attackers Level Requirement reduced by 100 (Hidden) |
|
 Doedre's Tenure - those slow down your Casting Speed, but grant a ton of Spell Damage in the return. Doedre's Tenure - those slow down your Casting Speed, but grant a ton of Spell Damage in the return. |
|
| +(20-50) to Intelligence 100% increased Spell Damage (25-15)% reduced Cast Speed |
|
 Replica Prismweave - it grants a ton of flat Elemental Damage for your Spells. It also increases your Damage during any Flask and provides Elemental Resistances. Replica Prismweave - it grants a ton of flat Elemental Damage for your Spells. It also increases your Damage during any Flask and provides Elemental Resistances. |
|
| (12-24)% increased Global Physical Damage Adds (14-16) to (30-32) Fire Damage to Spells Adds (10-12) to (24-28) Cold Damage to Spells Adds 1 to (60-68) Lightning Damage to Spells +(6-15)% to all Elemental Resistances 30% increased Elemental Damage during any Flask Effect |
|
 Seven-League Step - with high Movement Speed you will travel through the Campaign quickly. It saves you a lot of time. Seven-League Step - with high Movement Speed you will travel through the Campaign quickly. It saves you a lot of time. |
|
| 50% increased Movement Speed Level Requirement reduced by 100 (Hidden) |
|
4. Final Skill Tree, Ascendancy Points, and Pantheon
Final Skill Tree:
103 Points Final Passive Tree (doesn't include Cluster or Unique Jewels)
118 Points Path of Building (PoB) link
Ascendancy points:
Preferably in this order:
- Void Beacon
- Withering Presence
- Profane Proxy
- Unholy Authority
Pantheon:
Major God: Soul of Arakaali: 10% reduced Damage taken from Damage Over Time; Debuffs on you expire 20% faster; +40% Chaos Resistance against Damage Over Time
Minor God: Soul of Abberath: 60% less Duration of Ignite on You; Unaffected by Burning Ground, 10% increased Movement Speed while on Burning Ground
5. Final Gems links
| [DPS] Hexblast setup | |
 |
Hexblast - your main source of Damage. You should use it on a Hexed Enemy to greatly improve the Damage and AoE. It can inflict Elemental Ailments and is resisted by the lowest Enemy's Resistance. |
 |
Sacrifice Support - by using the Skill you will Sacrifice 20% of your current Life to add a portion of it as Chaos Damage to your Spell. Try to regain as much current Life as you can between the Casts to maximize the Damage bonus. |
 |
Lifetap Support - solving Mana Regeneration would require too many resources, so it is better to simply use this Support and pay your Costs with Life instead. |
 |
Increased Critical Damage Support - grants a lot of Critical Strike Multiplier, which is the main way of scaling Damage in this Build. |
 |
Void Manipulation Support - improves your Chaos Damage. The Awakened version also increases the Gem level of Hexblast by 1, but the Divergent Quality grants you Life Leech which is also useful to have. |
 |
Hypothermia Support - improves your Damage against Chilled Enemies. Swap it to Increased Critical Strikes Support if you still lack Critical Strike Chance. |
| [UTILITY] Aura setup | |
 |
Petrified Blood - reduces incoming Damage by 40%, and thanks to the Dissolution of the Flesh you can ignore the DoT effect. It also keeps you at a Low Life status for the purpose of Pain Attunement Keystone. |
 |
Zealotry - improves your Spell Damage and Critical Strike Chance. It also creates Consecrated Ground occasionally. |
 |
Summon Skitterbots - summons 2 Skitterbots that apply Shock and Chill on nearby Enemies. With the Profane Proxy Unique Ring, it will apply a Curse instead. |
 |
Enlighten Support - reduces the amount of Mana Reserved by linked Skills. |
 |
Tempest Shield - grants you a solid amount of Spell Block Chance and makes you immune to Shock. With enough Mana Reservation Efficiency on your Items, you don't have to get a second Enlighten Support for this. |
| [UTILITY] Frostbite setup | |
 |
Frostbite - it lowers the Cold Resistance of affected Foes. It should be socketed in your Ring so it will be automatically applied to nearby Enemies. |
 |
Blasphemy Support (optional) - if you don't have access to the Profane Proxy Ring, you should use this setup instead. It is important to automate the Curse application for smooth gameplay. |
| [UTILITY] Arcanist Brand setup | |
 |
Elemental Weakness - lowers all Elemental Resistances of Affected Foes. Hexblast removes the Curse with the lowest Duration, so it should prioritize the Frostbite instead. |
 |
Frost Bomb - applies Cold Exposure which lowers the Enemy' Cold Resistance. It also lowers their Life Regeneration. |
 |
Arcanist Brand - a Brand that casts all linked Spells in rapid succession. |
 |
Lifetap Support - Casting all those utility Spells would drain your Mana very quickly, so it is better to pay their Costs with Life instead. |
| [UTILITY] Mark setup | |
 |
Assassin's Mark - greatly improves your Critical Strikes and generates Power Charges for you. Marks don't interact with Hexblast. |
 |
Mark on Hit Support - it lowers your Mark effectiveness but makes it easier to apply. It only works with Attacks, so you can use Shield Charge and Glove Enchant for it. |
| [UTILITY] Mobility setup | |
 |
Flame Dash - a quick teleport that can be used to cross terrain gaps or move around a bit faster. |
 |
Withering Step - grants you Phasing and inflicts Withering stacks on nearby foes. |
 |
Arcane Surge Support - spending Mana grants you a buff that improves your Cast Speed. Keep it at a low level to trigger it with every use. |
| [UTILITY] Shield Charge setup | |
 |
Shield Charge - your main Movement Skill. It is a quick charge toward the targeted location, it has no Cooldown, and scales with your Attack and Movement Speed. |
 |
Faster Attacks Support - makes your Shield Charge quicker to use. |
 |
Additional Accuracy Support - if you use a Mark on Hit Support in your setup, you will need a bit of extra Accuracy to reliably Hit your opponents. |
| [UTILITY] Guard setup | |
 |
Steelskin - it absorbs a part of the incoming Damage and disables Bleeding on you. |
|
|
6. Gear Setup
You will need high Maximum Life modifiers on every Gear piece you wear. It is not an Attribute stacking Build, but Strength grants you flat maximum Life and a bit of Damage, so it is also worth having everywhere you can. In terms of Damage, you should look for Cast Speed, Critical Strike Multiplier, Chaos or Spell Damage bonuses, or additional Gem Levels for Hexblast. Energy Shield Recharge Rate will improve your Life Recovery thanks to the Eternal Youth Keystone, which makes the Sacrifice Support more effective.
|
Stat priorities on items:
|
 (Weapon) Divinarius - the best Weapon for this Build. It grants you tons of Damage against Single-target and caps your Critical Strike Chance against Enemies you wouldn't bother to Mark. (Weapon) Divinarius - the best Weapon for this Build. It grants you tons of Damage against Single-target and caps your Critical Strike Chance against Enemies you wouldn't bother to Mark. |
|
| (150-200)% increased Spell Damage Gain (100-200) Life per Enemy Killed Gain (50-100) Mana per Enemy Killed 30% increased Area of Effect (200-250)% increased Critical Strike Chance for Spells if you've Killed Recently +(60-100)% to Critical Strike Multiplier for Spells if you haven't Killed Recently |
|
 (Weapon) Rare Wand - if you are limited by your budget, use a Wand that grants you lots of Spell Damage, Critical Strike Chance and Damage, Cast Speed, and Gem Levels. You can also craft Double Damage Chance there. (Weapon) Rare Wand - if you are limited by your budget, use a Wand that grants you lots of Spell Damage, Critical Strike Chance and Damage, Cast Speed, and Gem Levels. You can also craft Double Damage Chance there. |
|
| Min. requirements: +70% increased Spell Damage +70% increased Critical Strike Chance for Spells +30% to Critical Strike Multiplier for Spells Optional affixes: % increased Cast Speed +1 to Level of all Chaos Spell Skill Gems % increased Cast Speed |
|
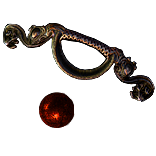 (Shield) Rathpith Globe - grants you tons of Critical Strike Chance and Spell Damage, as you stack a lot of maximum Life. Unfortunately, the Sacrifice from this Shield does not count towards extra Damage from the Sacrifice Support. (Shield) Rathpith Globe - grants you tons of Critical Strike Chance and Spell Damage, as you stack a lot of maximum Life. Unfortunately, the Sacrifice from this Shield does not count towards extra Damage from the Sacrifice Support. |
|
| (10-15)% Chance to Block Spell Damage (120-160)% increased Energy Shield 10% increased maximum Life Sacrifice 10% of your Life when you Use or Trigger a Spell Skill 5% increased Critical Strike Chance for Spells per 100 Player maximum Life 5% increased Spell Damage per 100 Player maximum Life |
|
|
|
|
| Min. requirements: +90 to maximum Life % of Physical Damage from Hits taken as Fire Damage increased Mana Reservation Efficiency (Essence + Eldritch Implicit) Optional affixes: Elemental Resistance Chaos Resistance Attributes |
|
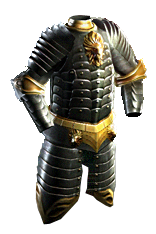 (Body Armour) Rare Armour - it should have the Hunter Influence, so it can grant you additional Spell Critical Strike Chance and improve your maximum Life by up to 10%. It should also grant you flat maximum Life, and be crafted with Physical Damage Taken as Elemental modifier. (Body Armour) Rare Armour - it should have the Hunter Influence, so it can grant you additional Spell Critical Strike Chance and improve your maximum Life by up to 10%. It should also grant you flat maximum Life, and be crafted with Physical Damage Taken as Elemental modifier. |
|
| Min. requirements: +#% to Spell Critical Strike Chance 10% increased maximum Life +110 to maximum Life Optional affixes: Elemental and Chaos Resistance % of Physical Damage from Hits taken as Elemental Damage |
|
 (Amulet) Rare Amulet - here you should look for maximum Life, Cast Speed, Critical Strike Multiplier, and additional Levels for your Gems. It can also provide a bit of Resistances or Attributes. (Amulet) Rare Amulet - here you should look for maximum Life, Cast Speed, Critical Strike Multiplier, and additional Levels for your Gems. It can also provide a bit of Resistances or Attributes. |
|
| Min. requirements: +60 to maximum Life +30% to Global Critical Strike Multiplier +15% increased Cast Speed Optional affixes: Elemental and Chaos Resistance Attributes +1 to Level of all Chaos Skill Gems % increased Damage while Leeching |
|
| Recommended anointment: Whispers of Doom |
|
 (Boots) Rare Boots - your Boots should provide you with high Movement Speed, maximum Life, and a Chance to Avoid being Poisoned, which you can obtain from Eldritch Implicits. It can also provide immunity against Freeze and lacking Atributes or Resistances. (Boots) Rare Boots - your Boots should provide you with high Movement Speed, maximum Life, and a Chance to Avoid being Poisoned, which you can obtain from Eldritch Implicits. It can also provide immunity against Freeze and lacking Atributes or Resistances. |
|
| Min. requirements: +70 to maximum Life 30% increased Movement Speed % chance to Avoid being Poisoned +60% to Elemental Resistance Optional affixes: % chance to Avoid being Frozen Action Speed Attributes |
|
 (Gloves) Rare Gloves - on gloves look mostly for maximum Life, Resistances, Attributes, and an empty Prefix so you can craft useful Damage modifiers. Eldritch Implicits are also useful here, as they can provide you with a Chance to Unnerve Enemies, apply Exposure, or grant you Life Leech. (Gloves) Rare Gloves - on gloves look mostly for maximum Life, Resistances, Attributes, and an empty Prefix so you can craft useful Damage modifiers. Eldritch Implicits are also useful here, as they can provide you with a Chance to Unnerve Enemies, apply Exposure, or grant you Life Leech. |
|
| Min. requirements: +80 to maximum Life +60% to Elemental Resistance Optional affixes: Attributes % increased Damage while Leeching % increased Damage during any Flask Effect % chance to Unnerve Enemies for 4 seconds on Hit % of Chaos Damage Leeched as Life Inflict Cold Exposure on Hit, applying -#% to Cold Resistance |
|
 (Belt) Rare Belt - a proper Belt can grant you tons of maximum Life through the flat and percentage modifiers. It should also grant you lacking Resistances and Attributes. (Belt) Rare Belt - a proper Belt can grant you tons of maximum Life through the flat and percentage modifiers. It should also grant you lacking Resistances and Attributes. |
|
| Min. requirements: +70 to maximum Life +60% to Elemental Resistance Optional affixes: % increased Life Attributes Chaos Resistance Flask Charges gained/used |
|
 (Jewel) Rare Abyss Jewel - in your Stygian Vise Belt you can socket additional Abyss Jewel, which should have a high maximum Life bonus and a Corrupted Implicits that grants you immunity against Corrupting Blood. It can also improve your Cast Speed or provide Resistances and Attributes. (Jewel) Rare Abyss Jewel - in your Stygian Vise Belt you can socket additional Abyss Jewel, which should have a high maximum Life bonus and a Corrupted Implicits that grants you immunity against Corrupting Blood. It can also improve your Cast Speed or provide Resistances and Attributes. |
|
| Min. requirements: +30 to maximum Life Corrupted Blood cannot be inflicted on you Recommended affixes: Resistances Attributes % increased Cast Speed if you've dealt a Critical Strike Recently |
|
 (Ring) Profane Proxy - this Ring automates the Hex application with your Skitterbots. It is more beneficial to disable the Shocking Skitterbot, as you will inflict much more powerful Shocks by yourself. (Ring) Profane Proxy - this Ring automates the Hex application with your Skitterbots. It is more beneficial to disable the Shocking Skitterbot, as you will inflict much more powerful Shocks by yourself. |
|
| +3 to Level of Socketed Curse Gems +(20-30)% to Cold Resistance +(20-30)% to Lightning Resistance Left Ring Slot: Your Chilling Skitterbot's Aura applies Socketed Hex Curse instead Right Ring Slot: Your Shocking Skitterbot's Aura applies Socketed Hex Curse instead |
|
 (Ring) Rare Ring - here you should look for modifiers to maximum Life, increased Cast Speed, Critical Strike Multiplier, and lacking Resistances and Attributes. You can also craft additional Minimum Frenzy or Endurance Charges. (Ring) Rare Ring - here you should look for modifiers to maximum Life, increased Cast Speed, Critical Strike Multiplier, and lacking Resistances and Attributes. You can also craft additional Minimum Frenzy or Endurance Charges. |
|
| Min. requirements: +60 to maximum Life +50% to Elemental Resistance Optional affixes: Attributes % increased maximum Life Chaos Resistance % increased Cast Speed #% to Critical Strike Multiplier |
|
 (Jewel) Rare Jewels - on your Jewels you should look for maximum Life, Critical Strike Multiplier, and Cast Speed or lacking Resistances and Attributes. You can also reduce the Poison Duration or improve Mana Reservation Efficiency. (Jewel) Rare Jewels - on your Jewels you should look for maximum Life, Critical Strike Multiplier, and Cast Speed or lacking Resistances and Attributes. You can also reduce the Poison Duration or improve Mana Reservation Efficiency. |
|
| Min. requirements: increased maximum Life Recommended affixes: Resistances % increased Cast Speed while holding a Shield % to Critical Strike Multiplier for Spell Damage Mana Reservation Efficiency % reduced Poison Duration on you |
|
 (Jewel) Large Cluster Jewel - here you can look for generic Chaos Damage bonuses. Use a Large Cluster Jewel with 8 Passive Skills to save your Passive Points. The Unwaveringly Evil Notable is especially useful, as it prevents Stuns from Interrupting your Casts. (Jewel) Large Cluster Jewel - here you can look for generic Chaos Damage bonuses. Use a Large Cluster Jewel with 8 Passive Skills to save your Passive Points. The Unwaveringly Evil Notable is especially useful, as it prevents Stuns from Interrupting your Casts. |
|
| Recommended modifiers: 1 Added Passive Skill is Unholy Grace 1 Added Passive Skill is Unwaveringly Evil 1 Added Passive Skill is Wicked Pall |
|
 (Jewel) Medium Cluster Jewel - those can greatly improve your Critical Strike Chance and the Damage you Deal. The Quick Getaway also improves your Movement Speed, which is a rare modifier to find outside your Boots. (Jewel) Medium Cluster Jewel - those can greatly improve your Critical Strike Chance and the Damage you Deal. The Quick Getaway also improves your Movement Speed, which is a rare modifier to find outside your Boots. |
|
| Recommended modifiers: 1 Added Passive Skill is Pressure Points 1 Added Passive Skill is Quick Getaway 1 Added Passive Skill is Basics of Pain |
|
 (Jewel) Dissolution of the Flesh - causes you to Reserve your Life instead of losing it upon taking Damage, and you need to avoid taking Damage for 2 Seconds to Unreserve it all. It greatly improves your maximum Life and allows you to freely Sacrifice it with your Spells. (Jewel) Dissolution of the Flesh - causes you to Reserve your Life instead of losing it upon taking Damage, and you need to avoid taking Damage for 2 Seconds to Unreserve it all. It greatly improves your maximum Life and allows you to freely Sacrifice it with your Spells. |
|
| Removes all Energy Shield Life that would be lost by taking Damage is instead Reserved until you take no Damage to Life for 2 seconds (20-30)% more Maximum Life |
|
 (Jewel) Watcher's Eye - the Zealotry Aura modifiers provide a decent bonus to your Damage. You can also fit in a level 1 Vitality or Precision Aura to benefit from the special modifiers here. (Jewel) Watcher's Eye - the Zealotry Aura modifiers provide a decent bonus to your Damage. You can also fit in a level 1 Vitality or Precision Aura to benefit from the special modifiers here. |
|
| (4-6)% increased maximum Energy Shield (4-6)% increased maximum Life (4-6)% increased maximum Mana <Two or Three random aura modifiers> Recommended Aura mods: (10-15)% increased Cast Speed while affected by Zealotry Critical Strikes Penetrate (8-10)% of Enemy Elemental Resistances while affected by Zealotry (0.8-1.2)% of Damage leeched as Life while affected by Vitality +(20-30)% to Critical Strike Multiplier while affected by Precision |
|
 (Flask) Bottled Faith - improves your Critical Strike Chance and Damage against Enemies standing in the large Consecrated Ground it creates upon use. (Flask) Bottled Faith - improves your Critical Strike Chance and Damage against Enemies standing in the large Consecrated Ground it creates upon use. |
|
| (30-15)% reduced Duration Consecrated Ground created by this Flask has Tripled Radius Consecrated Ground created during Effect applies (7-10)% increased Damage taken to Enemies (100-150)% increased Critical Strike Chance against Enemies on Consecrated Ground during Effect |
|
|
Suggested Flasks:
|
|
     |
|
|
If you have any other build requests please leave that in the comments below. We are always open to suggestions and constructive feedback.
Pictures used in this article are the intellectual property of Grinding Gear Games.


 (Helmet) Rare Helmet - on your Helmet it is important to obtain high quantities of Mana Reservation Efficiency. Other than that, look for high bonuses to maximum Life, Strength, or Resistances. You can also craft a special modifier that converts part of the incoming Physical Damage to be taken as Elemental.