
Rain of Arrows Crimson Dance Gladiator Build
Rain of Arrows build for Gladiator. It's a Bow-based Crit build that uses Bleed mechanics to its full potentialRain of Arrows
Gladiator Build
Updated for Patch 3.14
The Best Crafty Guides by Odealo
Estimated budget: low to medium

| Guide notes |
| June 24, 2021 -Build created July 4, 2021 -Added gameplay video |
Rain of Arrows has a very high base amount of fired Arrows - 21, allowing you to easily stack Bleeding on enemies thanks to Crimson Dance Keystone. Gladiator Ascendancy is one of the most suitable for Bleed builds - Blood in the Eyes and Gratuitous Violence boost your damage with Bleeding by a lot while forming a small defense layer as well. Your damage comes mostly from attacking Bleeding and Maimed enemies and with a huge number of Arrows and the amount of Attack Speed - it is really effective. The Bleed-based Bow Gladiator builds had their peak of performance previous patch, before the rework of Elder Bleed-related mod. Right now the best Elder Mod for Bow for this build is "59% to Damage over Time Multiplier for Bleeding from Hits with this Weapon", previously you had a 60% chance for bleeding to deal 100% more damage, and given that if the enemy has already the maximum number of Bleeds, the highest amount of Bleed damage will replace the lowest one - the damage output is lower but only for the boss fights with high-end builds with a lot of Attack Speed. For the same reason, Ryslatha's Coil is a heavily recommended item.
It's a solid build in both - offense and defense aspects. It mostly consists of rare items with generic mods with increasings for stats such as Physical Damage, Attack Damage, Bow Damage, and Critical Strikes. The Bleeding plays a big role but to assemble the right gear is not rocket science. The reason for picking Gladiator over Ranger is its synergies better with Bleeds and the fact that it's slightly more defensive-oriented. Your offense will come in a form of easily achievable stats to be picked up from your skill tree and gear, there is no complex mechanics involved here. The defense of this build comes in a form of Chance to dodge Hits and Maximum Life. The chance of not being Hit will oscillate around 50% with the Wind Dancer Keystone, and the Maximum Life should be around 5k.
You can also check our other Path of Exile builds: Odealo's Crafty Guides - Full List
1. Gameplay
Use Dash to move between packs of enemies and fire your Rain of Arrows as you're in the middle of the pack. By staying close to your opponents while attacking you deal much more damage thanks to the Point Blank Keystone and Passives from Cluster Jewels. Have your Blood Rage constantly activated and use Vaal haste when needed (mostly against Bosses). For the most part, you should be able to ignore incoming damage, but against end-game Bosses, you surely need to avoid their AoE effects and high damage spikes because of the relatively low Life pool. This build offers a standard Bow/Ranged playstyle but truly shines in Melee ranged because of insane damage bonuses.
|
|
|
|

2. Build's PROS & CONS
| PROS |
|
| CONS |
|
3. Leveling tips
The build is really flexible, especially in the early stages of the game so feel free to use any attack Gems, but later you'll have to switch to some Bow Attacks like the Skill that'll be used in the final setup - Rain of Arrows. Look for rare gear with increased Physical/Attack/Bow Damage. Remember to switch to better Flasks and to keep your Elemental Resistances high.
Suggested leveling Gem setups:
| Rain of Arrows setup | |
 |
Rain of Arrows - a great leveling Skill thanks to its wide AoE. It's also the core Skill used in this build so obviously, you can practice using it during the campaign |
 |
Mirage Archer Support - a great boost to your damage. It creates a Mirage Archer on your back that uses Rain of Arrows with reduced Attack Speed and Damage, but you can travel or attack yourself while it does it |
 |
Vicious Projectiles Support - increases your damage and DoT caused by linked Projectile Skills |
 |
Chance to Bleed Support - offers high flat bonus Physical Damage and increased Chance to inflict Bleeding |
| Ensnaring Arrow setup | |
 |
Ensnaring Arrow - use for Boss fights to deal more damage with Bleeding. Just apply the debuffs using it and keep Attacking with Rain of Arrows |
 |
Hextouch Support - will cause Ensnaring Arrow to apply Curse on hit |
 |
Vulnerability - the best Curse for this build which grants a high Physical Damage boost |
 |
Barrage Support - maximum Ensnaring stages in one use, use when firing more than one arrow by default |
| Utility Gems | |
 |
Anomalous Blood and Sand - a very strong Aura that reserves just a little bit of your Mana. and increases your Projectile Attack Damage |
 |
Dread Banner - increases your Physical Damage and grants increased chance to Impale with your Attacks |
 |
Pride - the best Aura for this build which grants the highest bonus for this build |
Bandits:
We recommend killing all the Bandits for two additional Passive Points
Leveling Skill Trees:
32 Points Skill Tree
Priorities: 1) Bravery 2) Fury Bolts 3) Point Blank 4) Crimson Dance
63 Points Skill Tree
Priorities: 1) Wind Dancer 2) Acrobatics Keystones 3) Bow cluster
Recommended leveling items:
 Belt of the Deceiver - a Belt one can use until yellow maps, it's a mix of almost all the stats needed in this build Belt of the Deceiver - a Belt one can use until yellow maps, it's a mix of almost all the stats needed in this build |
|
| +(25-35) to Strength (15-25)% increased Global Physical Damage You take 30% reduced Extra Damage from Critical Strikes +(30-40) to maximum Life +(10-15)% to all Elemental Resistances Nearby Enemies are Intimidated |
|
 Goldrim - great leveling Helmet which grants very high Elemental Resistances bonuses Goldrim - great leveling Helmet which grants very high Elemental Resistances bonuses |
|
| +(30-50) to Evasion Rating 10% increased Rarity of Items found +(30-40)% to all Elemental Resistances Reflects 4 Physical Damage to Melee Attackers Level Requirement reduced by 100 (Hidden) |
|
 Tabula Rasa - best Body Armour for leveling for almost all the builds Tabula Rasa - best Body Armour for leveling for almost all the builds |
|
| Item has no level requirement and Energy Shield (Hidden) Item has 6 White Sockets and is fully linked (Hidden) |
|
|
|
|
| +(10-20) to Dexterity 100% increased Physical Damage 100% increased Attack Speed +2 Mana gained for each Enemy hit by Attacks (50-100)% increased Projectile Speed +(25-50) to Accuracy Rating 30% less Damage |
|
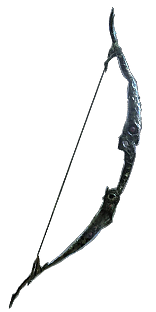
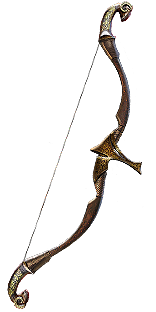 The Crimson Storm - later in the game it can function as a placeholder for a better, Rare Bow that can be very expensive The Crimson Storm - later in the game it can function as a placeholder for a better, Rare Bow that can be very expensive |
|
| 6% increased Movement Speed (140-170)% increased Physical Damage (25-35)% increased Critical Strike Chance 50% chance to inflict Bleeding on Critical Strike with Attacks Enemies you inflict Bleeding on grant (60-100)% increased Flask Charges Adds (100-120) to (150-165) Physical Damage against Bleeding Enemies 50% chance to Maim Enemies on Critical Strike with Attacks Veiled Suffix |
|
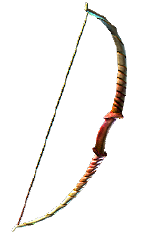 Quill Rain - Quill Rain is one of the most used Bows for leveling due to its overall great stats
4. Final Skill Tree, Ascendancy Points, and Pantheon
Final Skill Tree:
115 Points Final Skill Tree (does not include Cluster Jewels nor Thread of Hope or Intuitive Leap configuration)
115 Points Path of Building (PoB) link
Ascendancy points:
Preferably in that order:
- Blood in the Eyes
- Gratuitous Violence
- Outmatch and Outlast
- Arena Challenger
Pantheon:
Major God: Soul of Lunaris 1% additional Physical Damage Reduction for each nearby Enemy, up to 8%; 1% increased Movement Speed for each nearby Enemy, up to 8%
Minor God: Soul of Ralakesh 25% reduced Physical Damage over Time Damage taken while moving; 25% chance to avoid Bleeding
5. Final Gems links
| [DPS] Rain of Arrows | |
|
Vaal Rain of Arrows - Fires a lot of Arrows that'll land on enemies causing Bleed, Maim, almost certain Blind, and Impale. it's possibly the best Skill Gem for this build |
|
Mirage Archer Support - repeat your Active Skill resulting in even more Arrows, and even more damage |
|
Vicious Projectiles Support - greatly increases your Projectile damage and Dots applied by Rain of Arrows |
 |
Impale Support - increases your chance to Impale with Attacks and increases the effect of it |
 |
Maim Support - enemies will take more Physical Damage, from Hits as well as from Bleeding, it increases your damage |
 |
Brutality Support - grants a very high increase to Physical Damage, at the cost of Chaos and Elemental Damage |
| [UTILITY] Banner, Golem, and Blood Rage setup | |
 |
War Banner - increases the Physical Damage nearby enemies take and increases your Accuracy |
 |
Summon Lightning Golem - Lightning Golem grants you Attack Speed |
 |
Culling Strike Support - enemies at 10% of their Maximum Life or Lower will die instantly when hit by a Lightning Golem |
 |
Blood Rage - Attacks Speed is the most important buff this Skill Gem grants while draining your Life |
 |
Enhance Support - increases the quality of all connected Gems increasing their effect |
 |
Cast when Damage Taken Support - supported Skill will trigger automatically after taking damage. That applies to Blood Rage and your Golem |
| [UTILITY] Auras | |
 |
Pride - grants very high bonus Physical Damage which is amplified the longer your target stays close |
 |
Blood and Sand - allows you to switch between Blood and Sand stances. Use Sand Stance for farming/leveling and Blood Stance against Bosses and tougher rare opponents |
 |
Precision - Aura that grants you Critical Strike-related benefits. At level 1 it reserves little to no mana, while you can still benefit from its minor buffs and Watcher's Eye upgrades, but this build allows you to have it at level 20 |
 |
Enlighten Support - use Enlighten Support to reduce the amount of Mana Reserved by linked Auras |
| [UTILITY] Ensnaring Arrow | |
|
Ensnaring Arrow - use for Boss fights to deal more damage with Bleeding and slow their movement |
|
Hextouch Support - allows you to Curse enemies with Hits |
|
Vulnerability - increases the amount of Physical Damage Cursed enemies take and the rate at with they Bleed |
|
Barrage Support - Arrows are fired in sequence, by hitting the enemy three times the maximum efficiency of Ensnaring Arrow will be achieved |
| [MOBILITY] Dash, Guard Spell, Vaal Haste | |
 |
Dash - the mobility Skill of your choice, it suits the build the best |
 |
Vaal Haste - more Movement and Attacks speed for a short duration of time |
 |
Steelskin - a Guard Spell that decreases the amount of damage you take |
 |
Second Wind Support - improves the accessibility of linked cooldown Skills |
|
|
5. Gear Setup
Below you will find the recommended gear for this build. The build is simple but there are many mods that you can look for. With the fairly cheap gear, you can do Tier 16 Maps with no issue whatsoever. There are no required Uniques and the most important ones are Jewels that solely save you a bunch of Passives but are completely optional. In terms of equipment, it's a very flexible and simple build that should be fully viable even on the solo self-found mode.
Our recommended items will:
- Cap your resistances
- Give you enough DPS/Life to start mapping
|
Stat priorities on items:
|
 (Helmet) Rare Helmet - just aim for decent Life, Elemental Resistances, and possibly Accuracy Rating since it is going to be required. (Helmet) Rare Helmet - just aim for decent Life, Elemental Resistances, and possibly Accuracy Rating since it is going to be required. |
|
| Min. requirements: 90 maximum Life 80% Total Elemental Resistances Optional affixes: Nearby enemies take +#% Physical Damage Global Critical Strike Multiplier Accuracy Rating |
|
 (Helmet) Assailum - If you decide to use Assailum the build's going to need a bit of a rework. You can use it to Snipe with Puncture supported by Brutality, Vicious Projectiles, and Deadly Ailments and use it instead of Ensnaring Arrow for Boss fights for more raw damage. (Helmet) Assailum - If you decide to use Assailum the build's going to need a bit of a rework. You can use it to Snipe with Puncture supported by Brutality, Vicious Projectiles, and Deadly Ailments and use it instead of Ensnaring Arrow for Boss fights for more raw damage. |
|
| Grants Level 20 Snipe Skill Socketed Non-Channelling Bow Skills are Triggered by Snipe Socketed Triggered Bow Skills deal 33% less Damage +(350-500) to Accuracy Rating +(350-500) to Evasion Rating (7-10)% chance to Dodge Attack Hits while Channelling (7-10)% chance to Dodge Spell Hits while Channelling |
|
| Helmet enchantments: Rain of Arrows has 15% chance to fire an additional sequence of arrows 40% increased Rain of Arrows Damage 15% increased Rain of Arrows Attack Speed |
|
 (Weapon) Rare Bow - Look mainly for Physical Damage - it will translate to Bleed Damage with your Attack Skill. Other, luxurious and noteworthy mod is Chance to Deal Double Damage - the most damaging Bleed that comes from Hit will overwrite other Bleeds, pushing the lowest one out of the enemy when he already has the maximum amount of Bleeds - extremely useful as other mods with a chance for Double Damage. (Weapon) Rare Bow - Look mainly for Physical Damage - it will translate to Bleed Damage with your Attack Skill. Other, luxurious and noteworthy mod is Chance to Deal Double Damage - the most damaging Bleed that comes from Hit will overwrite other Bleeds, pushing the lowest one out of the enemy when he already has the maximum amount of Bleeds - extremely useful as other mods with a chance for Double Damage. |
|
| Min. requirements: 200% total increased Physical Damage 35% increased Damage with Bleeding 10% increased Attack Speed Optional affixes: Chance to deal Double Damage Increased Critical Strike Chance/Multiplier Accuracy Rating Adds Physical Damage |
|
 (Weapon) Rare Quiver - Look for Maximum Life, Elemental Resistances, DoT, and Accuracy Rating. It's a mix of defensive and offensive mods that you can find here and you should aim for both. (Weapon) Rare Quiver - Look for Maximum Life, Elemental Resistances, DoT, and Accuracy Rating. It's a mix of defensive and offensive mods that you can find here and you should aim for both. |
|
| Min. requirements: 90 to Maximum Life 35% increased Damage with Bleeding Optional affixes: Physical Damage over Time Multiplier with Attack Skills Elemental Resistances Increased Critical Strike Chance/Multiplier Accuracy Rating |
|
 (Body Armour) Rare Body Armour - just aim for high Maximum Life, that's the most important mods on the Body Armour. It also offers high Elemental Resistances and other useful unique to this gear slot mods. (Body Armour) Rare Body Armour - just aim for high Maximum Life, that's the most important mods on the Body Armour. It also offers high Elemental Resistances and other useful unique to this gear slot mods. |
|
| Min. requirements: 100 maximum Life Optional affixes: Elemental Resistances You can apply an additional Curse Attacks have +#% to Critical Strike Chance Socketed Attacks have -15 to Total Mana Cost Attributes Maximum Life% Recover Life on kill |
|
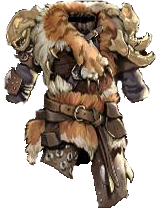 (Body Armour) Farrul's Fur - One of the best Body Armours for these types of builds. Replica Version works as well. It gives a lot of Maximum Life, Armour, and Evasion, and Aspect of the Cat cost no Mana now, but you can achieve better results with an expensive Rare Body Armour. (Body Armour) Farrul's Fur - One of the best Body Armours for these types of builds. Replica Version works as well. It gives a lot of Maximum Life, Armour, and Evasion, and Aspect of the Cat cost no Mana now, but you can achieve better results with an expensive Rare Body Armour. |
|
| (100-150)% increased Armour and Evasion +(80-100) to maximum Life Aspect of the Cat Reserves no Mana +2 seconds to Cat's Stealth Duration Gain up to your maximum number of Frenzy and Power Charges when you gain Cat's Stealth You have Phasing while you have Cat's Stealth |
|
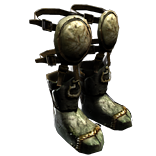 (Boots) Rare Boots - defensive stats like Maximum Life and Elemental Resistances, and increased Movement Speed are at most importance (Boots) Rare Boots - defensive stats like Maximum Life and Elemental Resistances, and increased Movement Speed are at most importance |
|
| Min. requirements: 70 Maximum Life 70% Total Elemental Resistances 25% increased Movement Speed Optional affixes: You have Tailwind if you have dealt a Critical Strike Recently chance to gain Elusive on Critical Strike Freeze and Chill immunity |
|
| Boot enchantment: 16% increased Attack and Cast Speed if you've Killed Recently |
|
 (Belt) Ryslatha's Coil - The belt most suitable for Bleed builds such as this one for it gives a chance to deal 40% more damage than normally (Belt) Ryslatha's Coil - The belt most suitable for Bleed builds such as this one for it gives a chance to deal 40% more damage than normally |
|
| (20-30)% increased Stun Duration on Enemies +(20-40) to Strength (30-40)% more Maximum Physical Attack Damage (40-30)% less Minimum Physical Attack Damage Adds 1 to (15-20) Physical Damage to Attacks +(80-100) to maximum Life Gain 50 Life when you Stun an Enemy |
|
 (Belt) Rare Belt - More Flexible and arguably better Belt for some situations than Ryslatha's Coil, and definitely cheaper. (Belt) Rare Belt - More Flexible and arguably better Belt for some situations than Ryslatha's Coil, and definitely cheaper. |
|
| Min. requirements: 100 maximum Life 100% Elemental Resistances increased Damage Optional affixes: Increased Maximum Life Attributes increased Flask Recovery Rate |
|
 (Amulet) Rare Amulet - Maximum Life and basic mods increasing your Physical Damage are important but if you can afford it, look for a Level increase of all Physical and/or Strenght Gems (Amulet) Rare Amulet - Maximum Life and basic mods increasing your Physical Damage are important but if you can afford it, look for a Level increase of all Physical and/or Strenght Gems |
|
|
Min. requirements: |
|
| Recommended Anointments: Tenacity Constitution |
|
 (Ring) Rare Rings - Use Diamond Rings for more Damage and Vermilion Rings for More Maximum Life. Two-Stone Rings are a decent option to look for additional Elemental Resistance. You can get one of the two Curses on your Ring - Vulnerability or Assassin's Mark given that you can cast two Curses upon the enemy. (Ring) Rare Rings - Use Diamond Rings for more Damage and Vermilion Rings for More Maximum Life. Two-Stone Rings are a decent option to look for additional Elemental Resistance. You can get one of the two Curses on your Ring - Vulnerability or Assassin's Mark given that you can cast two Curses upon the enemy. |
|
| Min. requirements: 70 maximum Life 60% Total Elemental Resistances Optional affixes: Global Critical Strike Chance/Multiplier Accuracy Rating Trigger Level 8 Assassin's Mark when you Hit a Rare or Unique Enemy Curse Enemies with Vulnerability on Hit, with 32% increased Effect Added Physical Damage to Attacks Attack Speed Increased Damage |
|
 (Gloves) Rare Gloves - Aim for defensive stats and later think about Attack Speed, Accuracy Rating, and Added Physical Damage to Attacks (a pair with all of these stats can get expensive). Use Gripped Gloves for more Damage (Gloves) Rare Gloves - Aim for defensive stats and later think about Attack Speed, Accuracy Rating, and Added Physical Damage to Attacks (a pair with all of these stats can get expensive). Use Gripped Gloves for more Damage |
|
| Min. requirements: 70 maximum Life 80% Total Elemental Resistances Optional affixes: Increased Damage while Leeching Attack Speed Added Physical Damage to Attacks Accuracy Rating |
|
 (Jewels) Rare Jewels - try to get extra Life - preferably 7%, and some Damage mods (either Projectile/Physical/Area) and an extra useful stat like Attack Speed, Elemental Resistances, or Critical Strike. Try to get one with Corrupted Blood immunity (Jewels) Rare Jewels - try to get extra Life - preferably 7%, and some Damage mods (either Projectile/Physical/Area) and an extra useful stat like Attack Speed, Elemental Resistances, or Critical Strike. Try to get one with Corrupted Blood immunity |
|
| Recommended affixes: increased maximum Life Optional affixes: increased Melee/Area/Physical Damage increased Attack Speed Critical Strike Chance Critical Strike Multiplier Attributes |
|
 (Jewels) Thread of Hope - With a Large Ring, it can provide around four very useful Notables when placed between Mind Drinker and Blood Drinker (Jewels) Thread of Hope - With a Large Ring, it can provide around four very useful Notables when placed between Mind Drinker and Blood Drinker |
|
| Only affects Passives in Large Ring Passives in Radius can be Allocated without being connected to your tree -(20-10)% to all Elemental Resistances |
|
 (Jewels) Intuitive Leap - by placing it near Fervour you can allocate four very useful Notables (Jewels) Intuitive Leap - by placing it near Fervour you can allocate four very useful Notables |
|
| Passives in Radius can be Allocated without being connected to your tree | |
 (Jewels) Watcher's Eye - with Pride and Precision, your best option is "Impales you inflict last 2 additional Hits while using Pride" mod, but it's rare and expensive so don't pay too much attention to it at first (Jewels) Watcher's Eye - with Pride and Precision, your best option is "Impales you inflict last 2 additional Hits while using Pride" mod, but it's rare and expensive so don't pay too much attention to it at first |
|
| (4-6)% increased maximum Energy Shield (4-6)% increased maximum Life (4-6)% increased maximum Mana <Two or Three random aura modifiers> |
|
 (Jewels) Large Cluster Jewel - There are some extremely useful Notables to pick, all of them are listed here. Fuel the Fight is needed when you lack in any other Mana Leech. Physical Damage and Bow Damage over Time are the bases on which to look for these mods. (Jewels) Large Cluster Jewel - There are some extremely useful Notables to pick, all of them are listed here. Fuel the Fight is needed when you lack in any other Mana Leech. Physical Damage and Bow Damage over Time are the bases on which to look for these mods. |
|
| Recommended Affixes: 1 Added Passive Skill is Force Multiplier 1 Added Passive Skill is Exploit Weakness 1 Added Passive Skill is Master the Fundamentals 1 Added Passive Skill is Fuel the Fight 1 Added Passive Skill is Martial Prowess 1 Added Passive Skill is Tempered Arrowheads |
|
 (Jewels) Medium Cluster Jewel - Look for an increase in Projectile Damage. These are not as impactful as Large Cluster Jewels. (Jewels) Medium Cluster Jewel - Look for an increase in Projectile Damage. These are not as impactful as Large Cluster Jewels. |
|
|
Recommended Affixes: |
|
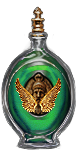
 (Flask) Cinderswallow Urn - more regeneration of Life and Mana, for Veiled mods look for Critical Strike or Chance to avoid being Stunned (Flask) Cinderswallow Urn - more regeneration of Life and Mana, for Veiled mods look for Critical Strike or Chance to avoid being Stunned |
|
| Onslaught Recharges 1 Charge when you Consume an Ignited corpse Enemies Ignited by you during Flask Effect take 10% increased Damage Recover (1-3)% of Life when you Kill an Enemy during Flask Effect Recover (1-3)% of Mana when you Kill an Enemy during Flask Effect Recover (1-3)% of Energy Shield when you Kill an Enemy during Flask Effect Veiled Suffix |
|
 (Flask) Bottled Faith - One of the Best Flasks in the game for every build, mainly for these that uses Critical Strikes (Flask) Bottled Faith - One of the Best Flasks in the game for every build, mainly for these that uses Critical Strikes |
|
| Creates Consecrated Ground on Use (30-50)% increased Duration Consecrated Ground created by this Flask has Tripled Radius +(1-2)% to Critical Strike Chance against Enemies on Consecrated Ground during Effect Consecrated Ground created during Effect applies (7-10)% increased Damage taken to Enemies |
|
 (Flask) Atziri's Promise - one of the best Flasks given that you do not use Brutality Support in your Rain of Arrows setup (Flask) Atziri's Promise - one of the best Flasks given that you do not use Brutality Support in your Rain of Arrows setup |
|
| +35% to Chaos Resistance 2% of Chaos Damage Leeched as Life during Flask effect Gain (15-20)% of Physical Damage as Extra Chaos Damage during effect Gain (10-15)% of Elemental Damage as Extra Chaos Damage during effect |
|
Other suggested Flasks:
|
|
   |
|
|
If you have any other build requests please leave that in the comments below.
Pictures used in this article are the intellectual property of Grinding Gear Games.
